How to use RTT4U
To use Real Time Testing for Unity (hereinafter referred to as RTT4U), you must follow the steps below.
- Build the RTT Client app (initially once or rebuild as necessary)
- Run Unity Editor Play Mode
RTT Client
RTT4U operates by building an app that applies the Hive SDK internally and then running it in the RTT Player, which is an Android emulator.
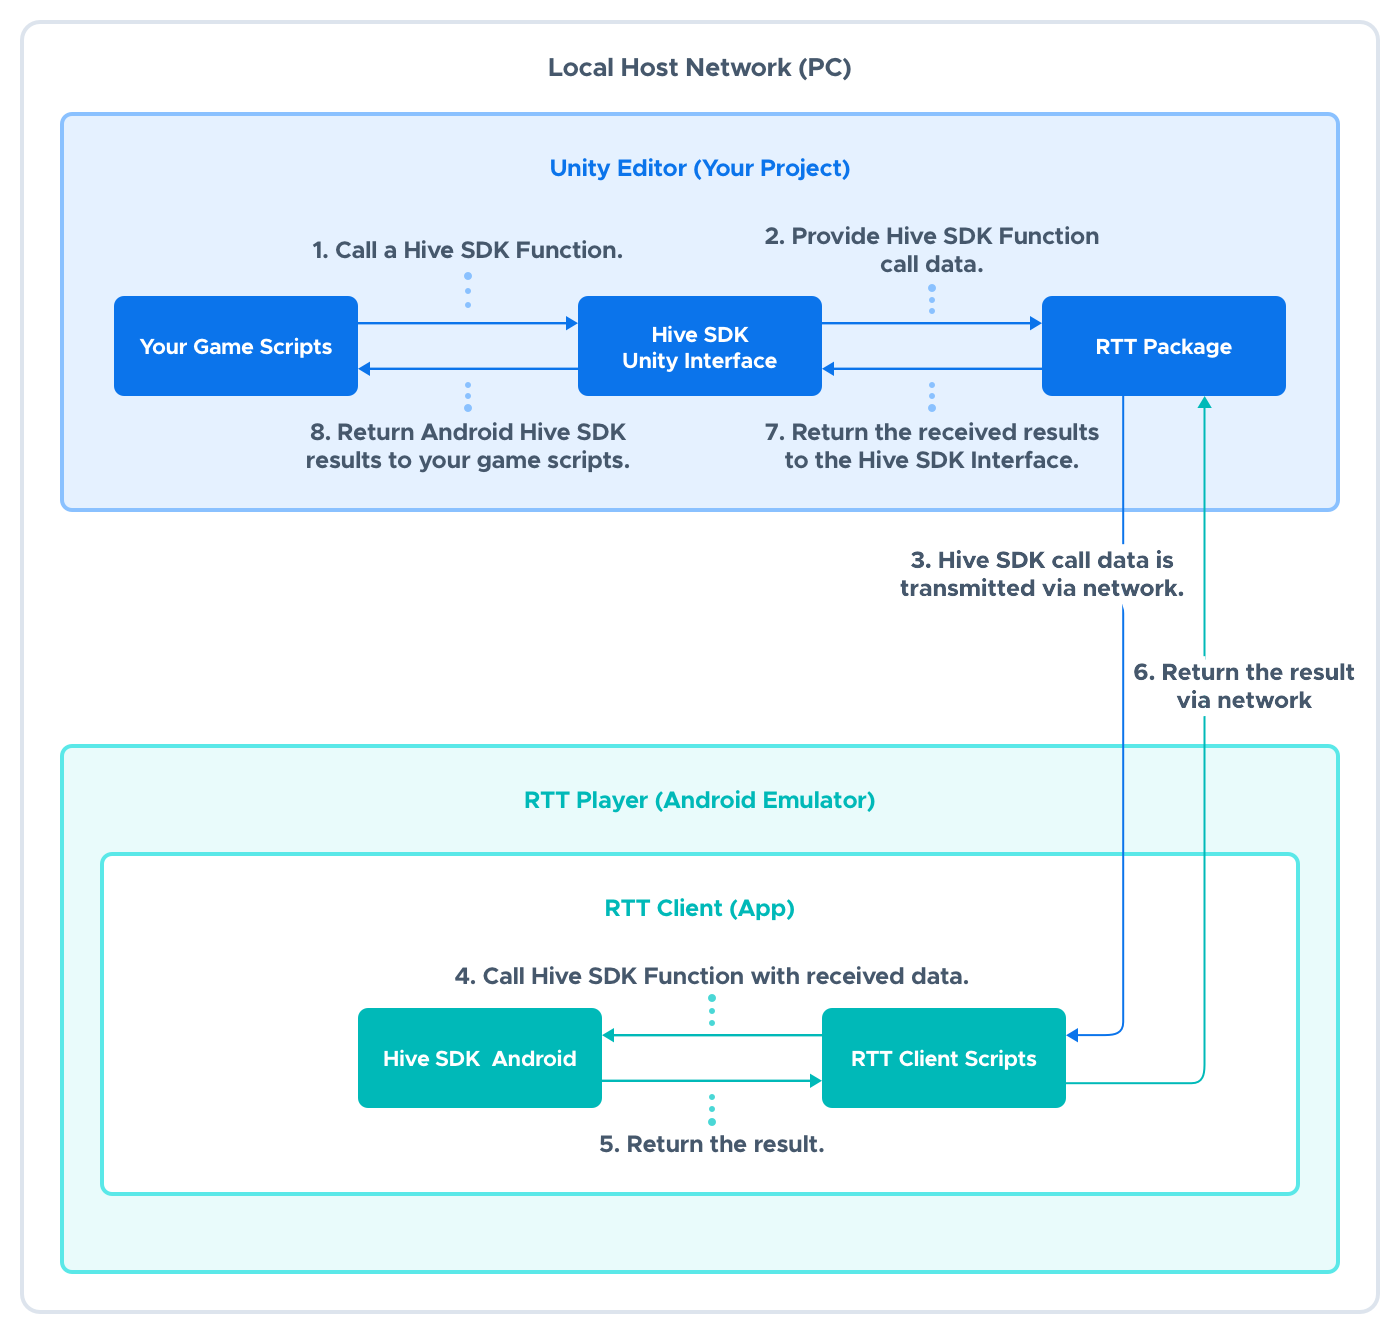
Therefore, to test any app implemented with the Hive SDK using RTT4U, the app must be built at least once. The built app is referred to as the RTT Client app. The RTT Client runs the Hive SDK Android library on the RTT Player and returns the execution results to the Unity Editor.
To build the RTT Client app, the following conditions must be met:
- Complete all processes from installing and configuring the Hive SDK Unity Android to app development
- Ensure that Android SDK and NDK are installed so that the app can be built correctly in Unity
There are two methods for building the RTT Client app: automatic and manual.
Automatic build (recommended)
The build process is as follows:
- Save the Unity project.
- Select Hive > RTT4U > Build RTT Client from the menu to start building the RTT Client.
- Once the build is complete, RTTClient.apk will be created in UNITY_PROJECT_DIRECTORY/Library/Builds/RTTClient. This is a temporary Unity project for the RTT Client.
If you change the contents of hive_config.xml or modify Android dependencies, you must rebuild the RTT Client.
Manual build
If the automatic build takes too long or RTTClient.apk is not created, try a manual build. Before attempting a manual build, check the following:
- Ensure that the Hive SDK is properly applied
- Confirm that the app can be built correctly in the Unity project
The manual build follows the steps below:
- Select Hive > RTT4U > Check RTT Client Project Path from the menu.
- Look for the log RTTClient Temp Project : {PROJECT_DIRECTORY} in the Unity Editor Console.
- Open the project located in PROJECT_DIRECTORY in the Unity Editor. This is a temporary Unity project for the RTT Client.
- Build the project directly by selecting File > Build Settings > Build. The project target should be Android.
- Resolve any issues that arise during the build.
- Apply the solutions found to the original Unity project you were working on.
Running Unity Editor Play Mode
After building the RTT Client app, follow the steps below to test the Hive SDK functionality in Unity Editor Play Mode.
1. Implement Plugin initialization in the Start Scene
Implement the Hive SDK Unity Plugin initialization (HIVEUnityPlugin.InitPlugin) in the Scene that starts the app. Ensure that the initialization code for the Hive SDK Unity Plugin is called after running the RTT Client app.
|
1 2 3 4 5 6 |
void Awake () { // Creates a game object for the Hive plugin. hive.HIVEUnityPlugin.InitPlugin(); } |
2. Activate RTT4U
Select Hive > RTT4U > RTT Enable from the menu to activate RTT4U.
3. Open RTTClientWaiter Scene
After saving the currently working Scene, select Hive > RTT4U > Open RTT Client Waiting Scene to open the RTTClientWaiter Scene.
4. Enter Play Mode
Click the Play button in the Unity Editor to enter Play Mode.
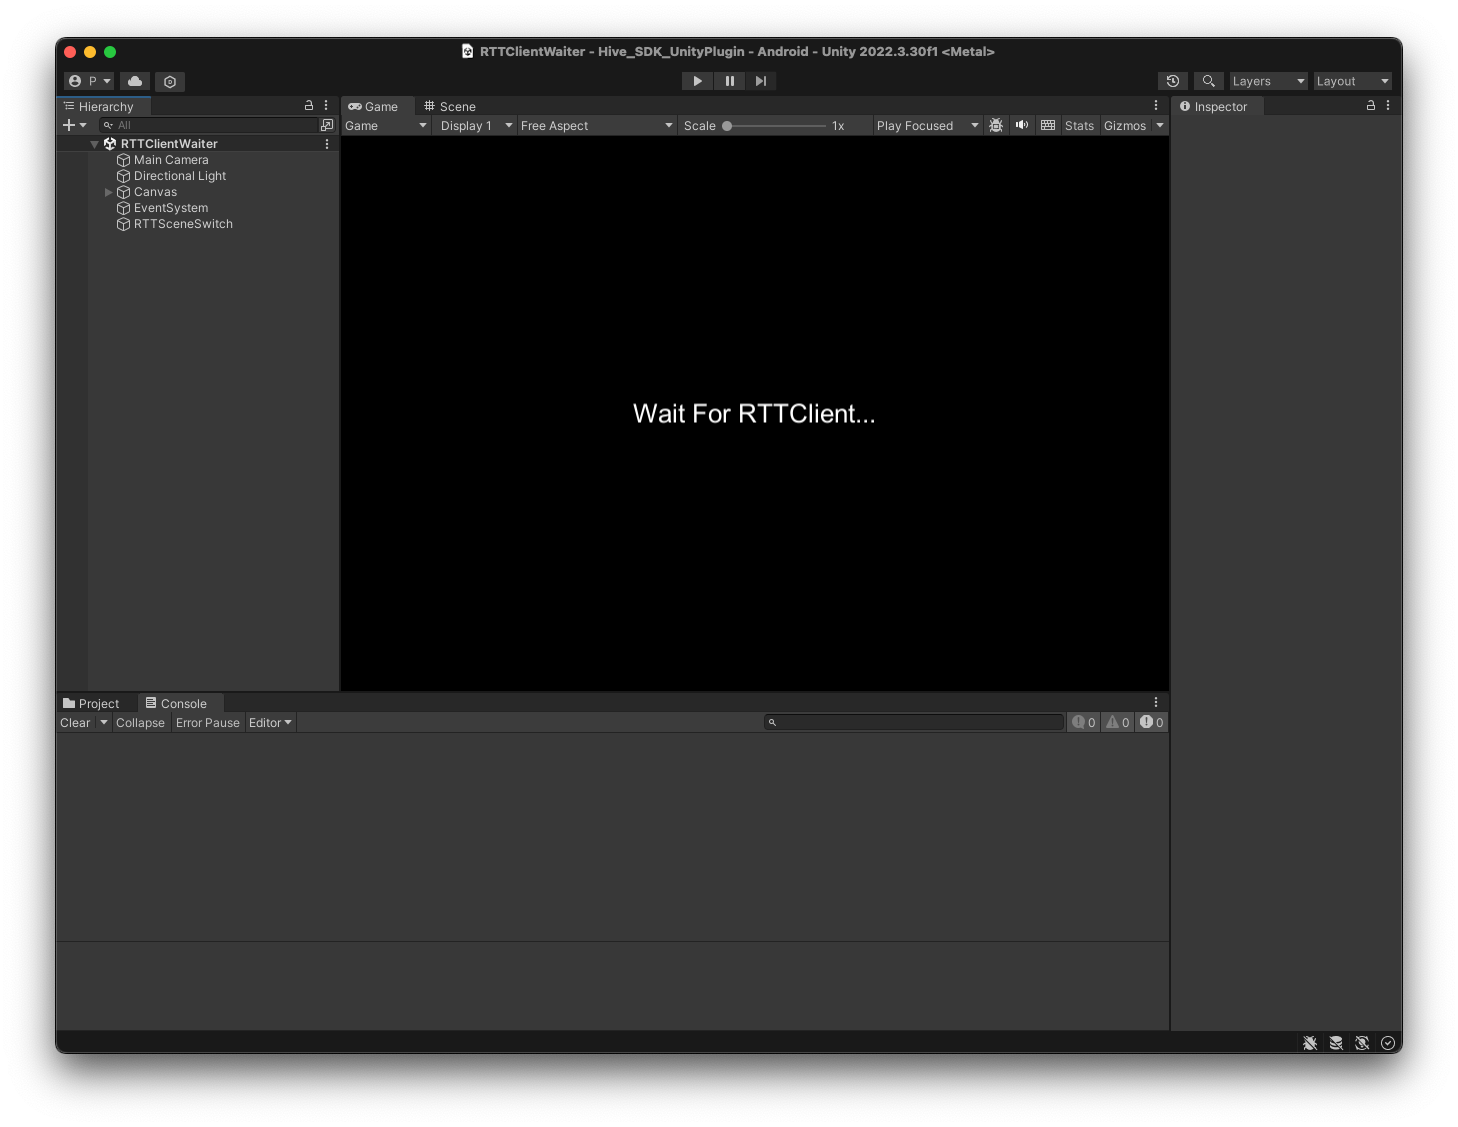
5. Wait for the RTT Client app to run
Once you enter Play Mode, the RTT Player and RTT Client app will automatically run. Wait until the RTT Client app is launched.
6. Test Hive SDK functionality
Test the Hive SDK functionality in the desired Scene. For example, in a game app, you can test the Hive SDK functionality in various Scenes such as login, game lobby, store, and battle. The Hive SDK UI will be displayed on the RTT Player, allowing you to test the Hive SDK from the displayed UI and return to the Unity Editor Player Mode to test the app.