How to install RTT4U
To use Real Time Testing for Unity (hereinafter referred to as RTT4U), you need to prepare as follows.
1. Set up development environment
You need to configure the following development environment to use RTT4U.
- Windows 10 or macOS 14.3 or higher
- Unity Editor 2021 or higher (macOS: Apple Silicon Unity Editors)
- Android SDK Command-line Tools 6.0
- Android Target SDK 33
- OpenJDK 11.0.18
- Hive SDK v4 Unity 24.3.0 or higher
RTT4U is currently available for Android only. Therefore, change the platform to Android target in File > Build Settings before using it.
2. Download and import RTT4U
Download RTT4U from here and import it into your Unity project.
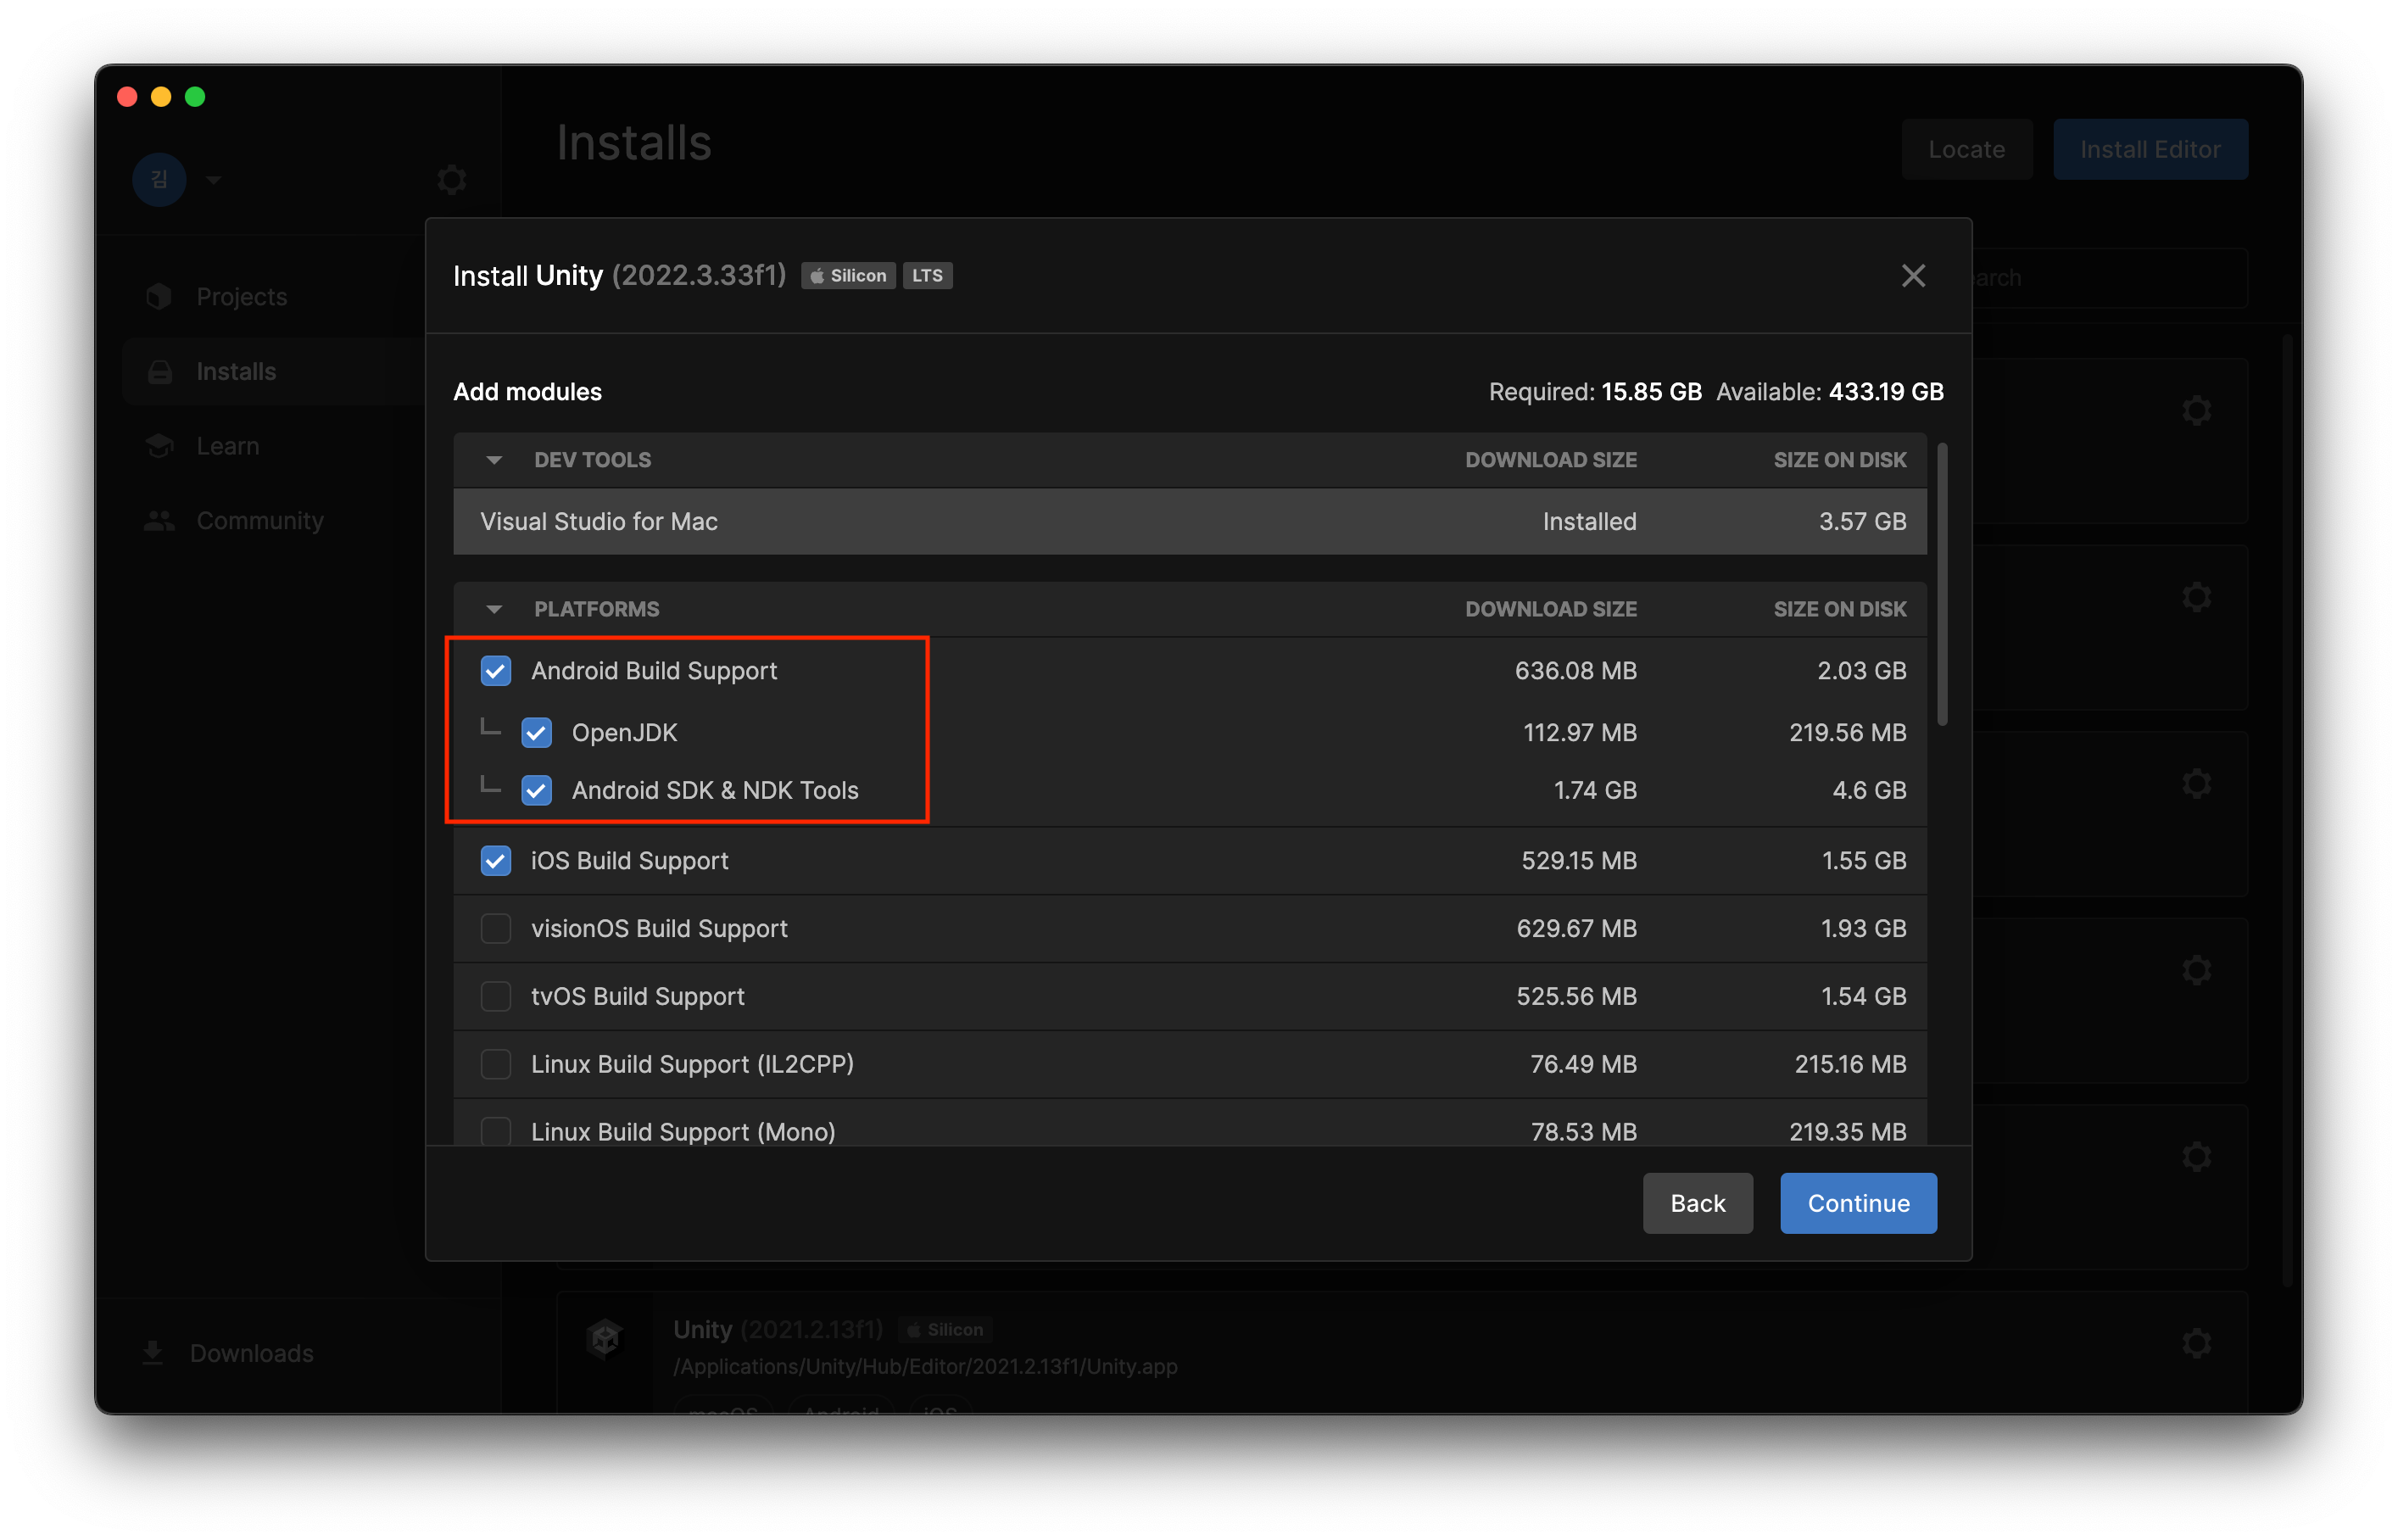
3. Install Unity Android Build Support
Check all components of Android Build Support during Unity installation and install them.
4. Install Android Studio and command-line tools (Windows)
In the Windows development environment, you cannot create system images within the Android SDK folder created during Unity installation due to administrator permission issues. Therefore, follow the steps below to install Android Studio and the command-line tools.
Install Android Studio
Download Android Studio from here. The Android SDK installation path is \Users\your_account\AppData\Local\Android\sdk.
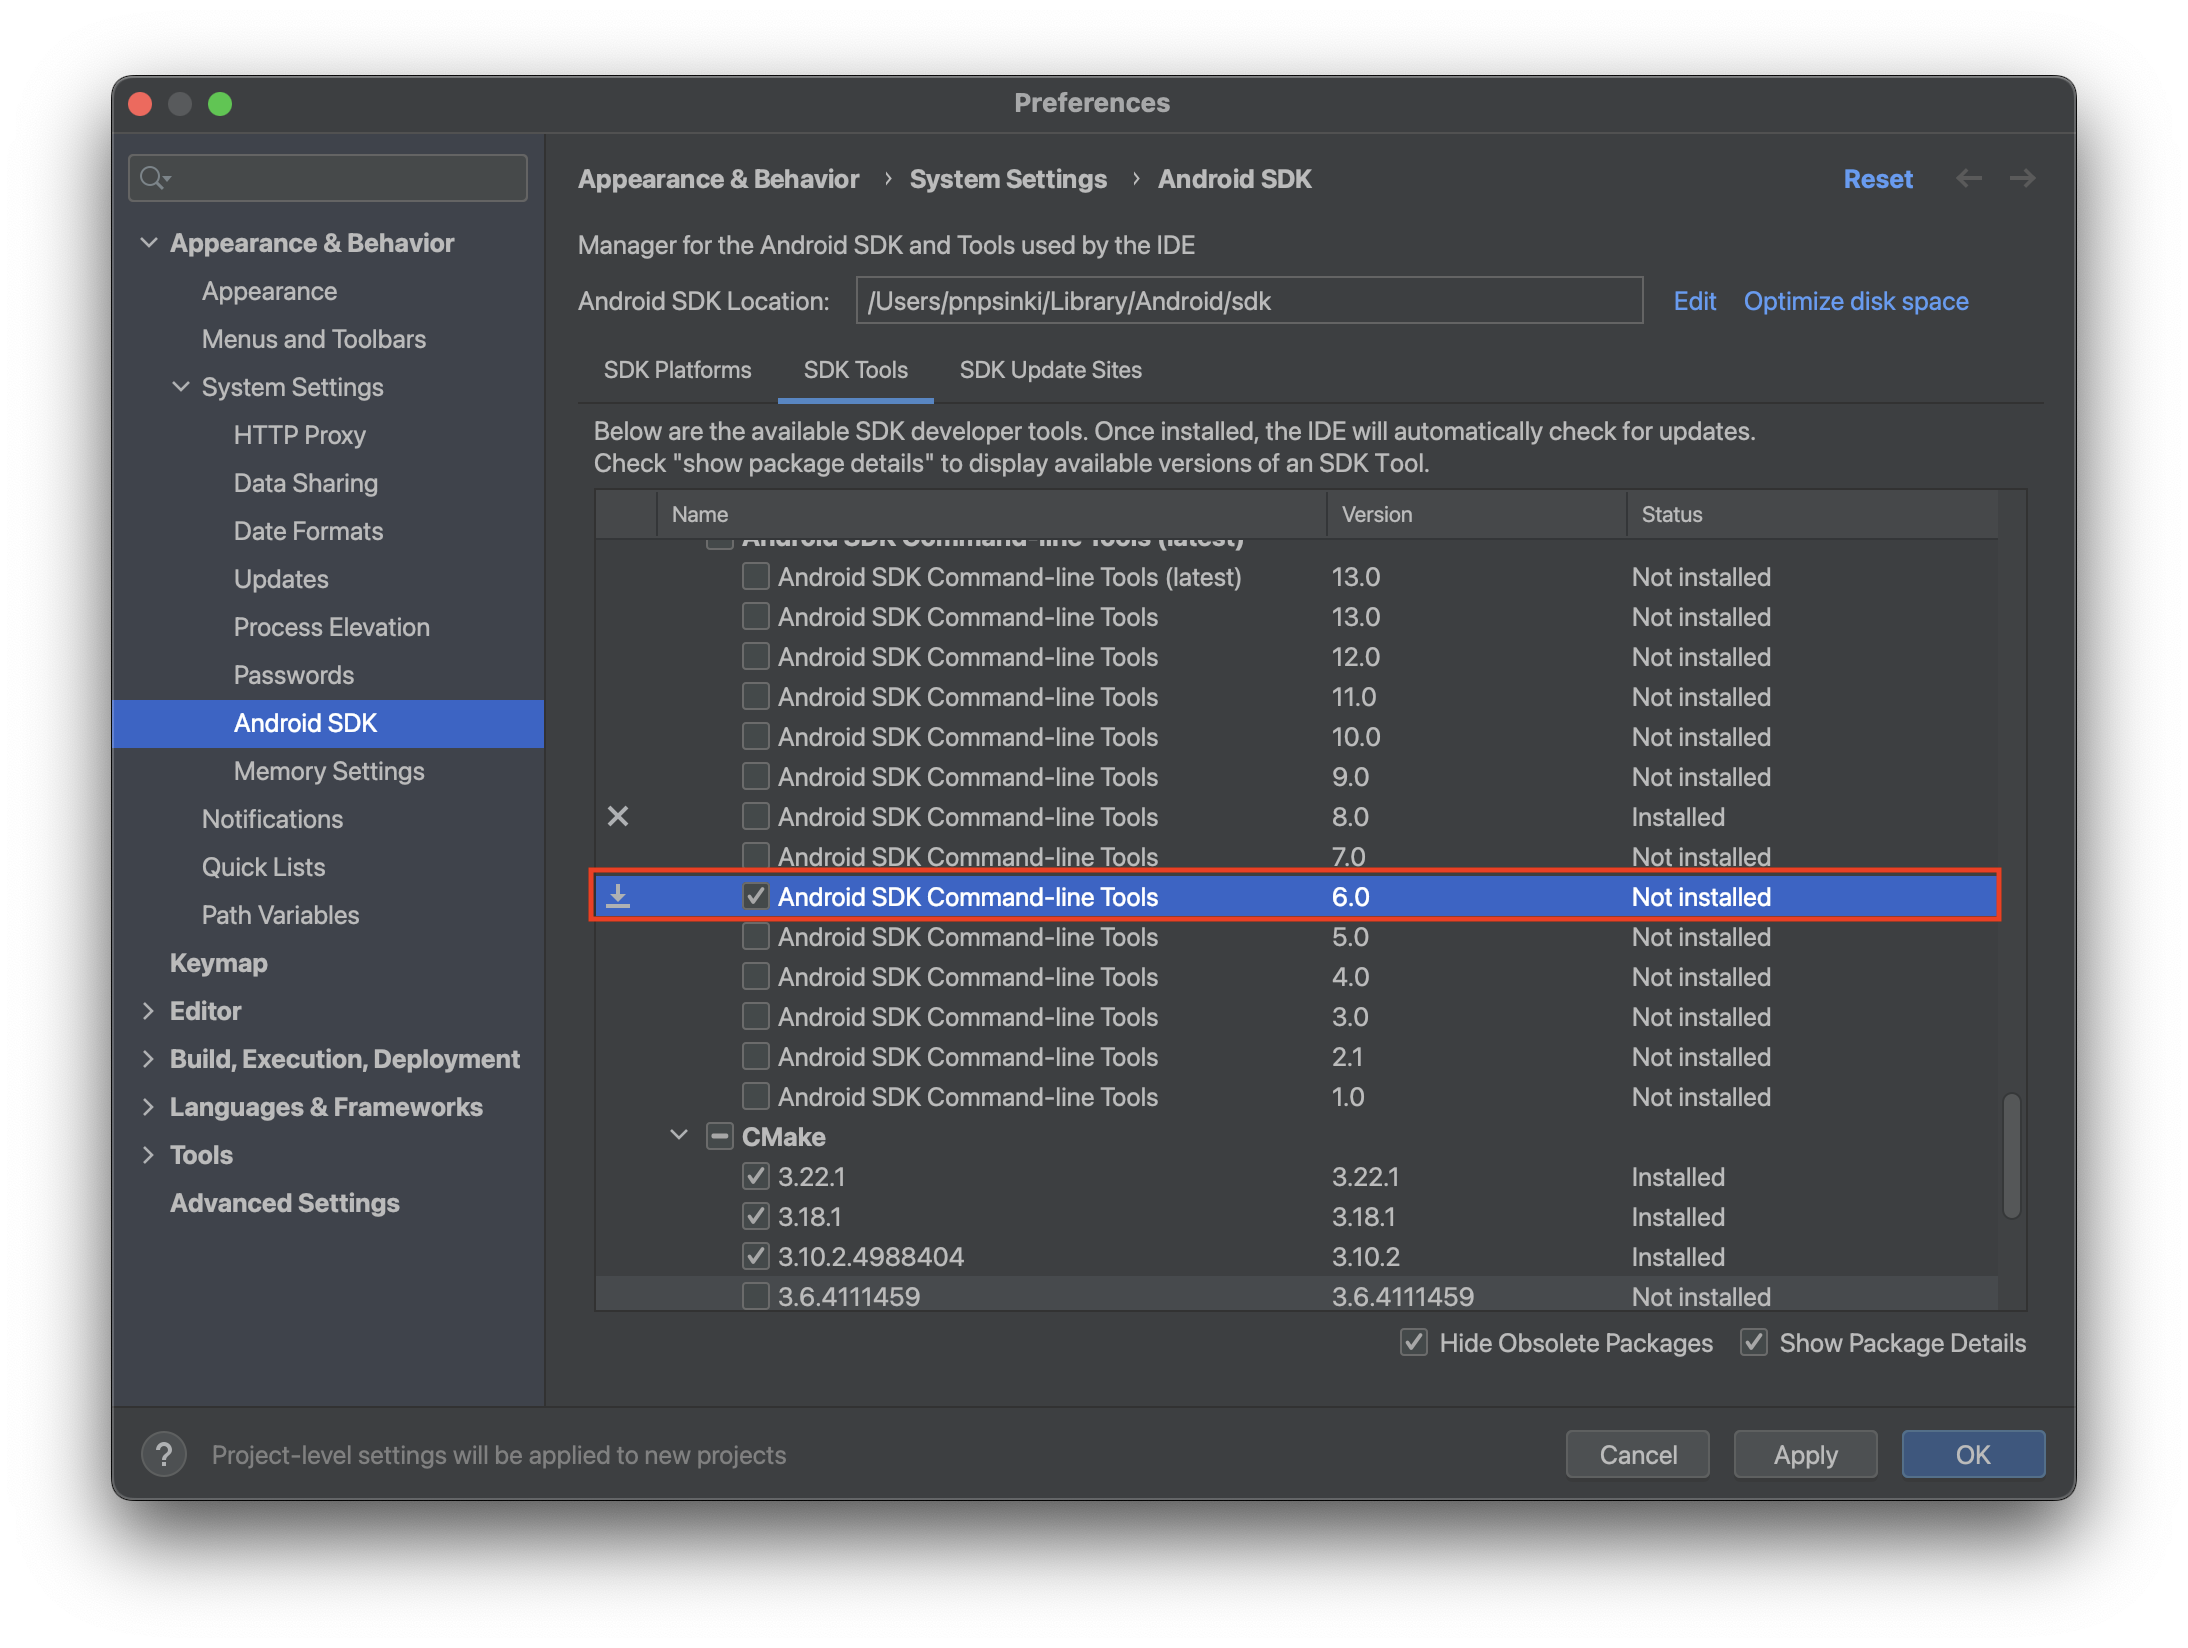
Install Android command-line tools
After installing Android Studio, create a blank project. In the Android Studio project screen, click SDK Manager, then install Android SDK Command-line Tools 6.0 from SDK Tools > Android SDK Command-line Tools (latest).
5. Check environment variables
Check whether the Java environment variable is set. Enter java -version in the terminal; if the Java version is displayed, it is correctly set.
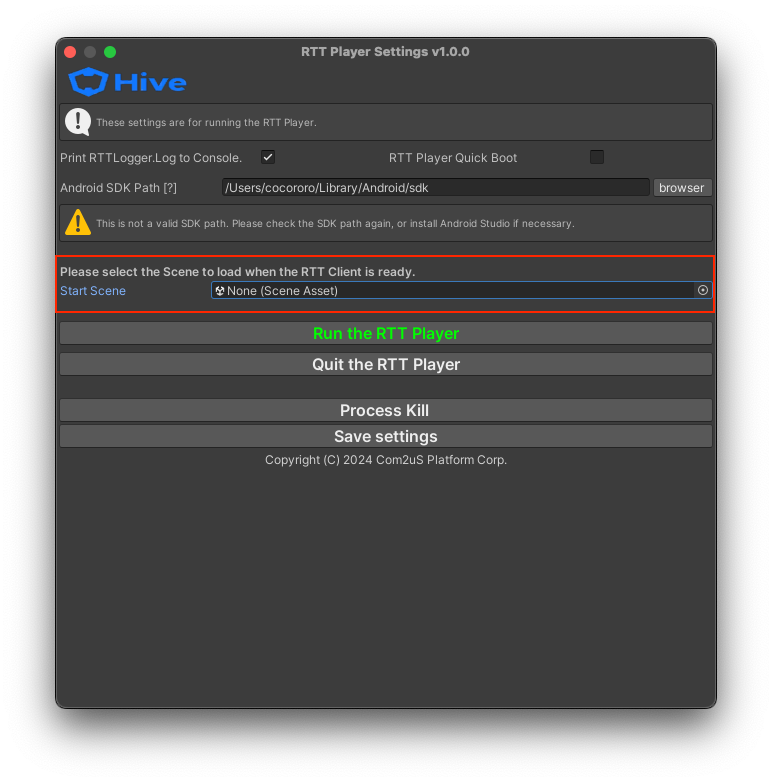
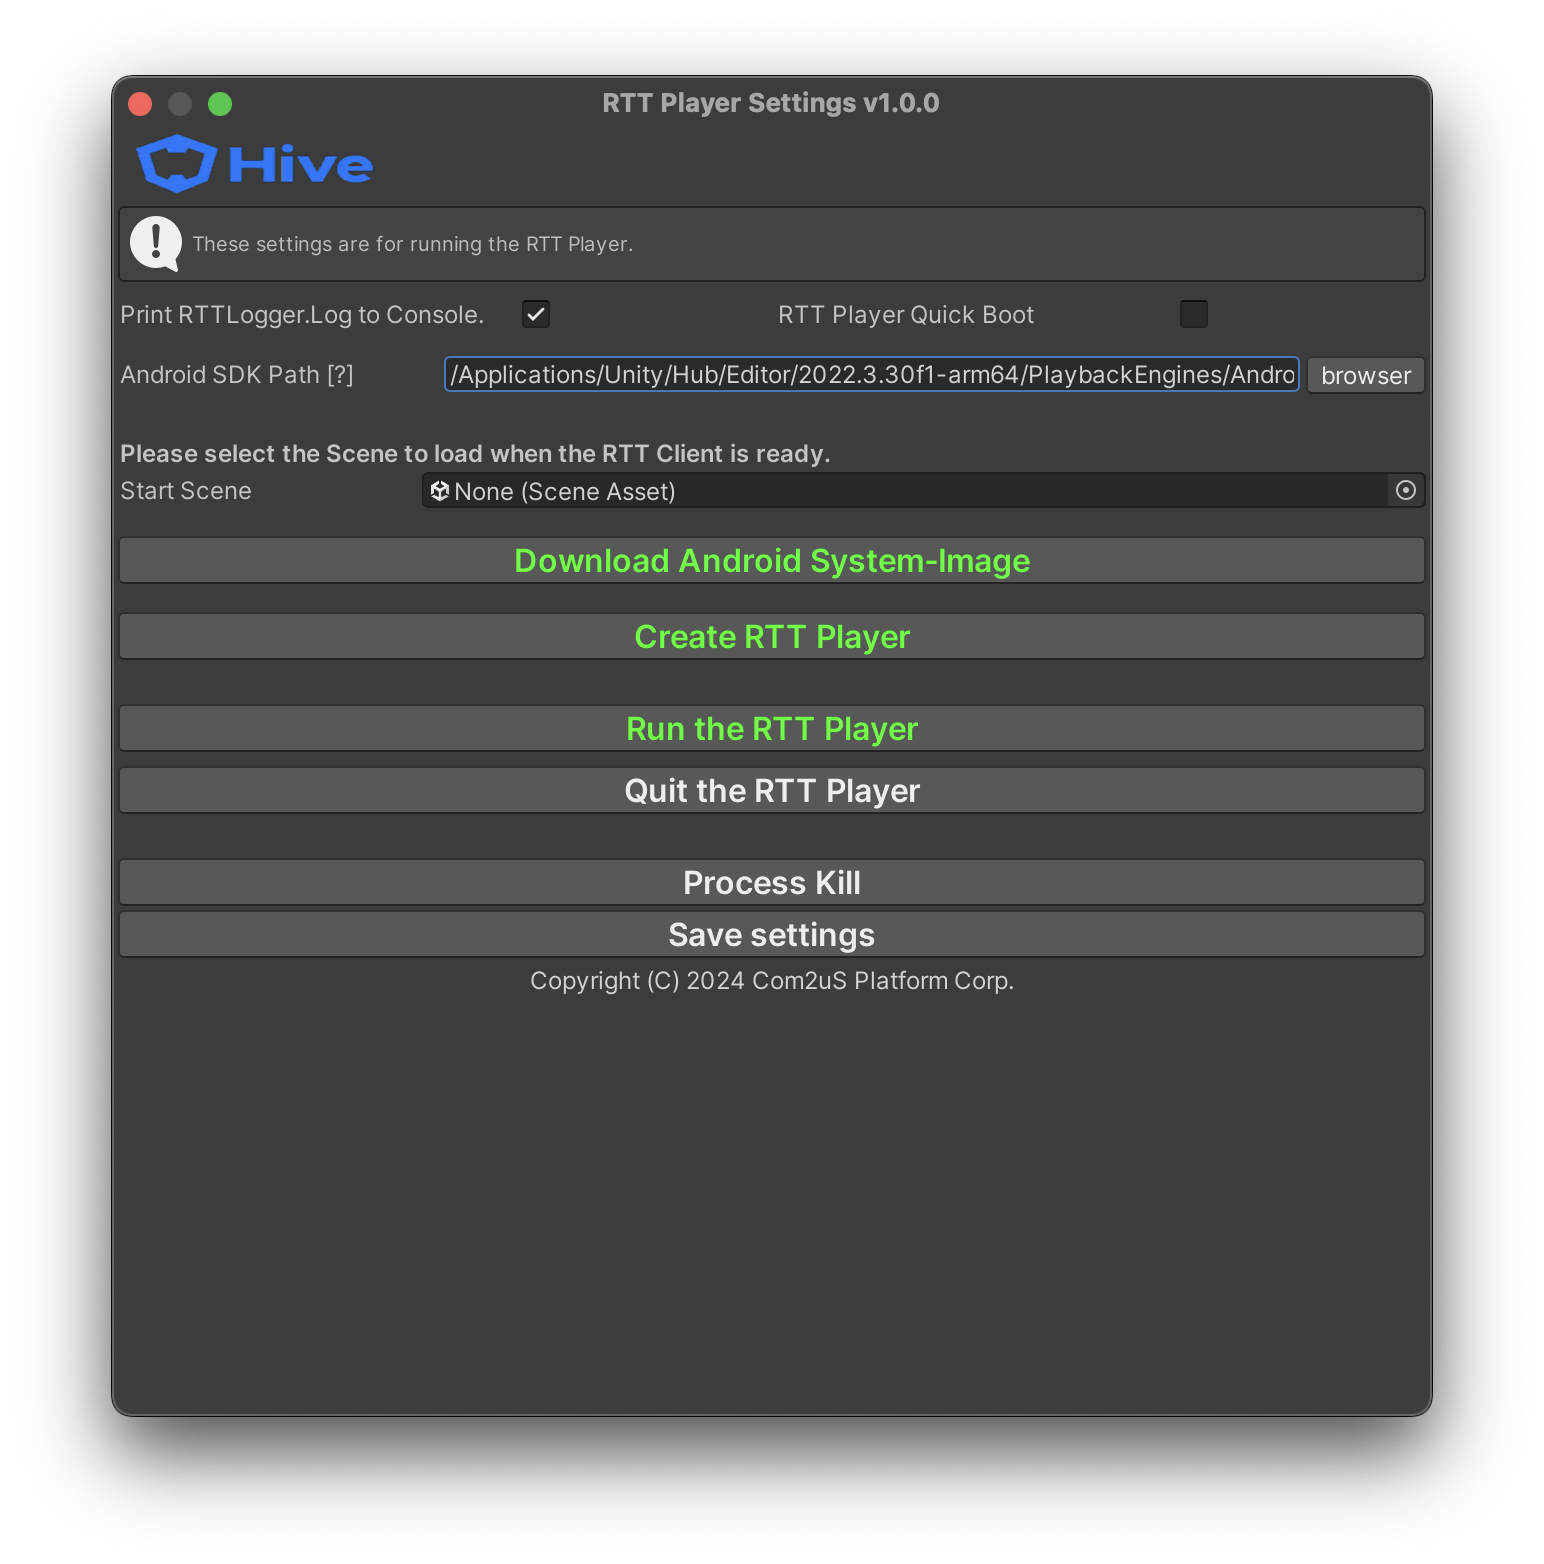
6. Enter Android SDK Path
Enter the path where the Android SDK is installed in Android SDK Path.
7. Install Android system image
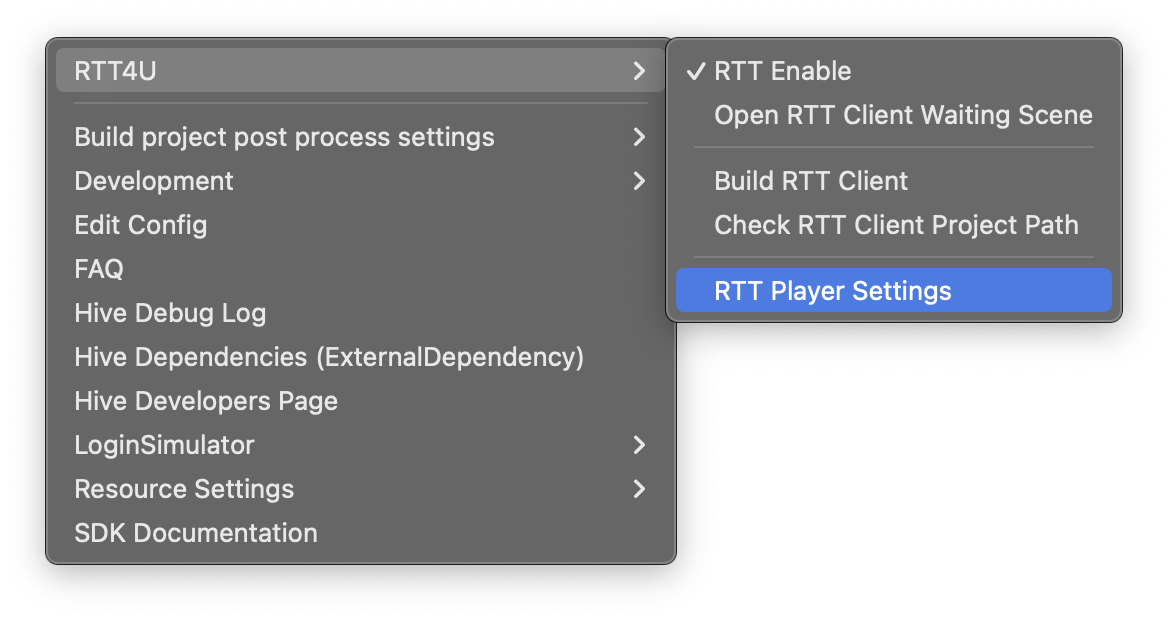
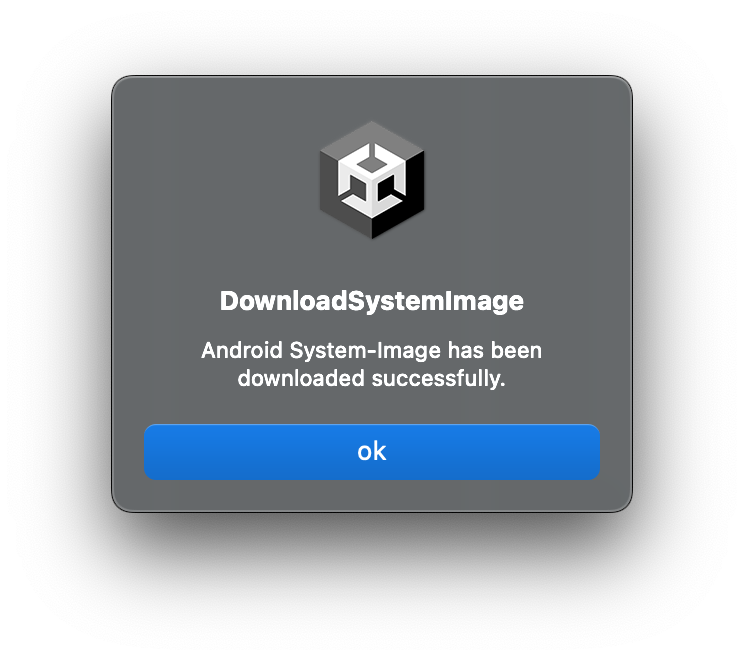
After running Unity, click Hive > RTT4U > RTT Player Settings from the top menu.
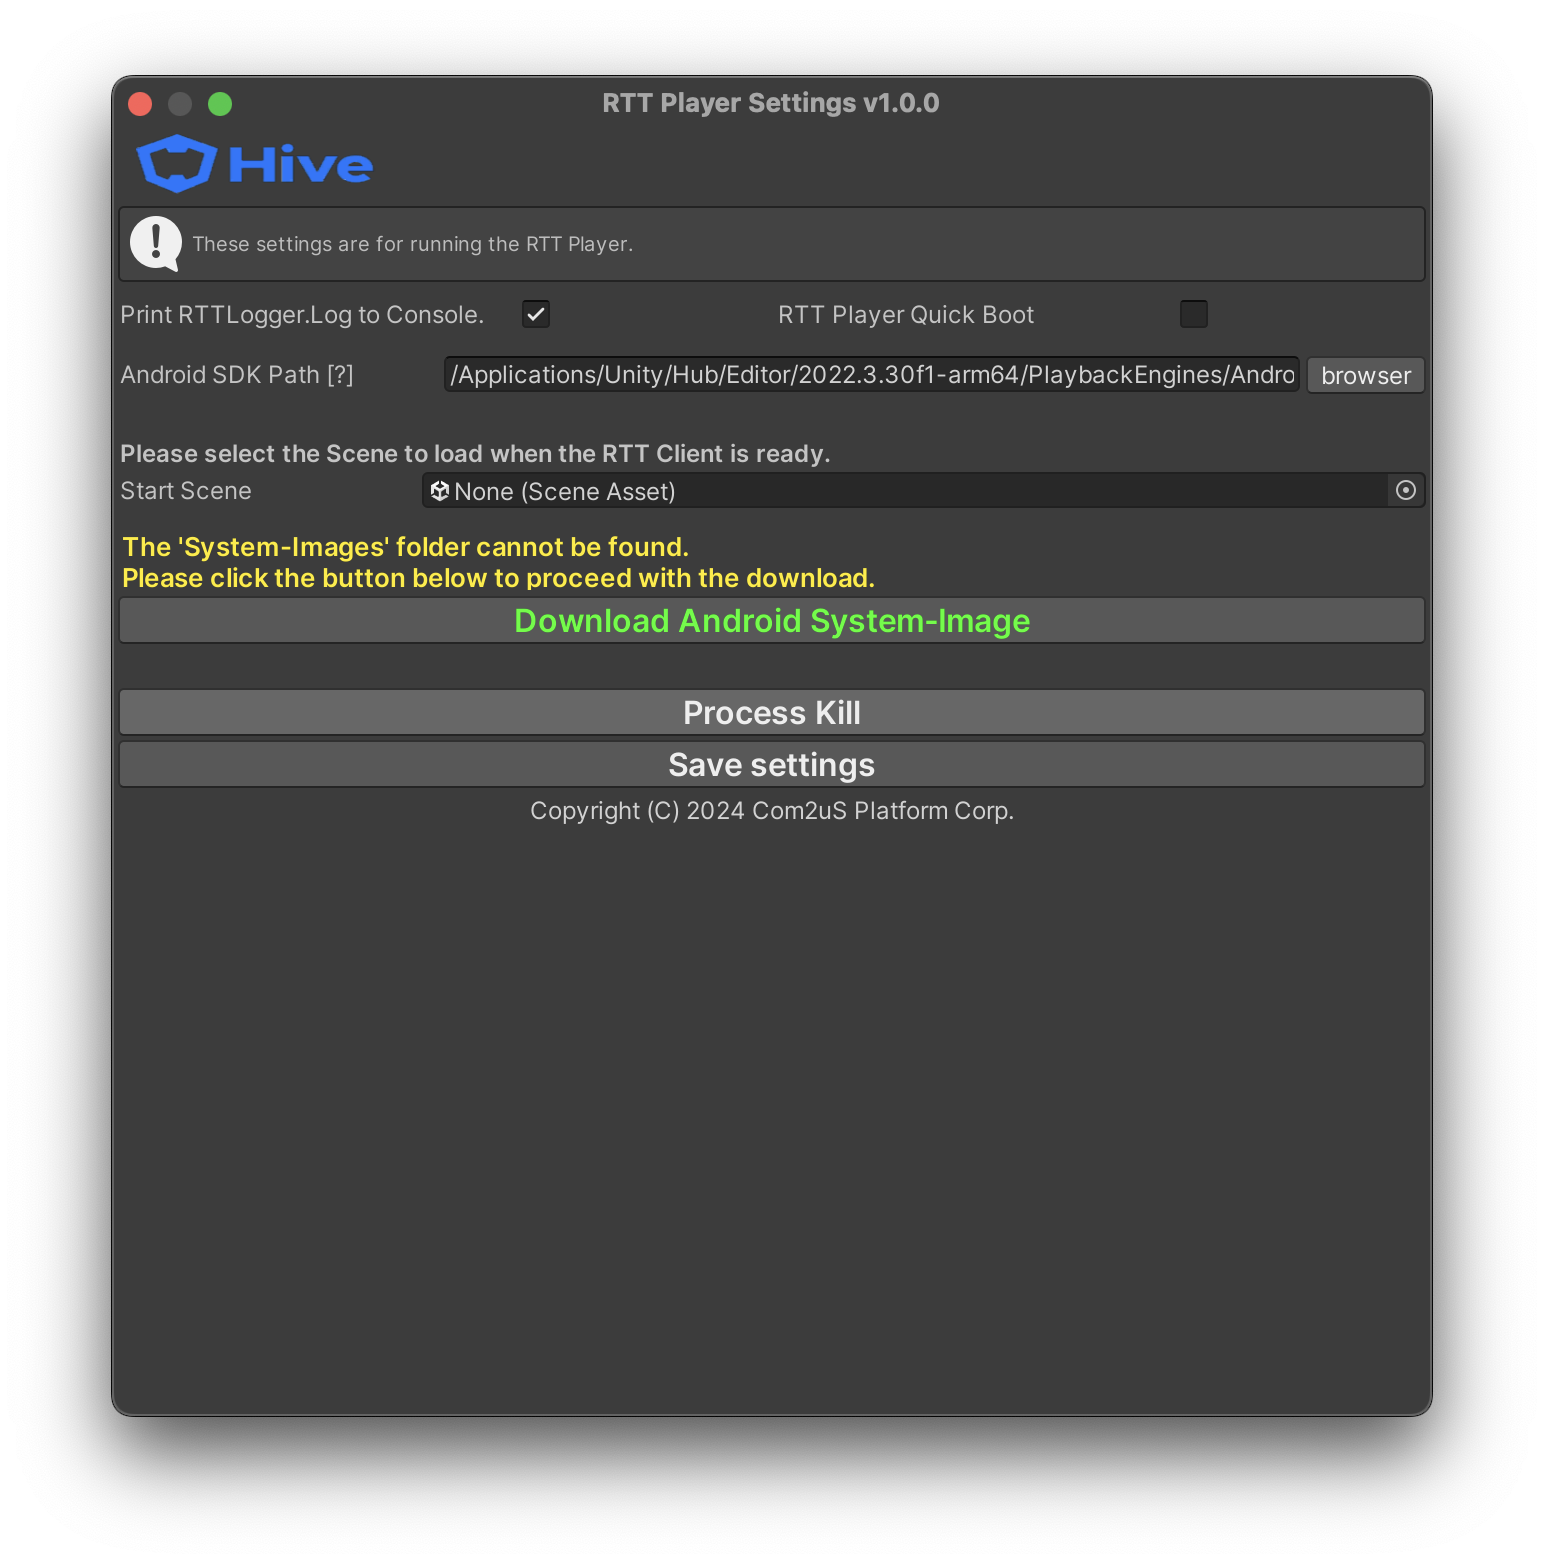
In the RTT Player Settings popup, click Download Android System-Image to install the emulator system image.
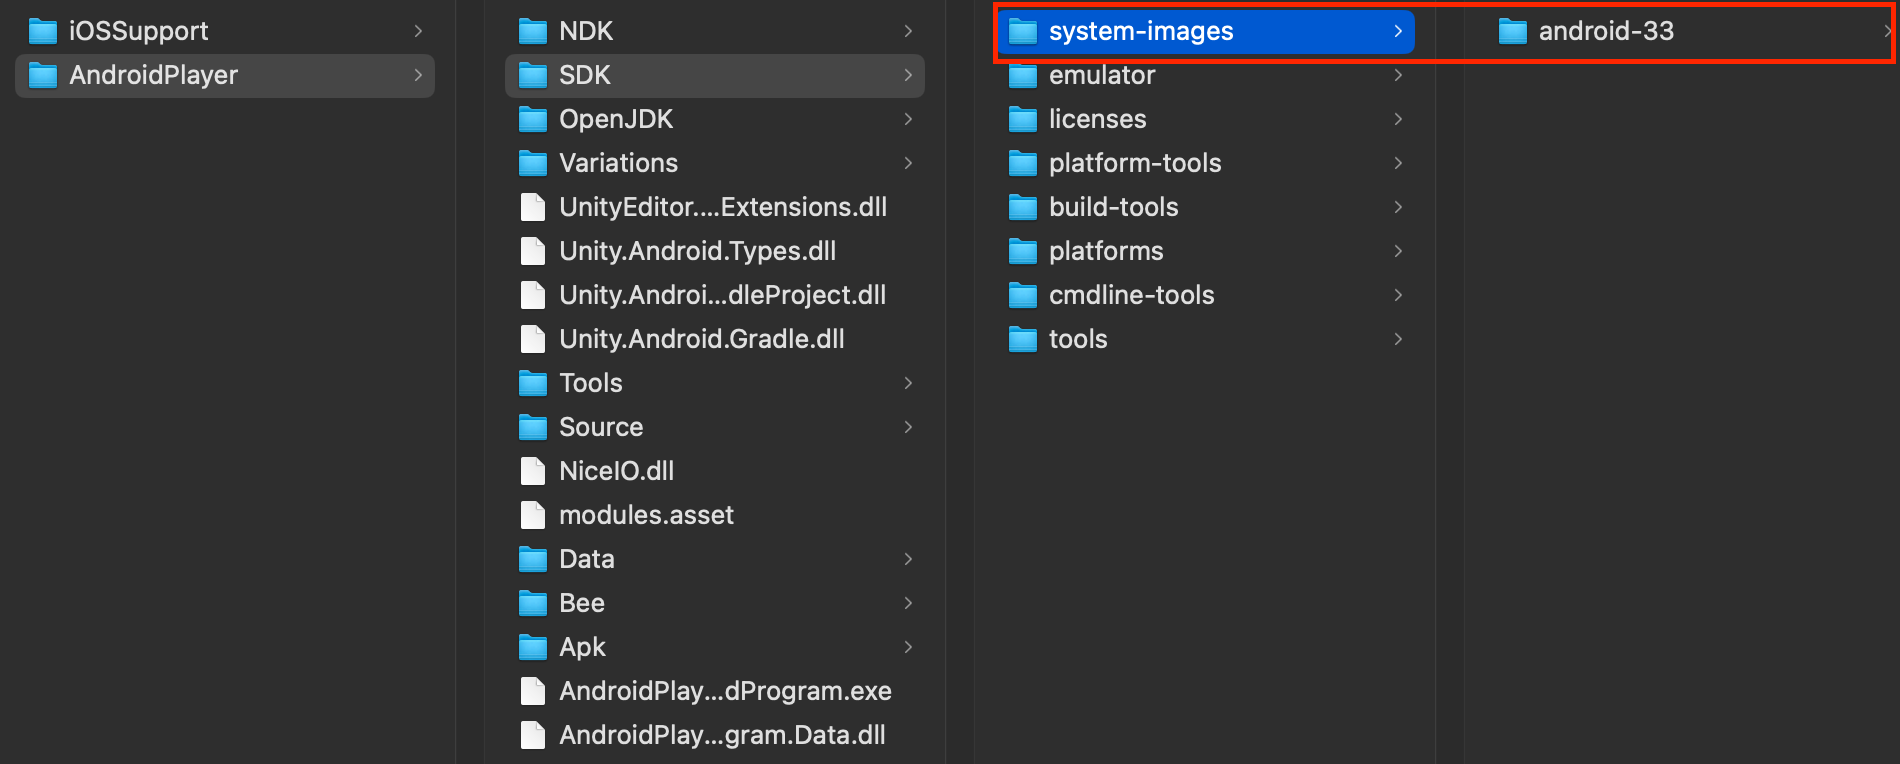
The system image will be installed in the paths below depending on the development environment. RTT4U will only operate correctly if installed in the exact path, so you must check the installation results.
- Windows: Android_SDK_PATH/system-images/android-XX/google_apis_playstore/x86_64
- MacOS: Android_SDK_PATH/system-images/android-XX/google_apis_playstore/arm64-v8a
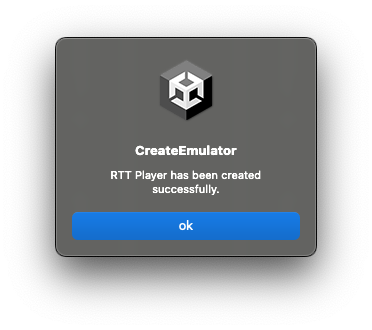
8. Create RTT Player
If you have installed the emulator system image, click Create RTT Player to create the RTT Player. The RTT Player is an emulator for testing Hive SDK functionality.
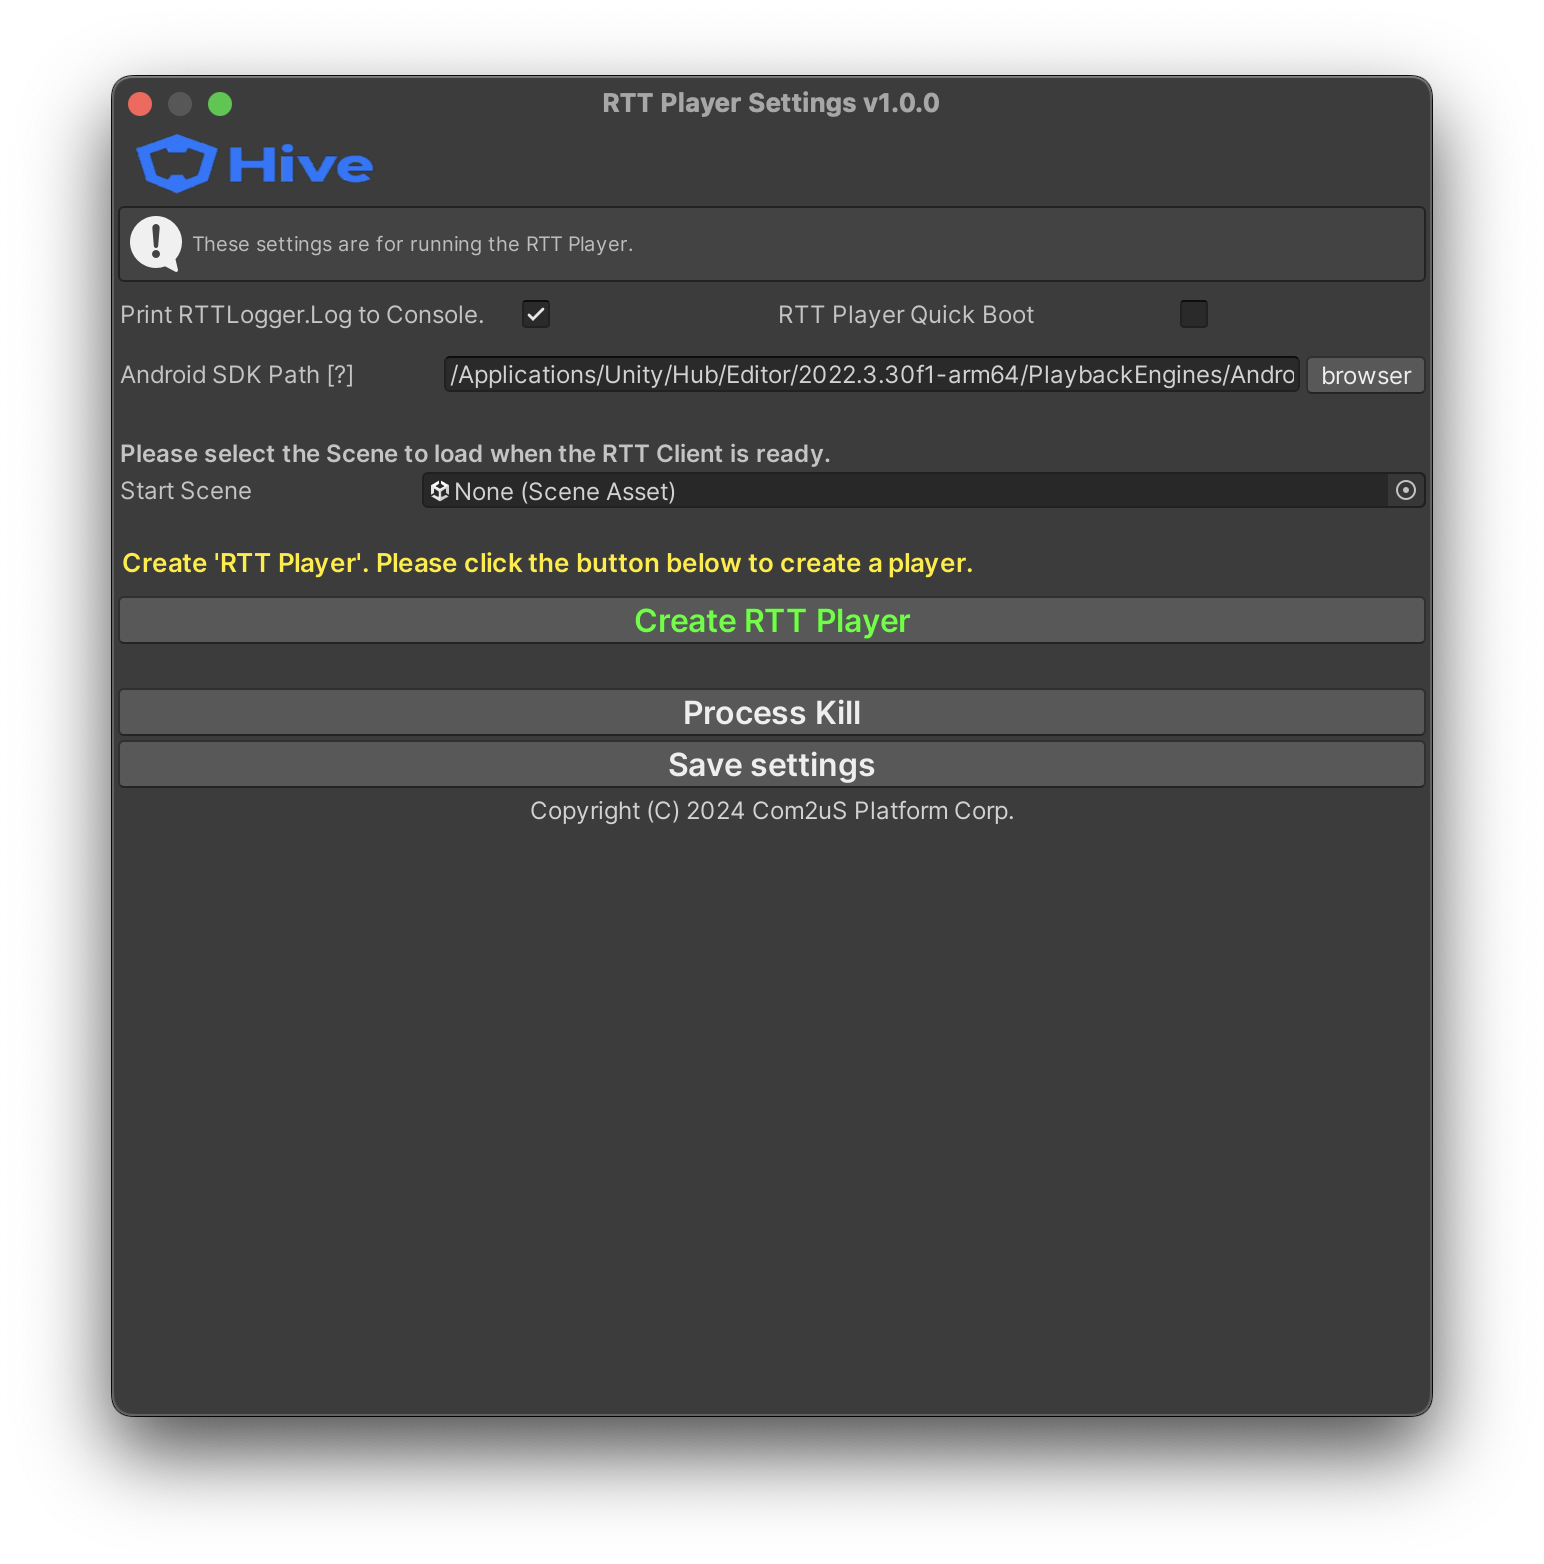
9. Enter Start Scene
Enter the Scene that starts the app in Start Scene. The Scene that starts the app is the Scene where the Hive SDK Unity Plugin initialization (HIVEUnityPlugin.InitPlugin) is executed. After entering, click Save settings to save the configuration.
10. Test RTT Player execution
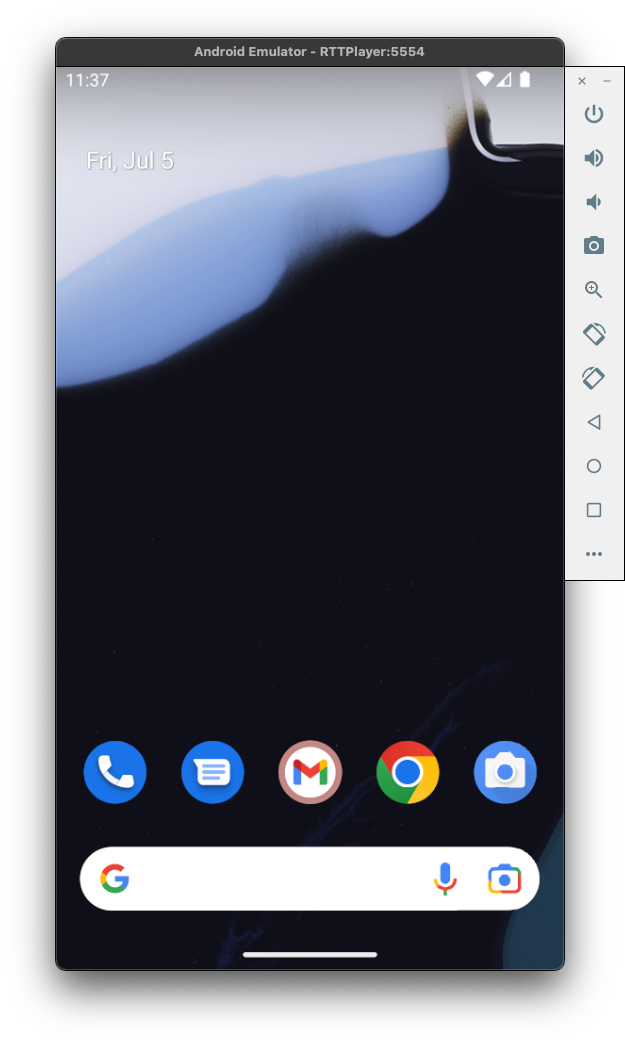
After creating the RTT Player, click Run the RTT Player to check if the emulator is functioning correctly.

RTT Player guide
This section provides guidance on RTT Player settings and button actions.
Settings
After configuring, you must click Save settings to save the settings.
- Print RTTLogger.Log to Console: Outputs RTT Player logs to the Unity Console
- RTT Player Quick Boot: Quickly boots the RTT Player if possible (note that the state is not saved when quitting the RTT Player)
- Android SDK Path: Enter the path where the Android SDK is installed
- Start Scene: Enter the Scene where the Hive SDK Unity Plugin initialization (
HIVEUnityPlugin.InitPlugin) is executed
Buttons
- Download Android System-Image: Downloads the Android system image needed to create the RTT Player
- Create RTT Player: Creates the RTT Player
- Run the RTT Player: Runs the RTT Player
- Quit the RTT Player: Exits the RTT Player
- Process Kill: Forcefully terminates the process if the RTT Player does not exit normally
- Save settings: Saves the currently configured information to a file