Installing the Hive SDK
The Hive SDK is available in several builds for different game engines and operating systems. Developers must install the Hive SDK build that matches their app environment. The installation process for the Hive SDK is as follows:
- Android Native: Install via Gradle
- iOS Native: Install via Cocoapods
- Unity: Install using the SDK Manager or Install manually
- Unreal: Install as a plugin
Below, we provide instructions for installing the Hive SDK Unity Android/iOS build as an example.
Automatic installation with SDK Manager
Unlike other Hive SDK builds, the Hive SDK Unity build supports installation using the Hive SDK Manager. The Hive SDK Manager is a Unity plugin tool that offers Hive SDK Unity installation, automatic updates, integrity verification, and rollback features for Unity app developers. If the Hive SDK Manager is unavailable, you must manually install Hive SDK Unity.
Installing the SDK Manager
- Download the latest version of the Hive SDK Manager and unzip it.
- Open the Unity Editor and activate the Project window. Then, drag and drop the HIVE-SDK-Manager.unitypackage file from the unzipped folder onto the Project window screen. Alternatively, navigate to Assets > Import Package > Custom Package and select the HIVE-SDK-Manager.unitypackage file, then select Import.

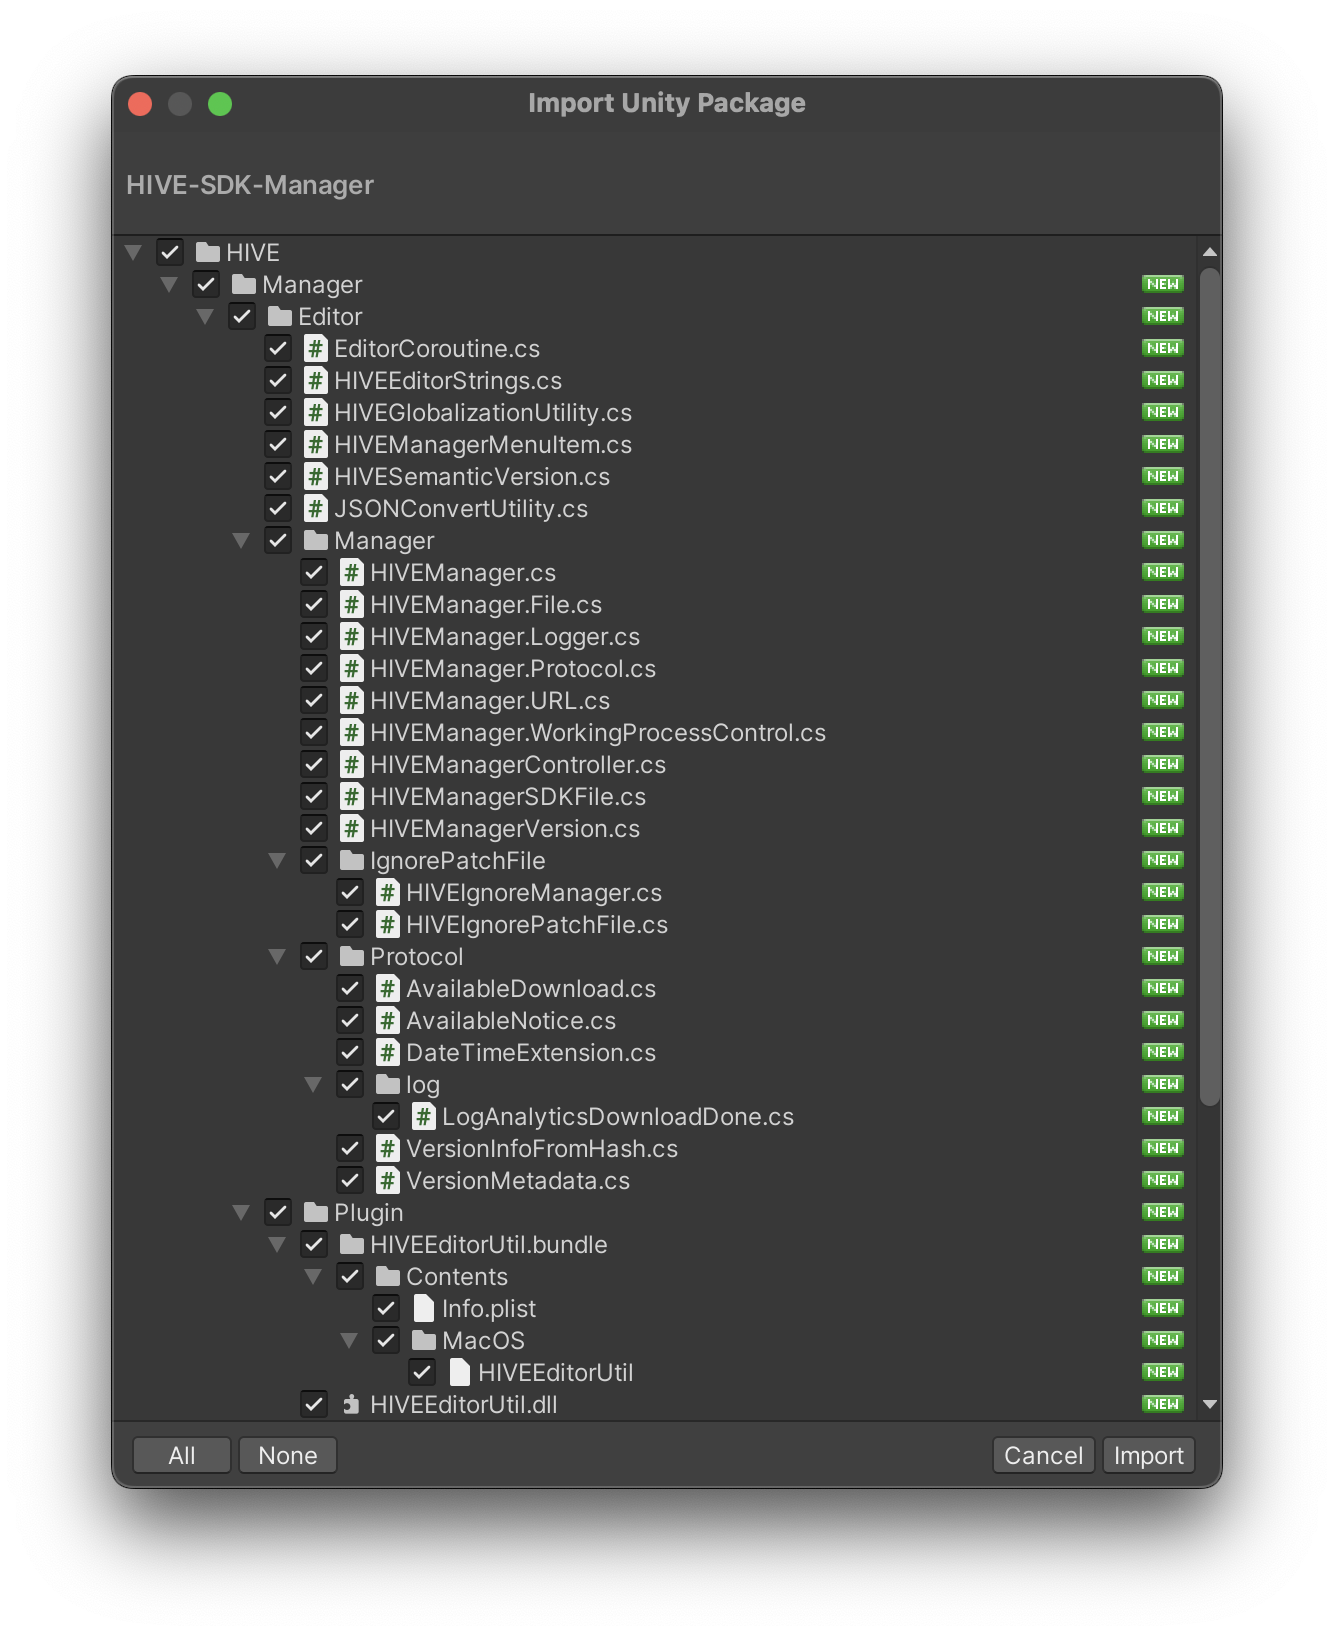
- When the Import Unity Package window appears, select Import to install the SDK Manager.
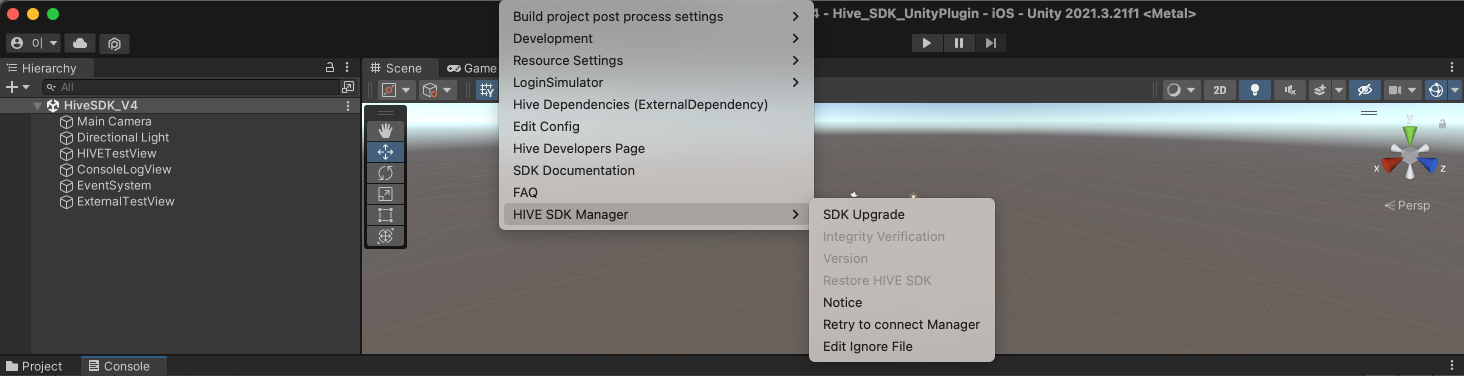
- If the SDK Manager has been successfully installed, you can find the Hive > HIVE SDK Manager menu in the Unity Editor.
Installing and updating Hive SDK Unity
Install Hive SDK Unity using the Hive SDK Manager. If Hive SDK Unity was already installed, it can be updated to a higher version.
- In the Unity Editor, select Hive > HIVE SDK Manager > SDK Upgrade.
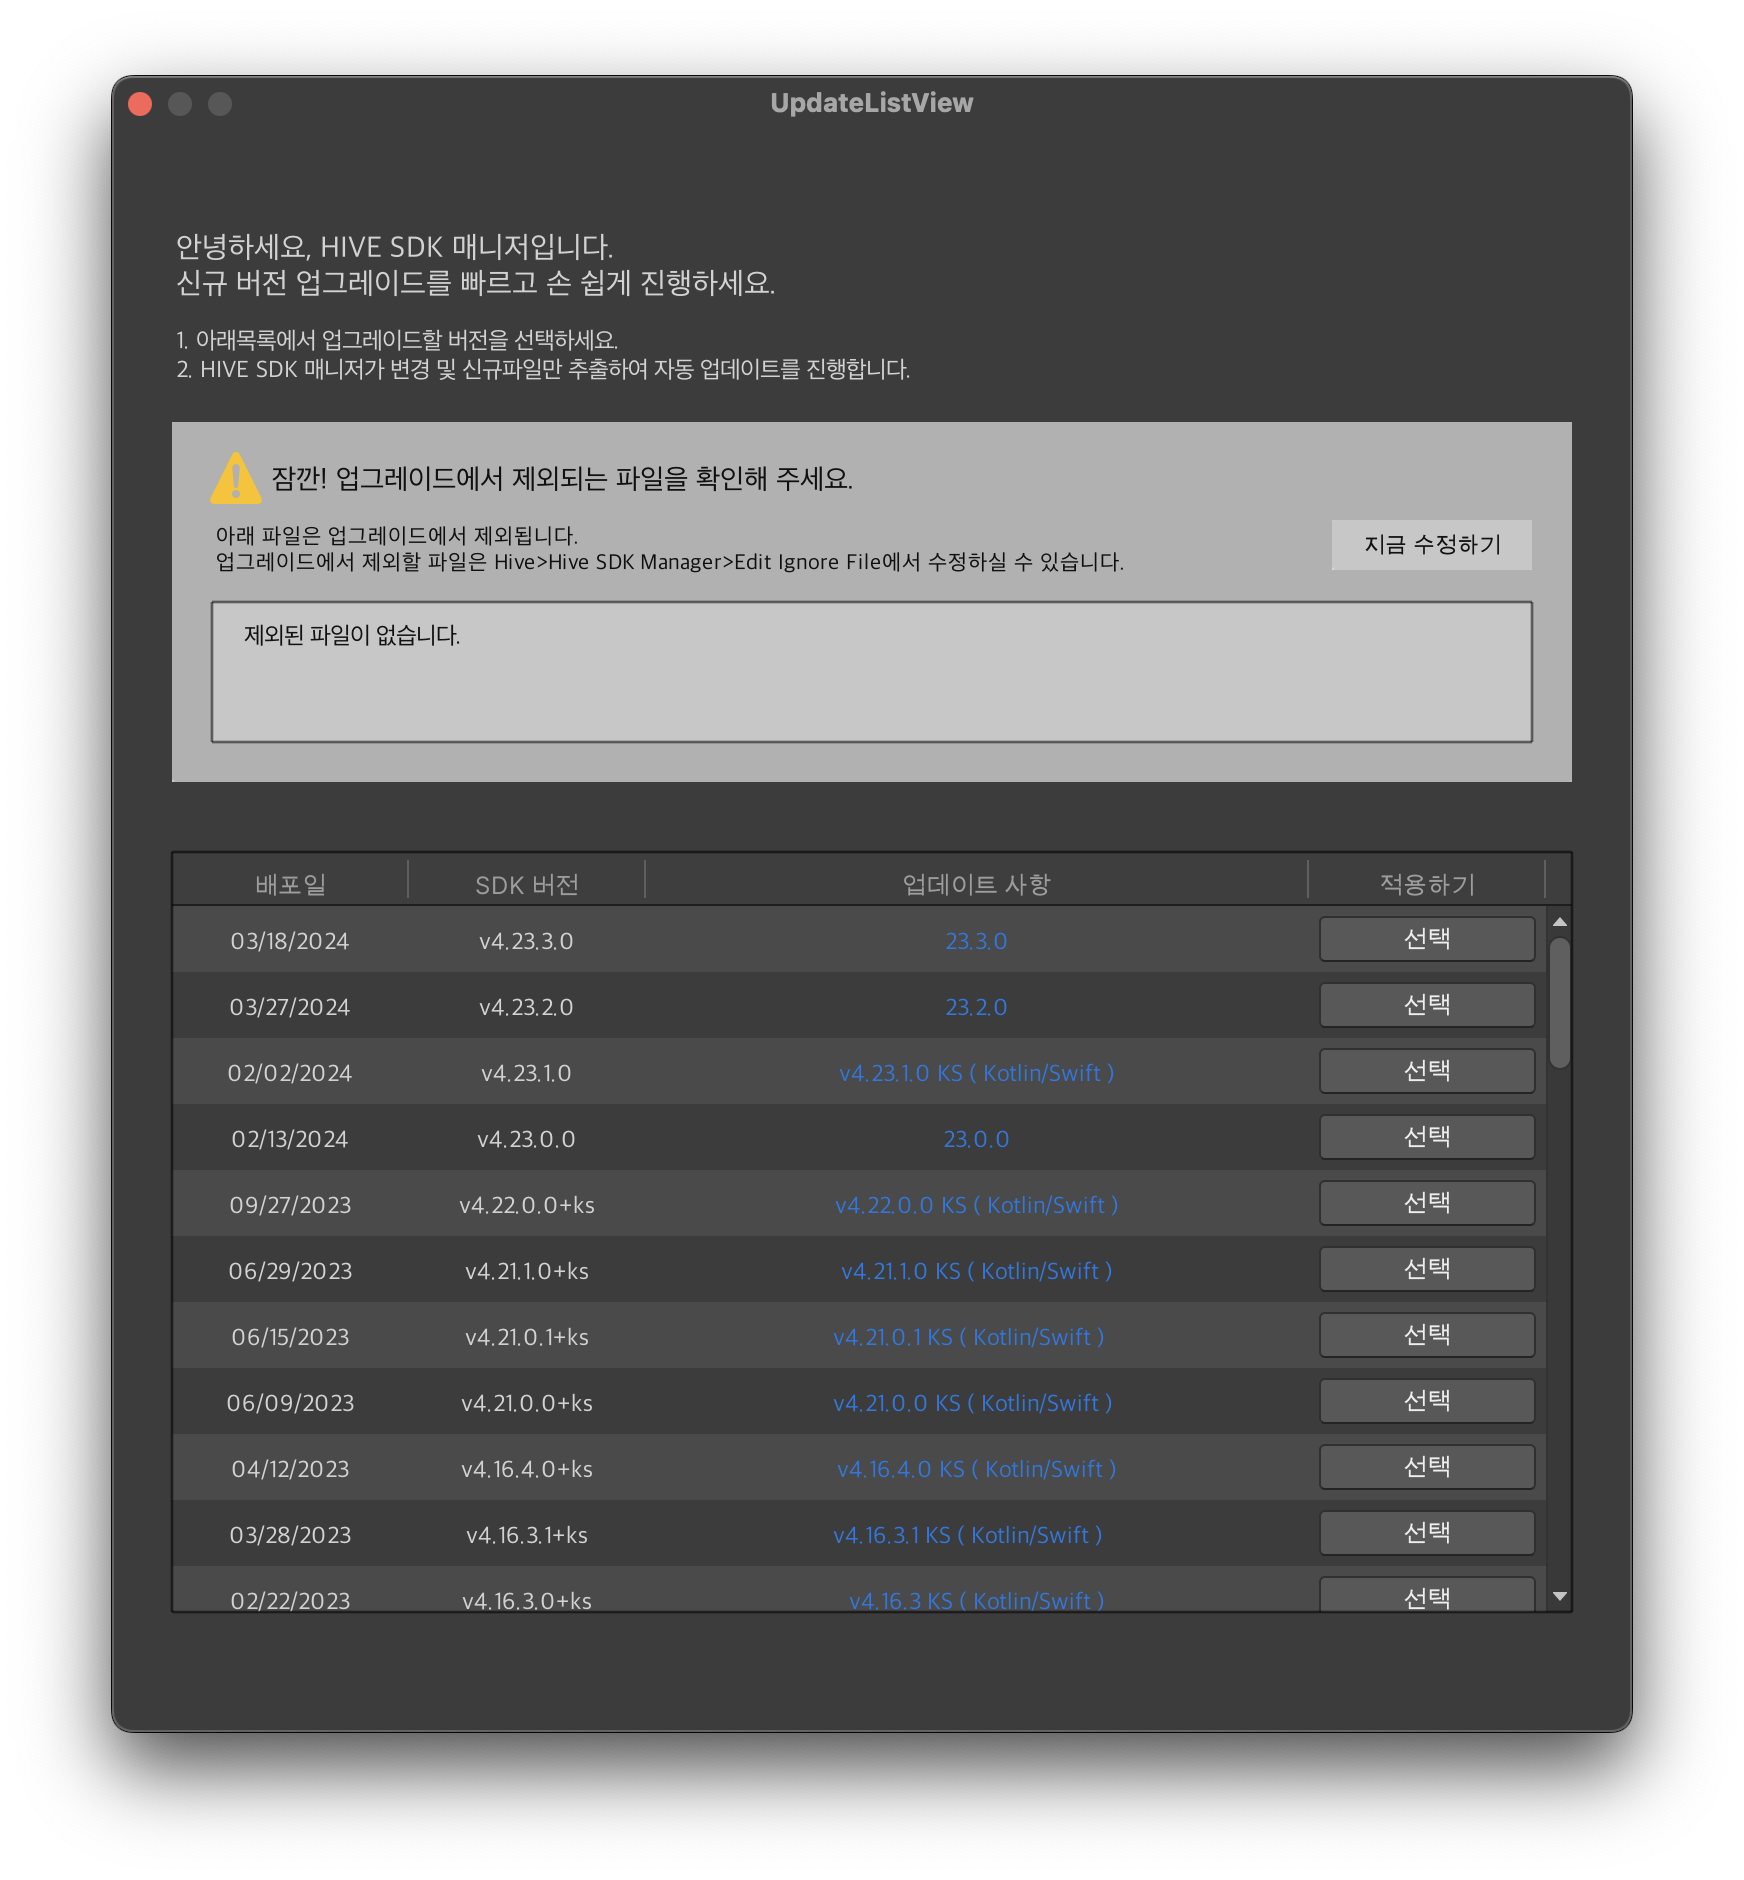
- When the UpdateListView window appears, select the Hive SDK version to install or update.
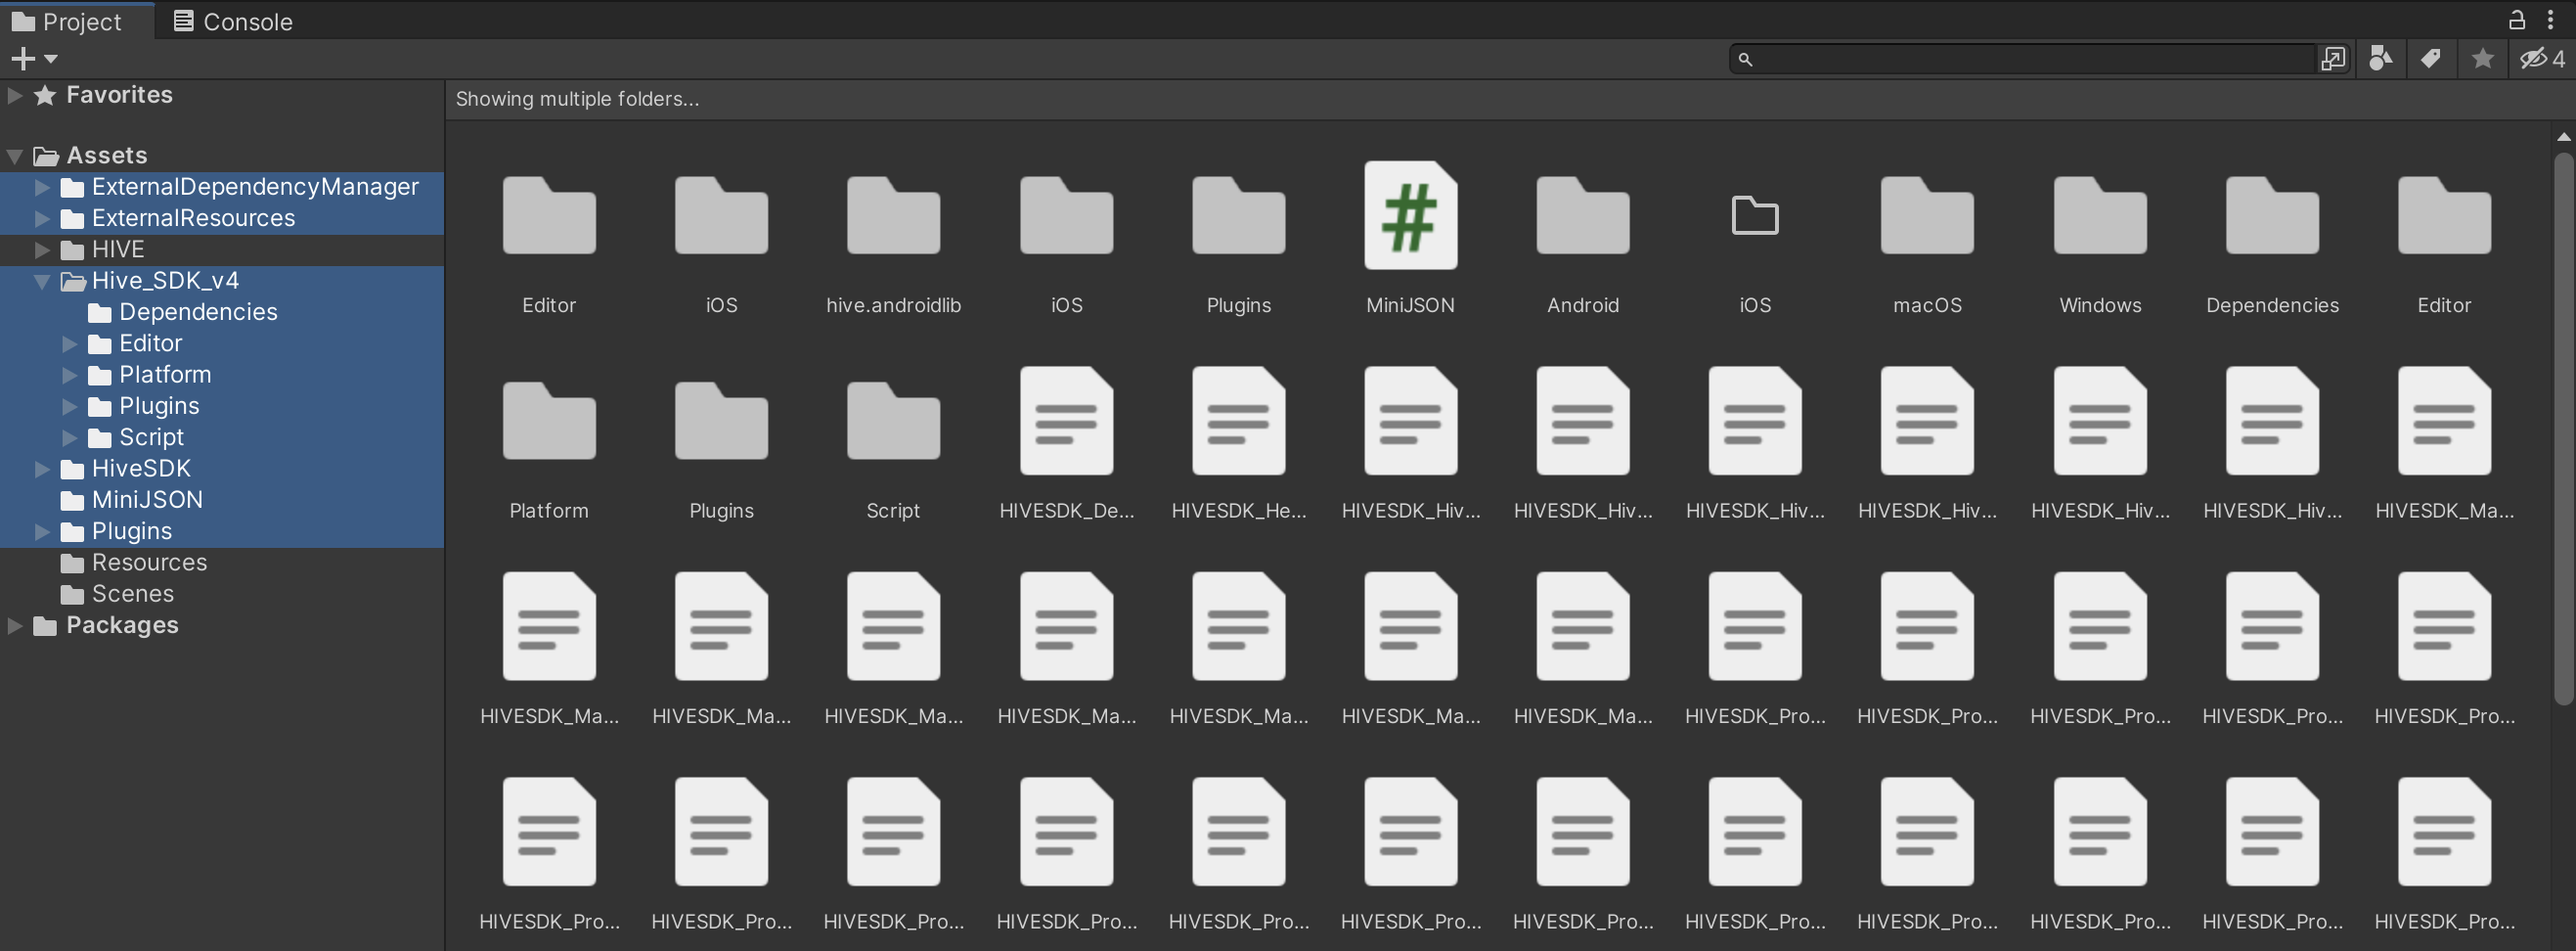
- After the upgrade is complete, click OK and check the /Assets/Hive_SDK_v4 folder.

Manual installation
- Download and unzip the latest version of Hive SDK Unity.
- Open Unity Editor and activate the Project window. Then, drag and drop the HIVE_SDK.unitypackage file from the unzipped folder onto the Project window screen. Alternatively, go to Assets > Import Package > Custom Package and select the HIVE_SDK.unitypackage file, then choose Import.
Update Hive SDK Unity
To manually update Hive SDK Unity, delete the existing Hive SDK Unity and then manually install the latest version.
Uninstallation
To remove Hive SDK Unity, delete the following files or folders:
- /Assets/Hive_SDK_v4
- /Assets/Hive_SDK
- /Assets/Plugins/Android/AndroidManifest.xml
- /Assets/Plugins/Android/mainTemplate.gradle
- /Assets/Plugins/Android/settingsTemplate.gradle
- /Assets/Plugins/Android/hive_config.xml
- /Assets/Plugins/iOS/hive_config.xml
Update or uninstall SDK Manager
You can update or uninstall the SDK Manager as needed.
Update SDK Manager
To update SDK Manager to the latest version, delete the current SDK Manager and then install the latest version.
Uninstall SDK Manager
Delete all files or folders in /Assets/HIVE.