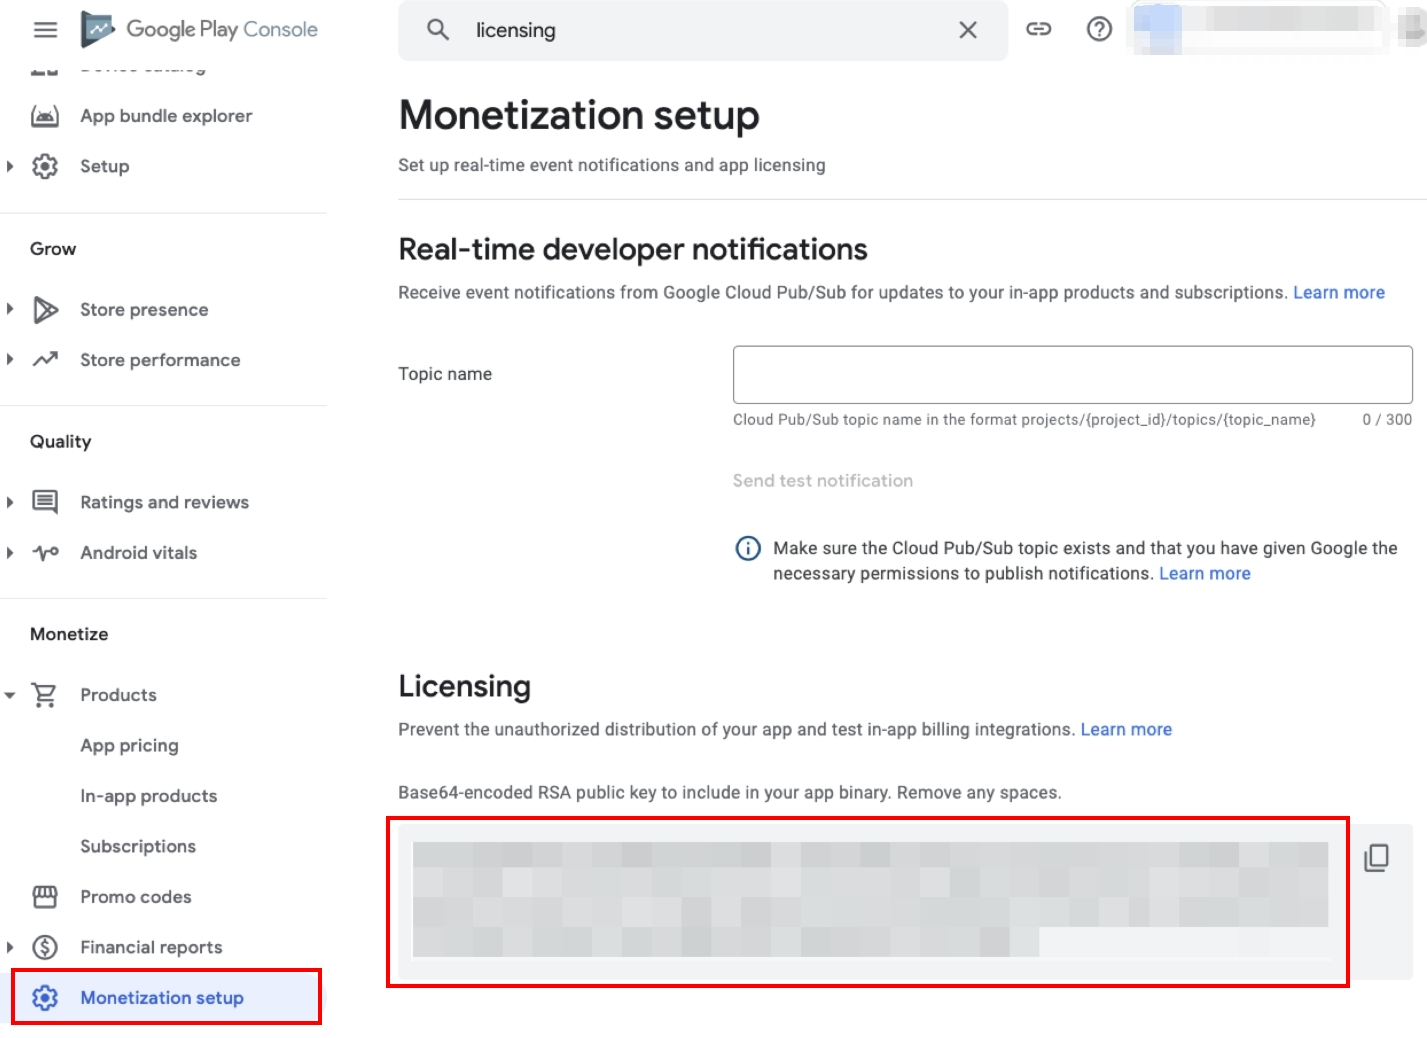
Google In–app Purchase License Key
Confirm the Google In–App Purchase License Key by following as procedure below.
- Go to the Google Play Console and select an app > Monetize > Monetization setup > Licensing section.
Google Market Account
To register the information of Google Market Account with the Hive App Center, follow these instructions to verify your account’s unique ID and download the key file (.json).
Confirm the Unique ID
-
-
- Access to Google API Console > Google Play Android Developer project > IAM & Admin > Service Accounts > Confirm Unique ID
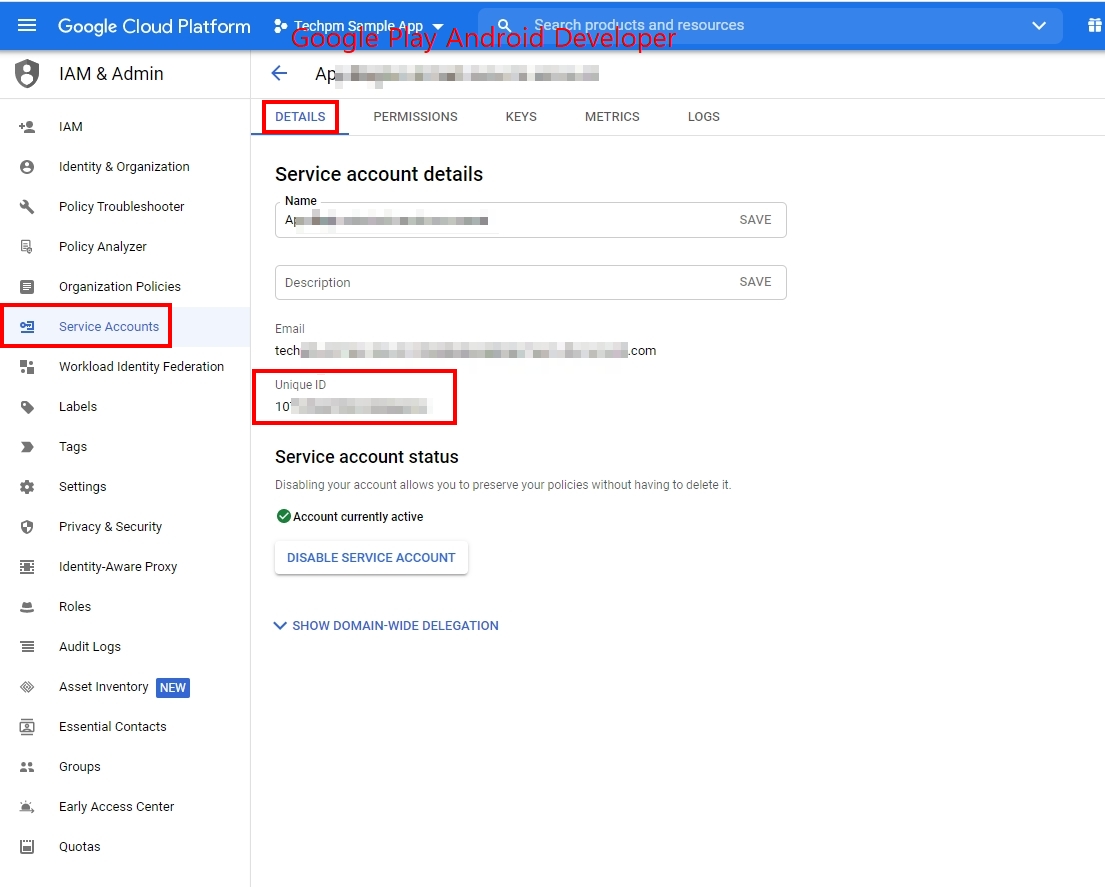
- Access to Google API Console > Google Play Android Developer project > IAM & Admin > Service Accounts > Confirm Unique ID
-
Download the json file
-
- Go to the Google API Console and click the Google Play Android Developer project > IAM & Admin > Service Accounts.
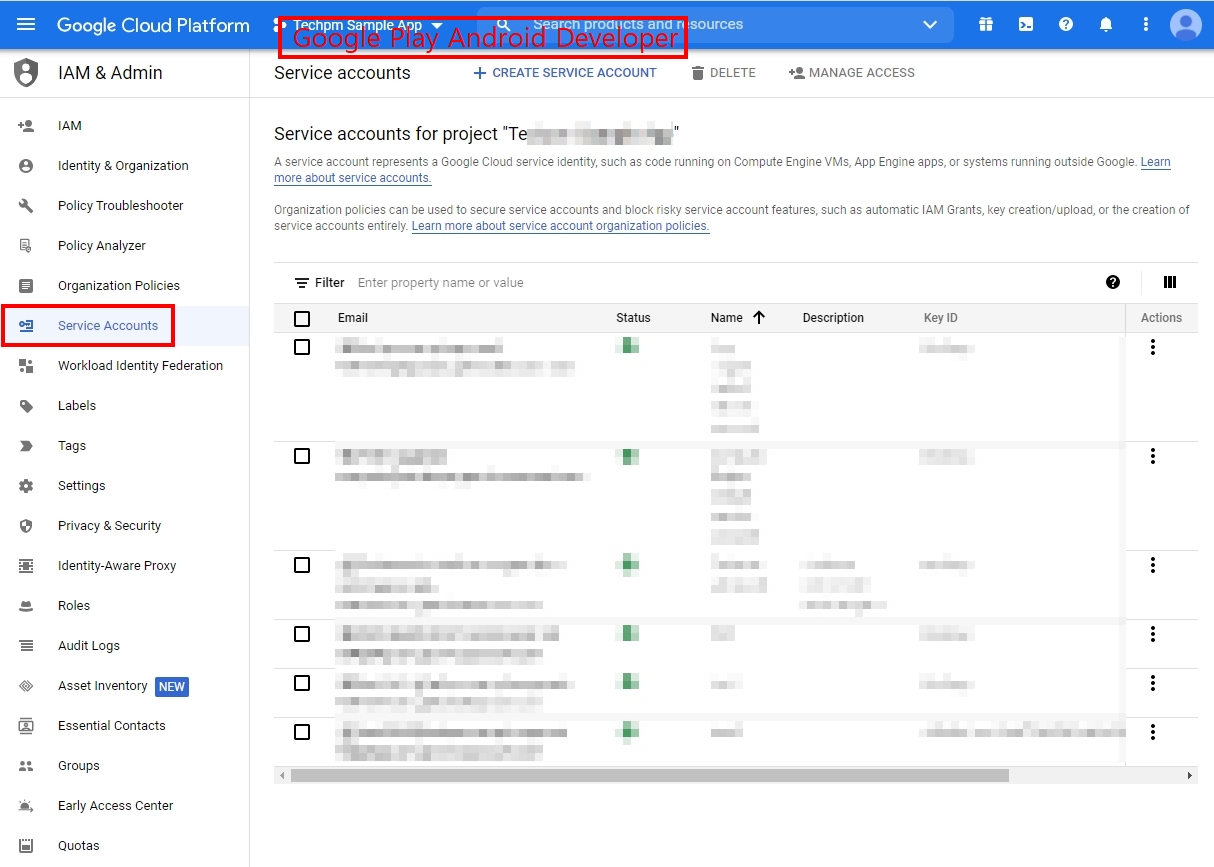
- KEYS tab > Click ADD KEY > Select JSON as Key type > CREATE > Download the .json file
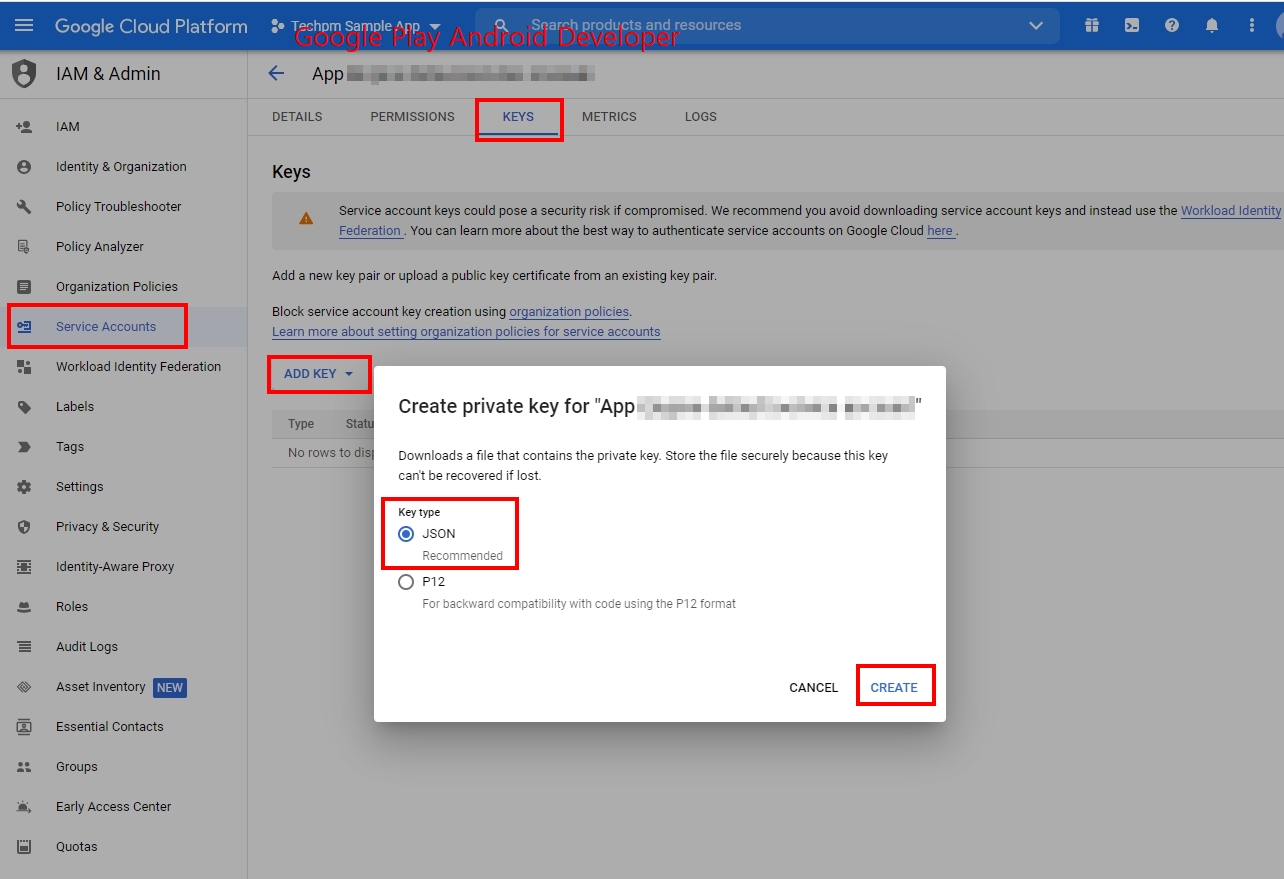
- Go to the Google API Console and click the Google Play Android Developer project > IAM & Admin > Service Accounts.
Google Play Games Services Setup
[1] Create a Play Games Services project
- Navigate to Play Games Services > Setup and management > Configuration on Google Play Console.
- On the Does your game already use Google APIs? page, choose No, my game doesn’t use Google APIs and enter your game’s name.

- Click Create to complete creating new Play Games Services game project. A Project ID would be issued.
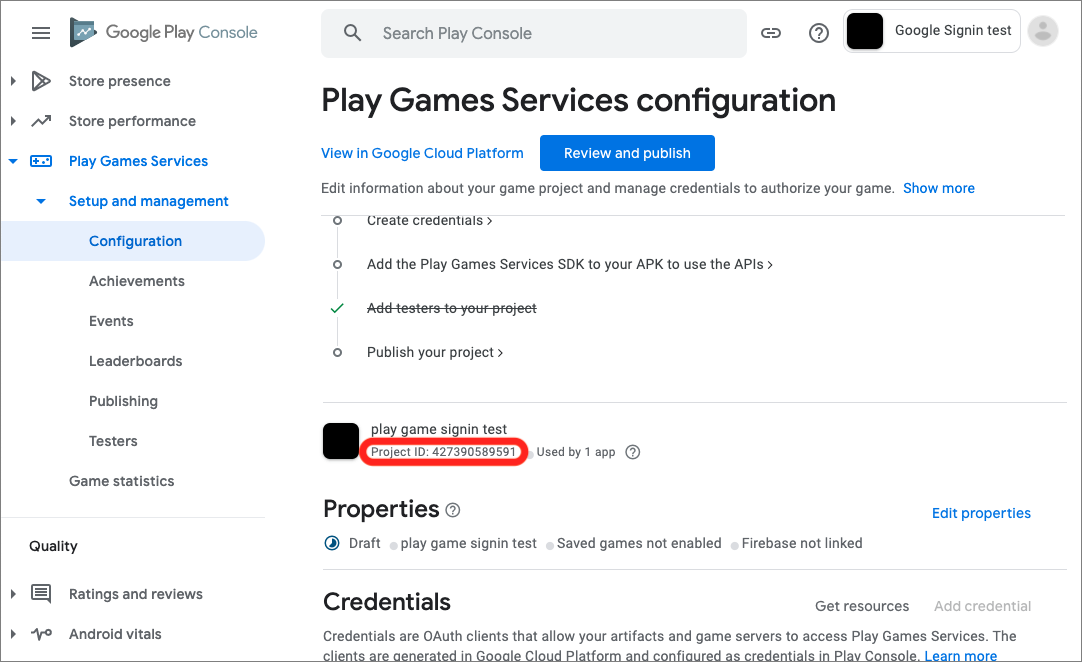
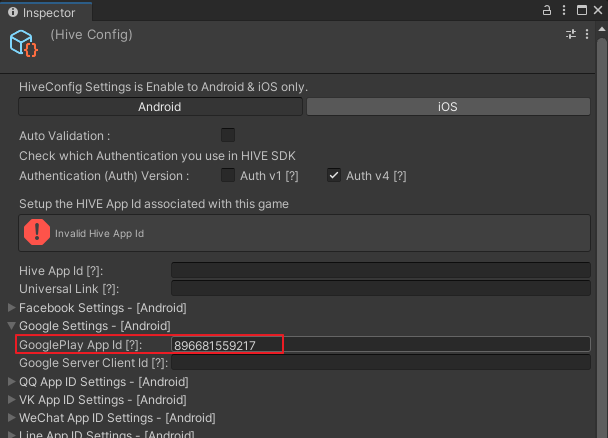
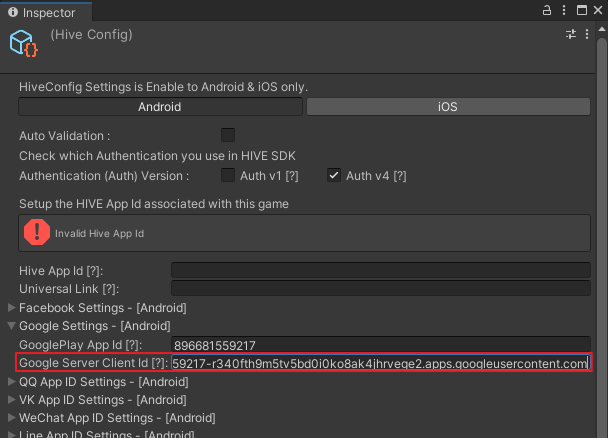
- In the Hive > Edit Config > Inspector > GooglePlay App Id of your Unity project, enter the created Project ID.
[2] Set up OAuth
- In the Credential section, click Configure for a message Configure your OAuth consent screen before adding credentials.
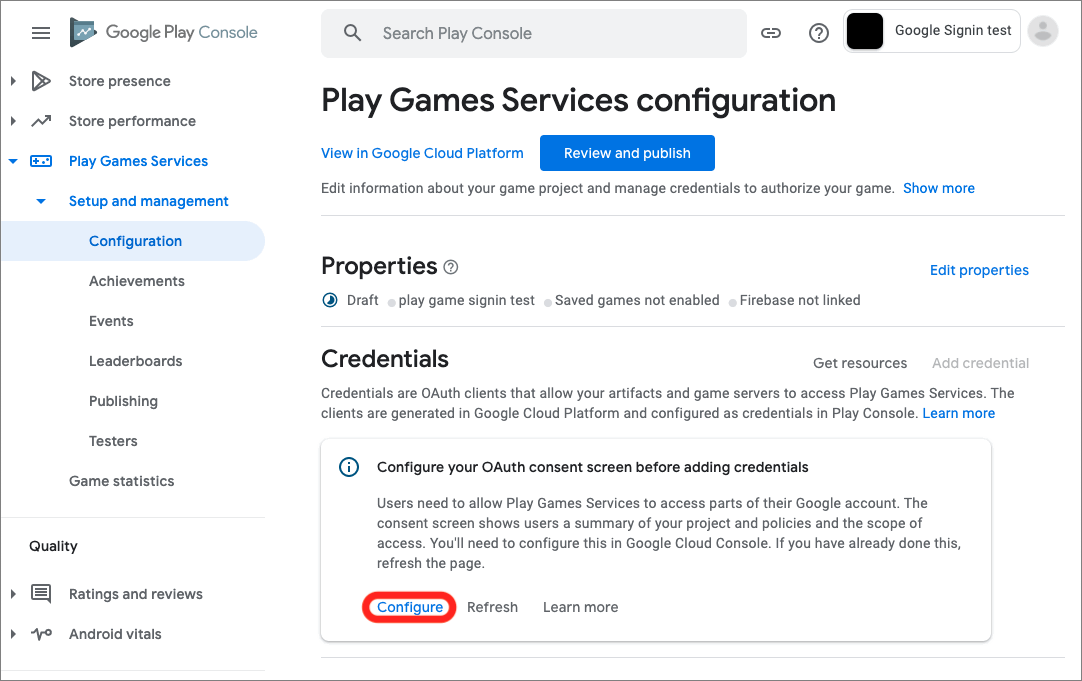
- When the Configure your OAuth consent screen is displayed, click a deep link to the Google Cloud Platform to go to OAuth consent screen.
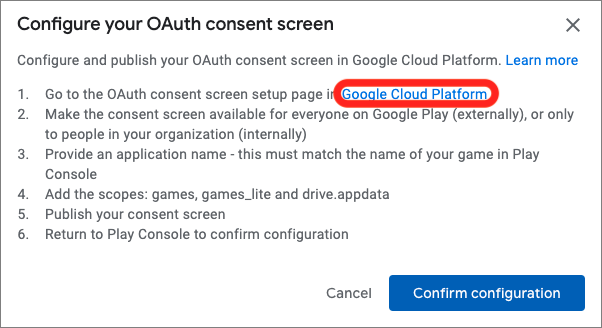
Make sure to use an account authorized for setting up the Google Cloud Platform Console. Otherwise, you can not see the OAuth consent screen.
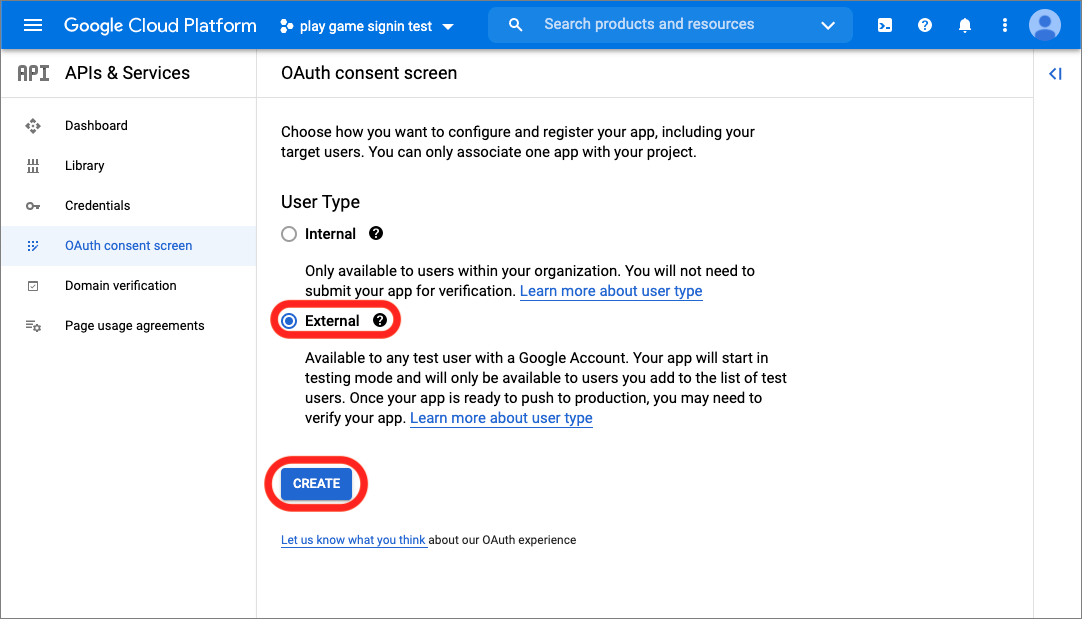
- Choose External for a User Type and click Create. You will go to the Edit app registration page.
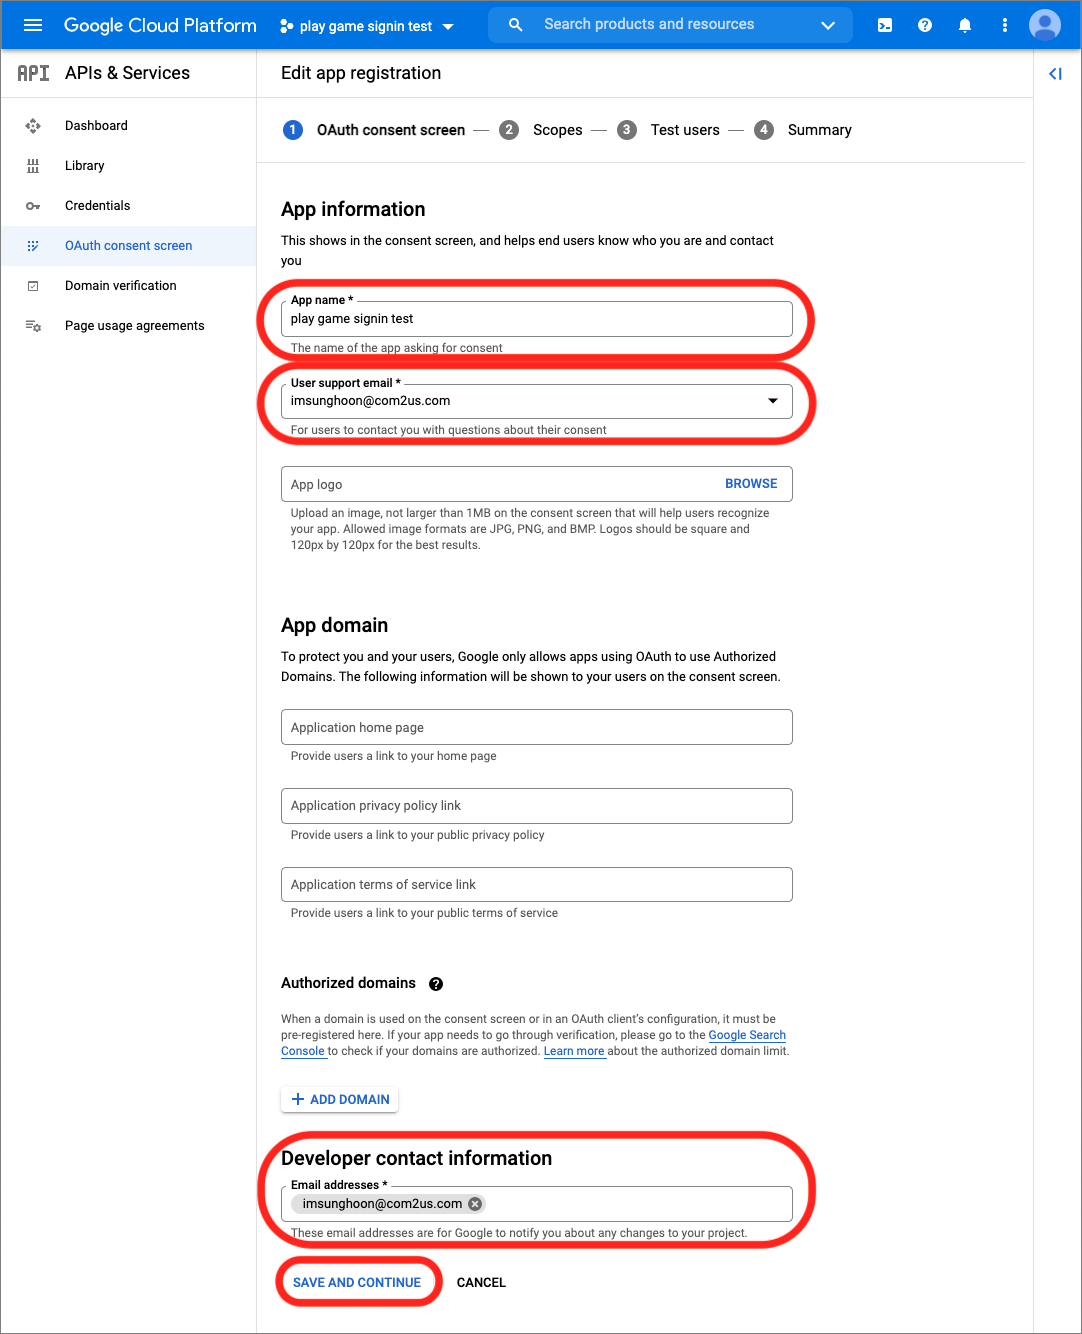
- In the Edit app registration page, enter your app name in the App name field and an email address for users to contact you with questions in the User support email field. Enter one more email address in the Developer contact information section for notifications from Google and click SAVE AND CONTINUE.
- Click SAVE AND CONTINUE without additional setup for Scopes.

- Click SAVE AND CONTINUE without additional setup for Test users.

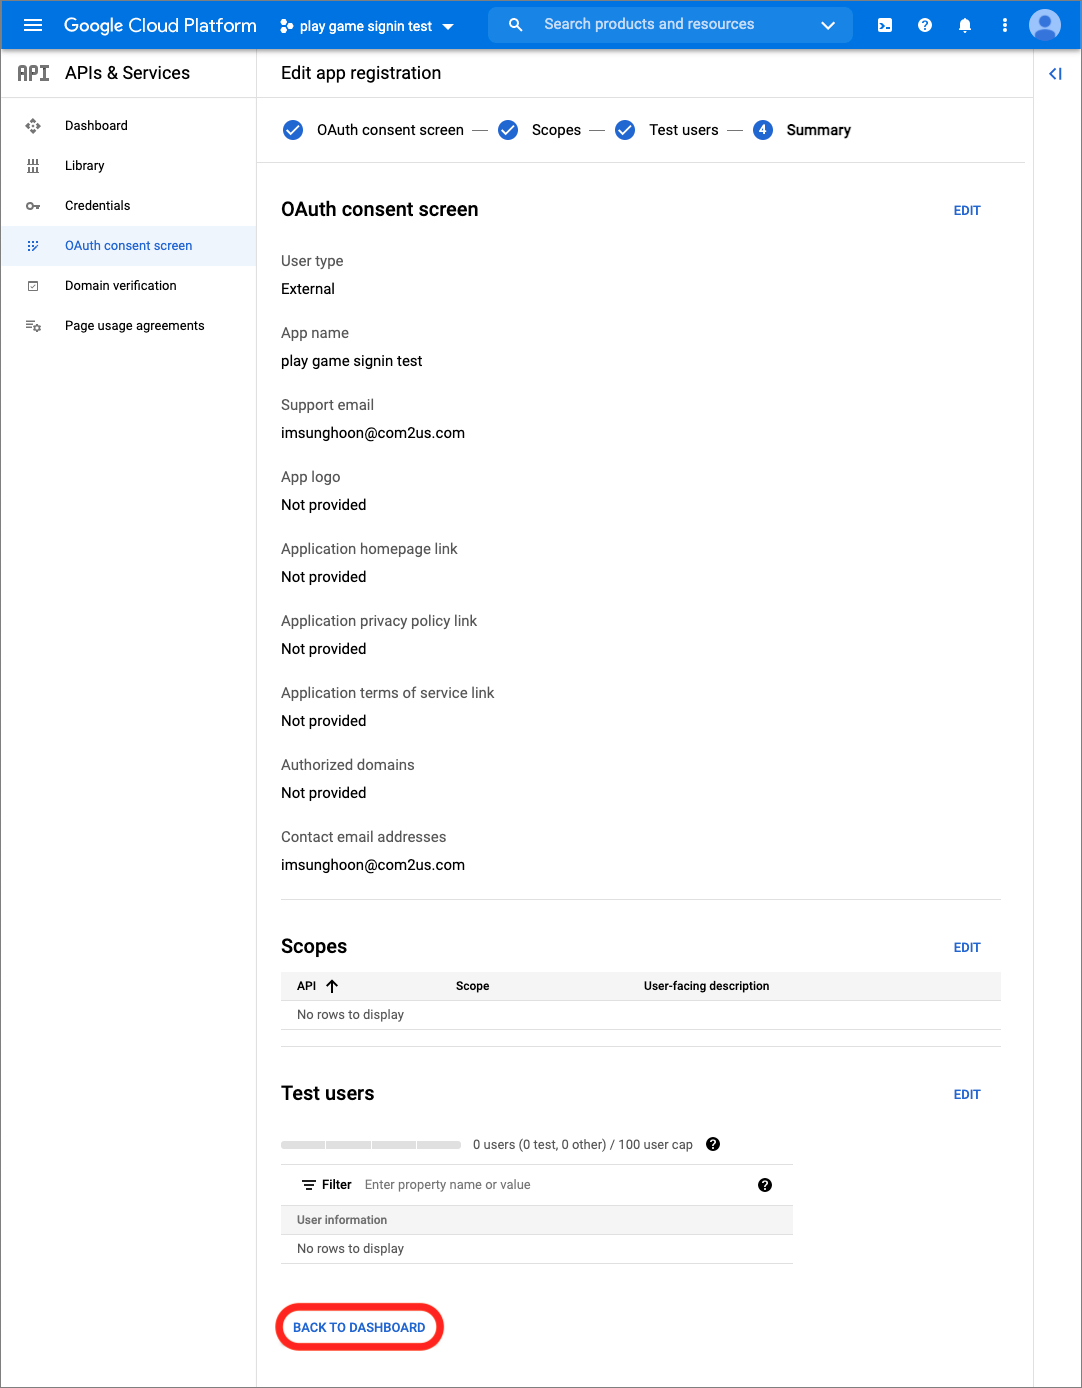
- Confirm your settings in the Summary pages and click BACK TO DASHBOARD.
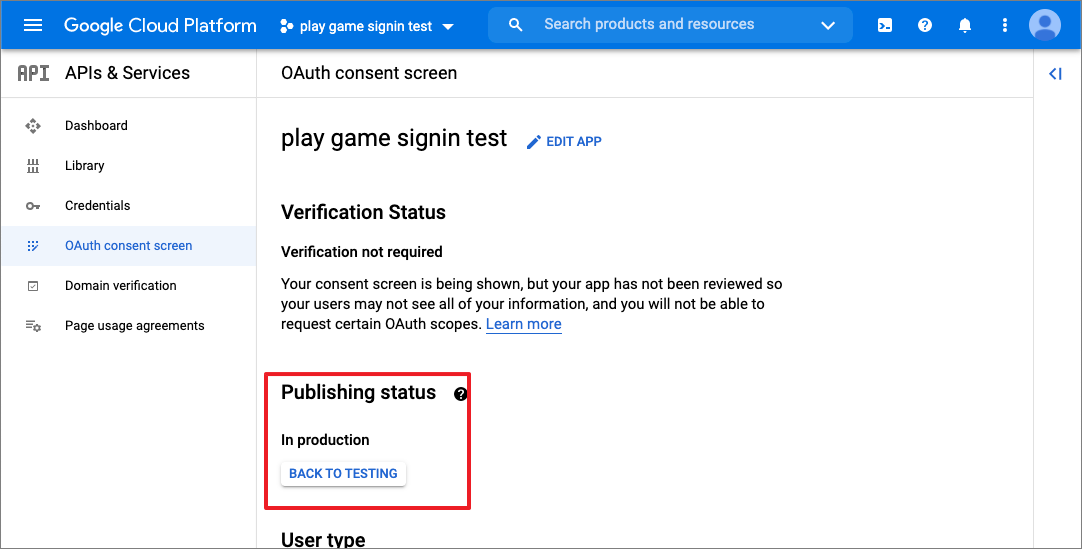
[3] Change publishing status
- Click PUBLISH APP of the Publishing status section in the OAuth consent screen. A message Push to production? would be displayed.
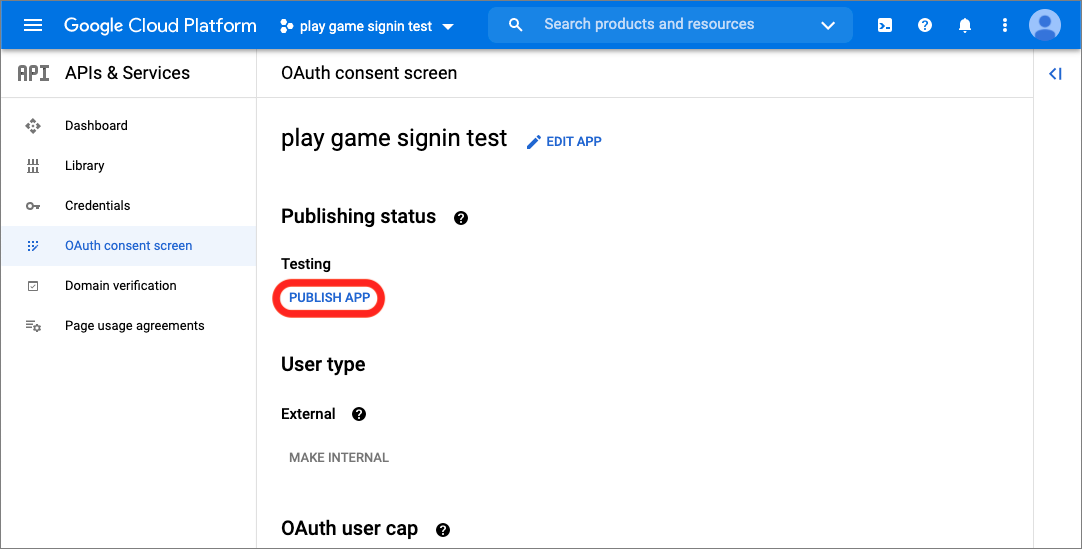

- Click CONFIRM to change the Publishing status from Testing to In production.
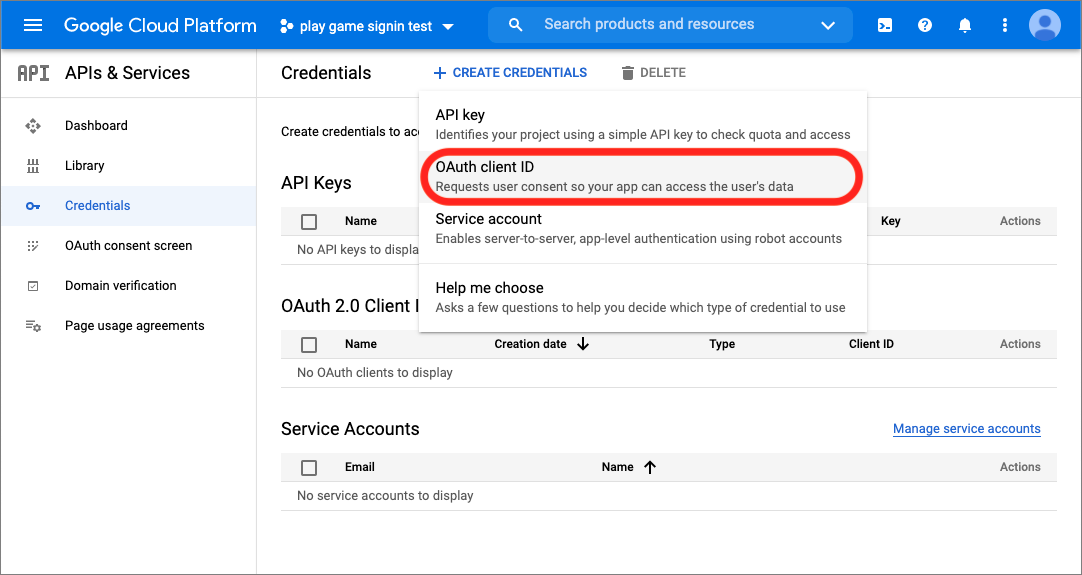
[4] Set up Credentials
- In the Google Cloud Platform, navigate to API & Services > Credentials.
- Click +CREATE CREDENTIALS and choose OAuth client ID to go to the Create OAuth client ID screen.
- Choose Android in the Application type field.
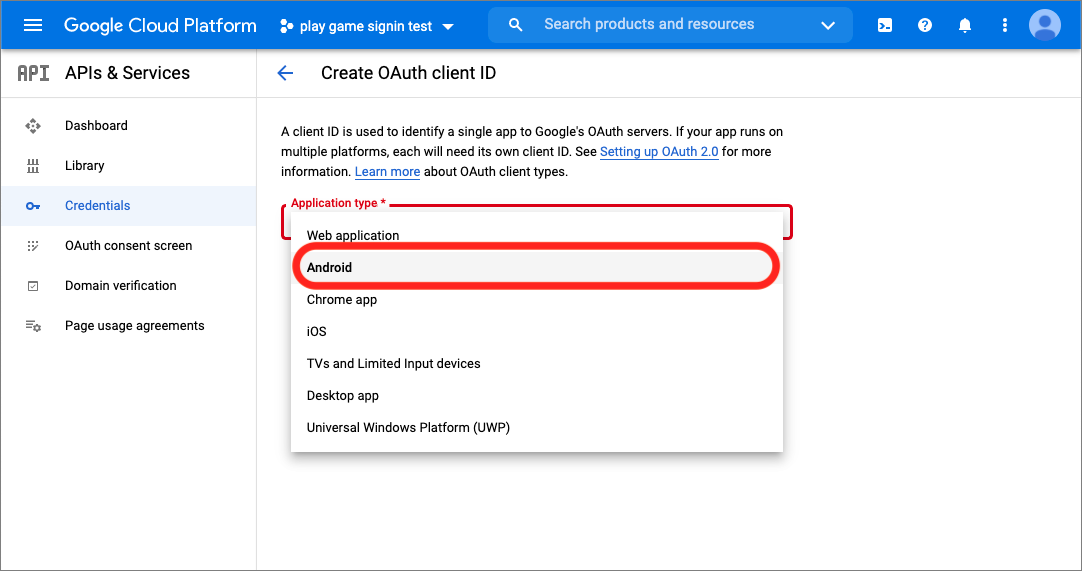
- Fill in the Package name field and the SHA-1 certificate fingerprint field, then click CREATE. The OAuth client created window will be appeared.

- You can find your Android application’s package name from the AndroidManifest.xml file.
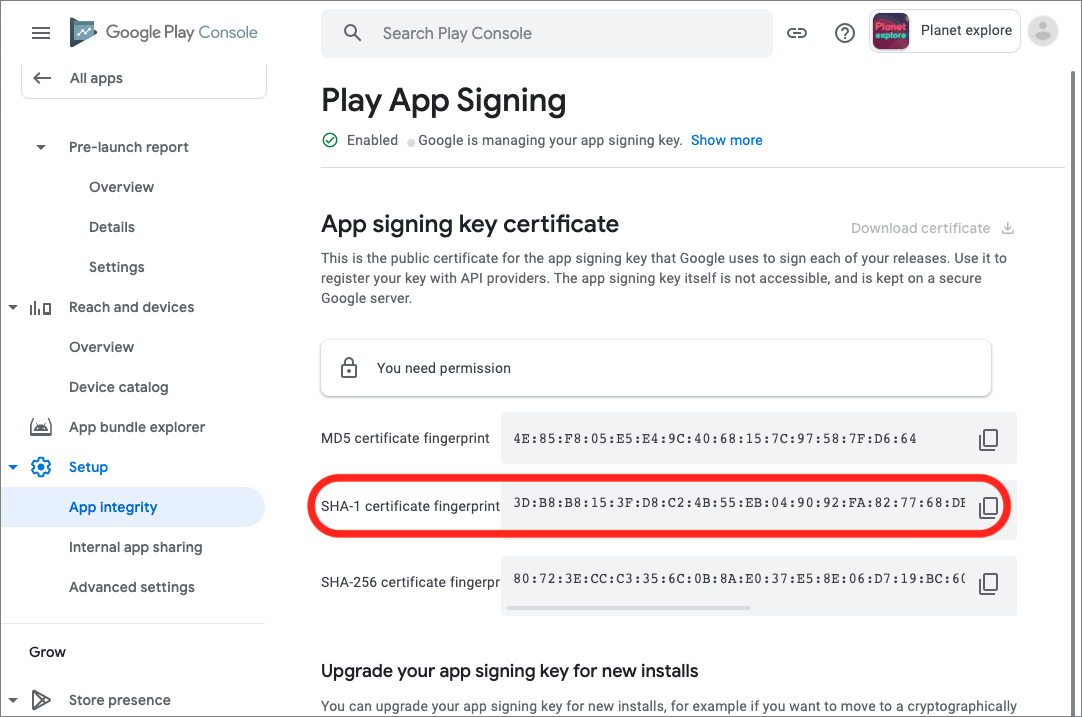
- To confirm the SHA-1 certificate fingerprint, open a terminal and run the keytool command after the
C:\Users\%USERPROFILE%\.android>line as a shown example below. (Refer to the Google Play Service guide.)- Example
After running the commandC:\Users\%USERPROFILE%\.android>keytool -list -v -alias androiddebugkey -keystore %USERPROFILE%\.android\debug.keystore, the keytool utility prompts you to enter a password for the keystore (Enter keystore password:). The default password for the debug keystore isandroid. The keytool then prints the fingerprint to the terminal as the12:34:56:78:90:AB:CD:EF:12:34:56:78:90:AA:BB:CC:DDformat.
- Example
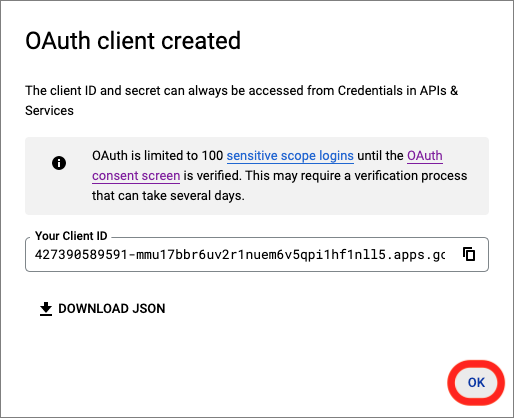
- Confirm Your Client ID and click OK.
- Add one more OAuth client ID of the Android type.
You can confirm the SHA-1 certificate fingerprint in the App signing key certificate section of Google Play Console > Release > Setup > App integrity menu.
- Add an OAuth client ID of Web application type.
On the Credentials page, click +CREATE CREDENTIALS > OAuth client ID. Choose the Application type as Web application and click CREATE to add credential.

- On the OAuth client created window, confirm Your Client ID and click OK.
- In the Hive > Edit Config > Inspector > Google Server Client ID of your Unity project, enter the client ID of the web application type.
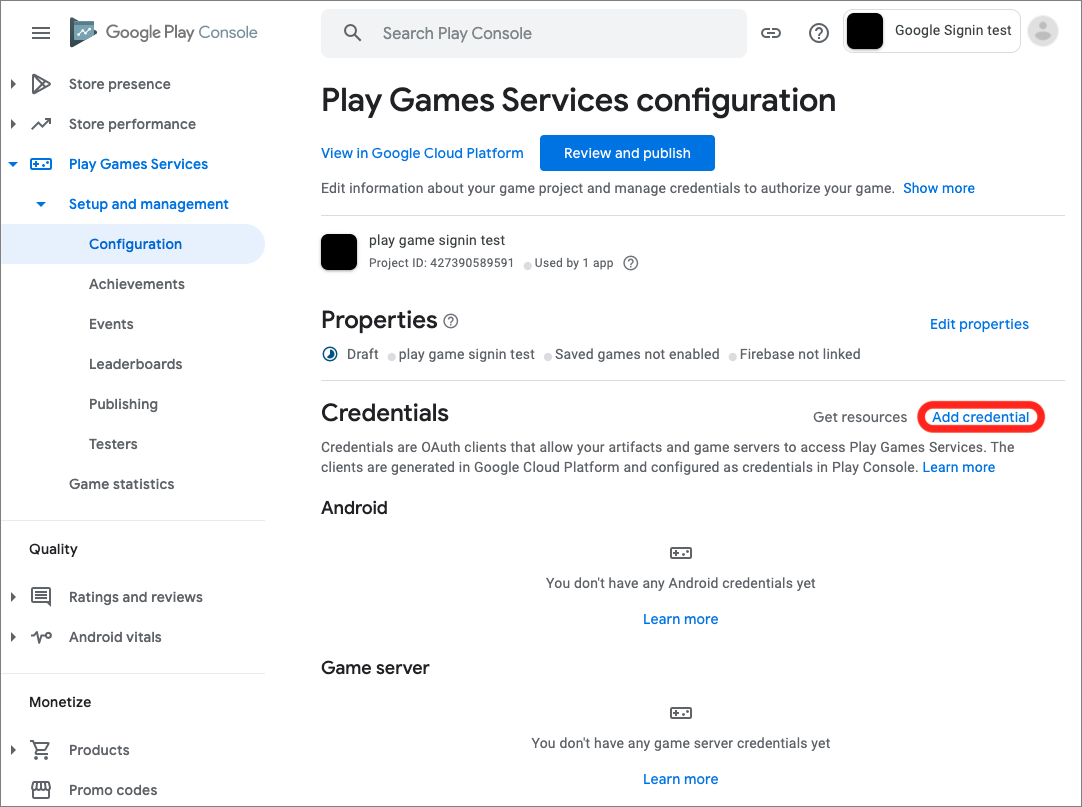
[5] Add a credential
- Navigate to Play Game Services > Setup and management > Configuration on the Google Play Console menu. In the Credentials section, click Refresh for the message Configure your OAuth consent screen before adding credentials.
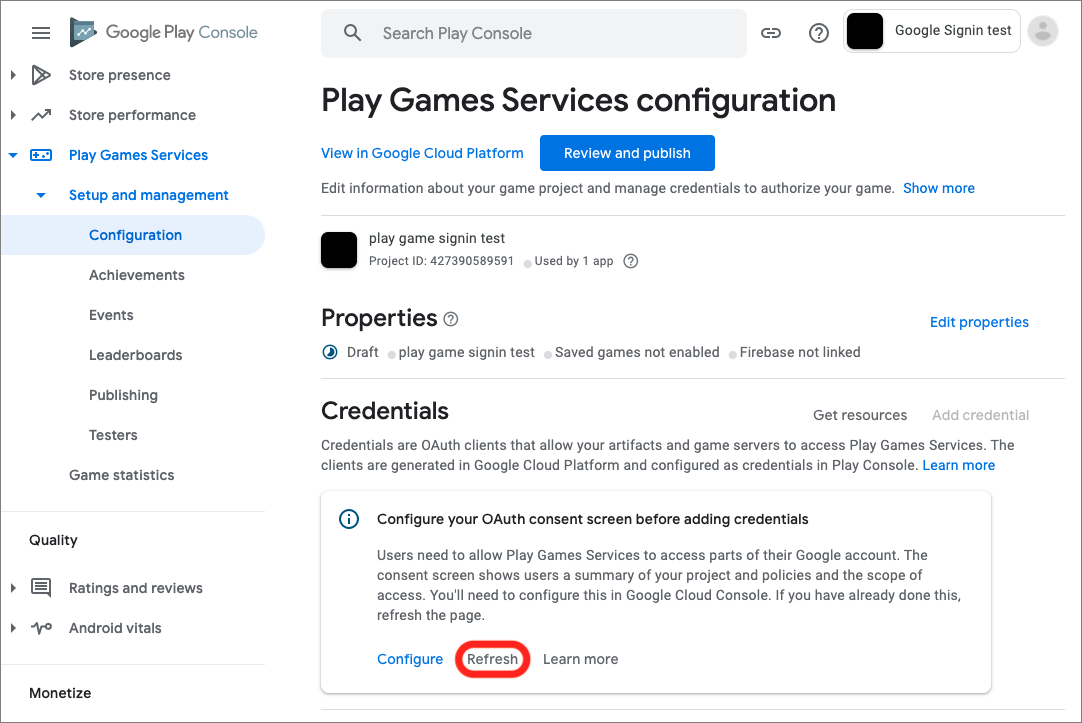
- After refresh the Play Games Services setup page, click Add credential in the Credentials section.
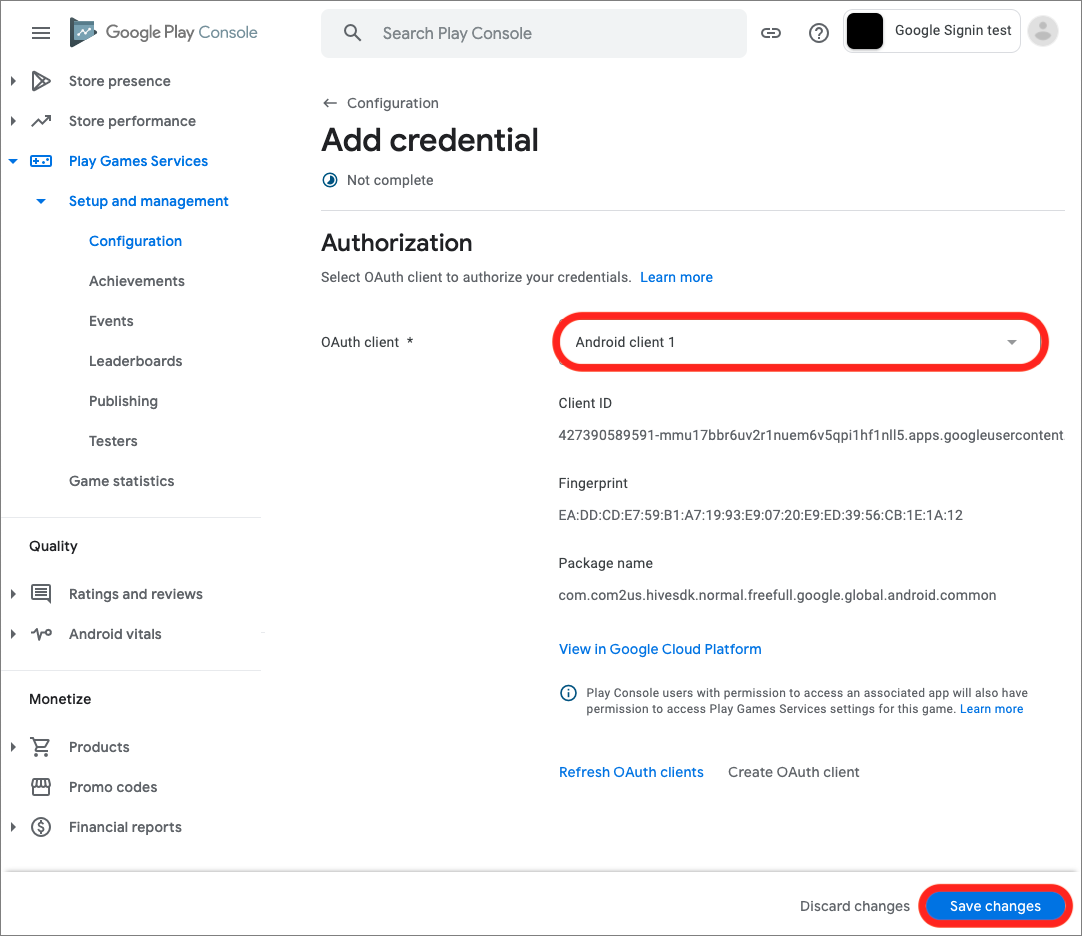
- In the Authorization section of the Add credential page, select one of a client you added in the [4] Set up Credentials step as OAuth client and click Save changes.
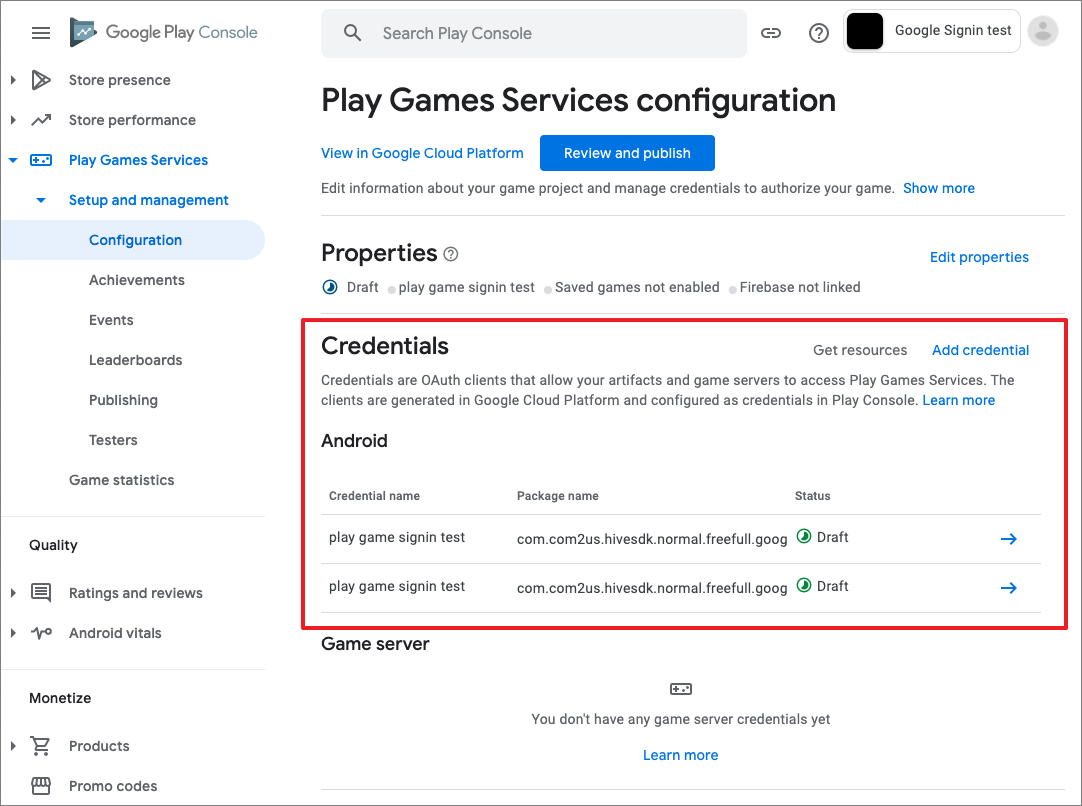
- Confirm your settings in the Credentials section of the Google Play Console > Play Games Services > Setup and management > Configuration page, and then add a credential for the other client you created on the [4] Set up Credentials step.
- Confirm the credentials you added in the Credentials section.
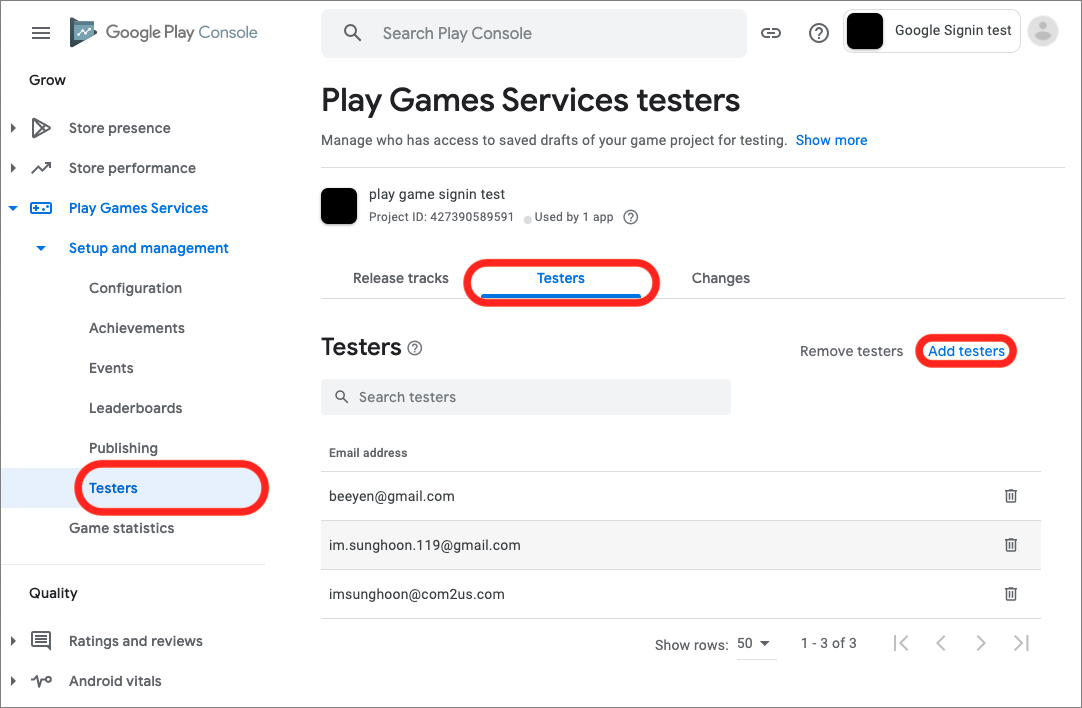
[6] Register a tester
Navigate to Play Games Services > Setup and management > Testers > Testers tab and click Add testers to add a Google account for testing Google login. Then, you can log in to Google with the account you added.