Hive Customer Support is a system that allows you to contact an agent one-on-one and receive a response to errors or inquiries that happened while playing the game or using the platform.
It offers a variety of capabilities such as FAQ for fast and accurate consultation, a bulletin board for communication with overseas corporations, and statistics for consultation analysis, and it is available in 16 languages for both domestic and international game users.
Administrators and agents who use Customer Support for the first time must be provided with corporate and game values ahead of time.
Initial Settings
The initial settings option is where you enter vital Hive Customer Support information.
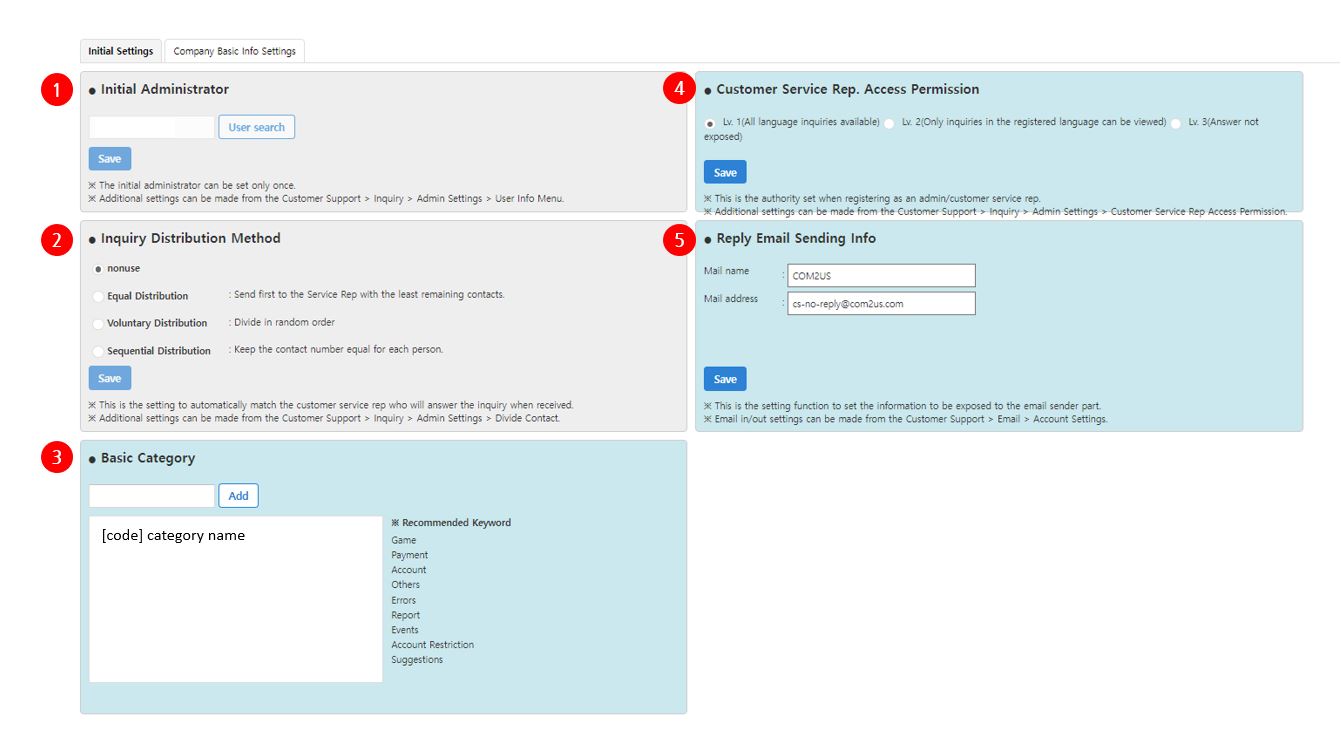
| Category | Details |
| 1. The initial administrator |
|
| 2. Method of inquiry distribution |
|
| 3. Default categories |
|
| 4. Agent viewing permission |
|
| 5. Information on sending response emails |
|
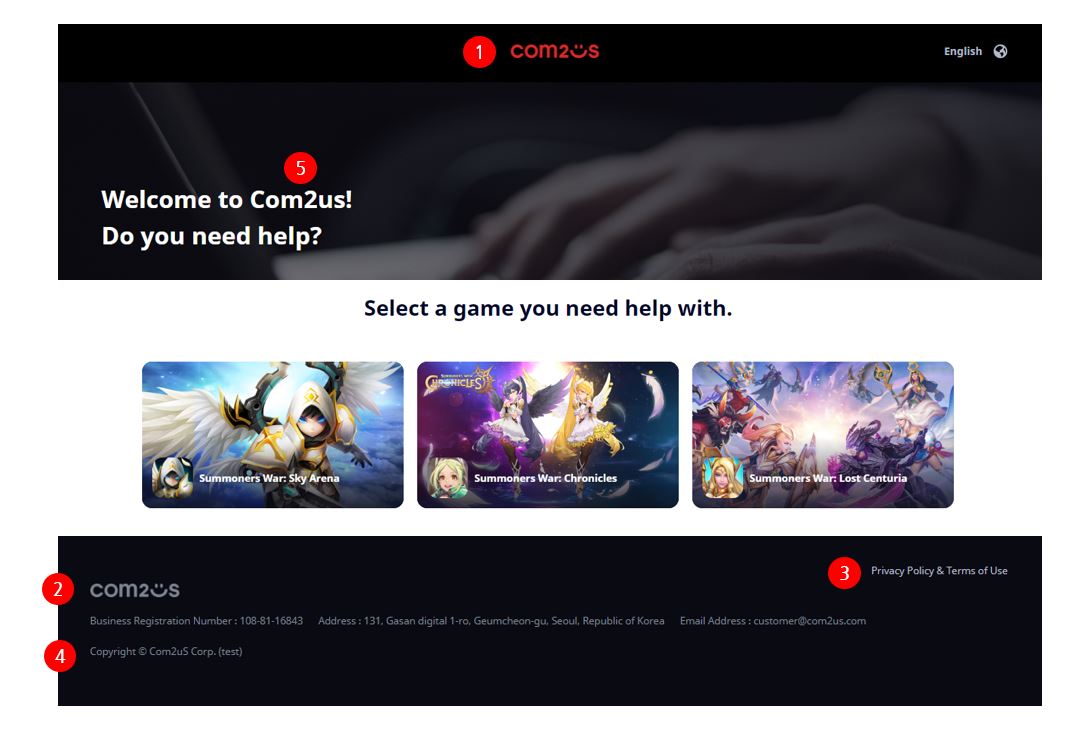
Set basic company information
The basic information settings option for the company is where you register basic information for utilizing the customer center online.
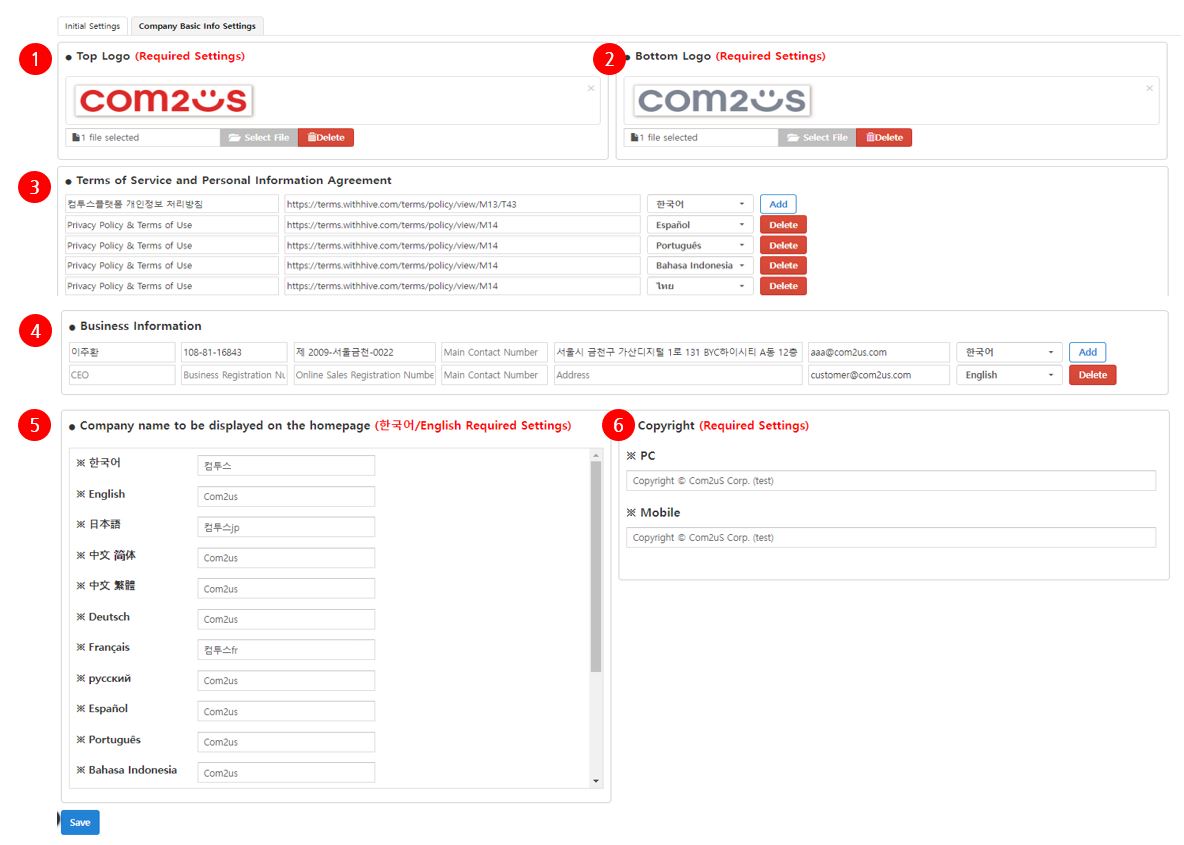
* Note: Registration is required.
| Category | Details |
| Top logo * |
|
| Bottom logo * |
|
| Terms of Service and Privacy Policy |
|
| Business information |
|
| Company name * |
|
| Copyright * |
|
Administrator settings
The first administrator can add administrators or agents, as well as offer agents inquiry rights based on their rank.
To use the customer support center normally, new managers and agents must have appropriate corporate and game values.
User information
New agent registration
Register agents who may respond to user requests and set permissions.
※ Menu location: Inquiry > Administrator Settings > Inquiry Management Settings > (Language) > User Information
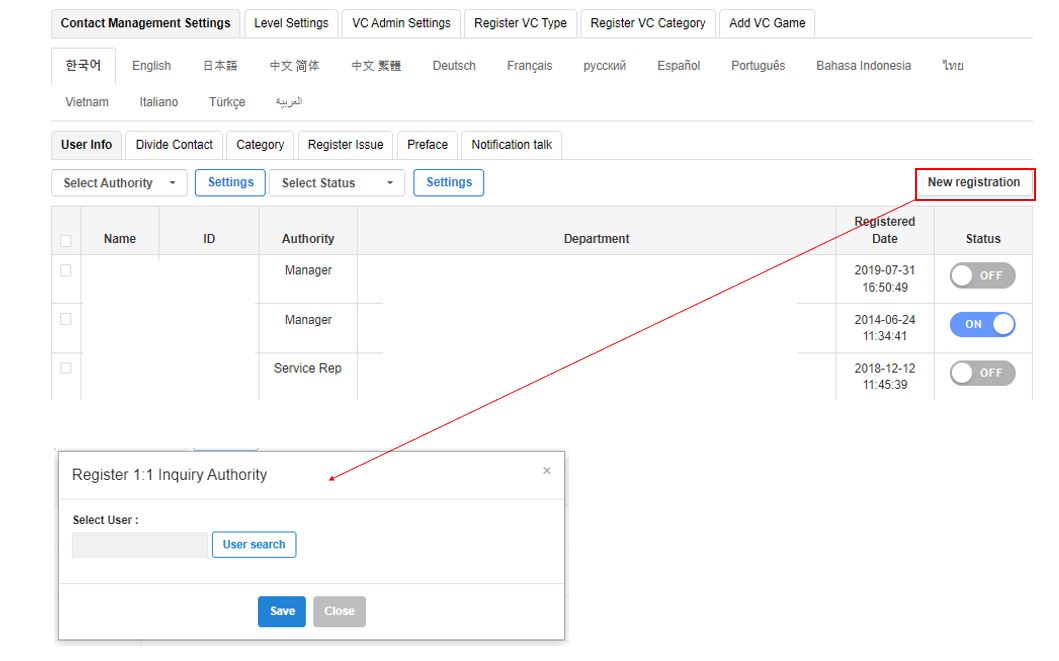
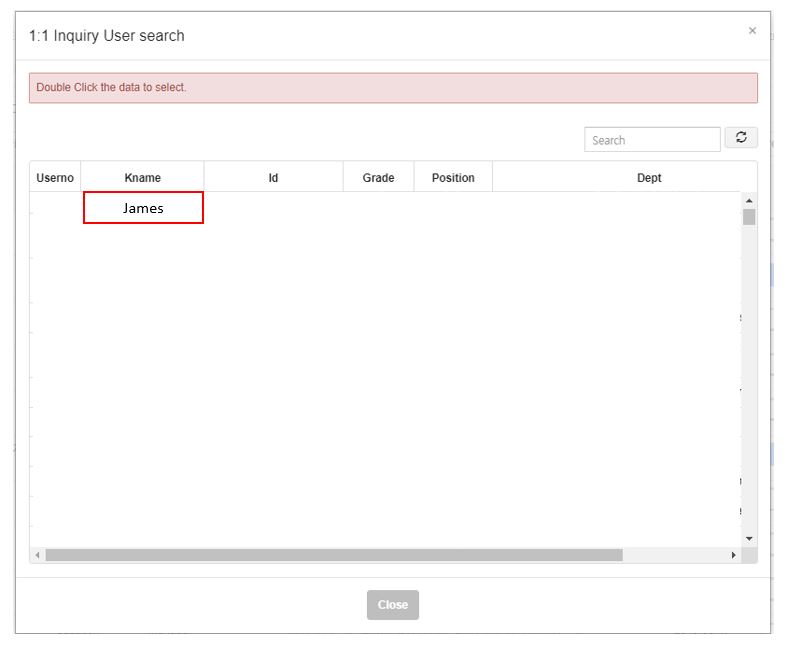
- In the 1:1 inquiry permission registration pop-up, click the New button and look for users.
- Double-click the found name and pick the agent for whom you wish to register permissions.
- Only users of that firm will be exposed, and only accounts registered at https://platform.withhive.com/ will appear in search results.
- Newly registered agents are established under the deactivated agent tab, and when granted permission as an administrator or agent, they are moved to the user information tab.
Setting and disabling agent permissions
As seen below, you can grant or withdraw permissions to users registered on the User Information tab.
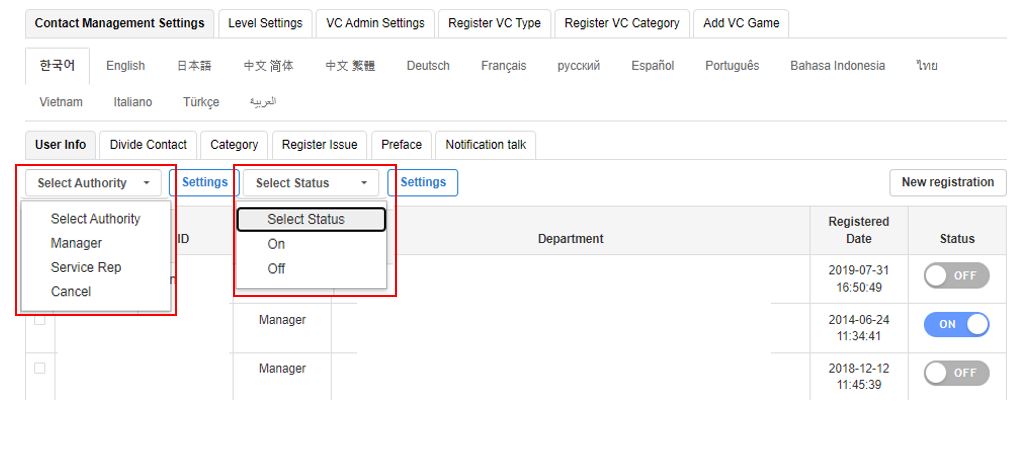
- Administrator: Set agent permissions for the Language tab registered as an administrator, and disseminate queries.
- Service Rep: Responds to inquiries as allocated.
- Disable permission: Take away agent privileges. Deactivated agents will not receive inquiries.
- Inquiries are routed to agents with the ON status.
- If you choose the ‘Distribute by game’ method, inquiries will be distributed to agents who are set to OFF as well.
Agent level settings
The level settings tab allows you to configure inquiry access rights for each language based on the agent’s level.
※ Menu location: Inquiry > Administrator Settings > Level Settings
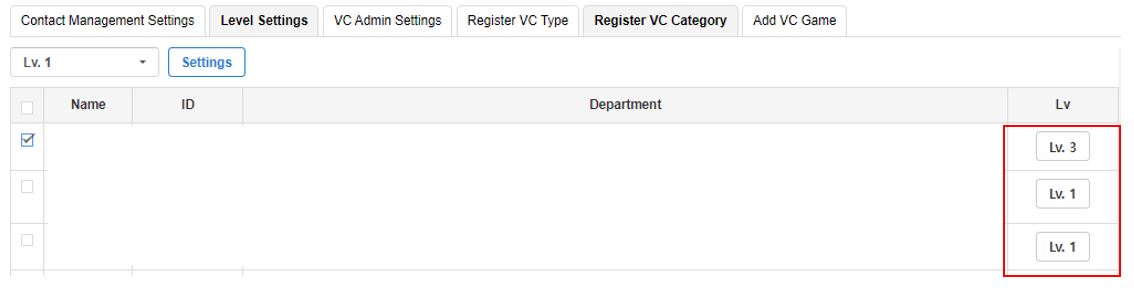
- Level 1: Inquiry posts are primarily allocated to the administrator and can be seen in all language tabs.
- Level 2: Inquiries can only be checked in the language tab selected as an agent.
- Level 3: You can see the inquiry posts in all language tabs, but you can’t verify the response.
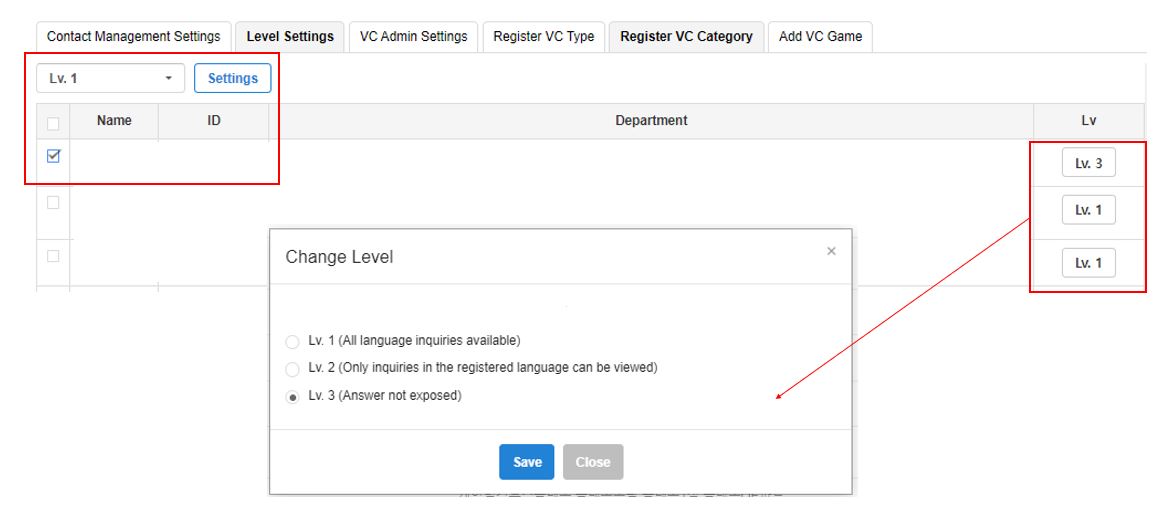
- Examine the agent and modify the settings using the drop-down menu.
- To change the level, click the level button in the level tab of agent information. A pop-up window will appear.
Inquiry distribution
Set the method of dissemination for inquiries received via 1:1 inquiry or email.
1:1 inquiry distribution settings
You can set up automatic inquiry distribution in the following ways:
Inquiries are transmitted to agents whose status is set to ON, with the exception of game distribution.
※ Menu location: Inquiry > Administrator Settings > (Language) > Inquiry Distribution > 1:1 Inquiry
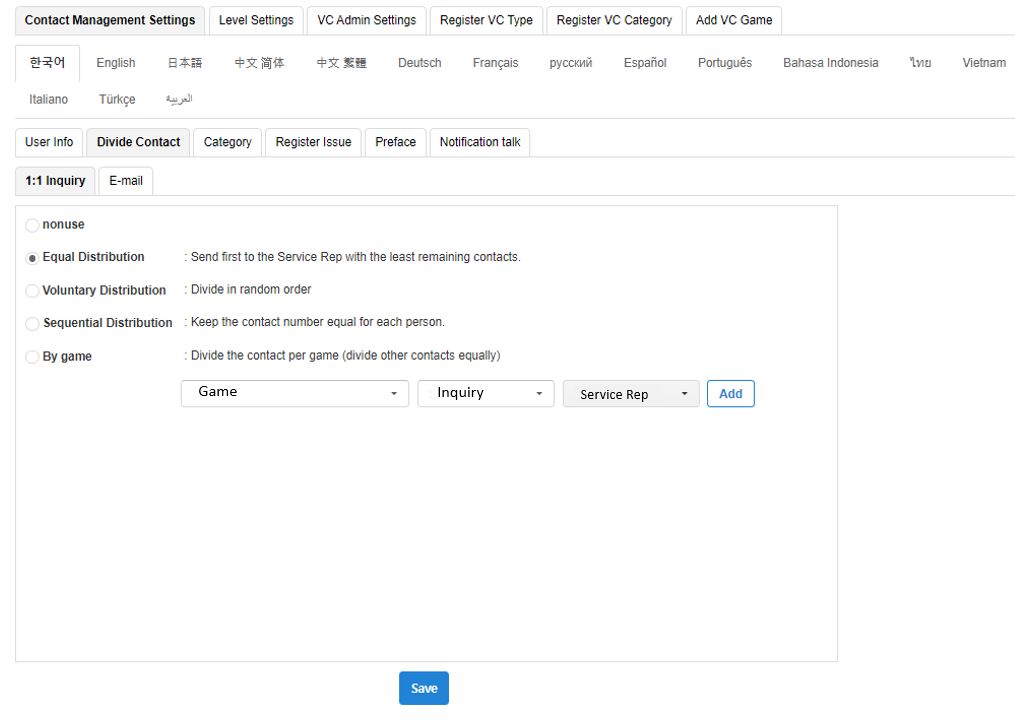
- Disabled: Select if you want the administrator to distribute queries manually rather than automatically.
- Equal distribution: Inquiries are assigned to the agent who has the fewest remaining questions first.
- Random distribution: Inquiries are allocated at random to all agents.
- Sequential distribution: The quantity of queries assigned to all agents is dispersed sequentially such that they are all the same.
- Distributed by game: Inquiries are allocated according to the game. (Inquiries registered as other will be distributed equally.)
- ※ Menu location: Inquiry > Administrator Settings > (Language) > Inquiry Distribution > Email
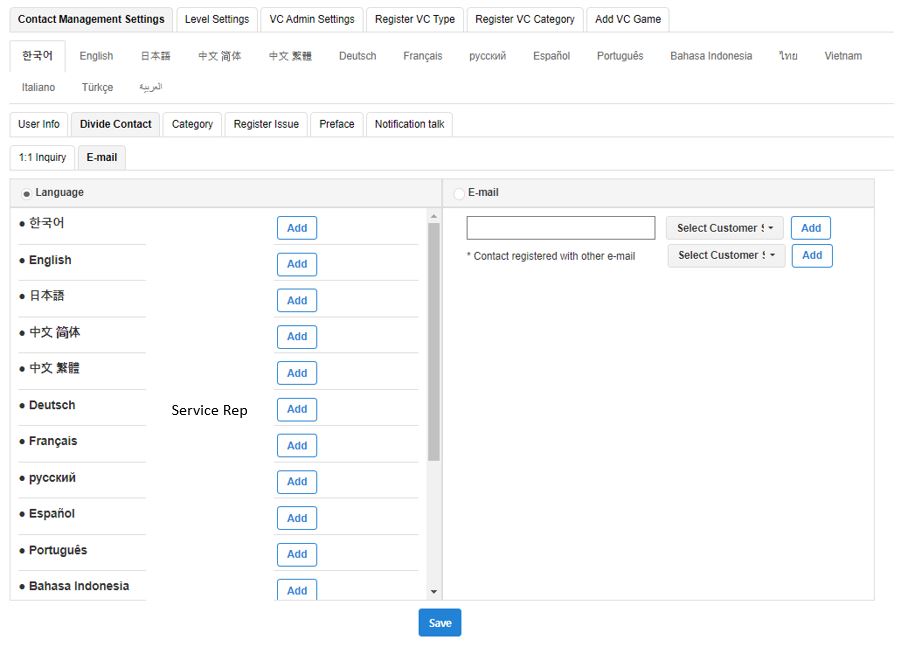
Email inquiry distribution settings
You can specify an agent by language or email address for email questions.
Category
Choose a category (=inquiry type) for each game that will be included on the inquiry page.
(Please follow the procedures below when configuring the customer center for the first time.)
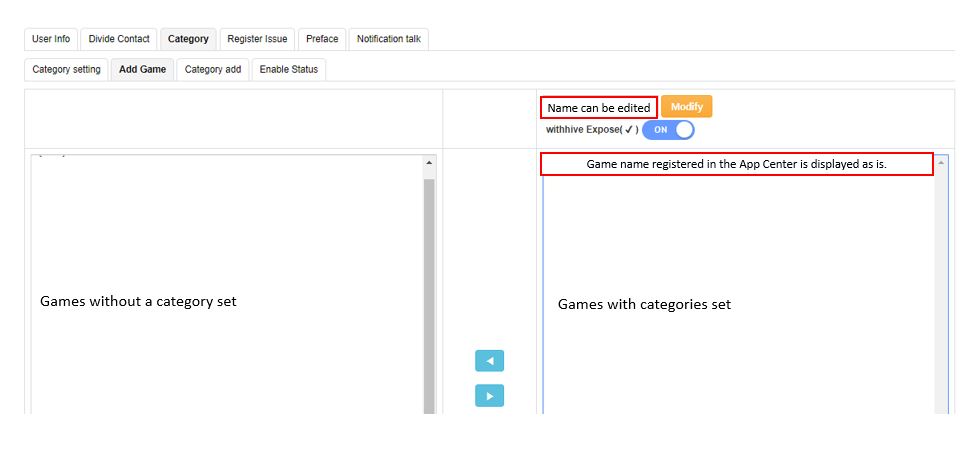
Add games
Move the game that will be displayed on the 1:1 inquiry page to the right from the list of all games on the left and save it.
You can change the name that appears on the customer support website.
※ Menu location: Inquiry > Administrator Settings > (Language) > Category > Add Game

Add Category
Please provide a game-related inquiry category. Once a category is added, it cannot be changed or removed.
If you add a category after selecting the default, the default category will be added when you specify the category for each game.
※ Menu location: Administrator Settings > (Language) > Category > Add Category
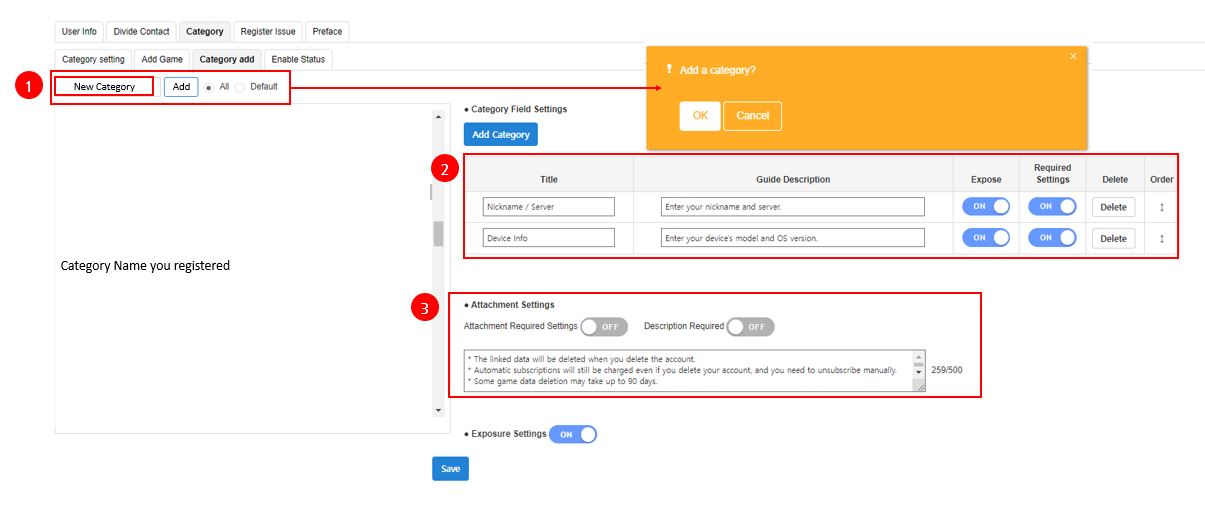
| Category | Details |
| 1) Category settings |
|
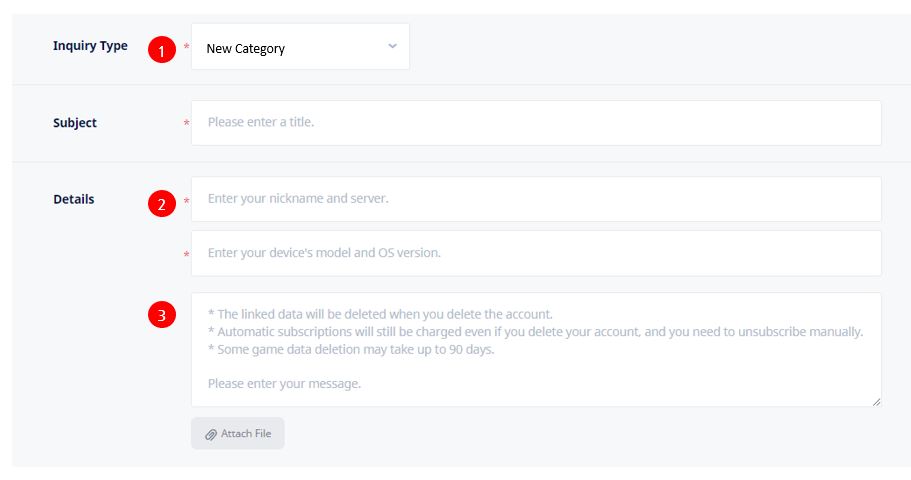
| 2) Input category settings |
|
| 3) Attachment file settings |
|
| 4) Public settings |
|
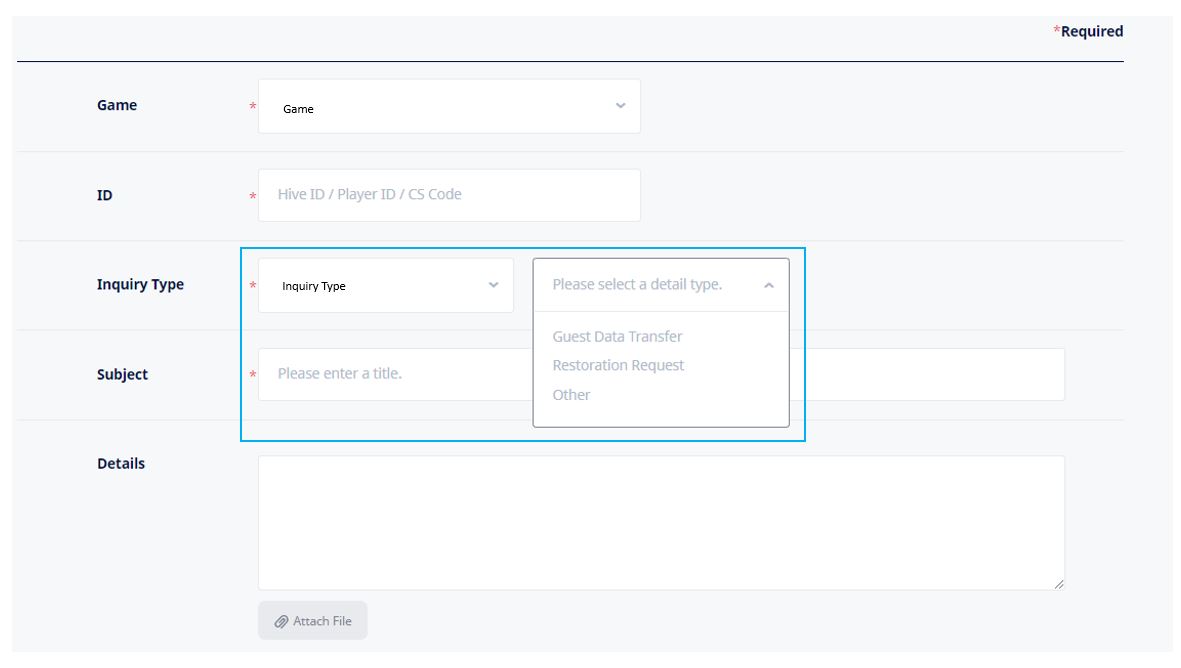
Category settings
On the 1:1 inquiry page, the template category defined in Add Category is assigned to the game and exposed.
Because defined categories cannot be changed or removed, please toggle the privacy option on/off depending on the reason for utilizing the category.
※ Menu location: Inquiry > Administrator Settings > (Language) > Category > Category Settings
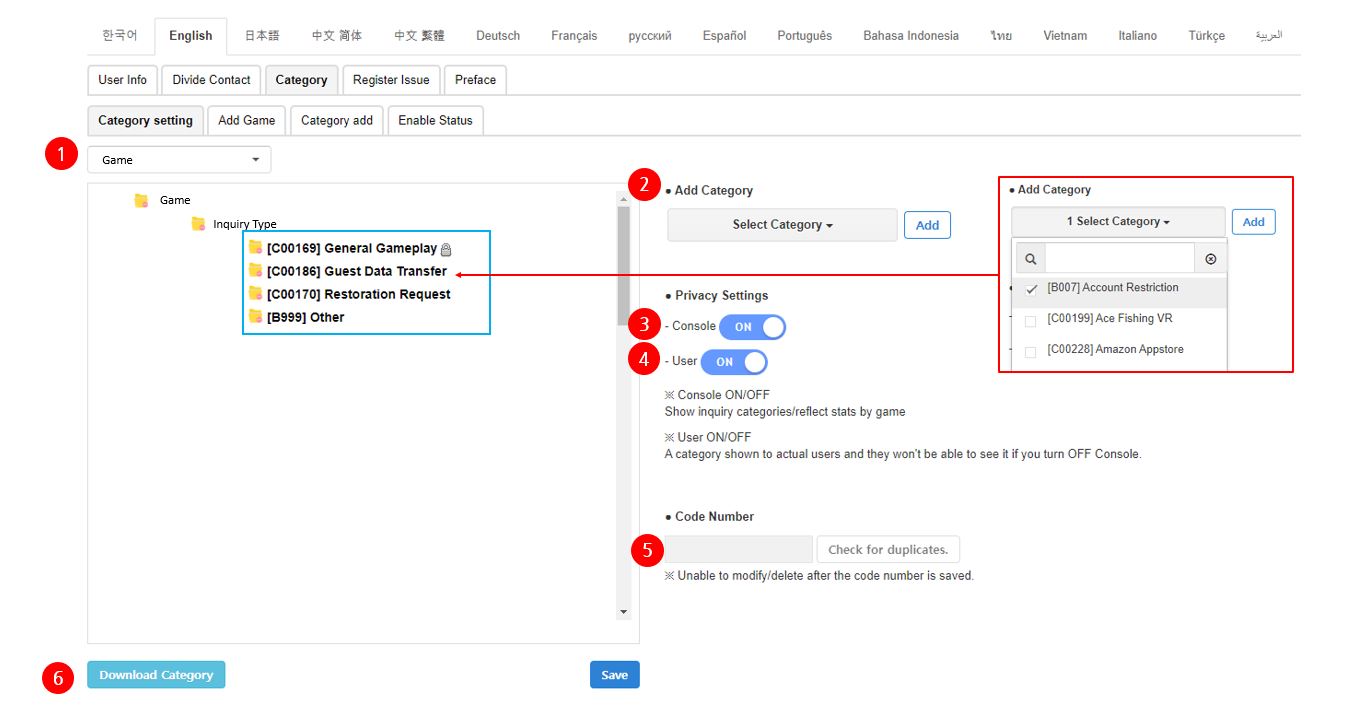
| Category | Details |
| Select games |
|
| Add category |
|
| Public Settings > Open to Console |
|
| Public Settings > Open to Use |
|
| Identifier code |
|
| Download Category |
|
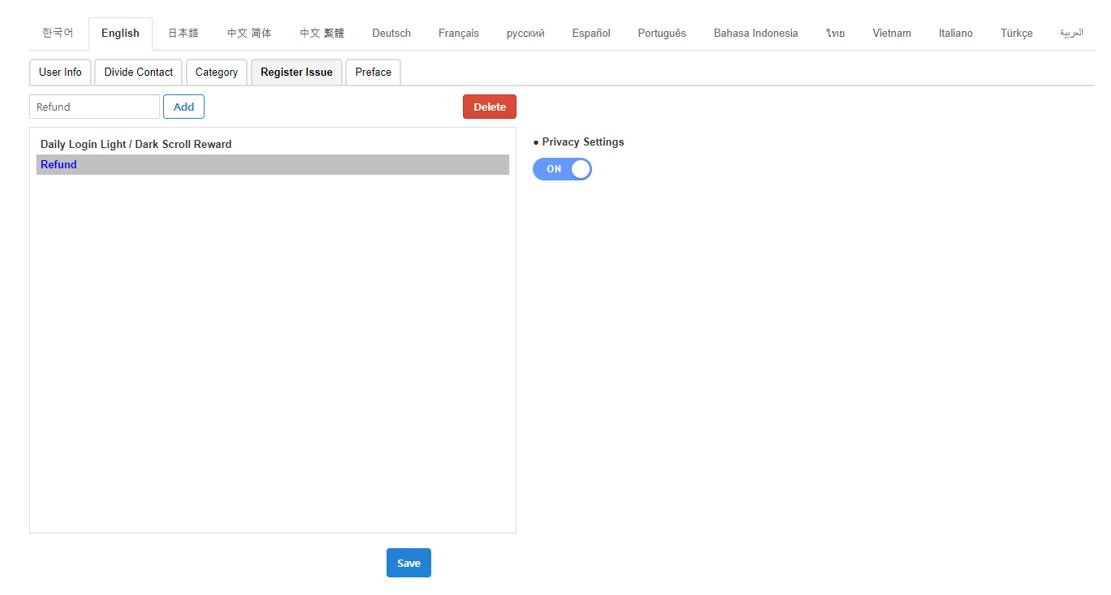
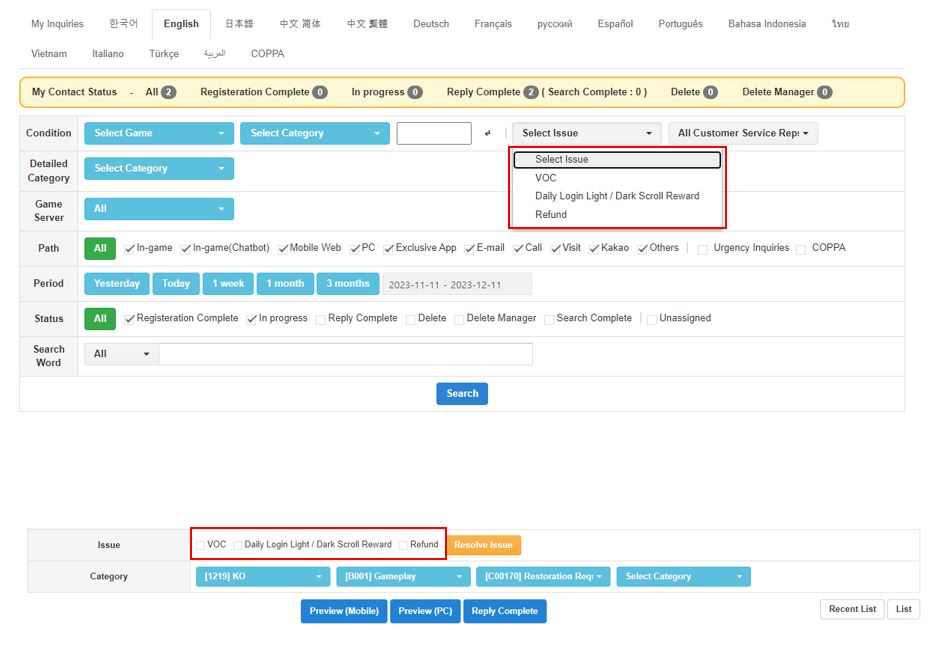
Register issue
Register this as a problem to be resolved when the agent responds to your inquiry. Registered issues can be utilized in the Inquiry > Inquiry List condition filter.
※ Menu location: Inquiry > Administrator Settings > (Language) > Register issue
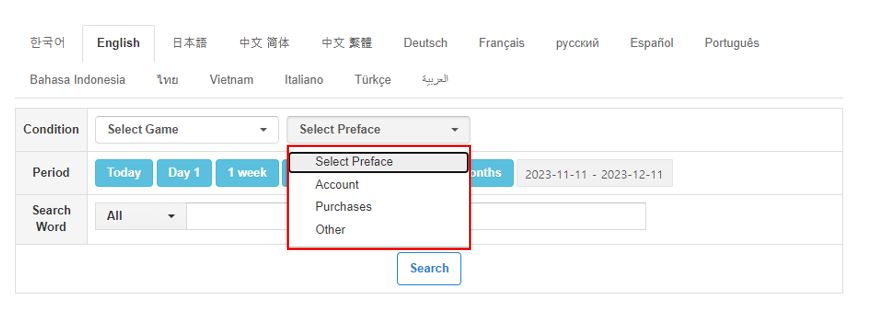
Preface
This function is used to register prefaces for usage in the isstue board and request board.
※ Menu location: Inquiry > Administrator Settings > (Language) > Preface
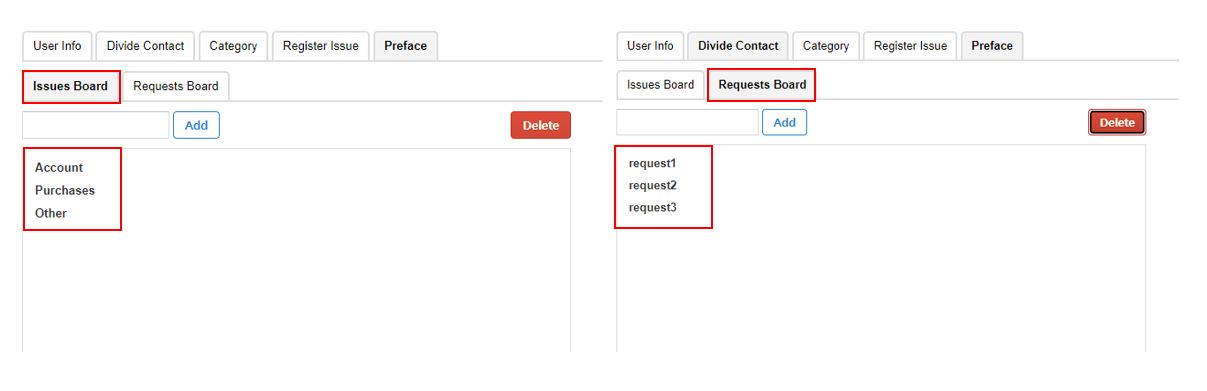
The issue bulletin board is a bulletin board divided by language and game for managers to share issues.
The request bulletin board is a bulletin board where agents can share requests that are classified by corporation and game.
