This is a guide to the Hive Console permission administration menu. First, access Hive Console (http://console.withhive.com) and log in.
Find the group permission menu in the following location.
Grant Individual Permission
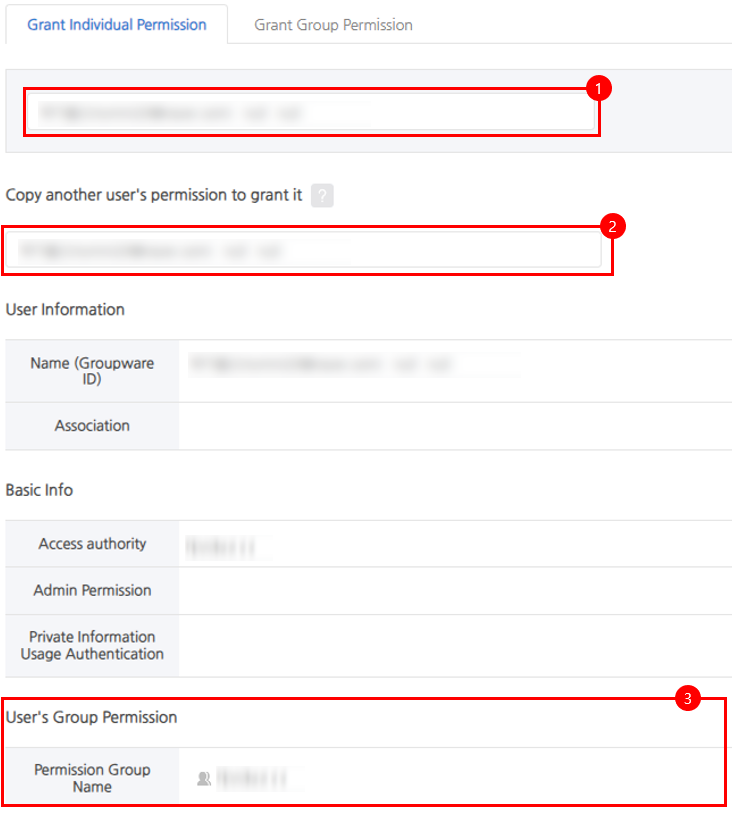
[1] You can find the user to whom you want to grant permission by searching for the user name (groupware account name)
[2] If you search for a user in [1] and then search for another user in [2], the permissions that the user in [2] possess will be copied to user in [1]. At this time, the permission that the existing user [1] has had will be overwritten with the authority of user [2], and the permission previously held will be lost. When copying, only the menu permission will be copied, and the company access permission, administrator permission, and personal information handling permission will not be copied.
[3] Shows the basic permission information of the user searched in [1]. If the user belongs to a specific permission group, the group information is also displayed.
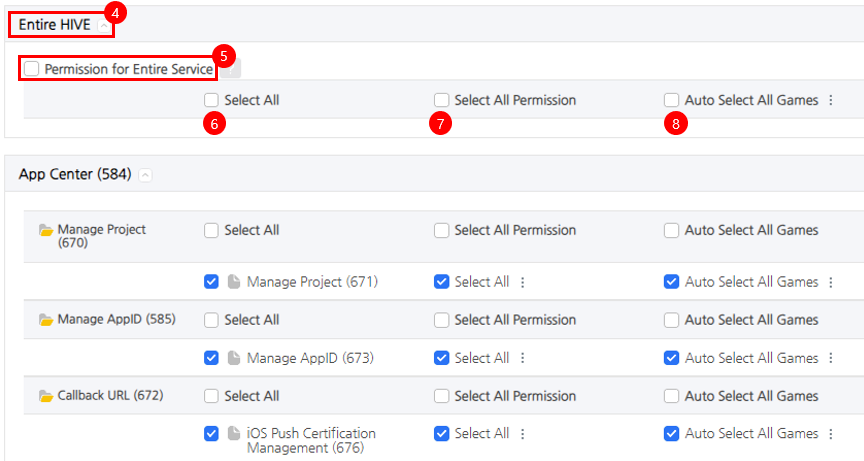
[4] From here you can grant menu permissions. The “Entire Hive” section controls all of the following product menus.
[5] If you check “Permission for Entire Service”, all the authorities of all menus, permissions, and all games (all games checked automatically) are granted. Hover your mouse over the question mark button on the right to see the detailed guide.
[6] If you check “Select All” checkbox in the Entire Hive section, all menus of all services will be checked.
[7] If you check “Select All Permissions” checkbox in the Entire Hive section, all permissions of all services will be checked.
[8] If you check the “Auto Select All Games” checkbox in the Entire Hive section, “Auto Select All Games” will be checked for all services. If you want to grant permission to all menus of specific games, and not all games, open the kebab menu on the right side of the Auto Select All Games and add the desired games. This way, you can grant permission to all menus of all services regarding particular games.
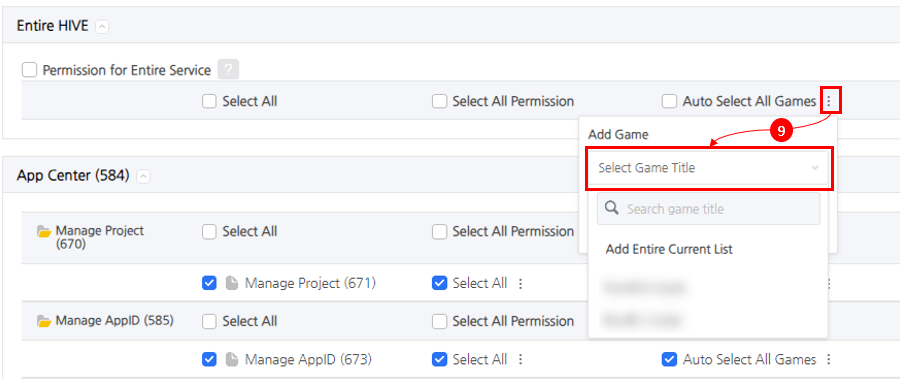
[9] You can also give different game permissions to different menus. Click the kebab menu on the right of the game permission of the game you want to give permission to and select the game you want to give permission to. If you select different games from another menu, you can give different menus different game permissions.
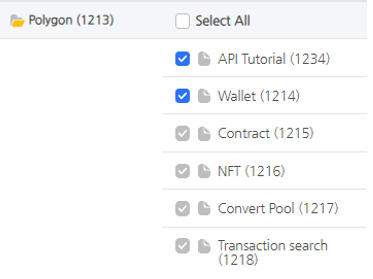
There are two types of check marks: blue check mark (enabled) and gray check mark (disabled)
Blue check marks are permissions granted from the “Grant Individual Permission” tab and you can remove the permission from the same tab.
Gray check marks are permissions granted from the “Grant Group Permission” tab and you can’t remove the permission from the “Grant Individual Permission” tab. You must search for the target user or group in the “Grant Group Permission” tab and edit.
Grant Group Permission
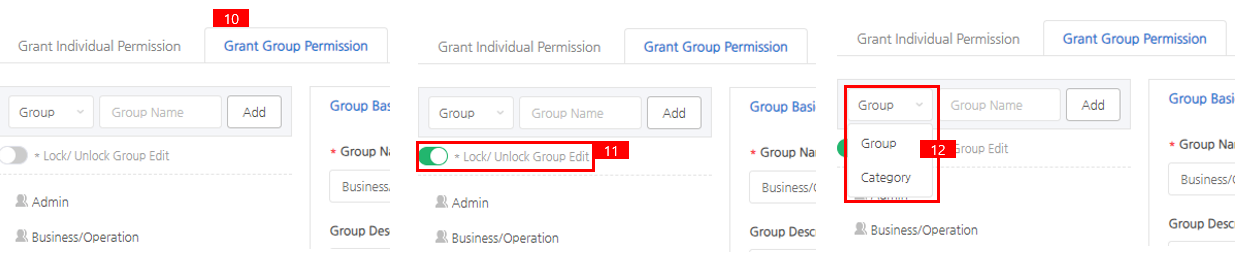
[10] You can select the “Grant Group Permission” tab to edit the group permission
[11] You can only edit or remove categories or group organization if the “* Lock/ Unlock Group Edit” toggle is enabled. To move the group or category location, you must also enable this toggle.
[12] Select “Group”, enter the group name on the right and click Add Button to create a group (person icon). Select “Category”, enter the category name and click Add Button to create a category (blue folder icon).
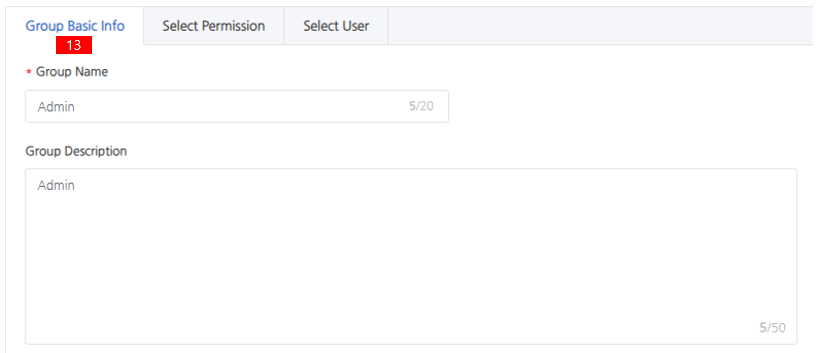
[13] You can select a specific group and edit the group’s basic information.
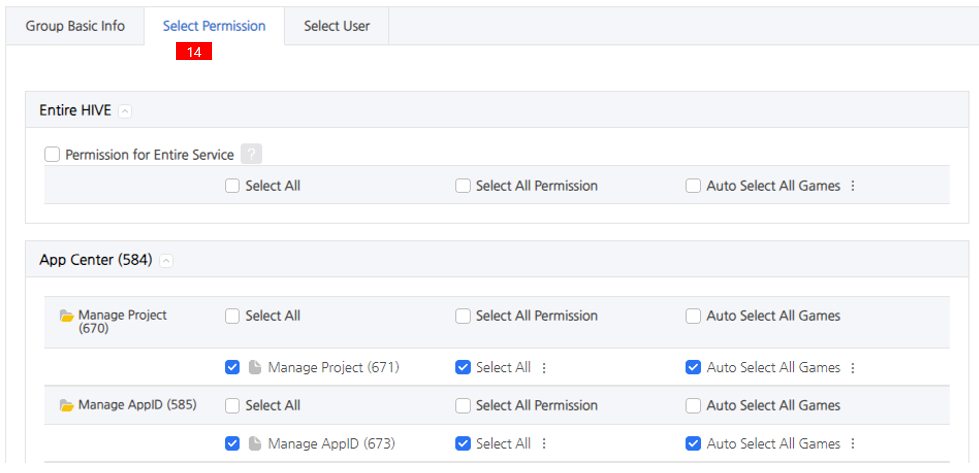
[14] You can select a specific group and grant permission to the group. The permission granted will be applied to the entire group including all group members.
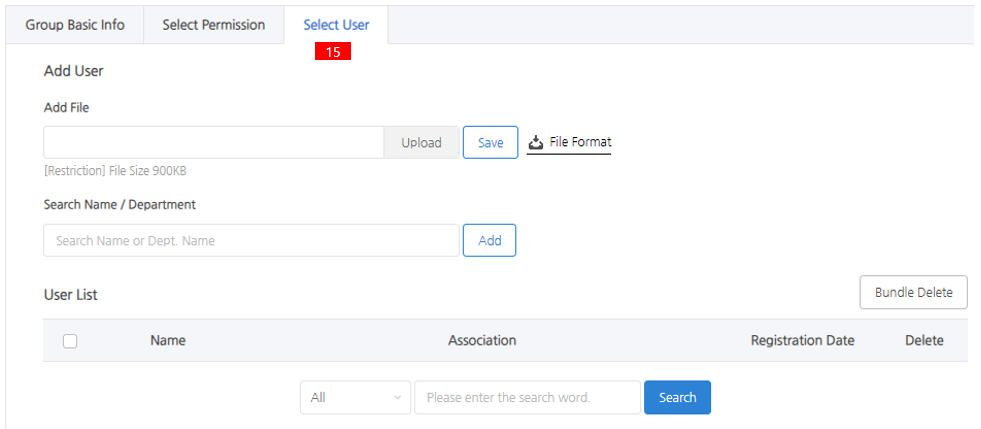
[15] You can select a specific group and edit the user list within the group. Groupware ID can be registered collectively by using the registered file or by searching manually. To use the file, download the form, fill out the form and upload it. You can also search for users by name or department and add them yourself. When searching for a department name, users whose Groupware information contains the corresponding department name will be searched. After searching for multiple users, click the Add Button on the right. After confirming that the users added to the bottom user list are registered, click the Save Button at the bottom to save.
This is the area where you can edit each information after selecting a specific group. Each tab can be moved and edited freely, and all changes will be reflected by clicking the Save Button at the bottom of any tab after all editing is completed.