Main Screen
Register image assets or set functions displayed on the community main page.
Main page elements such as the title and social media icons can be registered according to the used site language.
Please check the image registration location and image specifications in Image Asset.
Image
This is a page to register image assets that make up the community background.
Images are applied for all regardless of the site language.
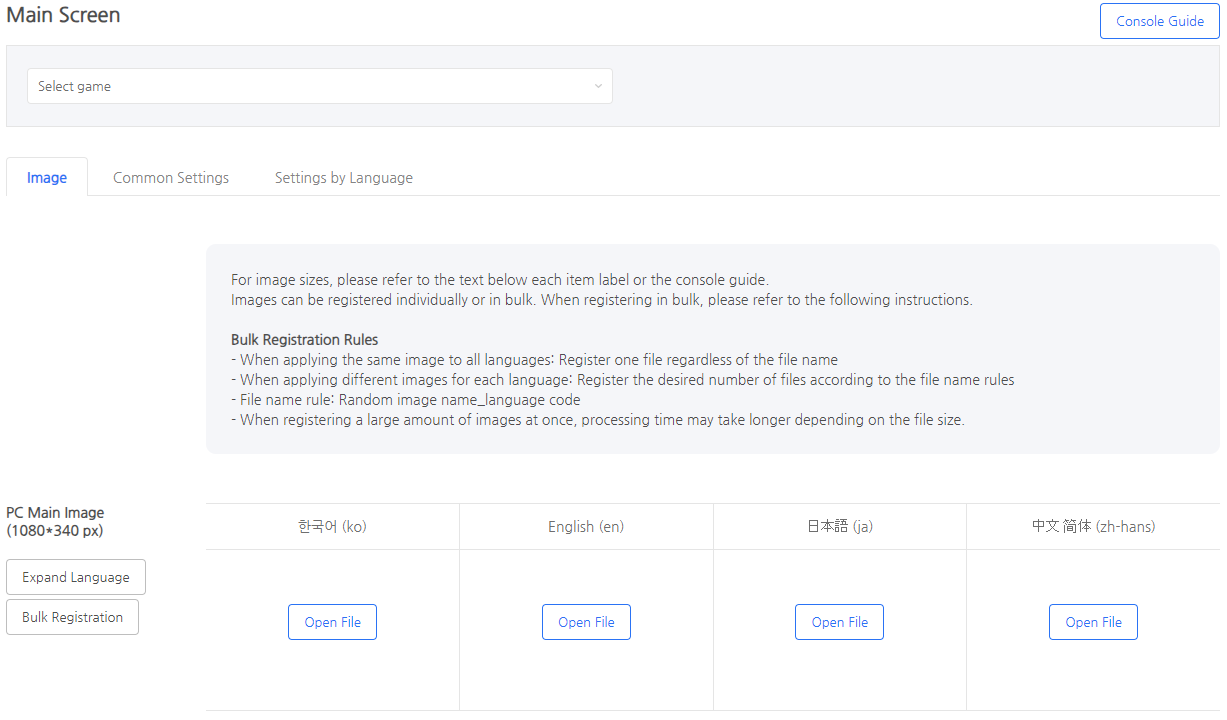

PC Main Image
- Set the main image of the PC site.
- 1080 * 340px size
- gif, png, jpg, and jpeg files can be uploaded
- Register individually for 16 languages
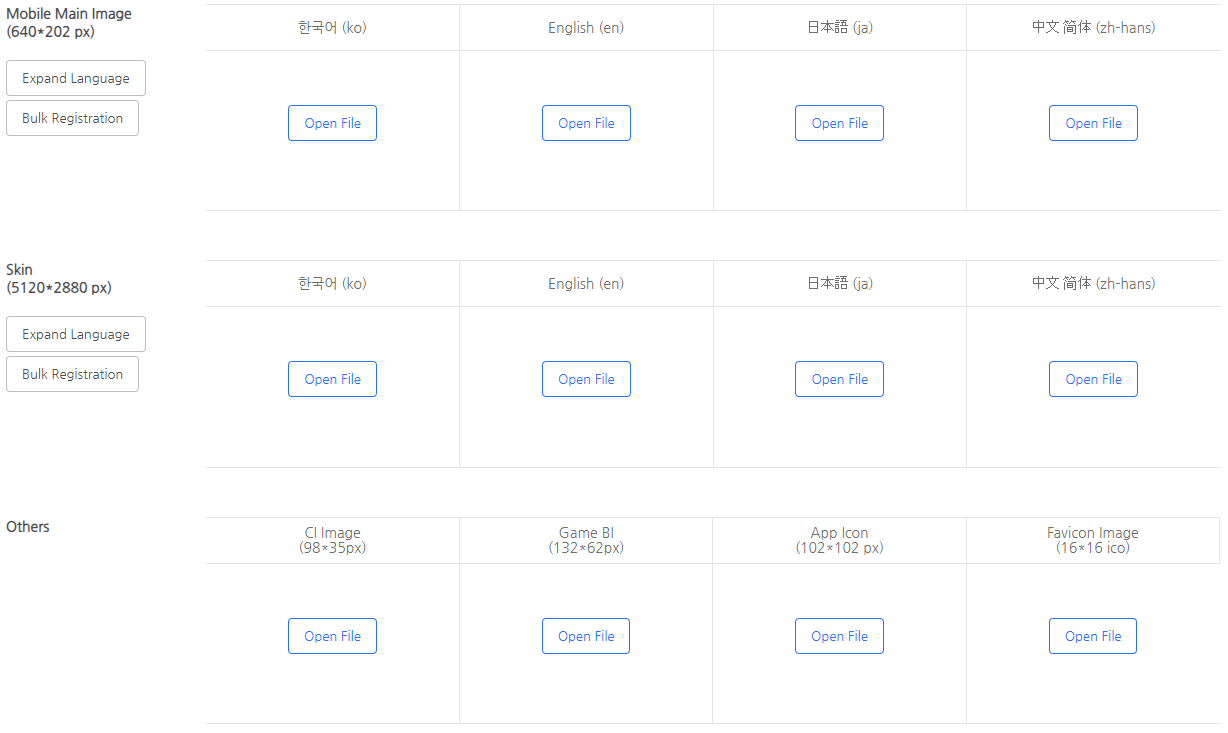
Mobile Main Image
- Set the main image of the mobile site.
- 640 * 202px 사이즈
- gif, png, jpg, and jpeg files can be uploaded
- Register individually for 16 languages
Skin
- Set an image that forms the background of the entire PC site.
- Don’t show on mobile
- 5120*2880px size
- Register individually for 16 languages
- Detailed Guide
Others
- Register for all 16 languages
| CI Image | Game BI(Game Logo) | App Icon | Favicon Image |
| Expose in footer | Expose in GNB | Top of side navigation | Top of browser |
| PC, MO | PC, MO | PC | PC |
| 98*35px | 132*62px | 102*102px | 16*16px |
| gif, png, jpg, jpeg | gif, png, jpg, jpeg | gif, png, jpg, jpeg | ico |
Preview Language/Type
- You can preview the community site by language and device (PC/Mo).
Common Settings
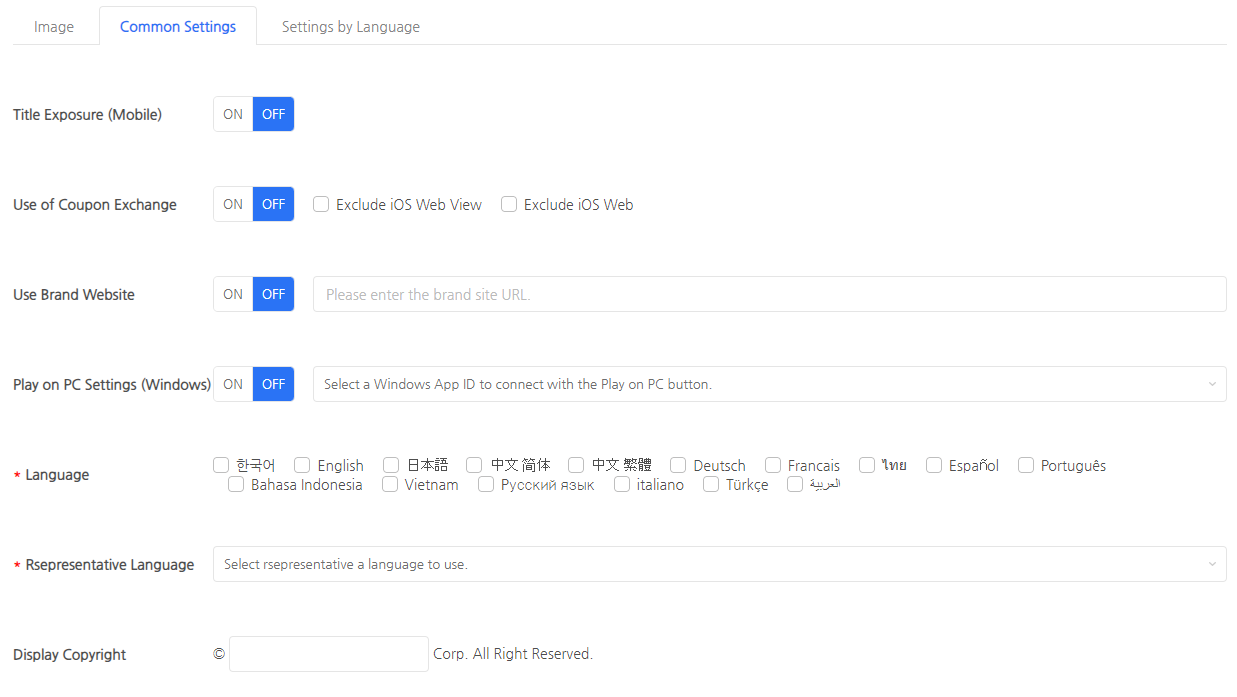
Title Exposure (Mobile)
- Decide whether to expose the title text above the mobile homepage image.
Use of Coupon exchange
- Decide whether to expose the Coupon Exchange Button.
- The information required for the coupon exchange is automatically delivered.
- When you go to the coupon exchange page through the community, the game server information and CS Code are automatically reflected.
- The Coupon Exchange Button is only exposed to logged in users with a PlayerID.
- e.g. Existing Hive members join the community before the game launch → Login is possible, but the Coupon Exchange Button won’t be displayed.
- If you do not want to use it on iOS devices, please use the Exclude iOS webview / Exclude iOS web options.
Use Brand Website
- Decide whether to expose the Brand Site Button.
- The Brand Site Button is not displayed in the in-game webview.
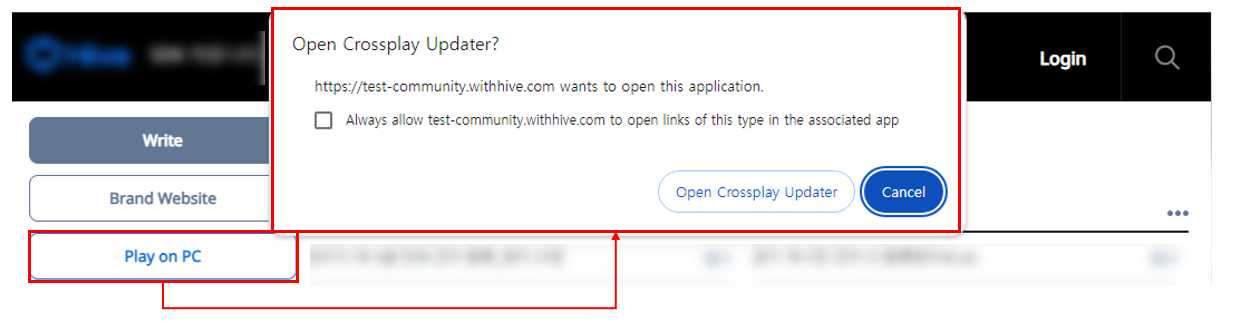
Play on PC Settings (Windows)
- Decide whether to expose the Play Button to PCs that can run the PC game launcher.
- You must connect the PC game AppID to the Play on PC Button.

- When you press the Play on PC Button, the crossplay launcher for the connected Windows PC game will run. (MacOS will be available in the future.)
- After logging in to the community, you will be automatically logged in when using PC games through the Play on PC Button.
Language
- Choose the operating language of the community. Only sites in the language selected as the used language will be exposed to users.
- Please be sure to set the language to use in order for the community to operate properly.
Representative Language
- Select the primary language to replace the used language.
- The representative language will be used in the following situations.
- In-game: The representative language will be exposed if the language is not included in the game device language
- Website: The representative language will be exposed if the language is not included in the browser language
- Please be sure to set the representative language to use in order for the community to operate properly.
Display Copyright
- Enter company information to be displayed in the copyright of the community site footer.
- Although it is not required for functionality, it must be entered during community operation.
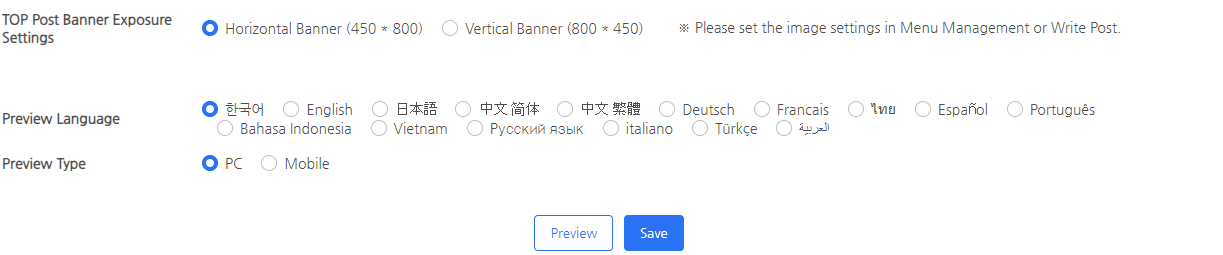
TOP Post Banner Exposure Settings
- Decide whether to use horizontal or vertical banners for the TOP Post Banner.
- The TOP Post Banner is displayed at the top of the post title of the board page.

Preview Language/Type
- You can preview the community site by language and device (PC/Mo).
Settings by Language
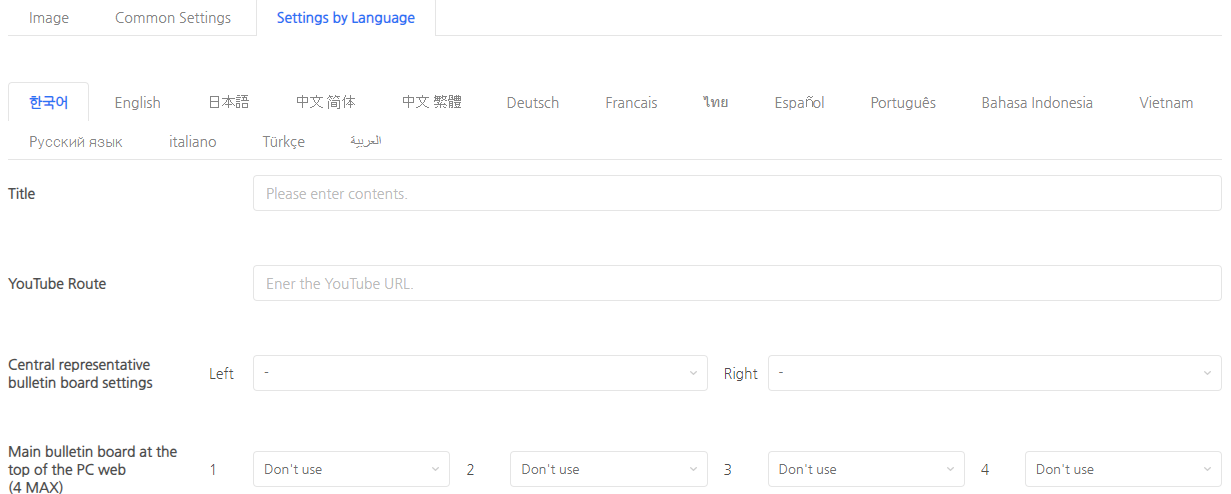

Title
- Enter the title for the community site.
- Exposure Location
- PC
- Title next to game BI in GNB
- Title next to favicon
- Title at the bottom of the app icon
- MO
- Above the mobile main image
- PC
- Title content automatically reflected in SEO meta tags
- <title>
- <meta property=”og:site_name”>
YouTube Route
- Enter the URL to be displayed in the YouTube area.
- Be sure to enter the Embed URL provided by YouTube as the URL.
- How to check the Embed URL
- YouTube video > Share Button > Embed > Copy and enter the embedded URL corresponding to the src value
- How to check the Embed URL
Central Representative Bulletin Board Settings
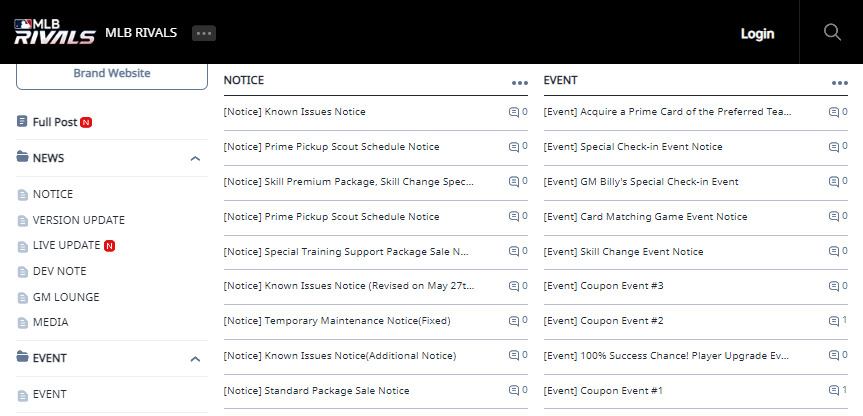
- Select two representative boards to be displayed at the bottom of the main page.
- The left board must be registered.
- Please check here for a guide on registering the first board.
Main Bulletin Board at the top of the PC web

- Select the main board to be displayed next to the title on the PC site.
- It’s optional and you can select up to 4.
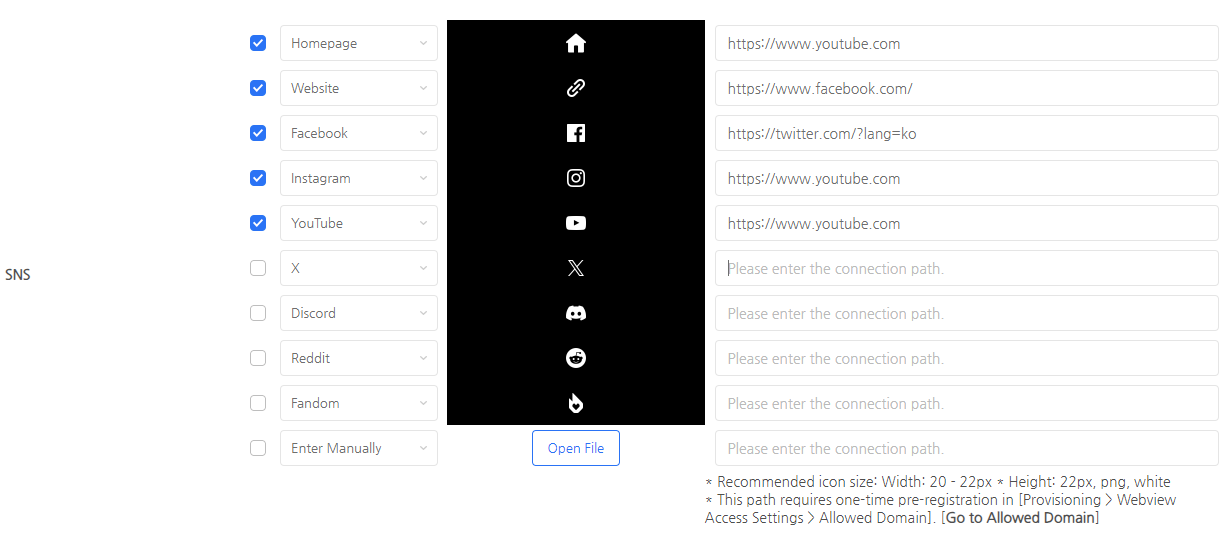
SNS/Social media
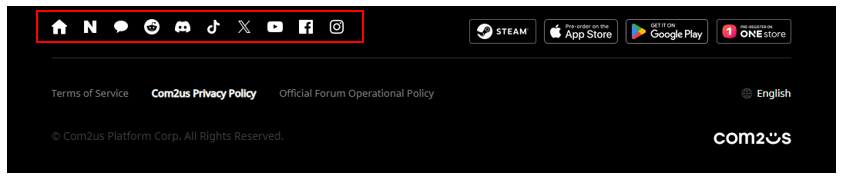
- Set up the social media to be exposed in the site footer.
- A total of 12 social media icons are provided, and you can also register your own icon.
- Up to 10 social media icons can be displayed.
- The recommended icon size is width (20-22px) * height (22px, png).
- If the social media path is not displayed properly in the webview, please register the domain from the menu below.
- [Provisioning > Webview Access Settings > Allowed Domain]
Download
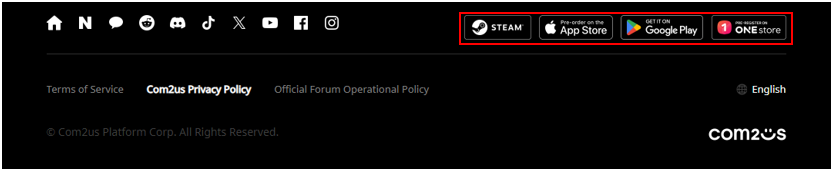
- Exposes a button to move to the download path.
- Apple App Store, Google Play Store, and One Store have separate pre-registration/download buttons.
- When setting the PC (Steam) download button, it will be displayed only on the PC web and not on mobile.
Terms of Service(Use when signing up for membership in the community)
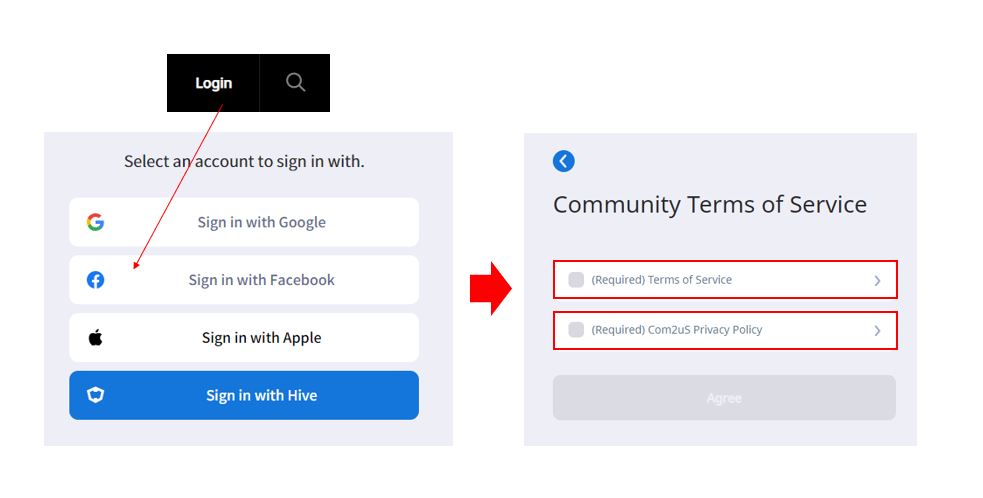
- Set the web login terms that will be displayed when a new member joins the community.
- (This does not apply to users who created an account in-game.)
- Web login terms are required settings, and if they are not set, community login will not work properly.
- You can display terms without creating a separate page through the Hive Provisioning Terms Menu.
- You must write in accordance with the terms and path rules below for proper operation.
| Checklist | Note |
| Terms paths require M code and T code, separated by “/”. |
|
| When registering terms in the console, make sure to differentiate them by language. |
|
Use a separate page
- It can be used if the company has a separate terms page.
- There are no separate connection path rules.
- When registering for the first time, registration is required by going to [Provisioning > Webview Access Settings > Allowed Domain].
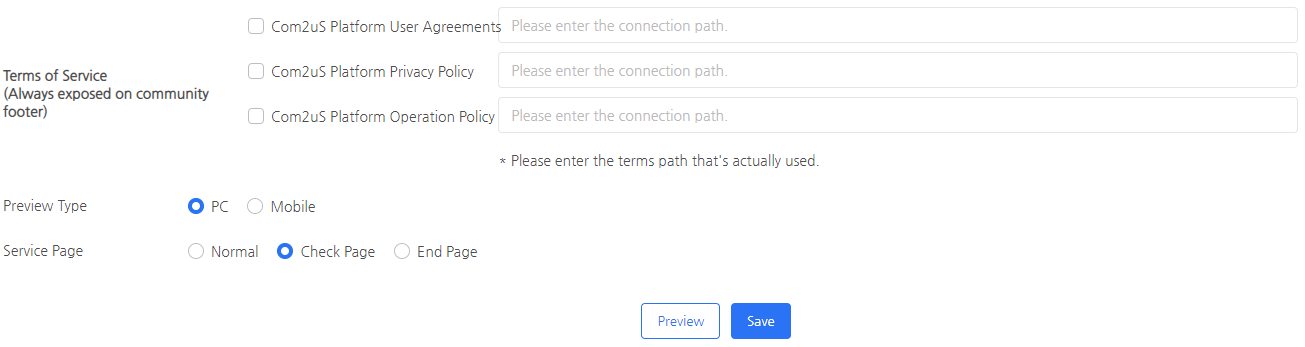
Terms of Service(Always exposed on community footer)
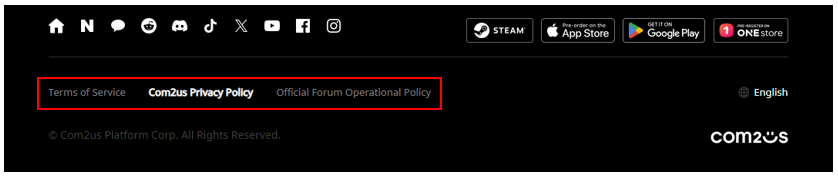
- Set the service company’s Terms of Service, Privacy Policy, and Operating Policy.
- The checked terms will be displayed, and the company name will be entered automatically.
- Although it is not required for functionality, it must be entered during community operation.
Preview Type
- You can preview the community site by device (PC/Mo).
Service Page
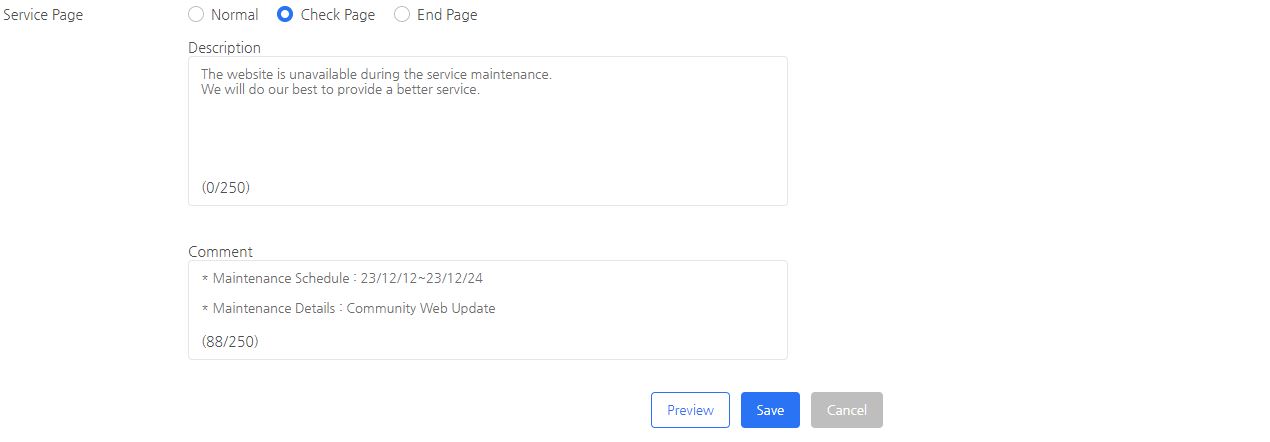

- You can change the service status for each community site language.
- The text in the description and remarks columns can be modified freely.
- The only difference between the inspection and exit pages is the main text, and the rest of the functions are the same.
- Normal: Changes to a normal status where users can access the community site.
- Check Page: Displayed as a page that can be used as a site maintenance notice. Additionally, the community is set to maintenance status when you first create a community.
- End Page: Displayed as a page that can be used when the service has been terminated.
- Normal: Changes to a normal status where users can access the community site.