Data Export Introduction
This is a service that extracts log data from Hive Analytics every hour and transfers it to cloud storage.
The data produced by data export can be used for analysis as needed, either by establishing a database directly as raw data or by processing it into the necessary format.
Hive Analytics offers file conversion and data transfer, however cloud storage requires registration with the cloud provider you’re utilizing.
Data Export Logic
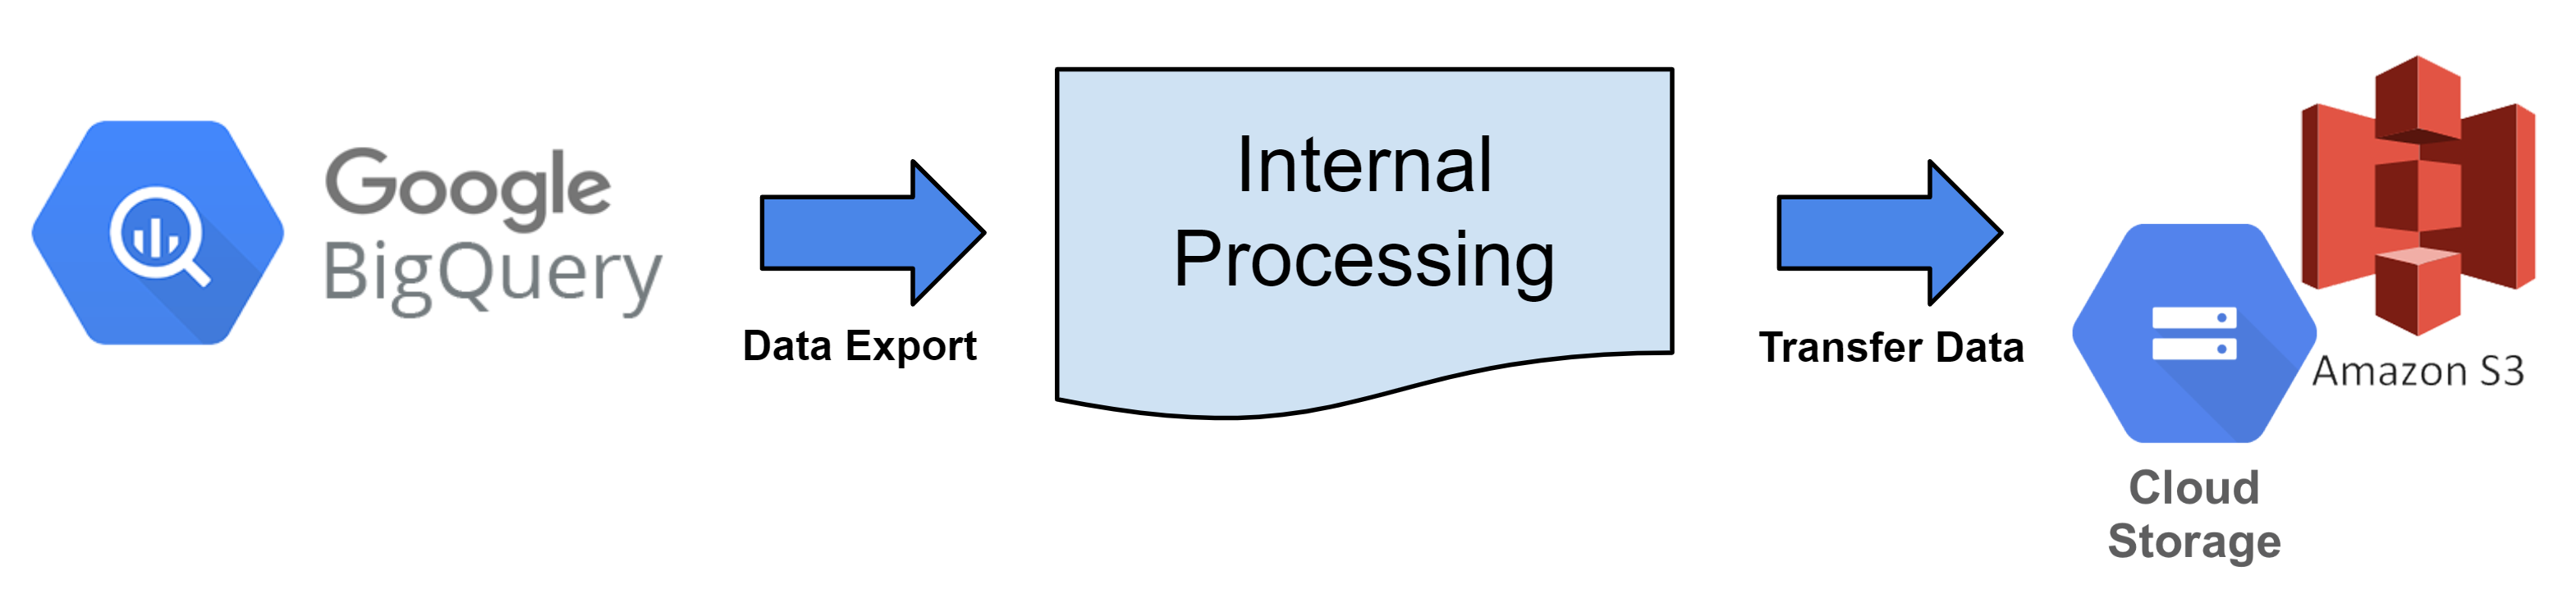
Every hour, BigQuery tables are converted into files in accordance with the data export cycle and uploaded to the registered cloud storage.
Data Export Service Permissions
- To use the data export function, you must have access to all games or own a Hive account.
- Because data is delivered by a table (log), split transmission by game is not possible.
Data Export Data Criteria
- Search the selected table data and upload the file to cloud storage.
- Data is extracted using an hourly transmission cycle based on UTC.
E.g.) Extract data of Sep. 1st, 2023 00:00:00 – 00:59:59 (UTC) on Sep. 1st, 2023 1:00 (UTC).- The partitioning standard for datetime columns is set to the view date minus one day.
E.g.) Aug. 30th, 2023 00:00:00 when extracting data from Sep. 1st, 2023 00:00:00 to 00:59:59 (UTC).- If the value of datetime is less than the query time minus one day, it will be excluded from the export data.
- The partitioning standard for datetime columns is set to the view date minus one day.
- Data is searched according to the time it was entered into Big Query.
- bigqueryRegistTimestamp Column Criteria
- Data Extraction Sample Query
SELECT * FROM bigquery_table WHERE bigqueryRegistTimestamp BETWEEN ‘2023-09-01 00:00:00’ and ‘2023-09-01 00:59:59’ and datetime >= ‘2023-08-31 00:00:00’
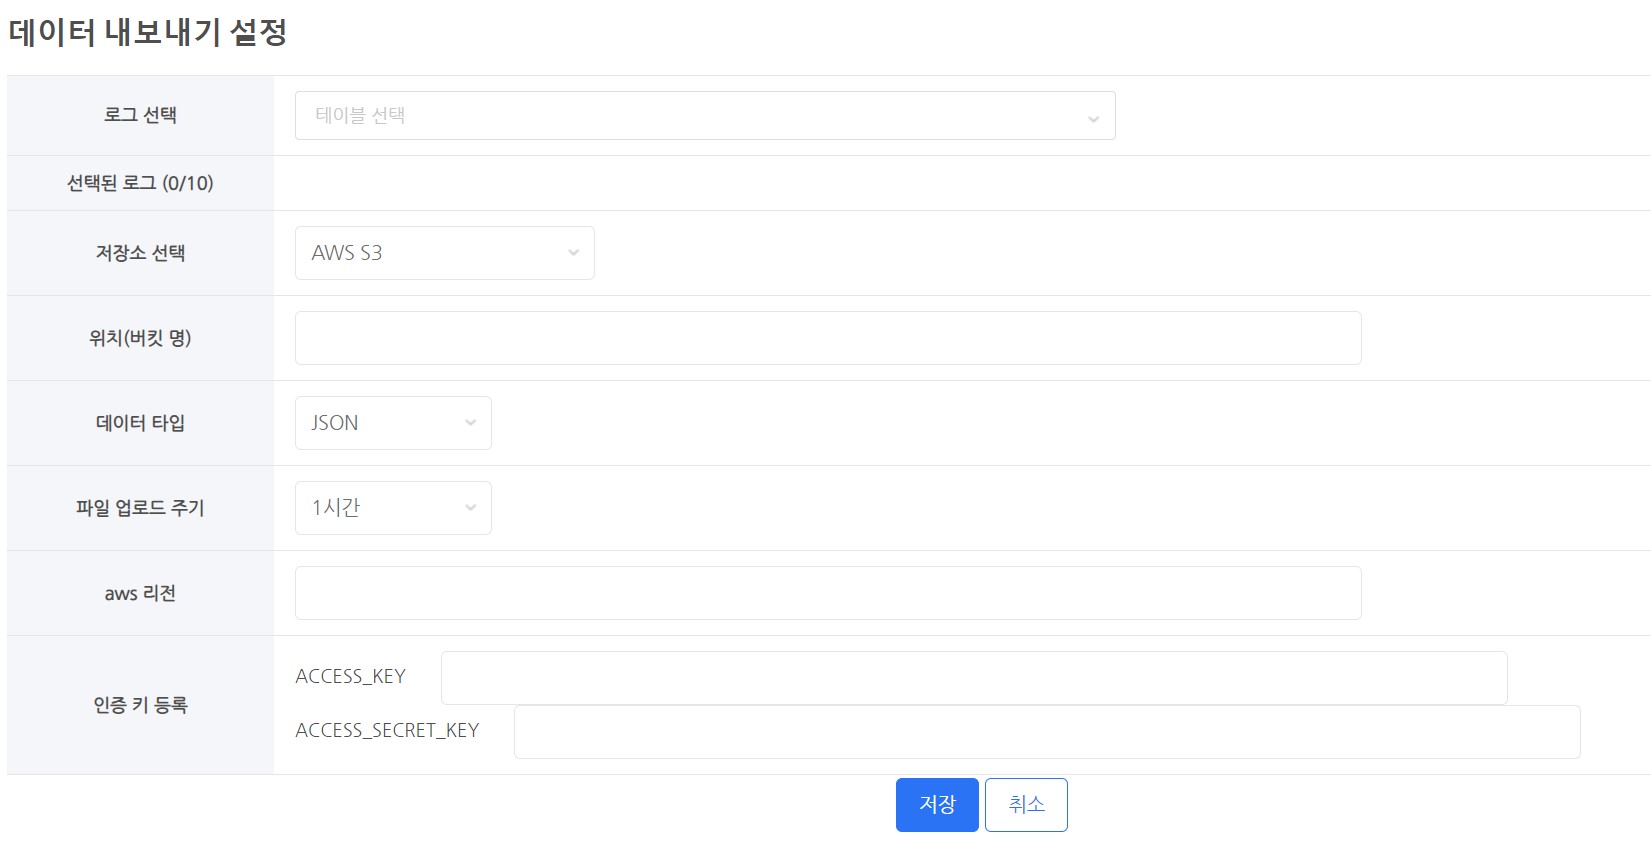
Data Export Settings
-
Select Log
- Select a table (log) to extract.
- You can search and select by entering a part of the table name.
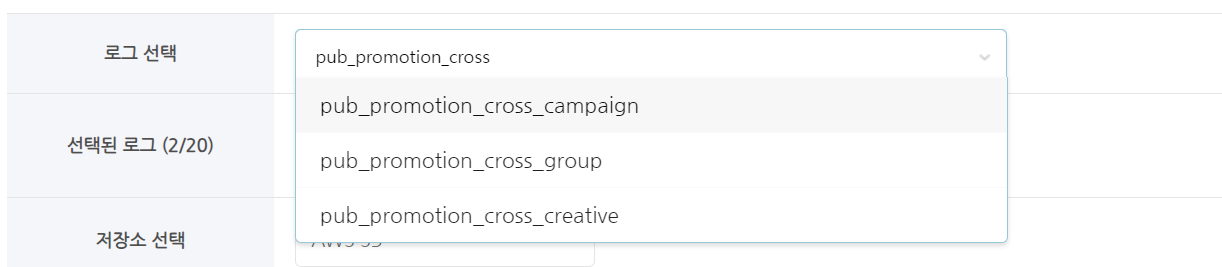
- You can choose up to ten tables.

- You can search and select by entering a part of the table name.
- Select a table (log) to extract.
-
Select Storage
- You need to use cloud storage to store your data.
- Supported Cloud
- AWS S3
- GCP google Cloud Storage
-
Location (Bucket Name)
- Enter the bucket name of the storage.
- E.g.)
- If the AWS S3 bucket name is s3://s3_bucket_name,
- enter only ‘s3_bucket_name’
- If the Google Cloud Storage bucket name is gs://google_bucket_name,
- enter only ‘google_bucket_name’
- If the AWS S3 bucket name is s3://s3_bucket_name,
-
Data Type
- There are two data types.
- Provided Data Types
- CSV
- JSON
- All files are encoded in UTF-8.
-
File Upload Cycle
- Data from an hourly range is extracted and uploaded every hour.
- The time is based on the bigqueryRegistTimestamp column value for extraction. (Based on UTC)
- E.g.) Begin extracting and uploading data at 15:00 (UTC).
- The bigqueryRegistTimestamp column has data ranging from 05:00:00 to 05:59:59.
- Completion time may vary based on the number of files and the upload size.
- E.g.) Begin extracting and uploading data at 15:00 (UTC).
-
Register Authentication Key
- Permission is necessary to upload data to cloud storage.
- You must register an authentication key or an authentication key file with data storage permissions.
- Authentication key registration techniques differ by cloud service.

- S3 – ACCESS_KEY, ACCESS_SECRET_KEY Register Authentication Value

- GCS – Register Authentication Key File
Cloud Storage
-
GCP – Google Cloud Storage
- To export data to Google Cloud, the following configurations are necessary.
-
- Go to the Google Cloud Console page and select Cloud Storage.

- Create a bucket just for data exports.
- Once set, the bucket name cannot be modified. If required, delete the old bucket and create a new one.
- It is advisable to create a bucket dedicated to data export.
- To enable data export, create a service key and grant write permission to the bucket.
- Select IAM & Admin → Service Account from the console page.
- To set up a new account, click Create Service Account.
- You can give your account an ID that matches your desired name.
- E.g.) hive_data_transfer_account@projectId.iam.gserviceaccount.com
- After creating an account, navigate to the Keys tab and generate a key for the service.

- Create a key file in JSON format from the Add Key → Create New Key.
- After downloading the created key file, keep it securely.
- You can give your account an ID that matches your desired name.
- Next, return to Cloud Storage and move to the Permissions tab in the bucket you created.

- In the Permissions tab, enter the newly created service account ID in the Grant Access → Add Main Member.
- In Role Assignment, check two permissions: Cloud Storage → Storage Object Creator and Storage Object Viewer, then click OK.
- After you’ve completed all of the settings, go to Hive Analytics’ Data Export Settings page and register the service’s key file.
- Go to the Google Cloud Console page and select Cloud Storage.
-
AWS – S3
- To export data to AWS, the following configurations are necessary.
-
- Go to Storage → S3 in the AWS console.
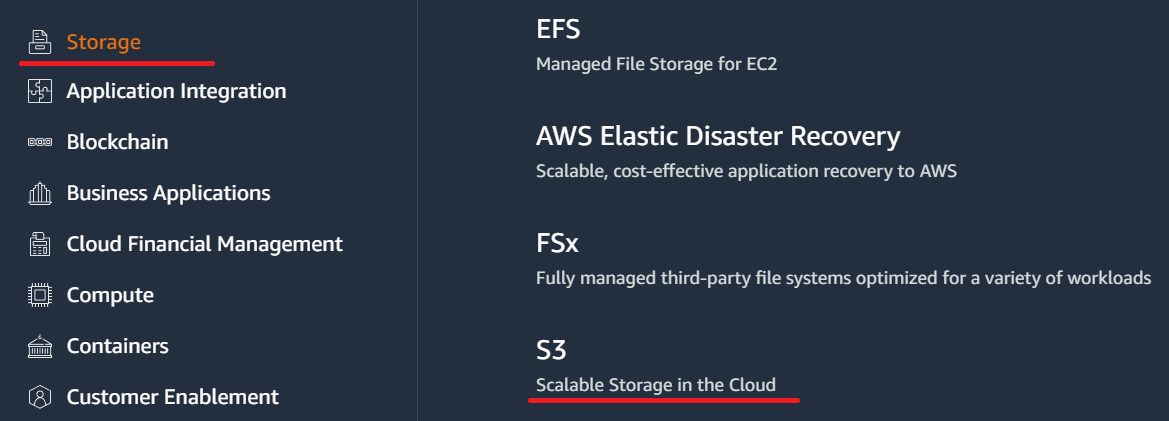
- Create a bucket for data export.
- Once set, the bucket name cannot be modified. If required, delete the old bucket and create a new one.
- It is advisable to create a bucket dedicated to data export.
- Create a bucket for data export.
- This user should only be used as a standalone account for data export. Create a new IAM user.
- Create an access key for the account you’ve created. Related information can be found in IAM user’s Manage Access Key – Create Access Key.
- Keep your access keys in a safe location.
- Add an inline policy for the created account.
- To include an inline policy for a user group (console), follow the steps in the policy creation topic.
-
To establish a policy, select the JSON tab and paste the JSON code shown below.
- The YOUR-BUCKET-NAME-HERE field includes the name of the bucket that you established.
123456789101112131415{"Version": "2012-10-17","Statement": [{"Effect": "Allow","Action": ["s3:GetBucketLocation", "s3:ListBucket"],"Resource": ["arn:aws:s3:::YOUR-BUCKET-NAME-HERE"]},{"Effect": "Allow","Action": ["s3:PutObject"],"Resource": ["arn:aws:s3:::YOUR-BUCKET-NAME-HERE/*"]}]}
- The YOUR-BUCKET-NAME-HERE field includes the name of the bucket that you established.
- Once you’ve completed everything, add the archived access key to the Hive console data export options.
- Go to Storage → S3 in the AWS console.
File Storage Format
-
Data Storage Directory Structure
- Common File Format
- withhive/data_export/Build_Type/YYYY/MM/DD/TableName/TableName_YYYY_MM_DD_UUID.fileExtension
- Build Type: Has two possible values: sandbox and live. When set to sandbox, it saves as sandbox.
- YYYY/MM/DD : This is the standard year/month/day for which data is extracted. (Based on UTC)
- UUID : This is a random value that prevents overwriting due to duplicate file names.
-
File Extension: Varies based on the file type chosen.
- withhive/data_export/Build_Type/YYYY/MM/DD/TableName/TableName_YYYY_MM_DD_UUID.fileExtension
- Common File Format
| File Type | Compression Status | Final File Name |
|---|---|---|
| json | V | withhive/data_export/BuildType/YYYY/MM/DD/TableName/TableName_YYYY_MM_DD_UUID.json.gzip |
| csv | V | withhive/data_export/BuildType/YYYY/MM/DD/TableName/TableName_YYYY_MM_DD_UUID.csv.gzip |
-
File Extension
- csv.gzip
- This is a file that contains data with fields separated by commas.
- Encryption settings cannot be used when compressing files. (Not supported)
- json.gzip
- This is a file containing data characters organized in Javascript object syntax.
- It is separated into lines.
- It’s a json file compressed with gzip.
- Encryption settings cannot be used when compressing files. (Not supported)
- csv.gzip
Transmission Limit Notice
- Maximum Table Number Limit
- Maximum Selectible Tables: 10
- Extract Data Total Capacity Limit by Table
- Exceeding 500Mbytes when extracting data: Excluded from transmission
- The actual transferred data is a compressed file of about 15%.
- Exceeding 500Mbytes when extracting data: Excluded from transmission