This menu is used to register items for the app.
Main Features
- Game server where you can manage different games at once at the App Center.
- You can register/delete server ID and server name, excluding the server URL, at the App Center. Item management is synchronized with App Center and operates.
- Deactivate in item management if the server is deleted from the App Center.
- The item cannot be paid regardless of the deletion in the App Center if the actual game server is deleted.
- You can register a large amount of items at once via file upload.
- You can operate the game safely by choosing whether or not to use items instead of deleting them.
- You can easily find out the cause of an issue via Modification History.
Item Registration Process
You can register items in the following process in case of launching a new game.
- Go to the AppCenter and register server at the Game Management
- The game must be registered at the App Center. See HERE to find out how you can register games at the App Center.
- Make sure to enter the same server name as displayed in the actual game when registering a server name in the App Center. The server name registered in the App Center is also exposed at the web coupon exchange page.
- Go to Billing> Item> Item registration to enter the URL to the registered server.
- Register item at the Item Tab
Register server URL
If you select a game, the game information and list of registered servers will be shown. Please check the following two points if you don’t see the game or server.
- You don’t have authority to access the game or the Edit button is not shown.
- In this case, please contact the admin in charge for access.
- The game or server is not registered to the App Center.
- Item registration server list is synchronized with the App Center. Therefore, games and servers must be registered in the App Center first.
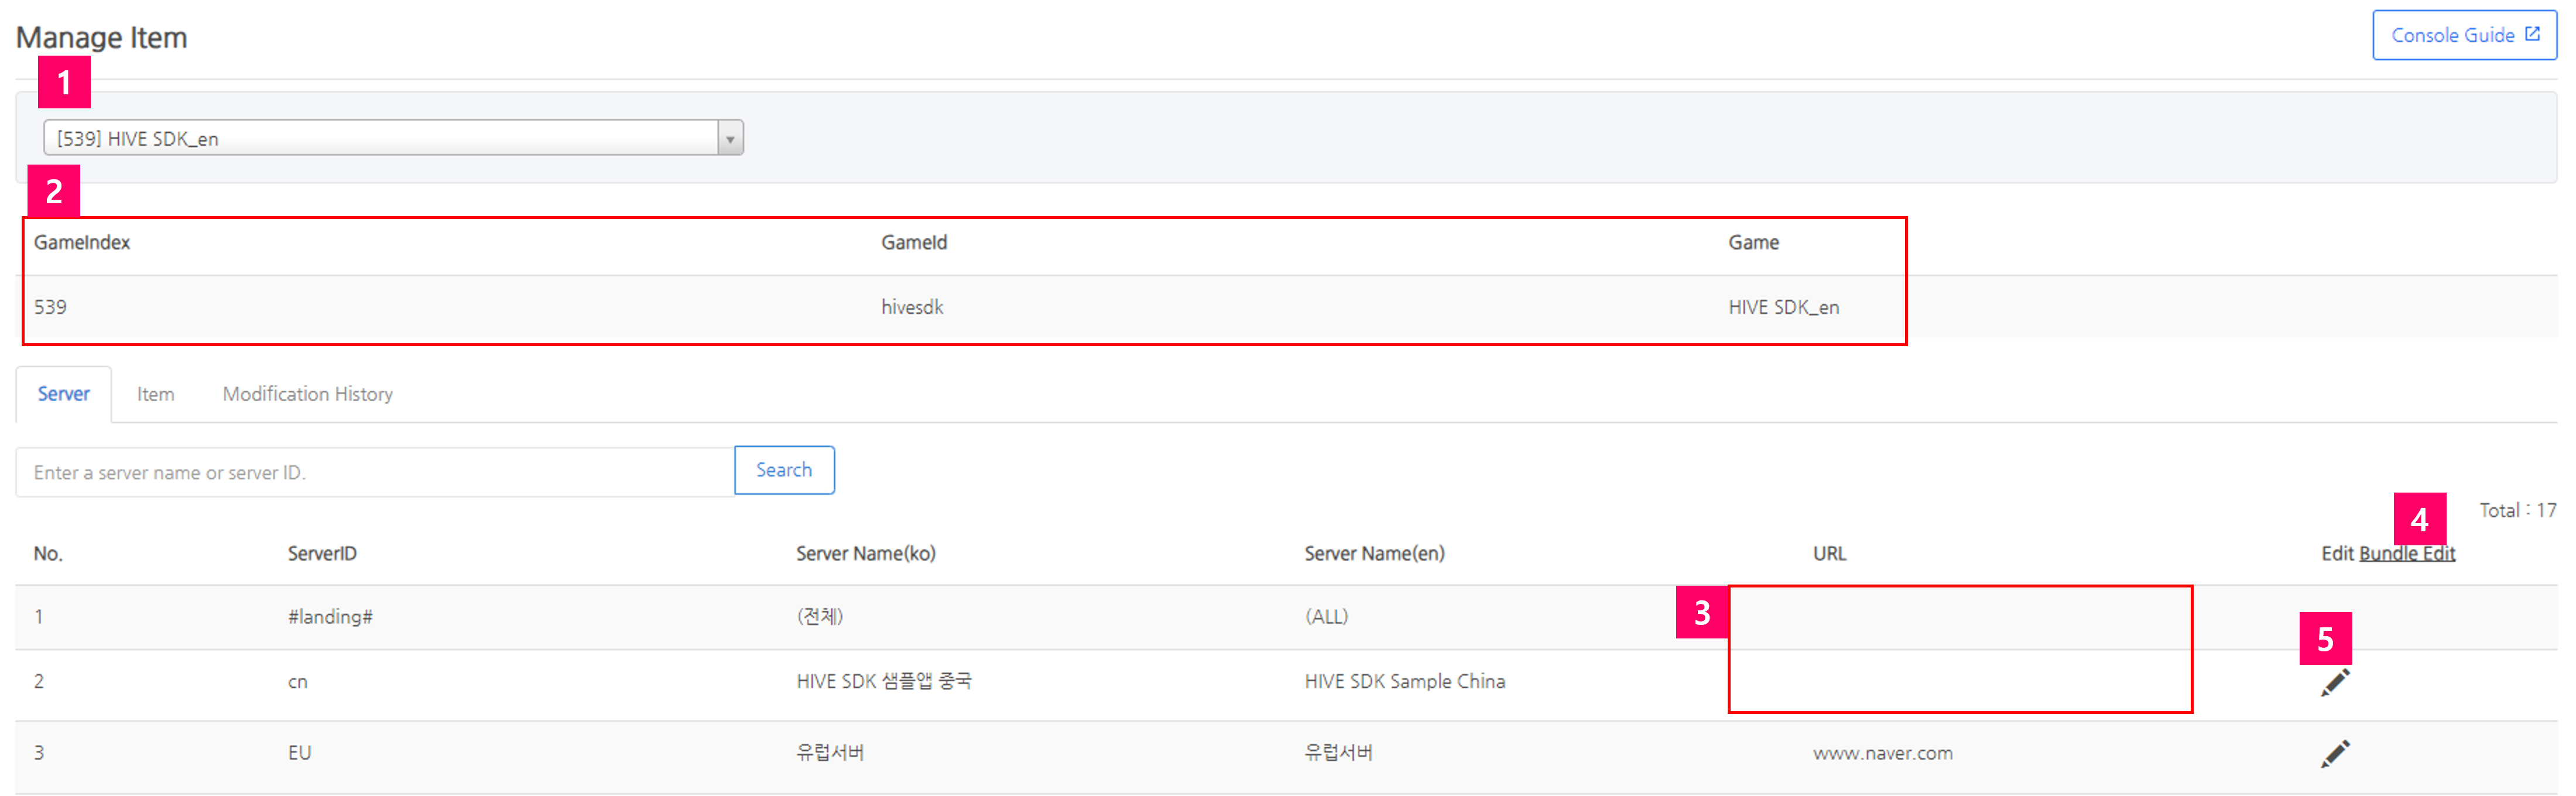
| ① Game List: You can load the game list registered at the App Center. You can only view games you have access to. ② Game Info: You can check game index and GameID. ③ URL: This field should be empty by default as only the server ID and server name are registered at the App Center. ④ Bundle Edit: You can edit at once by clicking the Bundle Edit Button when there are too many server lists. Permission to edit Items is required, and you can request permission from the person in charge of console authority. ⑤ Edit: You can use this feature when you need to modify URLs one by one. Item modification permission is required. |
- Bulk server URL registration / modification
Click the bulk server URL registration / modification if you need to register or modify at once due to a large number of server lists. The Edit Button will not be shown unless you have a permission.
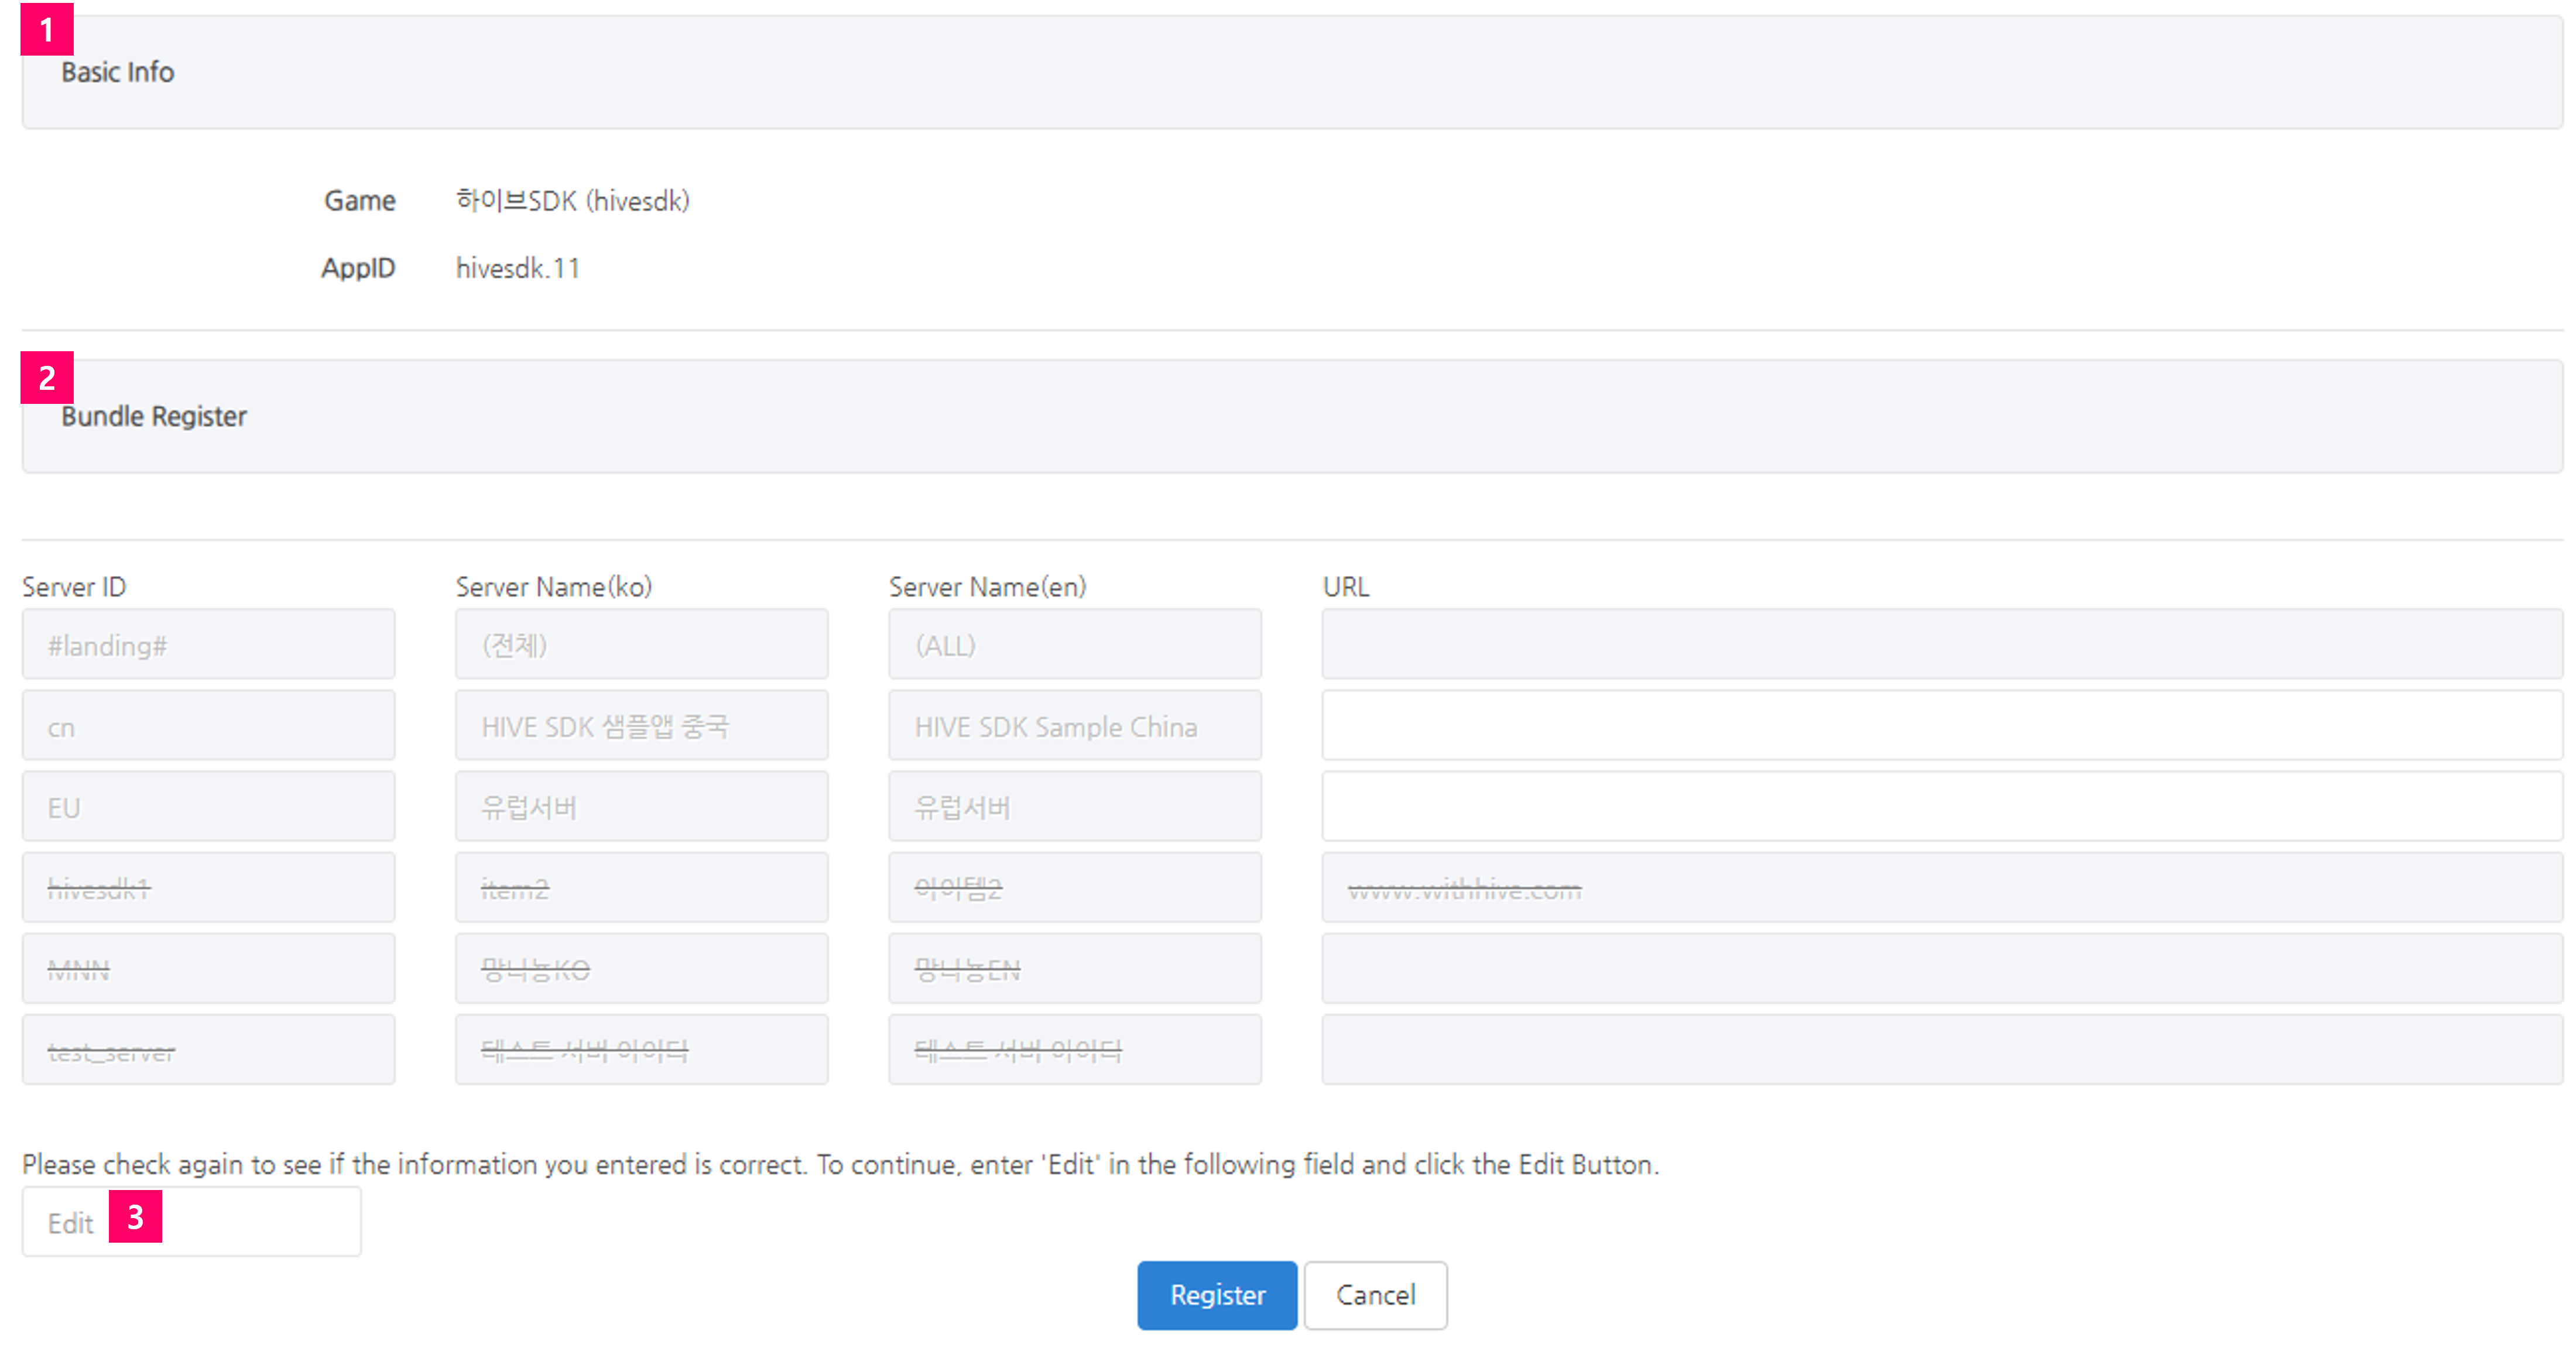
① Basic info: Check the current game and App ID.
② URL : Check each server ID and server name and enter the URL.
- Server id that’s #landing# and URL that’s # are the auto-registration items used in coupons.
- Server IDs cannot be modified.
- You can modify the server name in App Center> Game Management.
③ We require you to enter confirmation message to prevent it from being easily modified. Please enter “Edit” and click on the Edit Button.
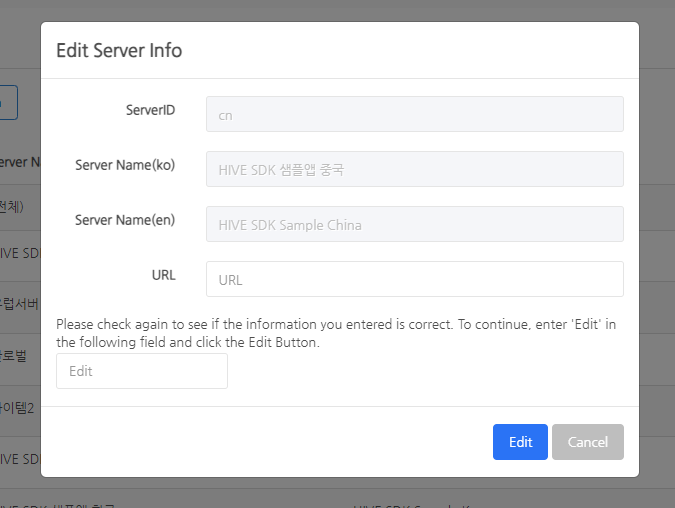
- Individual Edit
Click the pencil icon next to the URL to show the modification page as a pop-up. You can enter details in the same way as the Bundle Edit.
Item Registration
Click the Item Tab to go to the Items list. Items can be registered only when the server is registered first and cannot be deleted. “Item Edit” permission is required to register and edit items.
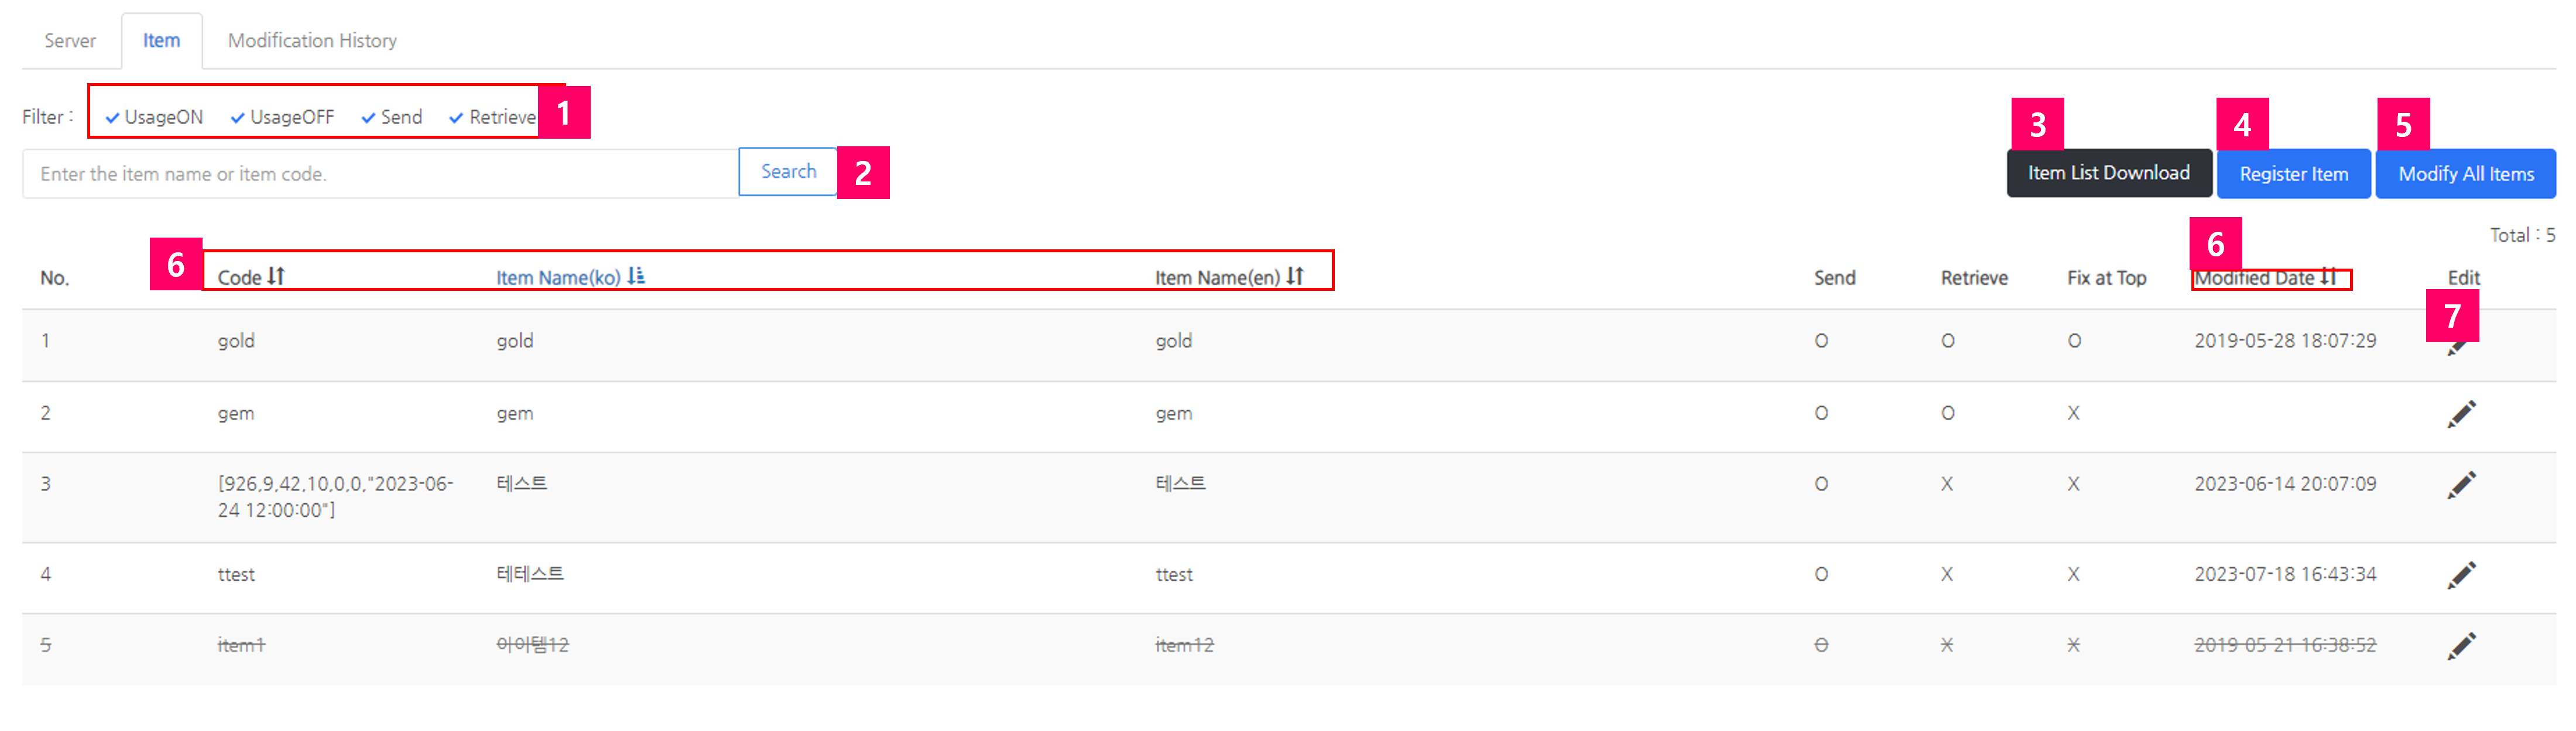
| ① Filter: All are checked by default, and only checked items are filtered. Search results can also be filtered.
② Search: Search by item name (KO), item name (EN) or code. |
1.Register Item
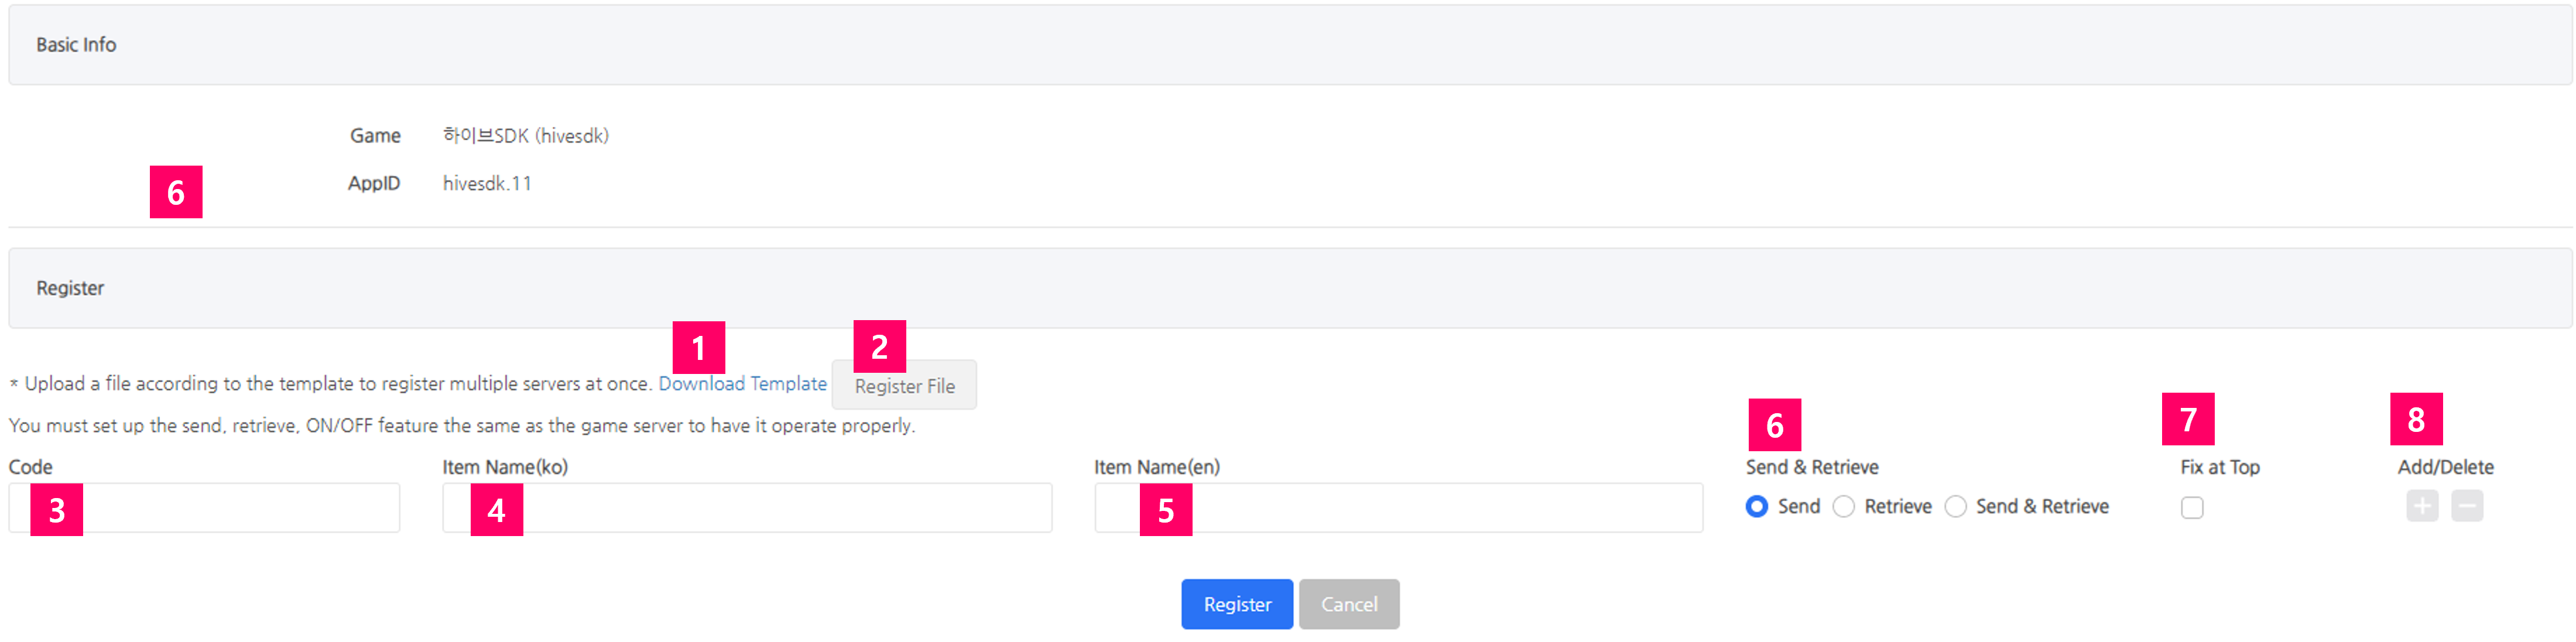
| ① Download Template: You can download the template according to the item registration.
② Select File: For multiple items, download the ② template, fill out the form and upload the file to register at once. ③ Code: Enter the item code. ④ Item Name (KO): Enter the item name in Korean. This should be registered for management use. ⑤ Item Name (EN): Enter the item name in English. This should be registered for management use. ⑥ Send & Retrieve: You can select one of the three: Send/Retrieve/Send&Retrieve ⑦ Fixed top: When checked, it is sorted at the top of the item list and cannot be modified. ⑧ Add/Delete: Click + to add registration forms when registering multiple items. |
You should fill out the template from the 2nd row. Refer to the first row for the send/retrieve status and enter numbers between 1~3.

- Edit
You can edit the information of the registered item. You cannot modify the code.
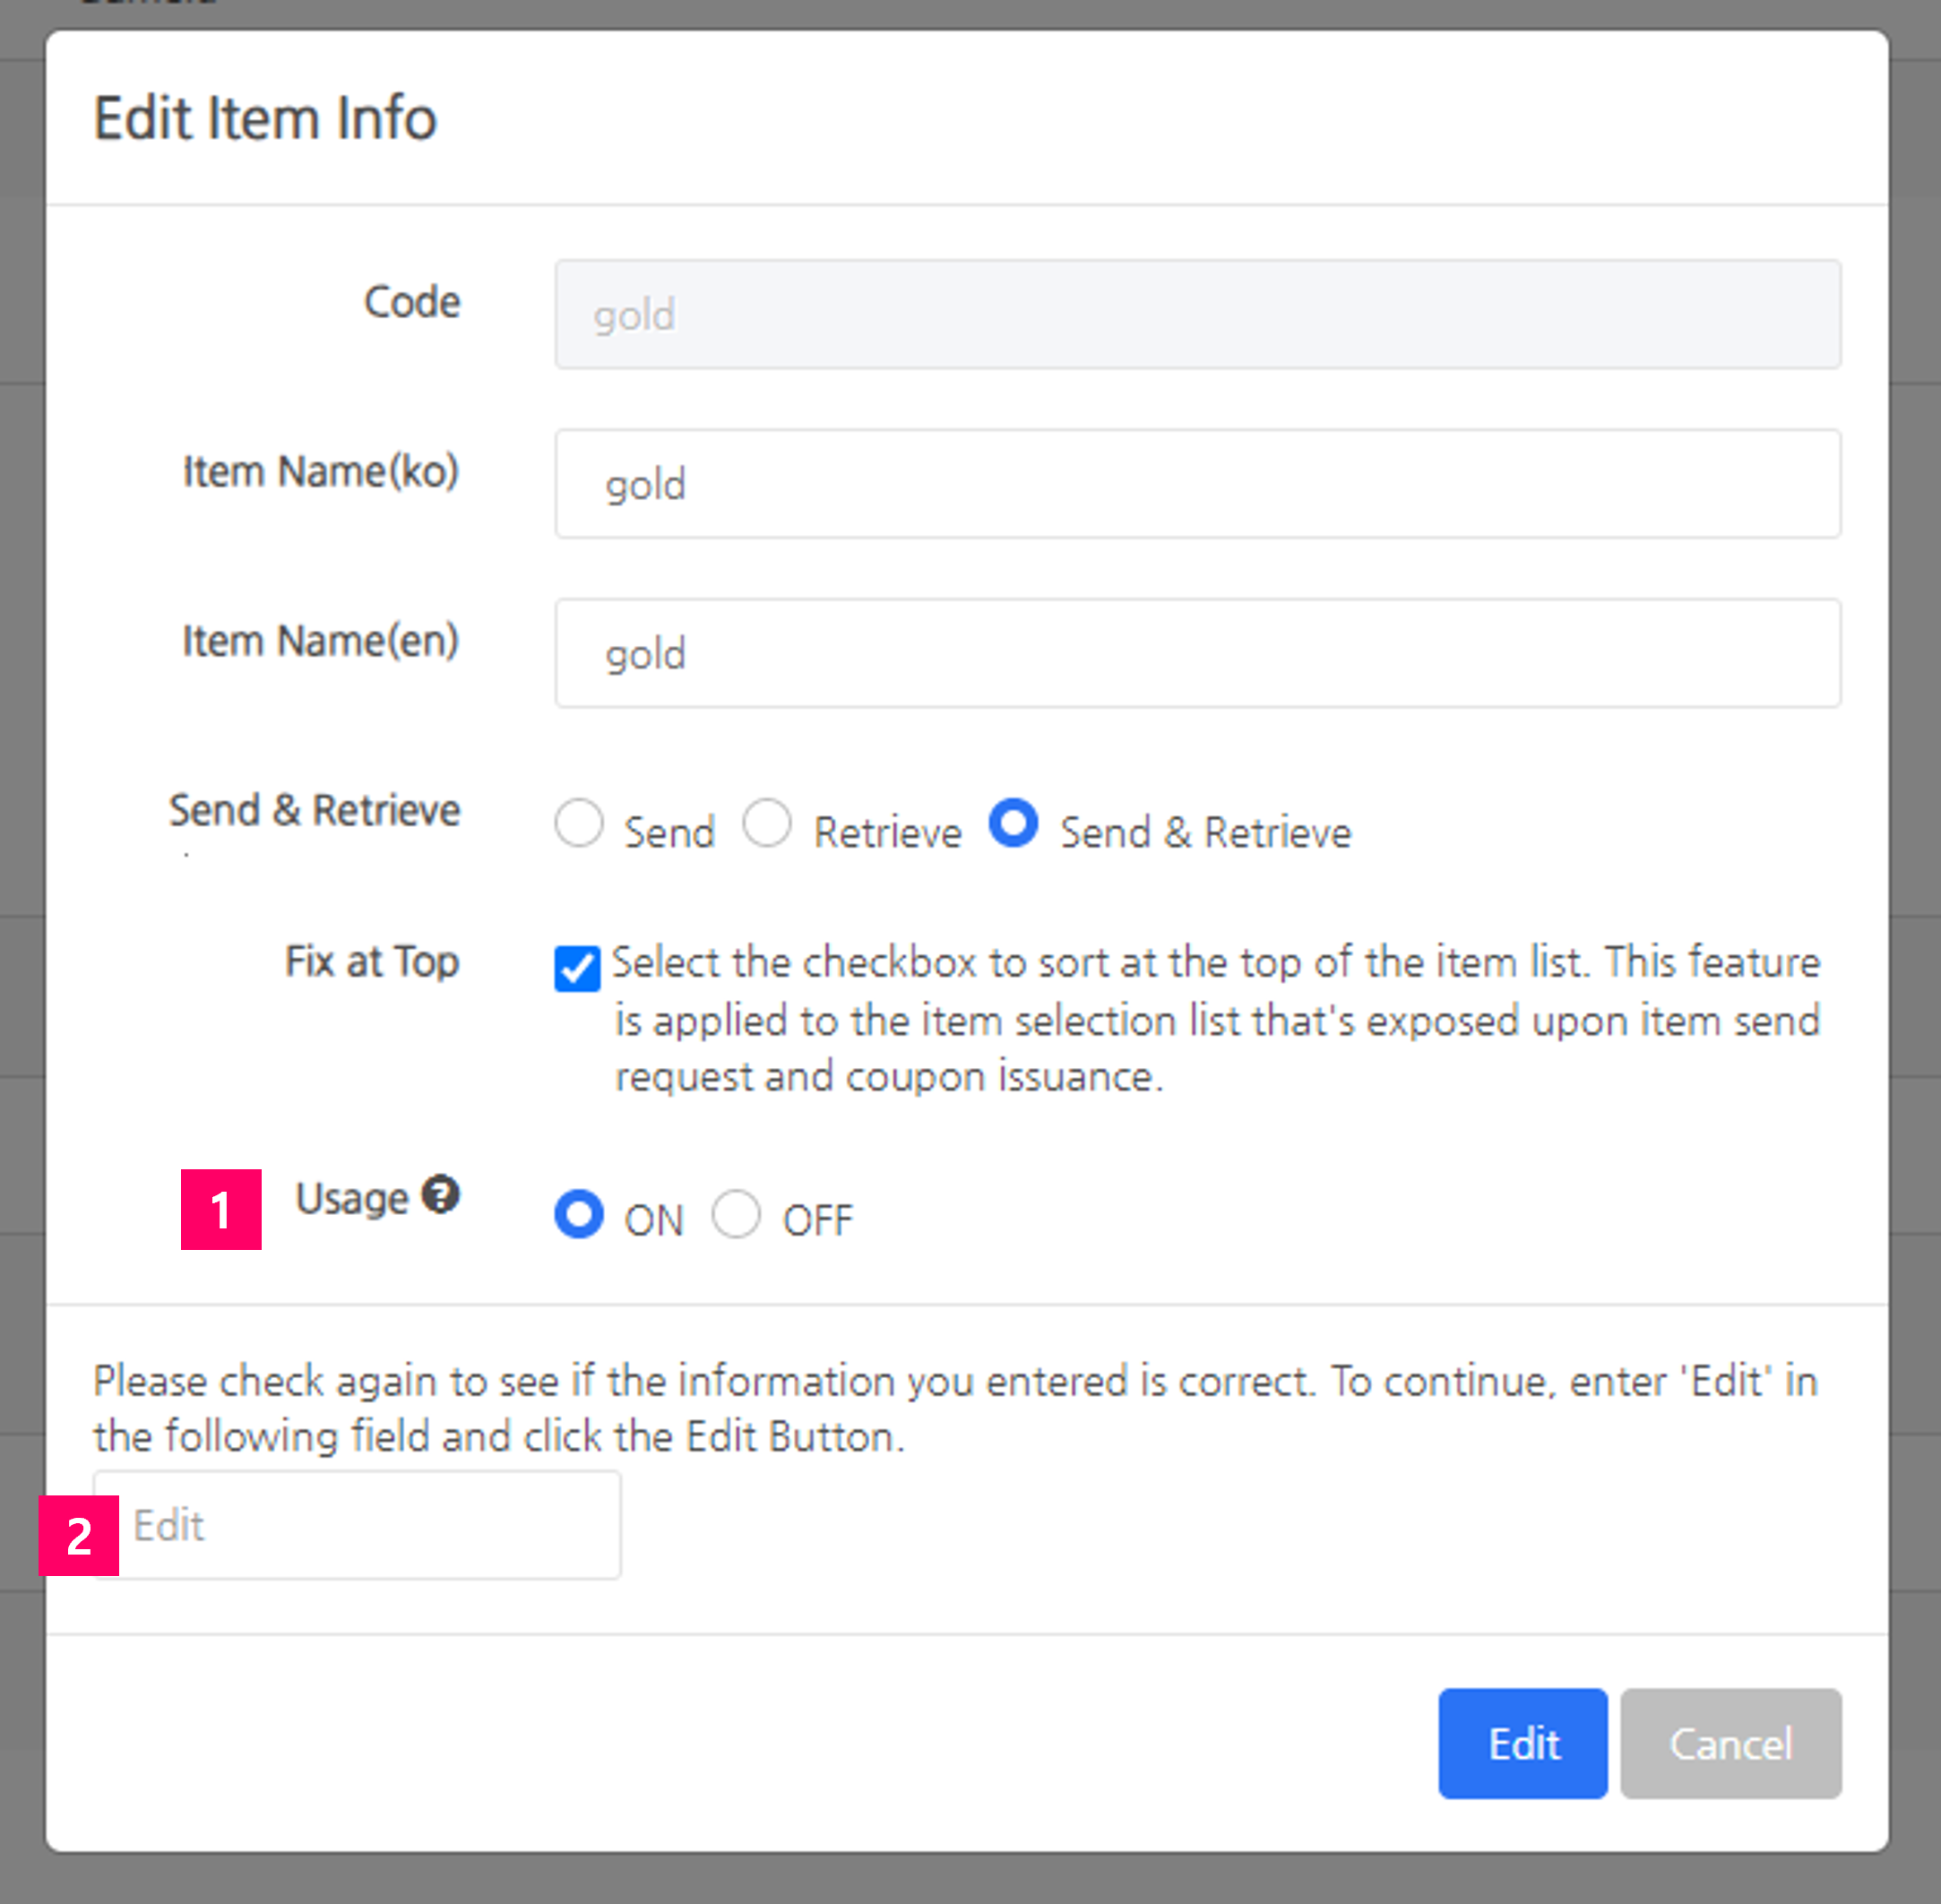
| ① Usage: You cannot delete registered items. If it’s an unused item, please change its status to OFF. Items set as OFF will be excluded from the list of items given as promotional/coupon rewards.
② We require you to enter confirmation message to prevent it from being easily modified. Please enter “Edit” and click on the Edit Button. |
Modification History
You can check the modification history at the server and Item Tab.
If an item is modified, its code, item name (KO), item name (EN), send/retrieve status and usage will be shown in order. If it’s a server, its server ID, server name (KO), server name (EN) and URL will be shown in order.
