To register an advertisement, click the “Hive Console > Promotion > Cross-promotion Ads > Register Ad menu.
Hive Cross-promotion follows a hierarchical structure for registration in the following order: Campaign > Ad Set > Ad.
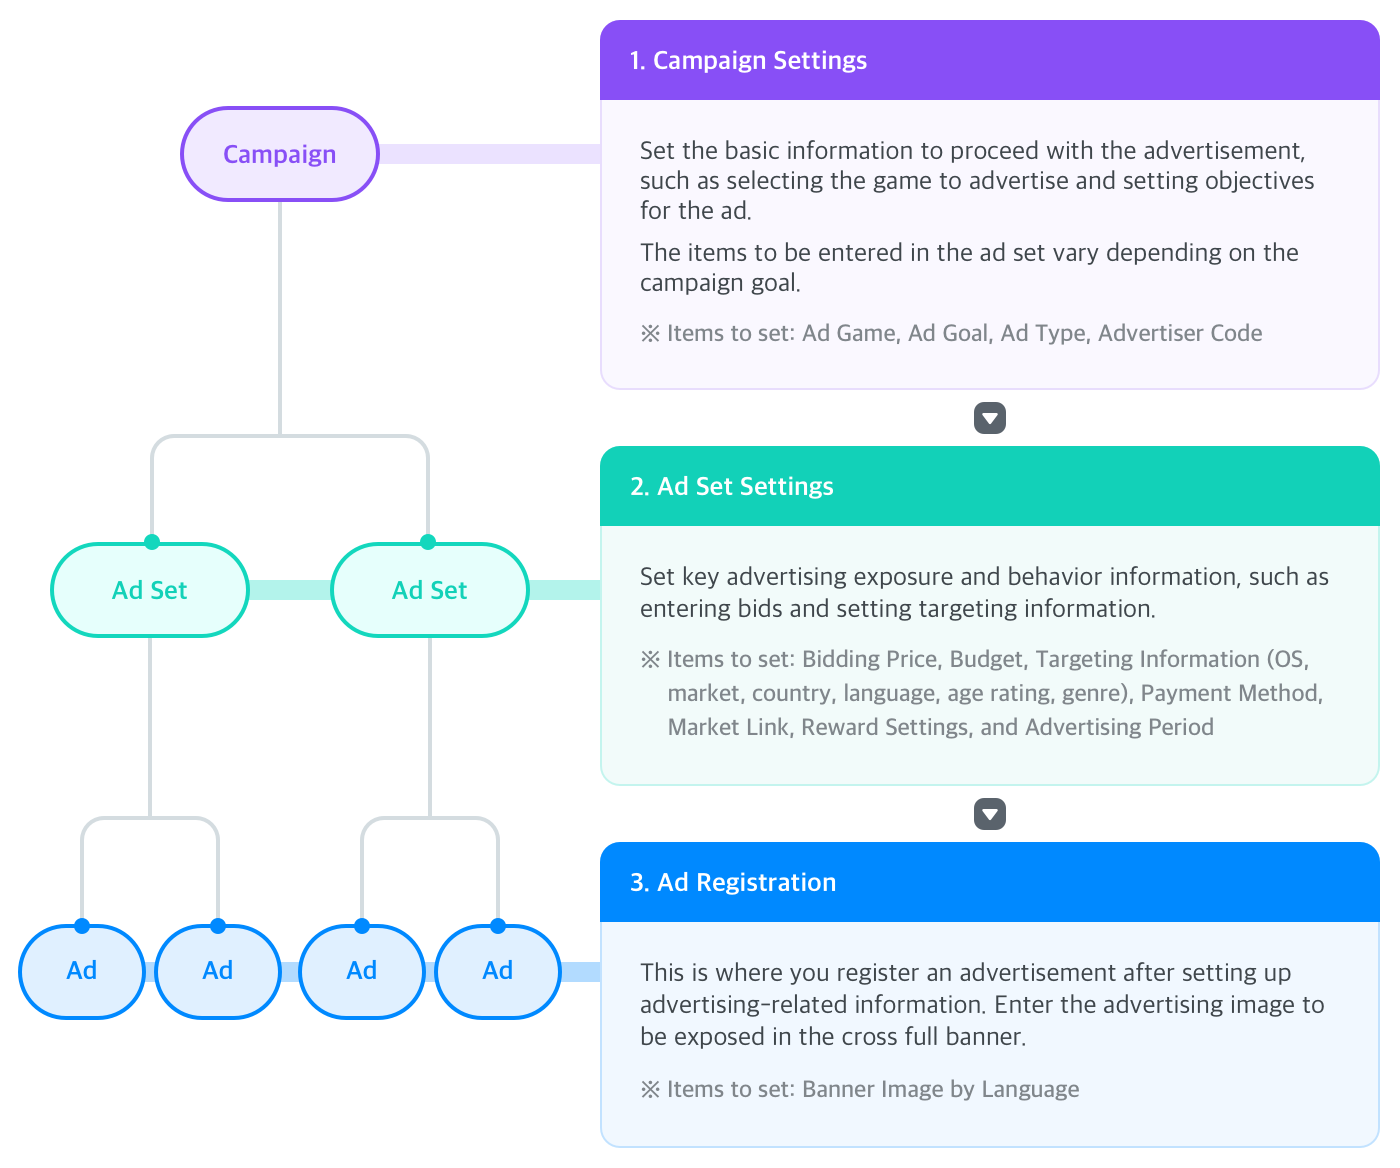
1.Campaign Settings
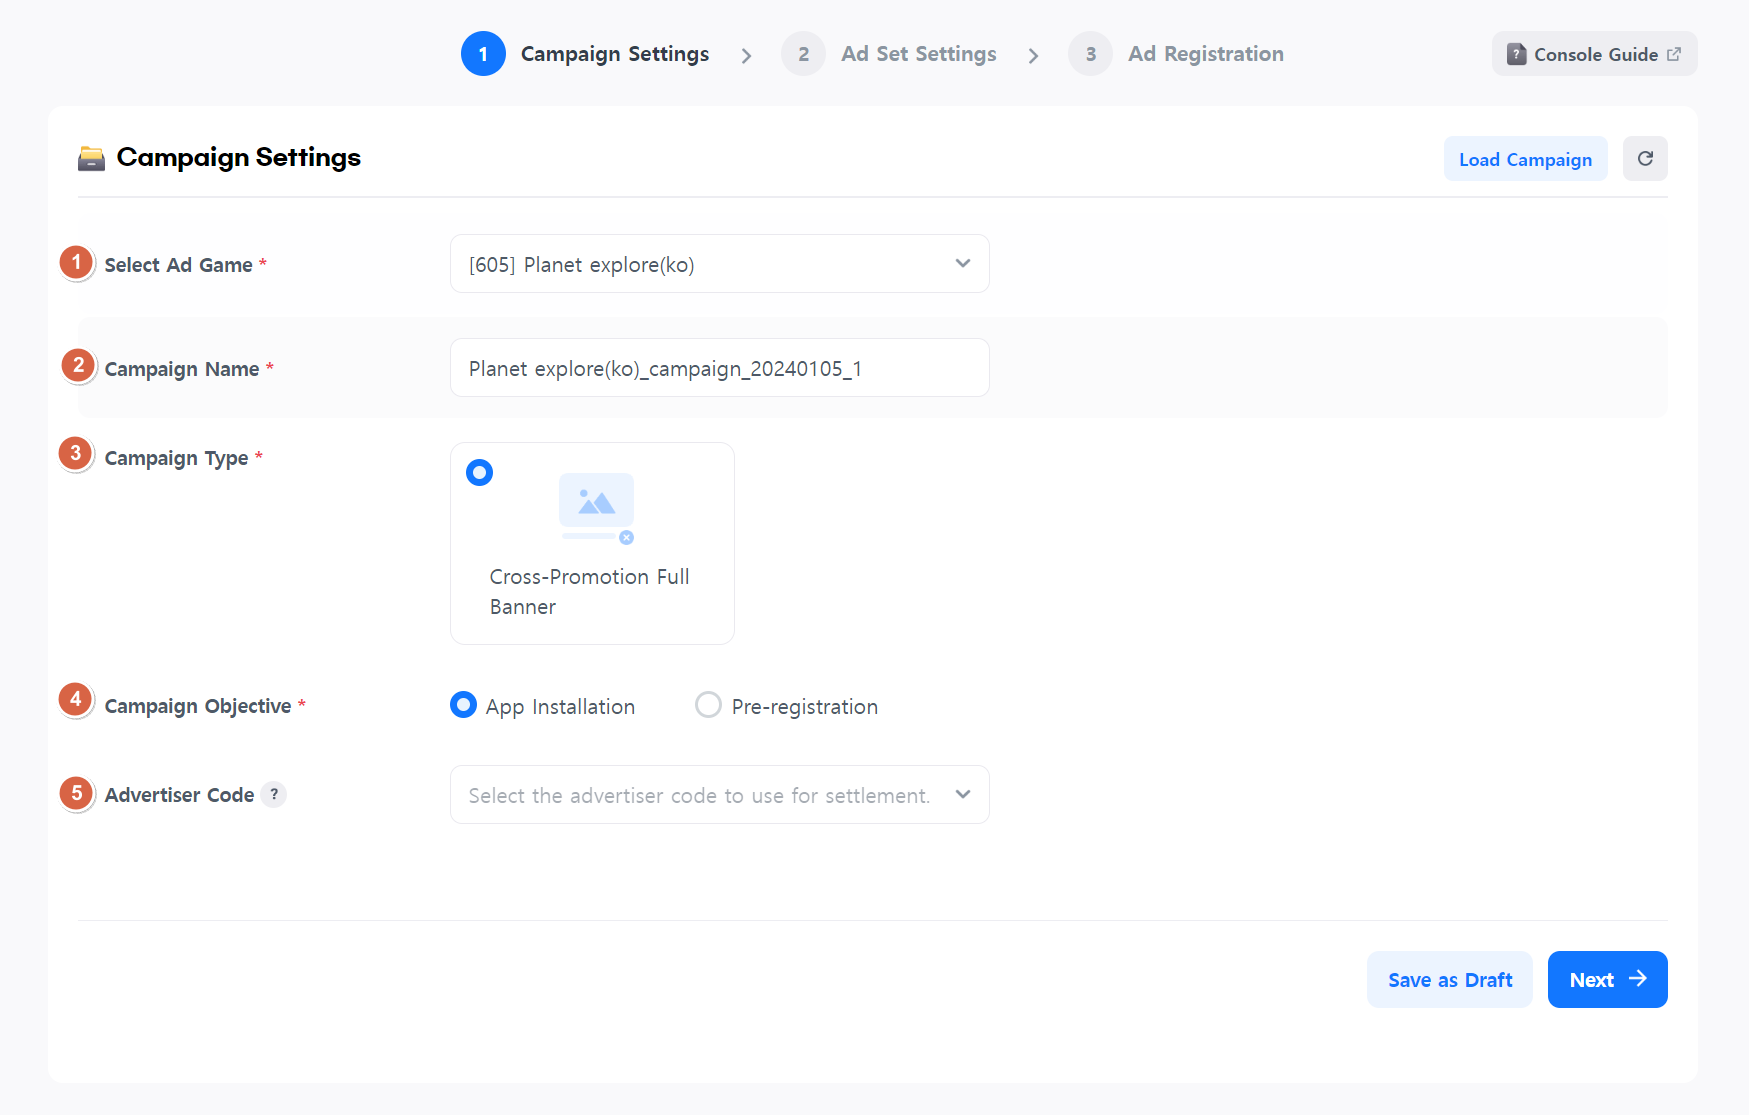
- Select a game to advertise.
Click on the selection area to see the games you have permission to access. Choose the game for which you want to run an ad. - Once you select a game, a campaign name will be automatically generated. You can also input your desired campaign name if you prefer.
- The campaign type is automatically set as “Interstitial Ad”.
The cross-promotion ad image will be displayed on banners that appear when the game is running. - Set your campaign goal. The values you need to input in the ad set depend on your campaign goal.
- If you want to promote app installations through your ad, select “App Installation”.
- If you want to promote a game currently accepting pre-registrations, select “Pre-registration”.
- The advertiser code is an optional field. You can check the settlement amount for each advertiser code you set.
Once you have filled in all the required fields, the “Next” button will be activated.
Click the “Next’ button”, and your Campaign will be saved with the current information, and you will be taken to the ad set setup
2.Ad Set Settings
Then, the campaign name you set earlier is displayed. You can see the parent campaign for the ad set you want to register.
You can see the parent campaign for the ad set you want to register.You can also enter an ad set name you want.
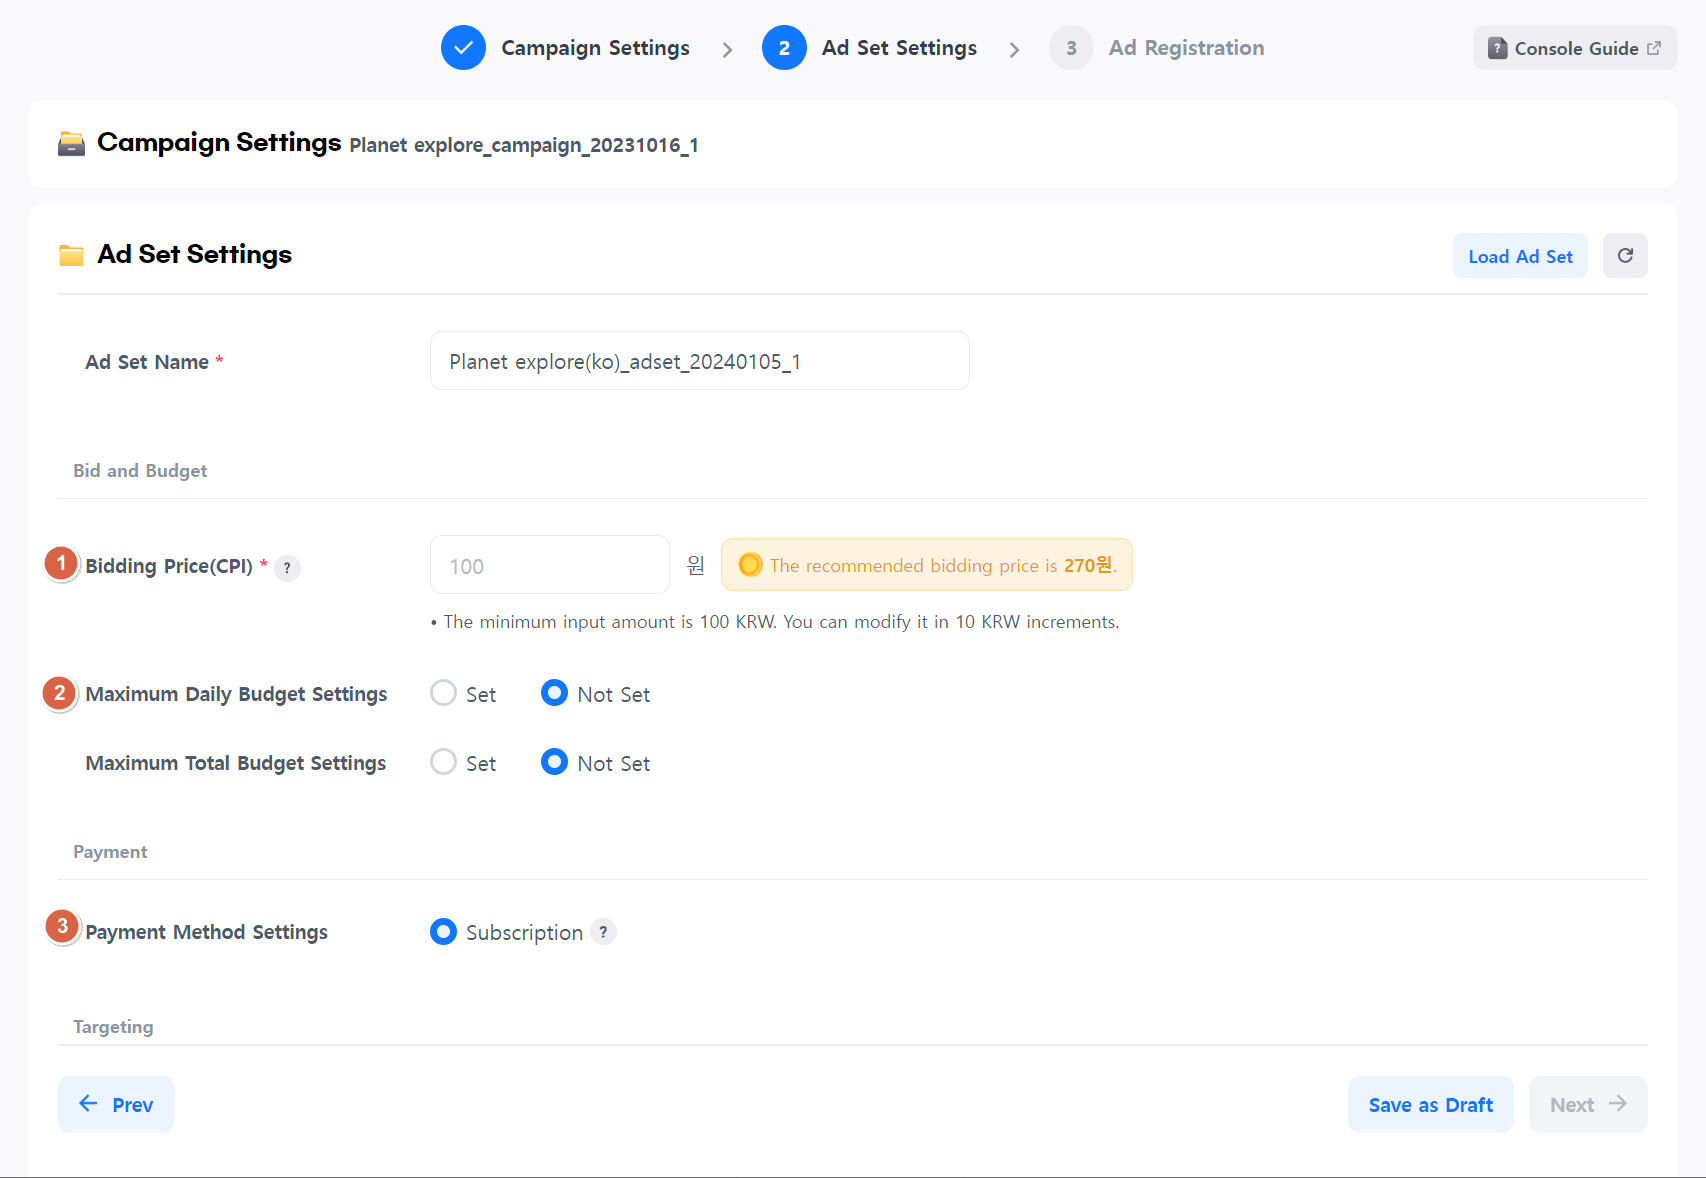
1.Bidding Price
Bid price is the most important information that affects your ad’s exposure in competition with other advertisements.
- For an App Installation campaign, enter the cost per install.
- For a Pre-registration campaign, enter the cost per click.
The recommended bidding price is provided on the right. You can use it as a reference.
2.Budget
You can set a budget to execute your ad within a specific budget range. If the budget limit is reached, your ad will stop running even if it’s within the ad duration.
You can set daily or overall maximum budgets as needed.
If you don’t set a budget, your ad will run without cost limitations throughout the ad duration.
3.Payment Method Settings
Cross-promotion ads are billed regularly in a lump sum. You’ll be charged for the ad costs executed during the month as before.
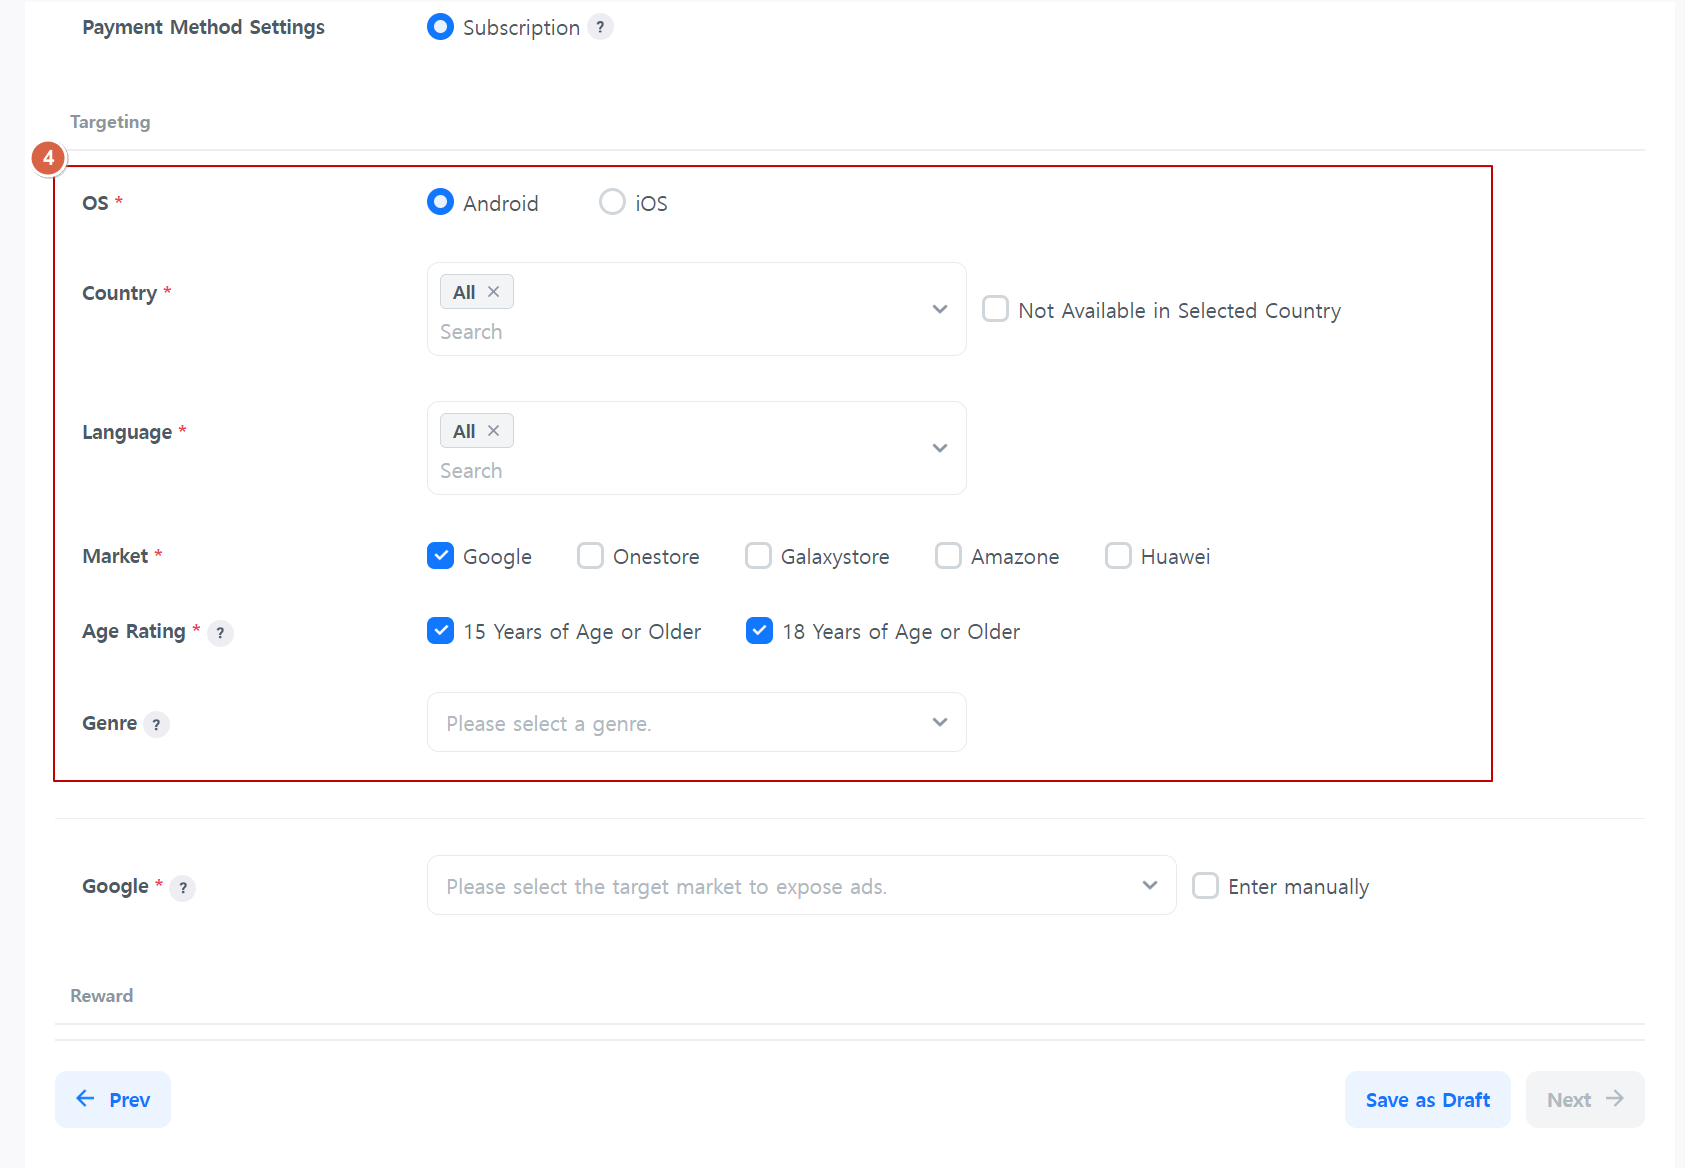
4.Targeting information
Select the target audience for your ad. You can set targeting information by country, OS, market, and language.
- You can set targeting information by country, OS, market, and language.
- The age rating should be equal to or higher than the age rating of the game you’re advertising.
For example, if you’re advertising a game rated for ages 12 and up, you can only advertise to users aged 12 and up, 15 and up, or 18 and up. - Genre is the only non-mandatory targeting option. Selecting a genre narrows the target audience but allows for more precise targeting.If you want to advertise to users playing a specific genre, use genre targeting.
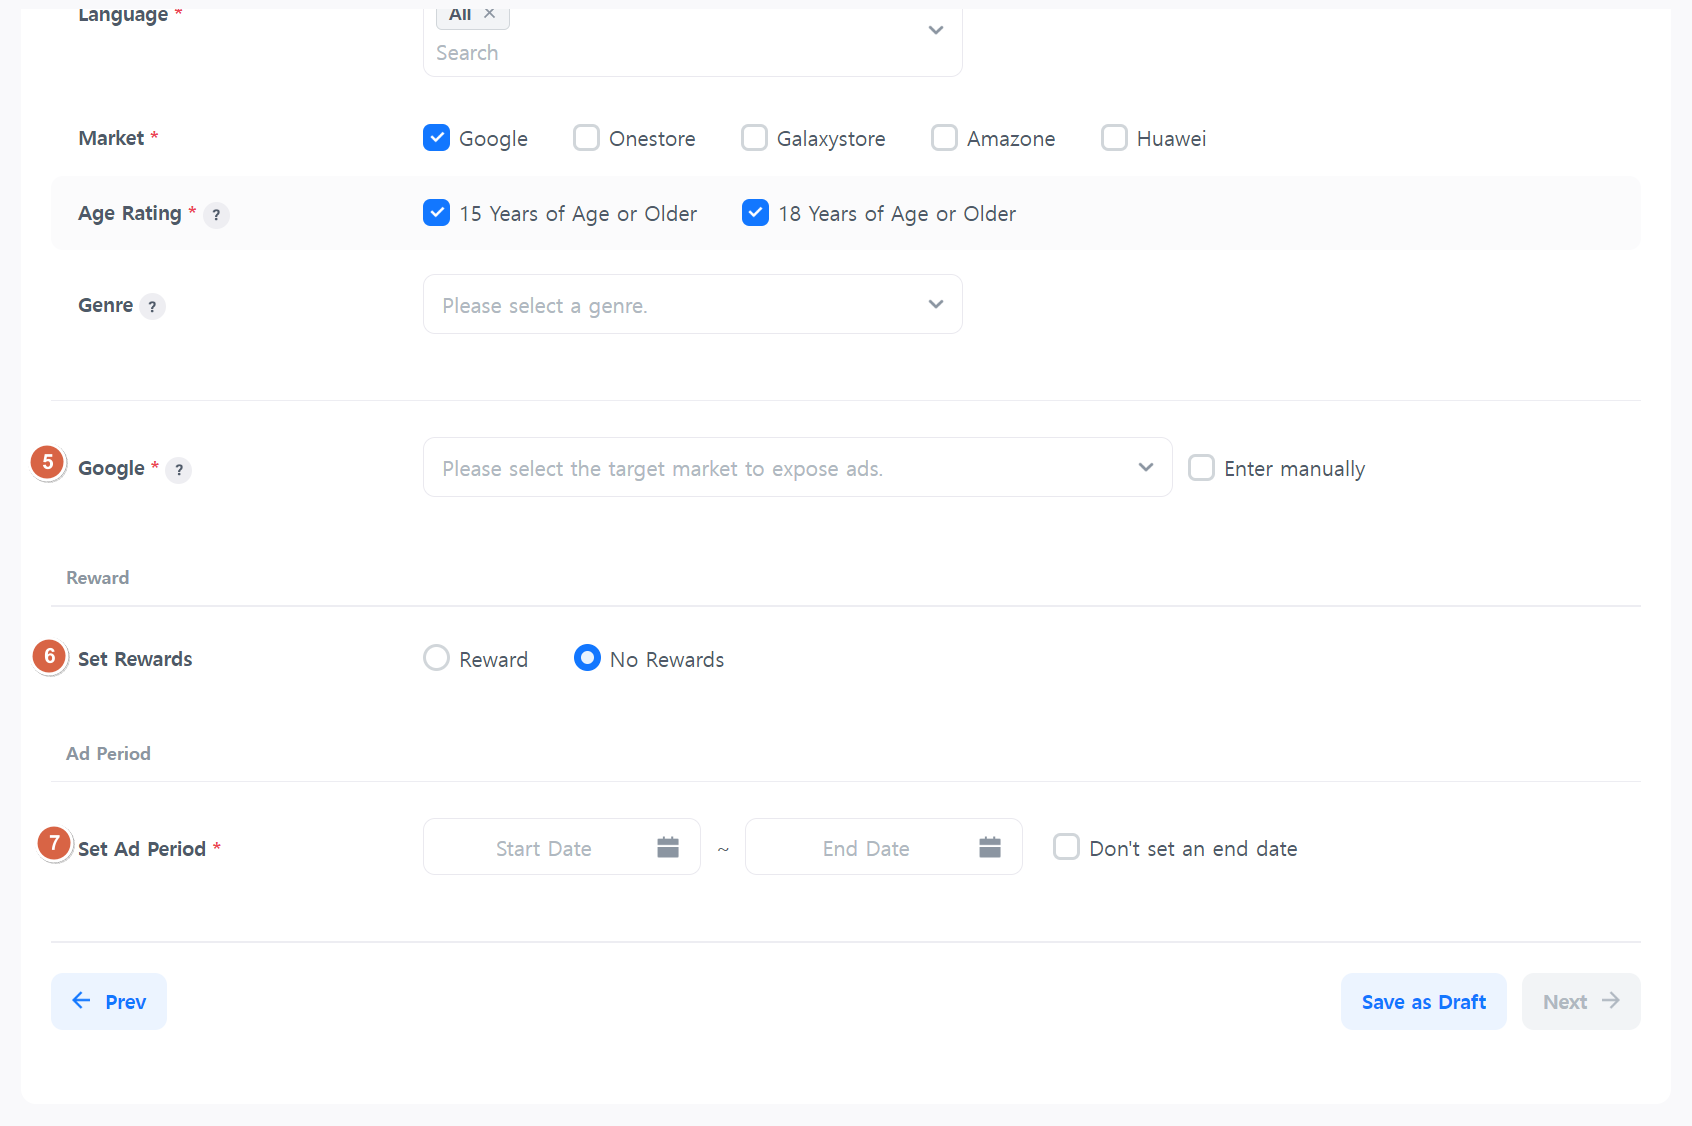
5. Market Link
Enter the market URL where users will be directed when they click on the ad. Depending on the selected market in the targeting section, input fields will appear accordingly.
You can select an app ID associated with the market link or enter a link manually.
6.Reward Settings
You can set whether to reward users when they install the app. The install reward amount should be specified in USD.
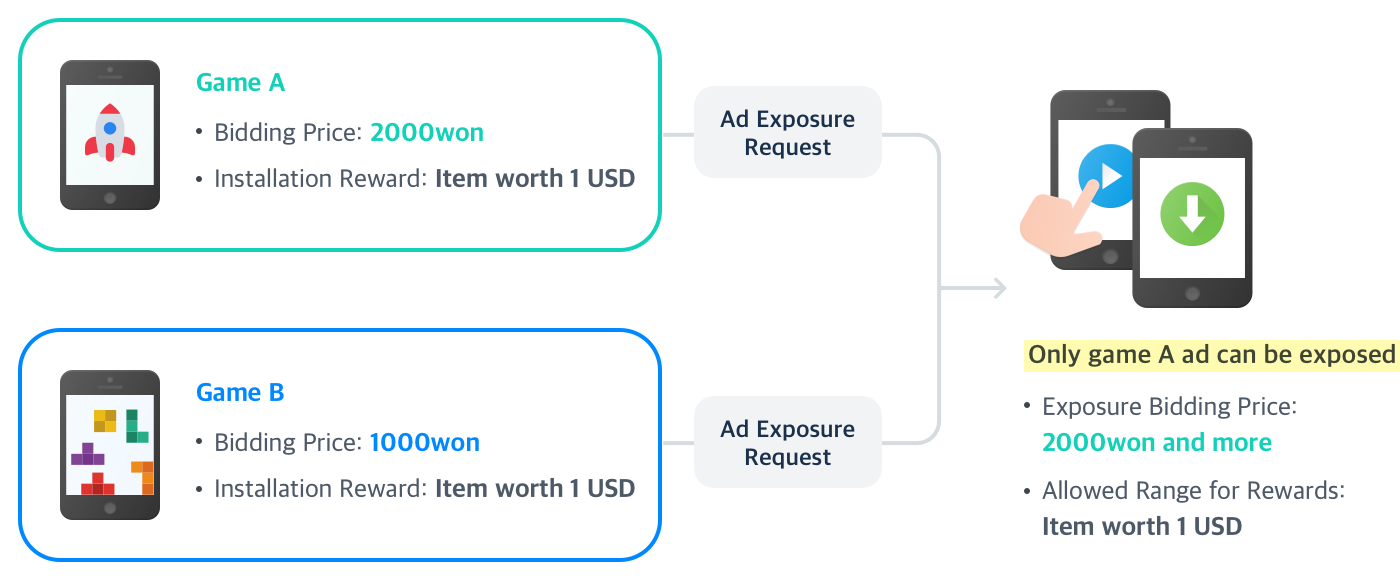
However, the reward is given by the party displaying the ad. Therefore, if the reward requested by the ad exceeds what the game can provide, the ad won’t be exposed.
Reward Ad Execution Conditions
When registering an ad, you can enter the installation reward amount and promote it to users through banner images. Ads will only be exposed in games that allow the reward amount required by the ad, and instead of providing rewards, the bidding criteria may increase.
7.Advertising Period
Set the ad duration. If you want the ad to run continuously without an end date, check the box labeled “Don’t set end date.”
When you click the “Next” button, the information you’ve entered for the ad set will be saved, and you will be directed to the ad registration page.
3.Register Ad
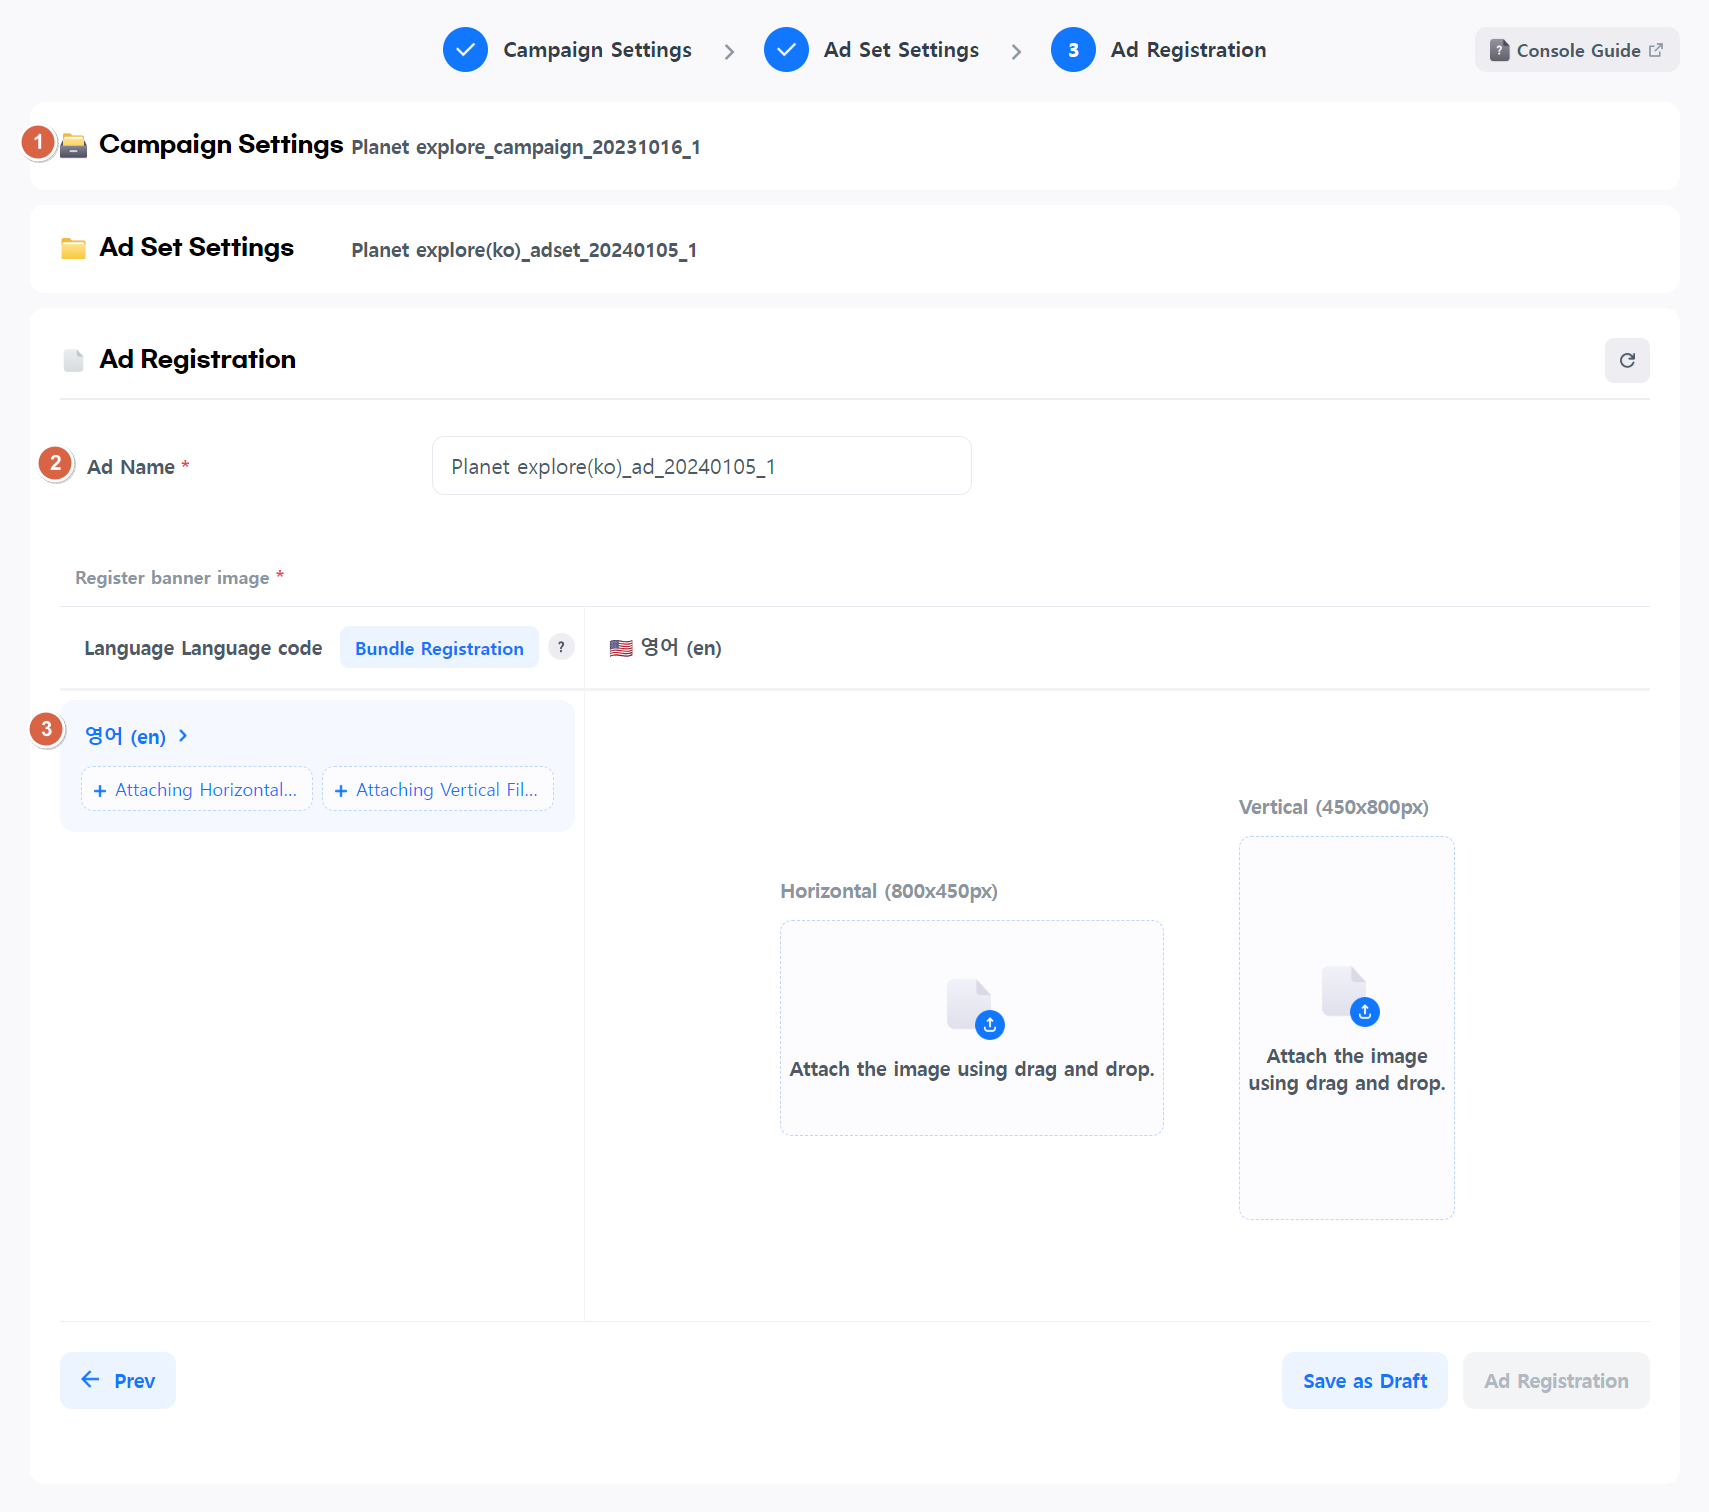
- You can see the parent campaign and ad set for the ad you want to register.
- The ad name is automatically generated. You can also enter an ad name you want.
- Set the ad image that will be displayed in the banner.
The image registration item is displayed depending on the targeting language selected in the parent ad set.
If you have filled in all the required fields, the “Register Ad” button will be activated.
Click the “Register Ad” button to complete the ad registration with your entered information.
You can move to the ad management page to check the newly created campaigns/ad sets/ads.
Common Features
Load
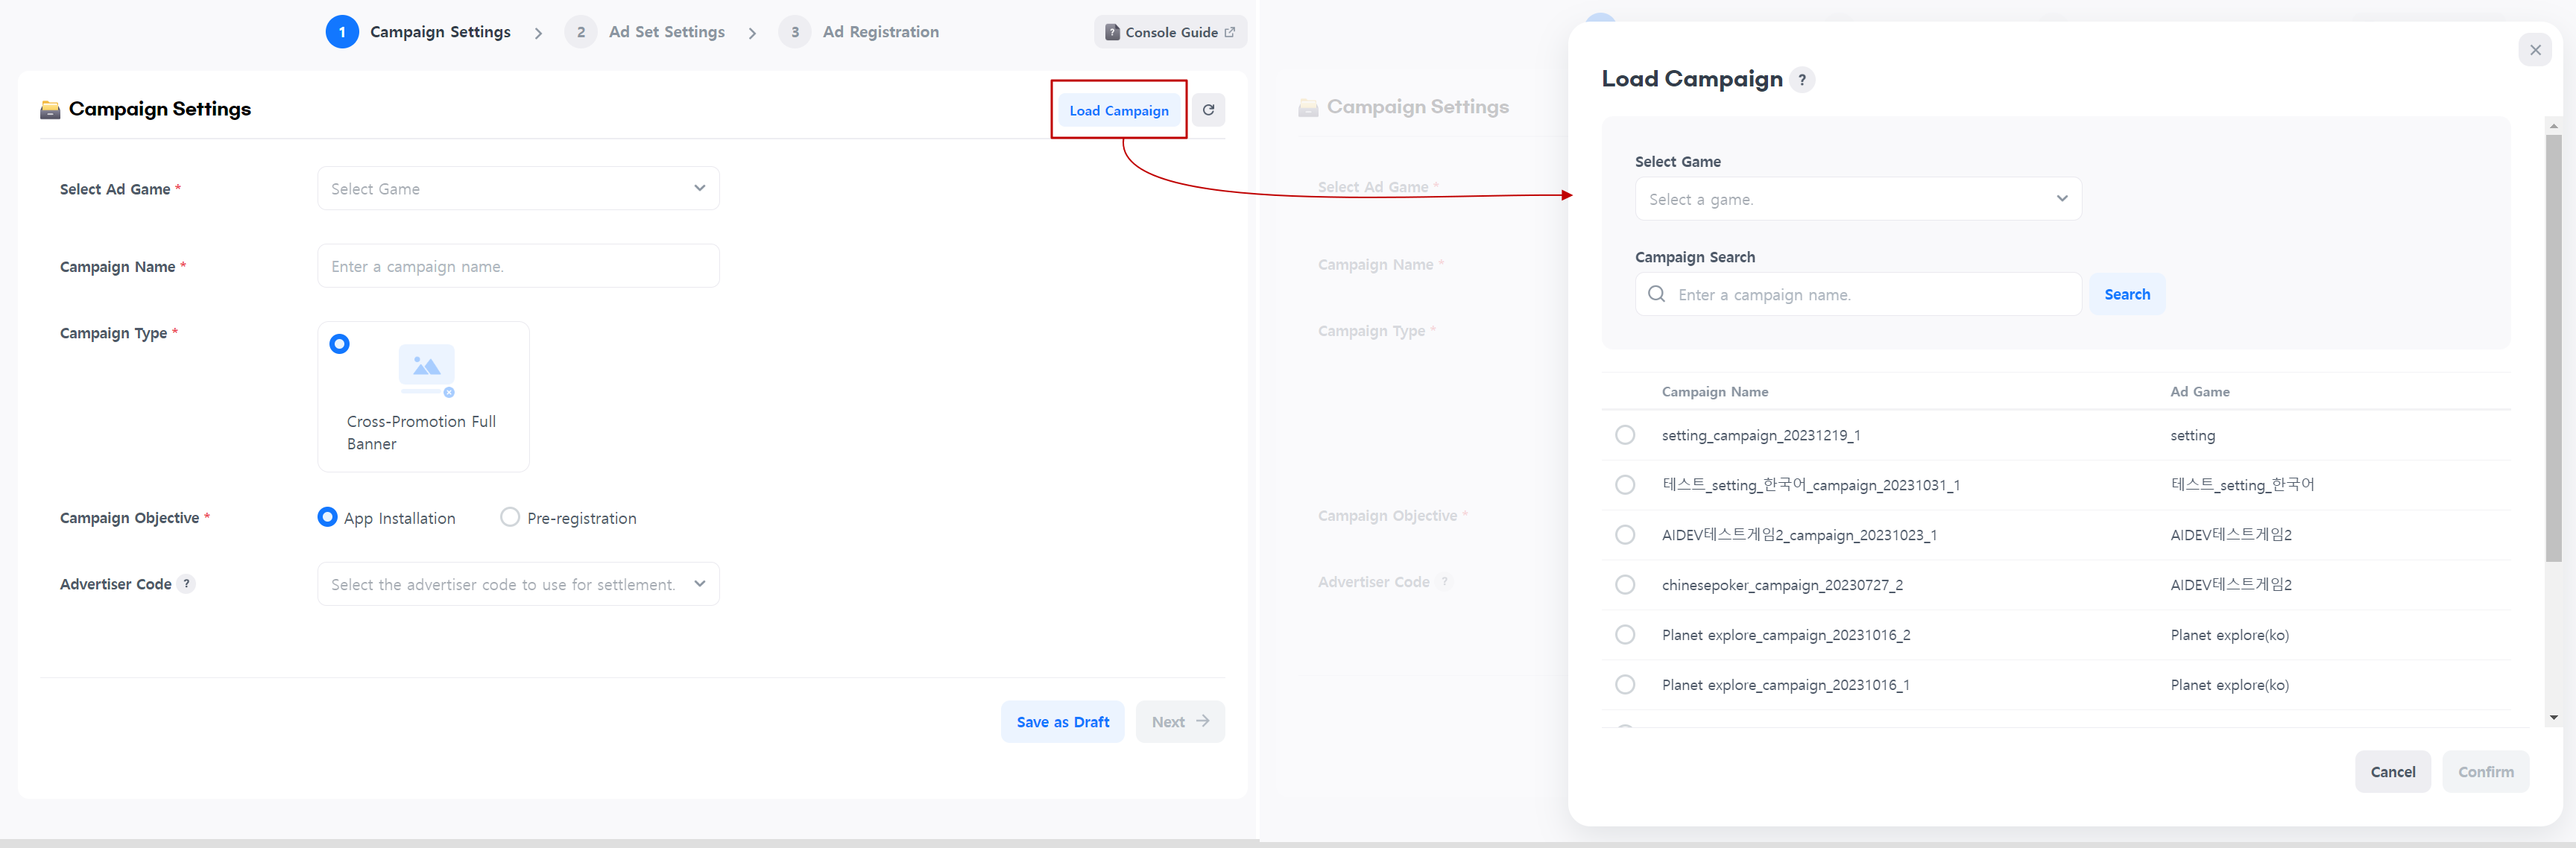
Click the “Load” button to select an existing campaign or ad set.
This feature allows you to skip redundant data entry and proceed directly to the next registration step.
You can add new ad sets to existing campaigns or new ads to existing ad sets through loading.
Reset
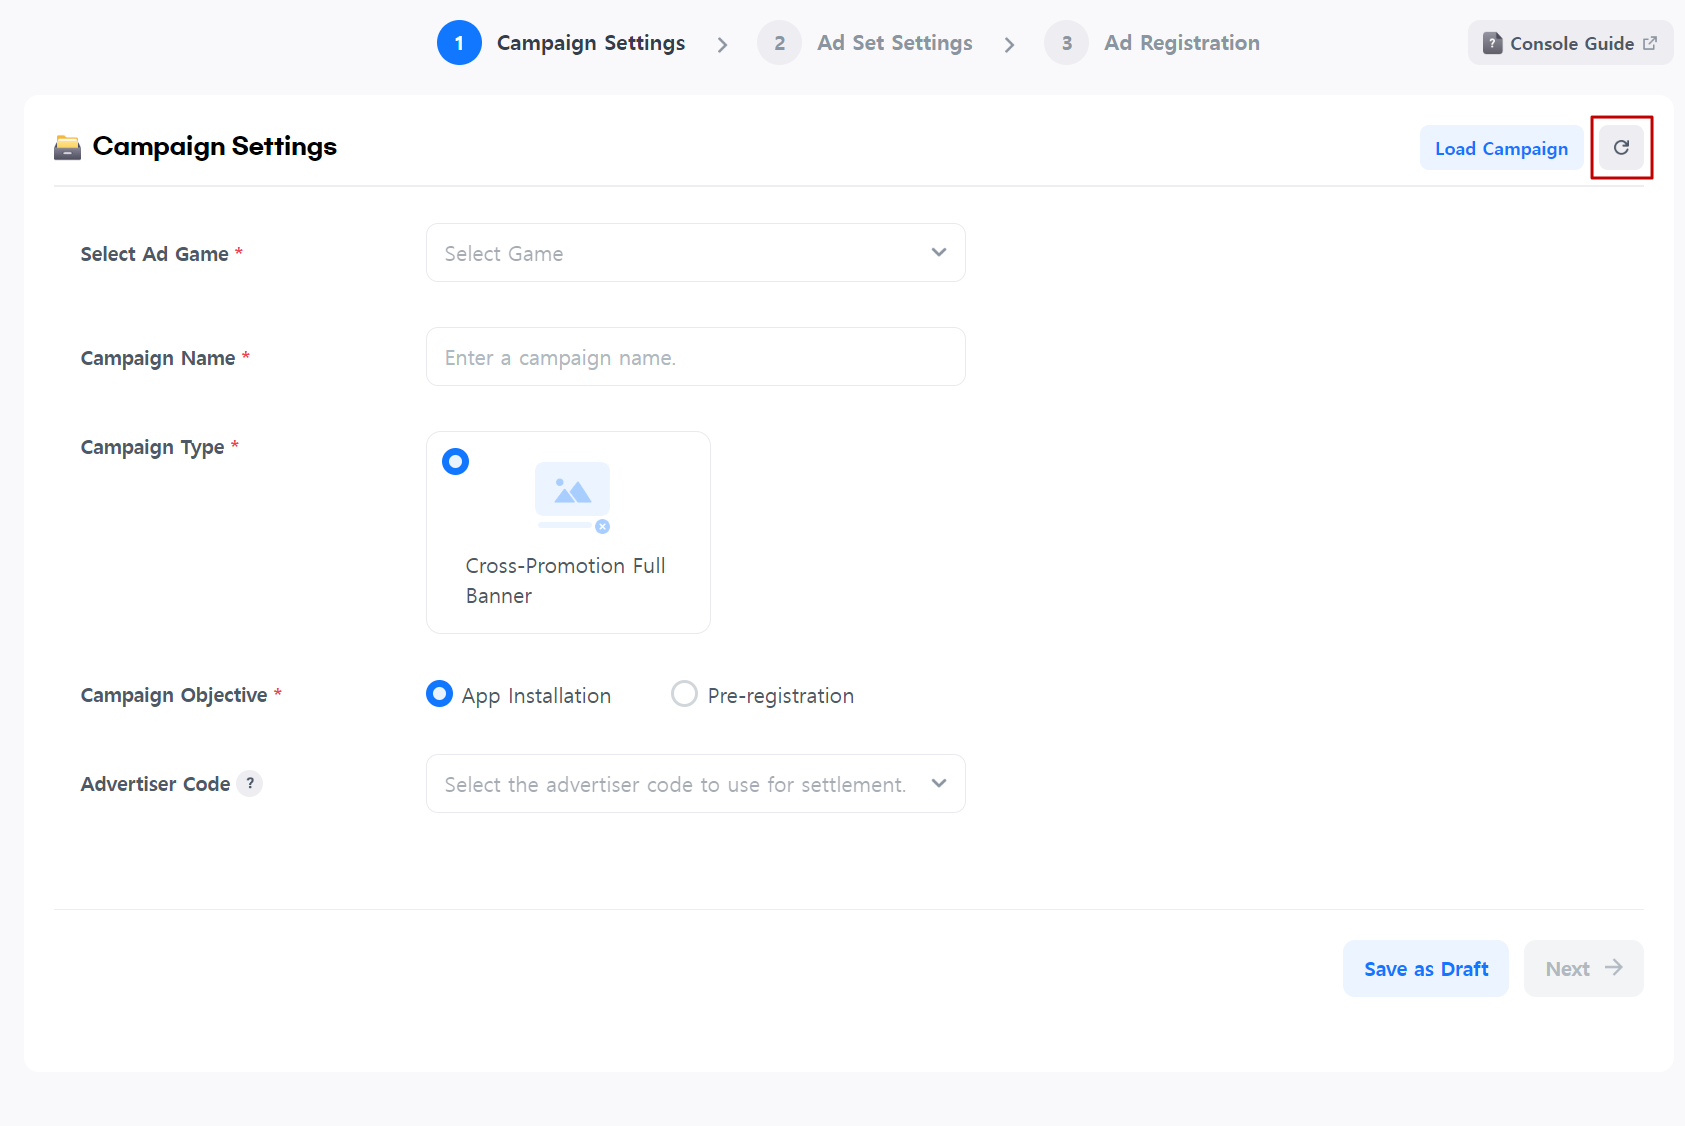
Click it to clear all the information you’ve entered and start over.
The requested loading will be canceled.
Save as Draft
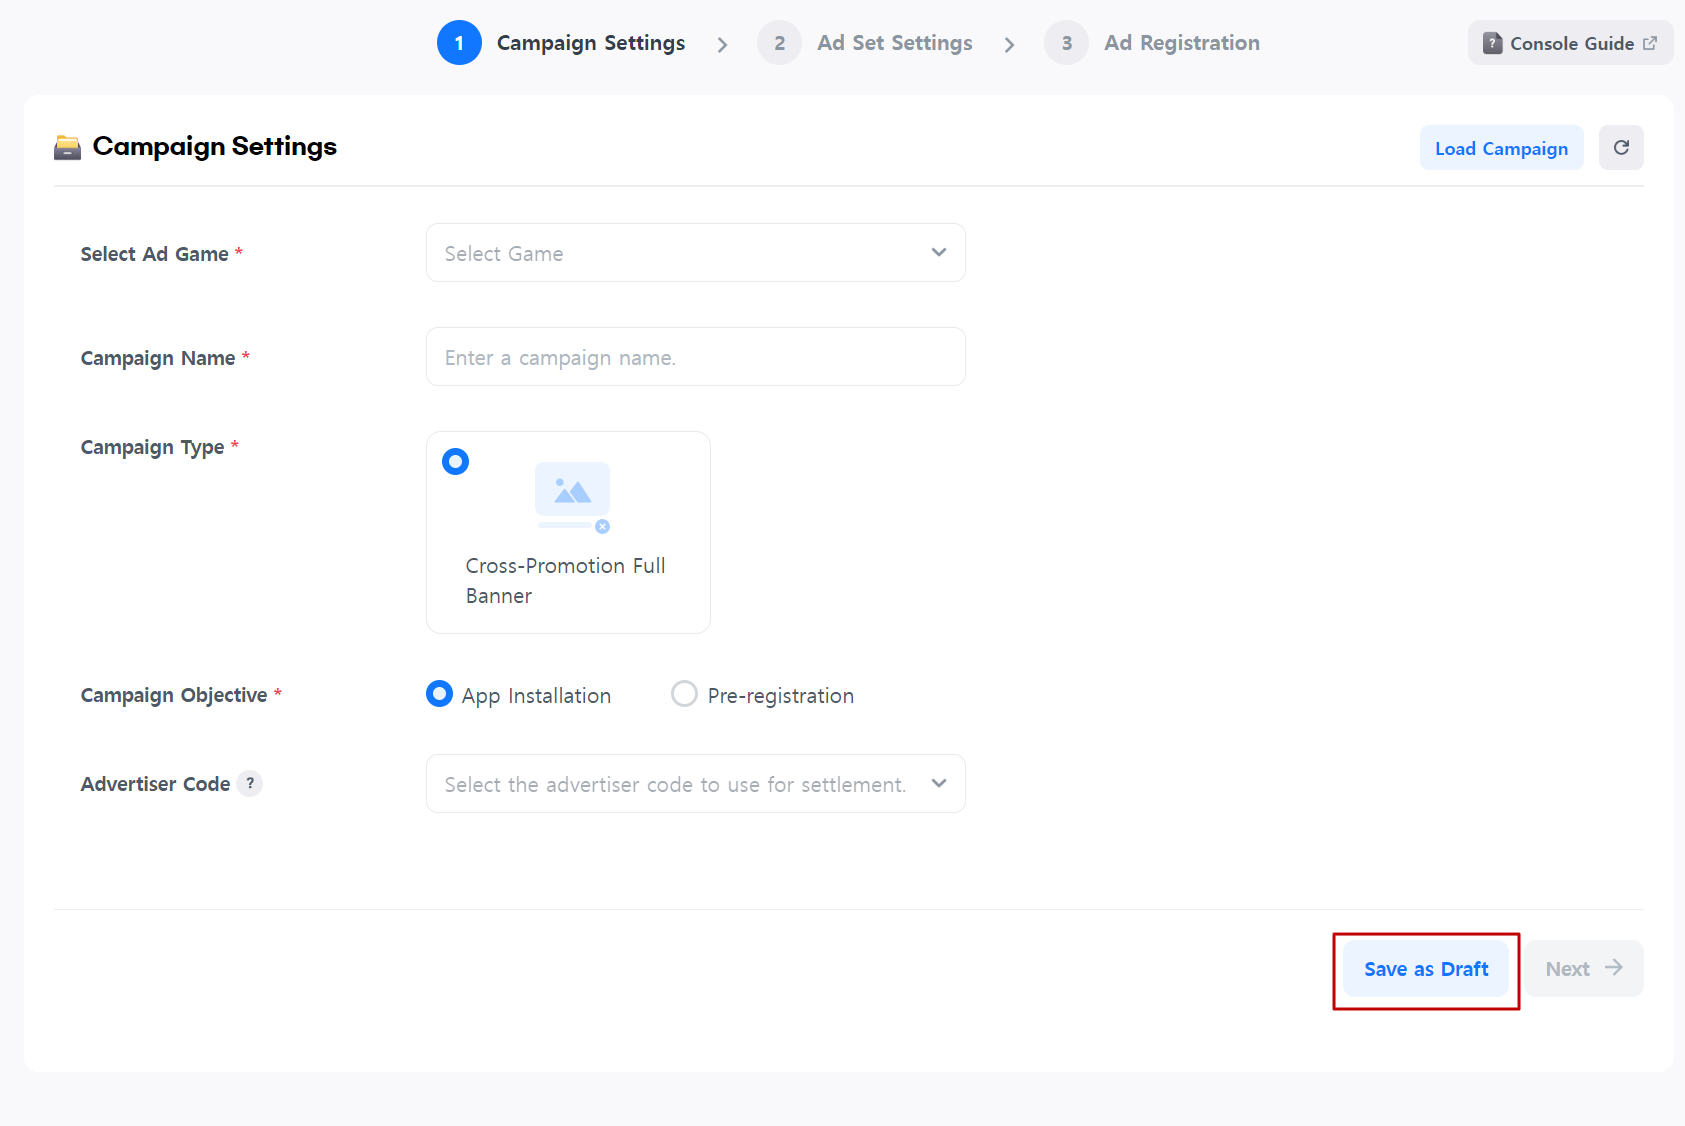
You can temporarily save the information you’ve entered.
If you save as draft, you can continue where you left off when you return to the ad registration page.
You can also view drafted posts in the Ad Management menu.