Keyword Monitoring System Guide
1. Register a community in the Community Settings Tab.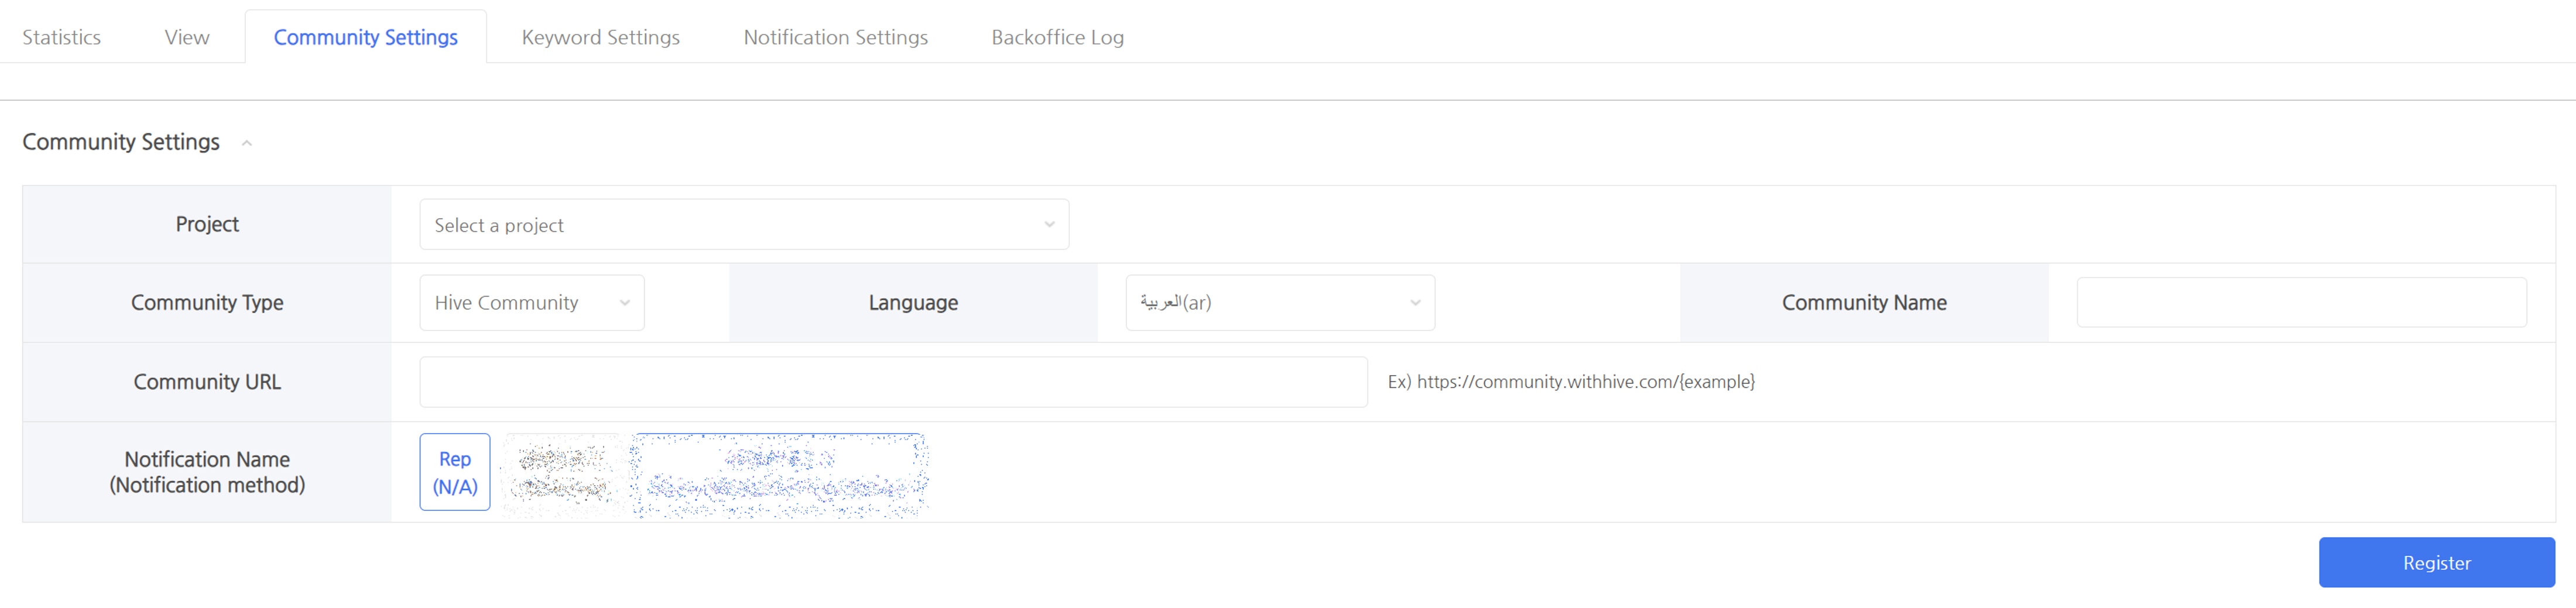
- Select a project. You can only use it if it’s registered in App Center.
- Select a community type and language. There are a total of 5 community types to choose from.
- Check the community name and edit it if necessary.
- In Community URL, enter a URL that matches the example URL format.
- If you are using a notification service, select Notifications. Please refer to number 3 for information on how to use the notification service.
- Click the Register Button to register the community you want to monitor. By default, it is activated upon registration, and can be deactivated if necessary.

2. If you want to add keywords other than those provided by default, you can add them in the Keyword Settings Tab.
- Select the priority of keywords. Priority is used as follows:
- Priority 1: Keywords related to complaints (e.g. no, not working, impossible)
- Priority 2: Keywords for the subject of the complaint (e.g. server, Android, etc.)
- Select the language for your keywords.
- Select text color and background color to distinguish text.
- Enter keywords. Multiple keywords can be entered at the same time separated by ,.
- Click the Register Button to add keywords.
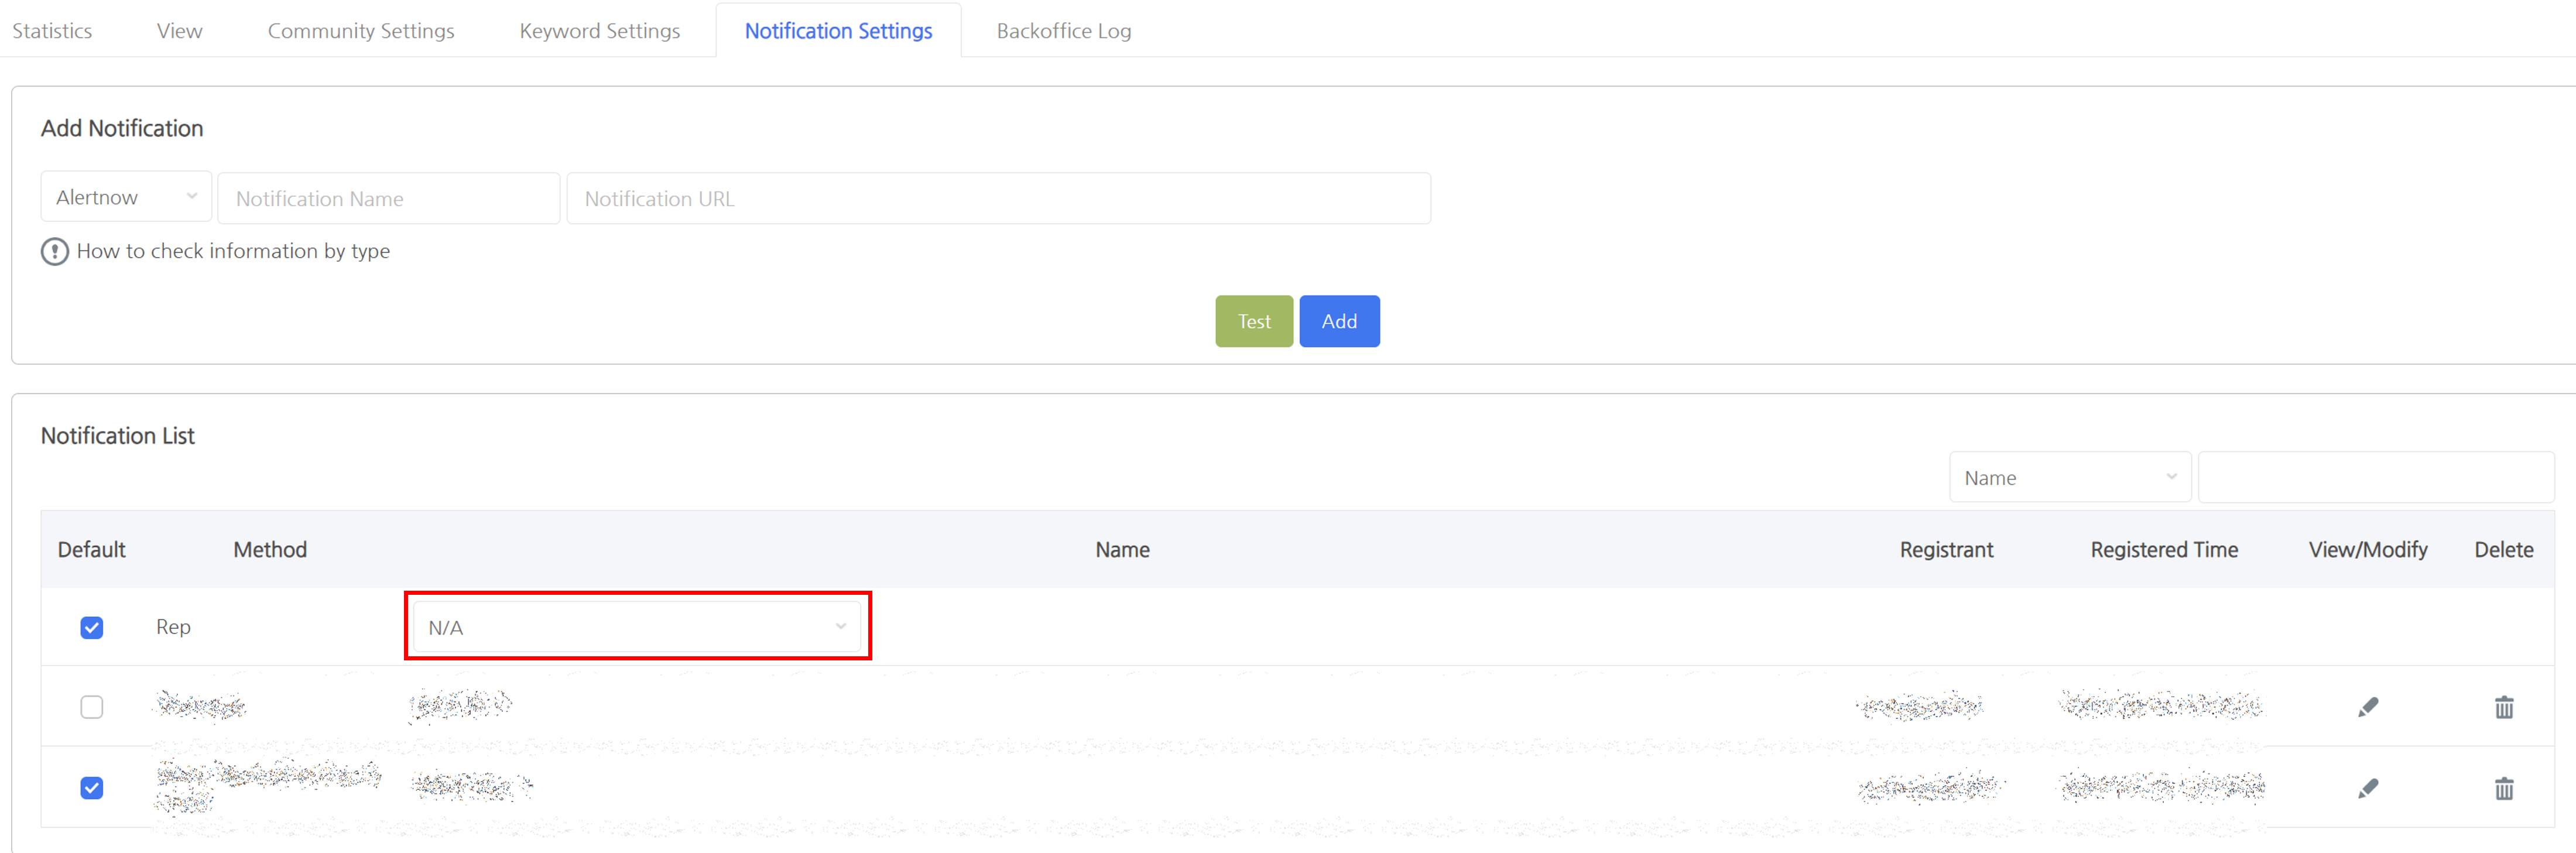
3. If you want to use the notification service, you can use it after registering the notification service in the Notification Settings Tab.
- Select a notification method. Enter a notification name to distinguish the notification.
- Check notification receive method in information check method per type.
- Enter the notification URL (bot token and chat ID for Telegram).
- Test to see if notifications work properly.
- Click the Add Button to add a notification.
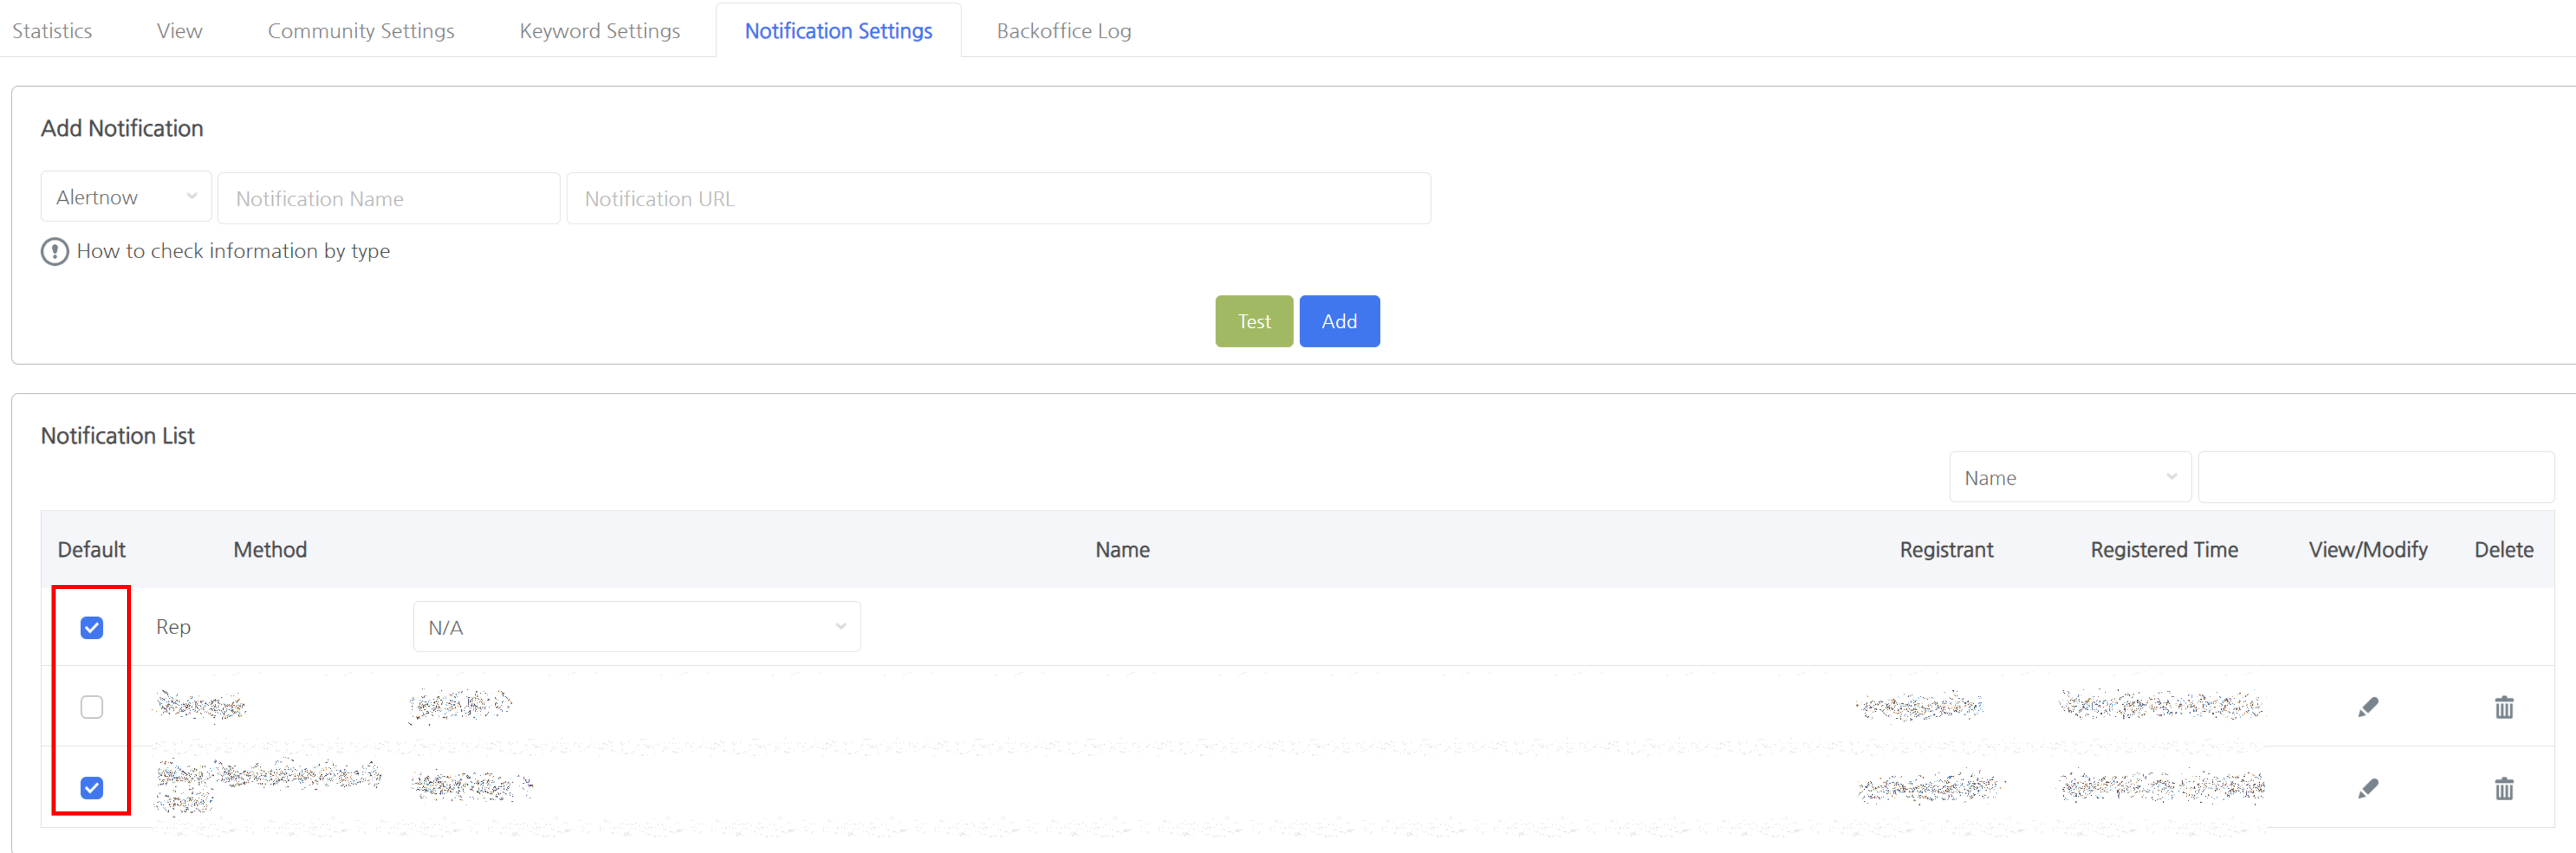
- If you want to automatically select notifications when registering a community, select Default in the table below.
- If you want to register a representative notification, change the name of the row where the method is “Representative” in the bottom table. The default is None, and you can select one of the registered notifications.