Campaign Registration
A Interstitial Banner is the first banner that’s displayed when you run the game. A Normal Banner is the banner that’s displayed on the event area of the News. Rolling banners are customizable banners that can be displayed in the desired location in the game. The only difference between the Interstitial Banner and Normal Banner is their size, and the campaign registration process is the same for both. The campaign registration process has been written based on Interstitial Banners as follows.
Basic Settings
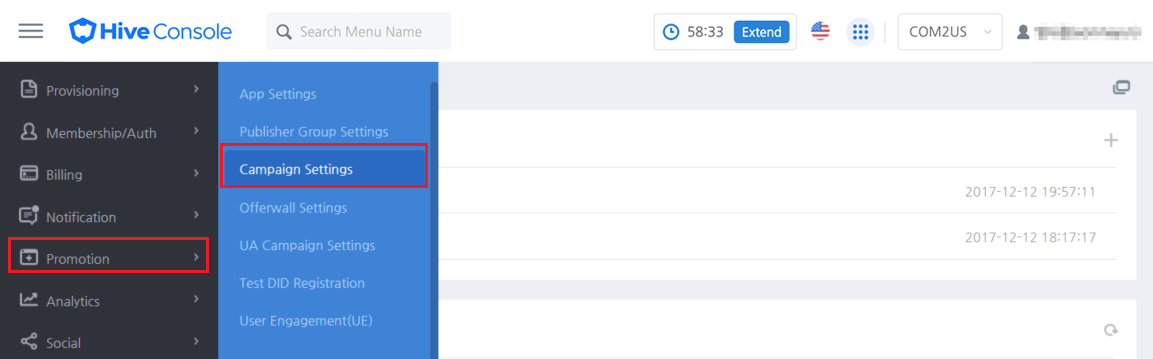
- Click on the Promotion-> Event Campaign -> Campaign Registration.
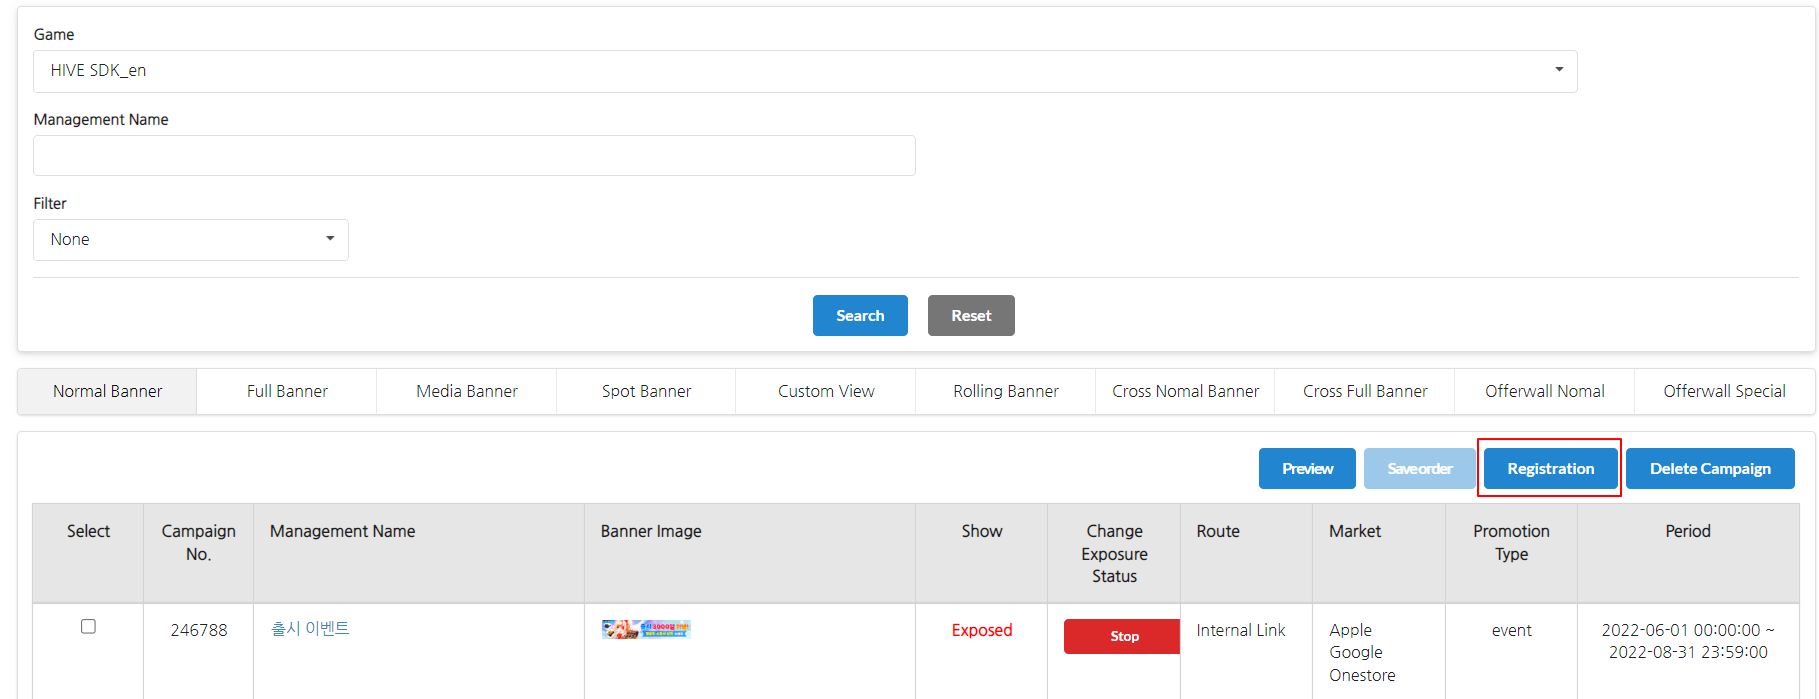
- Select a game to register to the campaign -> click on the Normal Banner Tab -> click Registration Button.
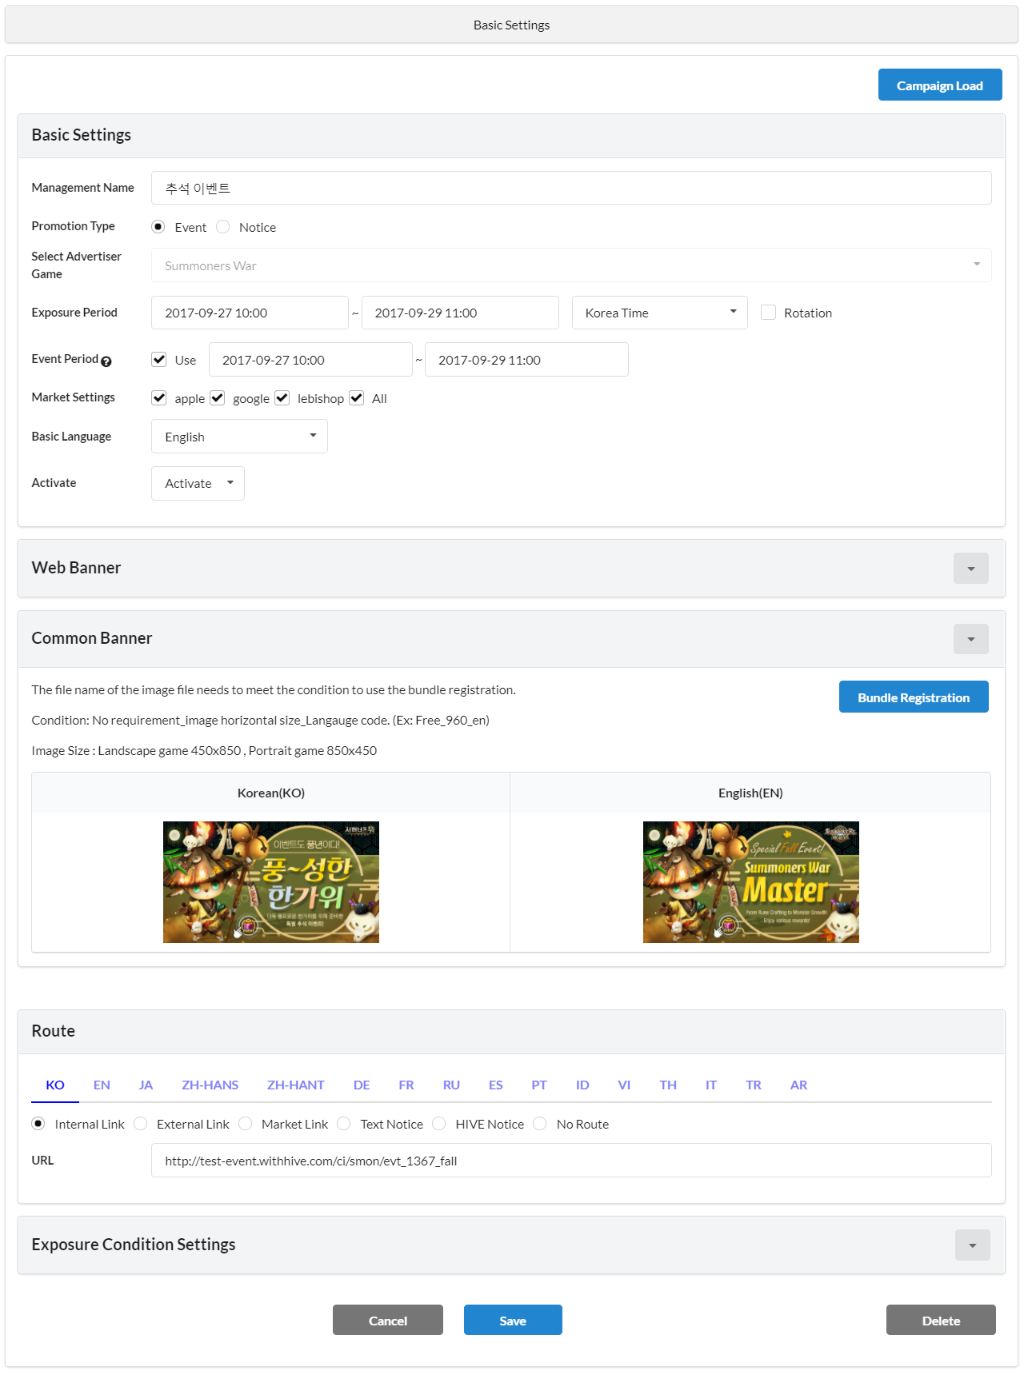
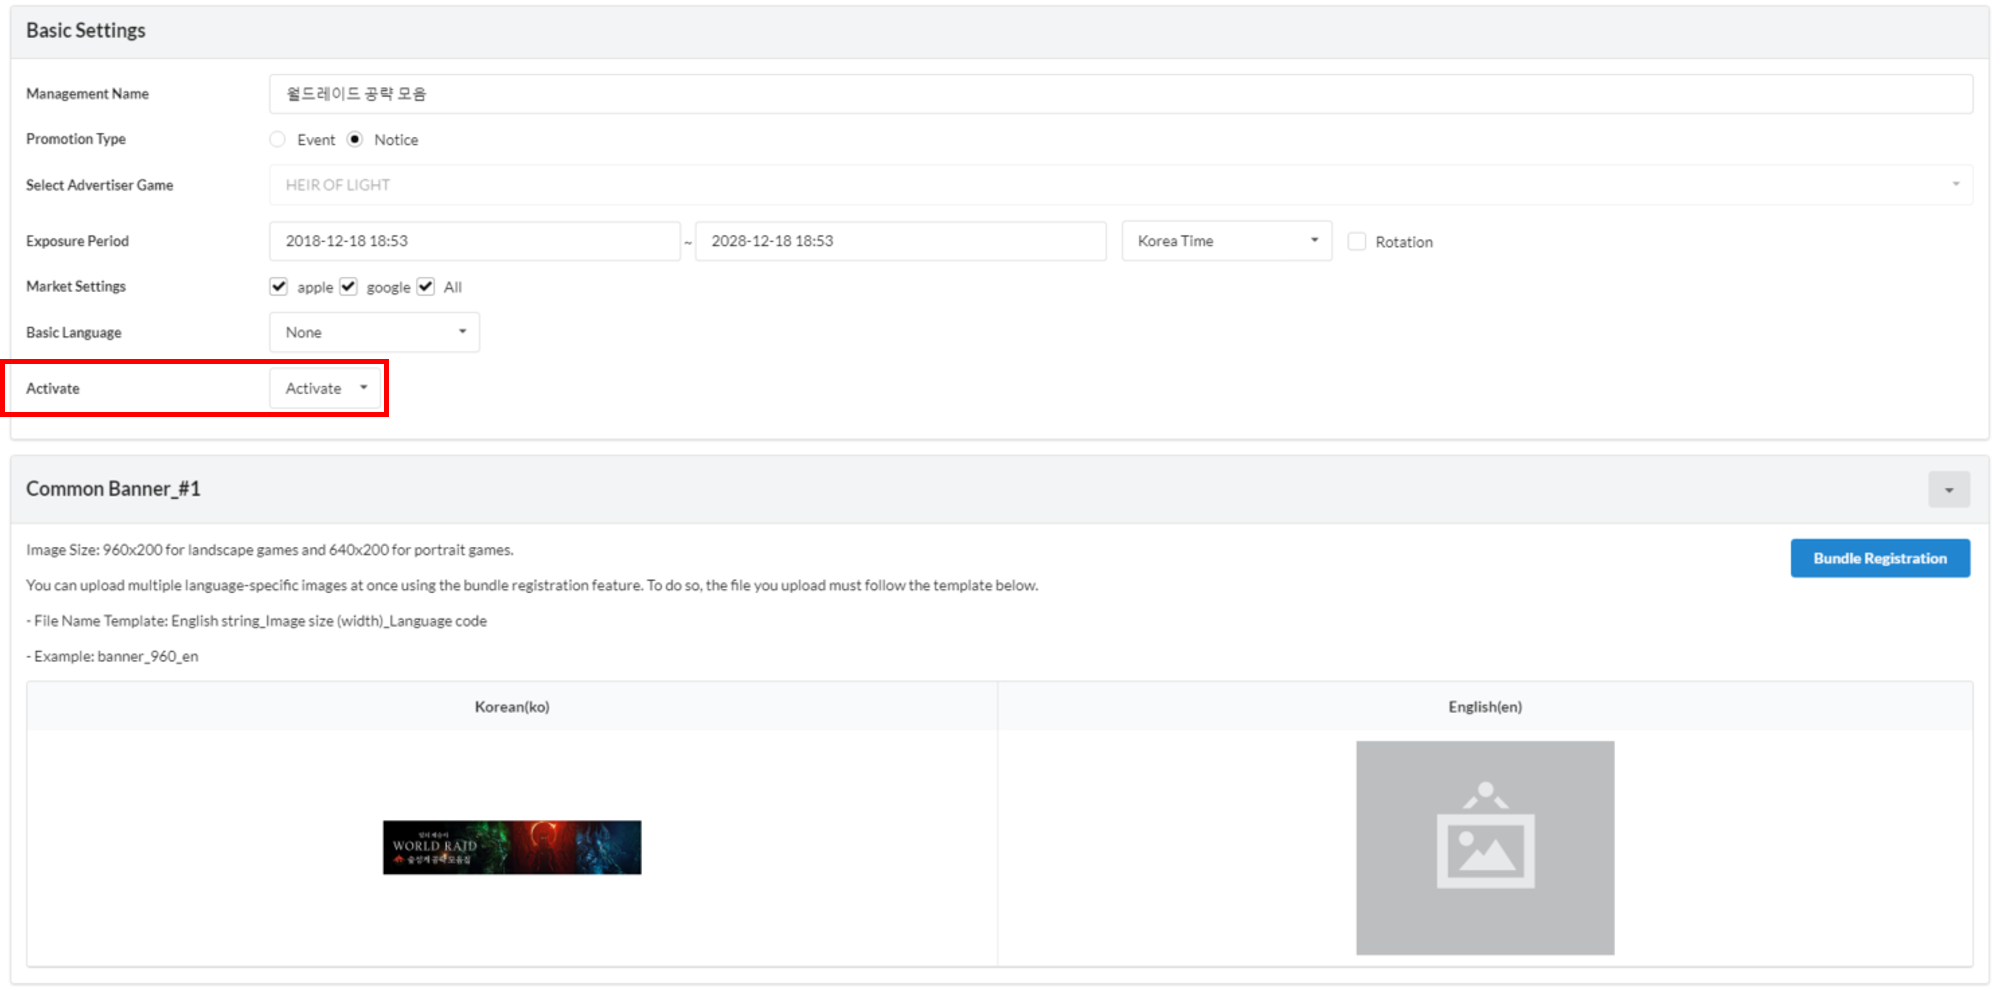
- Enter the campaign info on Basic Settings.
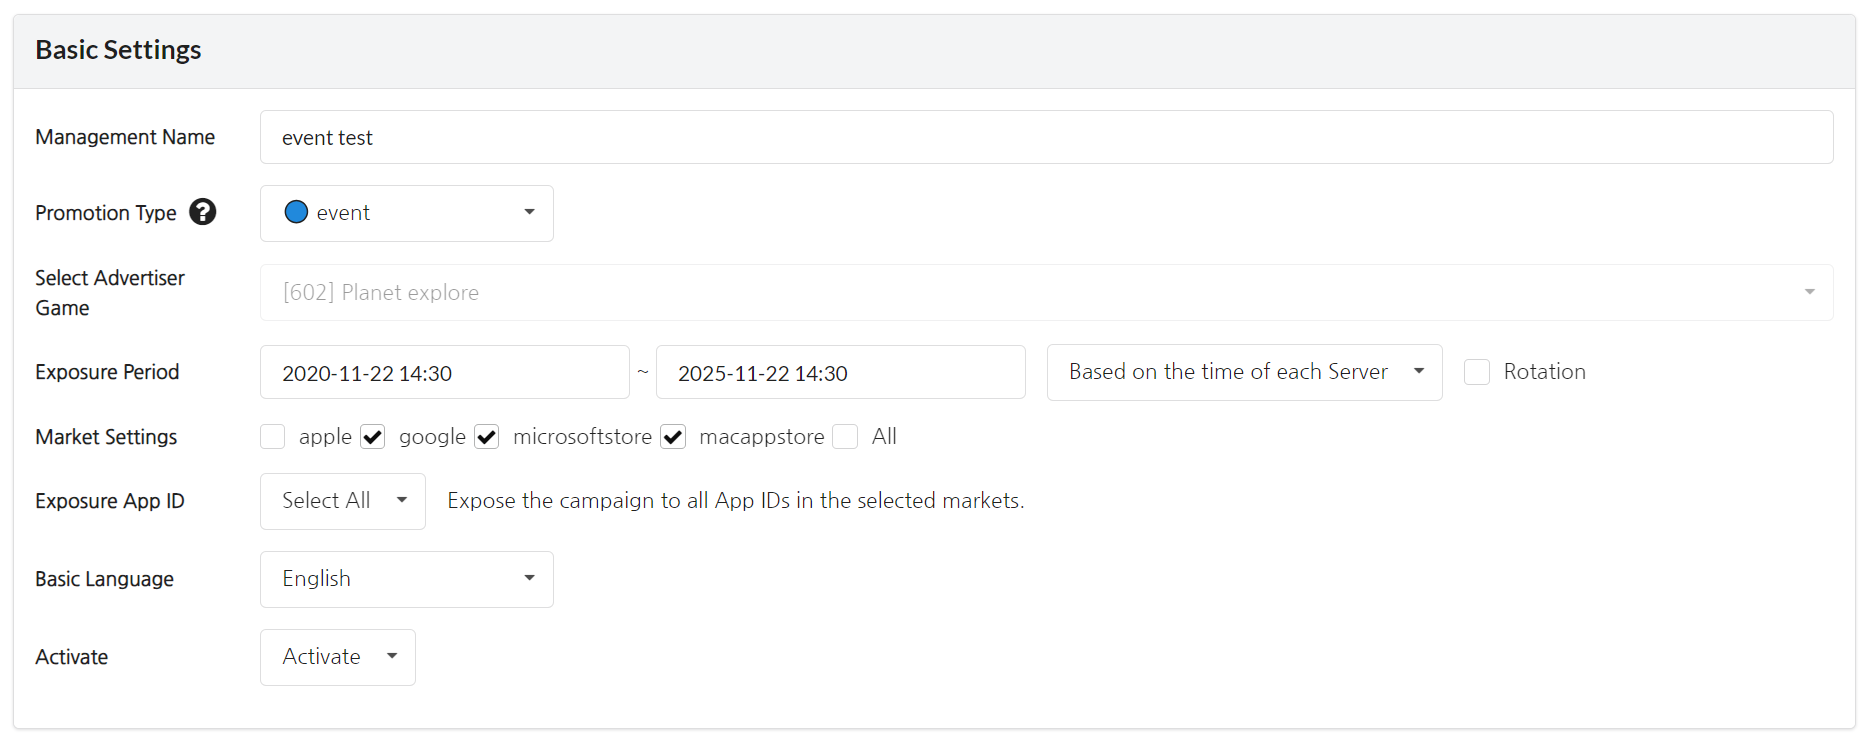
- Management Name : Enter a title that describes the campaign.
- Promotion Type: From Improved News, general banners can be separated and displayed in News menu according to the promotion type name. You can add types by clicking [Add Menu] in App Settings > UI Settings >Improved News UI Settings.
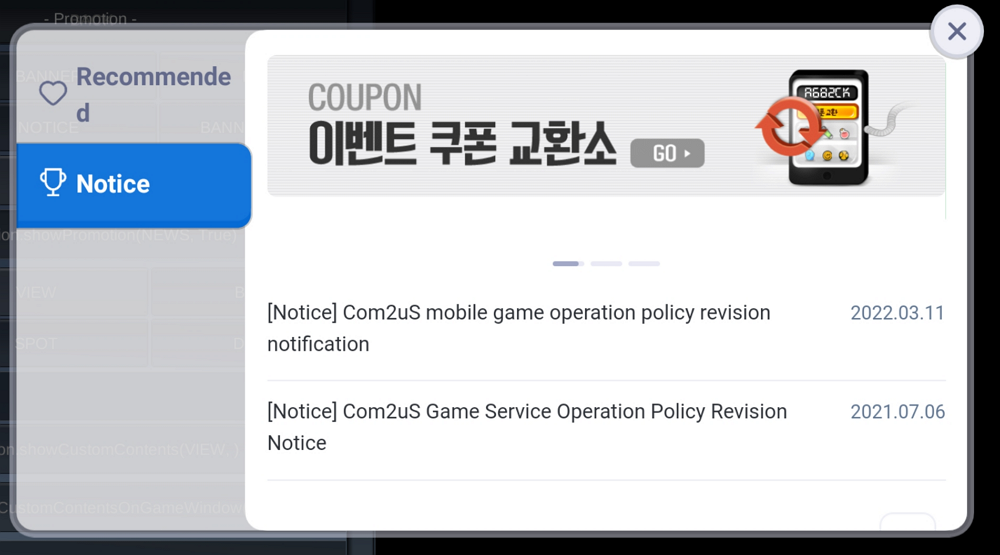
- event: It’s a promotion type name of banners to be used as event banners.
- notice: When customizing and configuring an event banner UI through the direct banner, only the banner set as the Notice type can be used.
- iOSvalidation: When setting drop rate banner for iOS review, please set the promotion type name as “iOSvalidation” and register. Only iOS validation type banners will be exposed when changing to the validating status.
- notice_special : banner is only exposed at the top of the notice list. You can register the image banner to highlight specific notices.
- ”notice_special’ banner can only be set as a link to Hive notices.
- Special banners are displayed in a rolling form when two or more are registered. Up to three are exposed by the campaign order set in the console.
- notice_special Banner Example Screen
- Exposure Period : Choose how long you want the banner to be exposed. You can set the period for each server if you’ve registered the server info at App Settings.
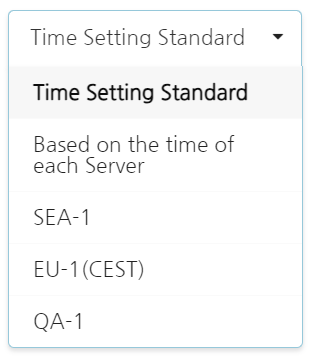
- Time Setting Standard: Set up the exposure period by selecting a time zone.
- Time per Server: The campaign period will be exposed based on the standard time of each server.
- A particular server: The selected server becomes the reference time. If you select a US-1 Server, the campaign period will be set based on this server time. For example, if US-1 Server is set as GMT -8, and the campaign is set to start at 3pm, then the campaign will begin when the timezone of GMT -8 is at 3pm.
 ←Example of a Server Option
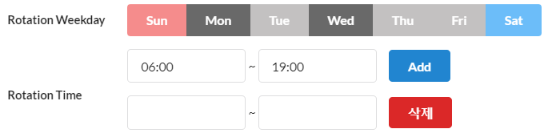
- Rotation: You can set a recurring time for a specific day of the campaign. Multiple days of the week can be selected, and recurring times can also be set in multiple intervals. For example, if you set up like the image below, it will only be displayed on every Monday and Wednesday from 6am to 7pm during the campaign period.
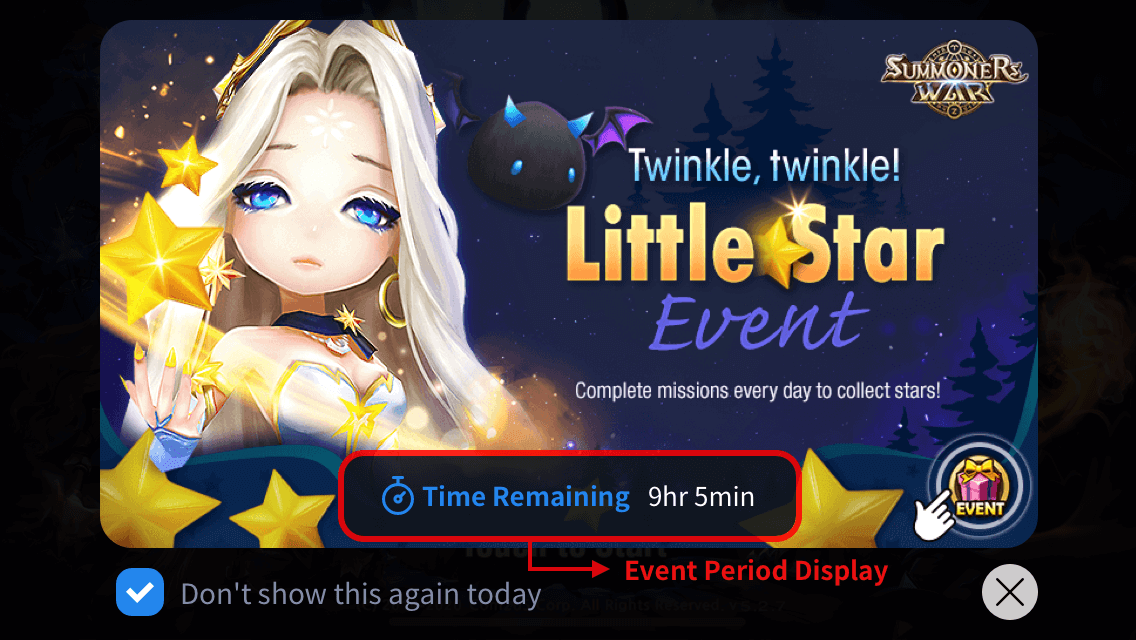
- Event period: It displays the remaining event time of event banners. The remaing event period can be displayed in a total of 16 languages, and please make sure to set it up based on Korea Standard Time (KST). This feature only supports the Interstitial Banners, and when designing the banner, please be sure to take into account that the lower area of the banners will be covered and may not be shown.
[Example – Interstitial Banner with Event Period Display]
- Market Settings: Select a market to expose the campaign on.
- App ID Settings: Select the App ID to display the campaign.
- Select All : Expose the campaign to all App IDs in the selected markets.
- Select Manually : You can display campaigns by specifying an App ID.
- Basic Language: Select a method to use for languages which you didn’t register the banner for. Banners won’t be displayed if you select “None”. If you select one of 16 languages, the banner for the selected language will be displayed. Please refer to Basic language Settings Example for more info on the basic language.
- Activate: Decide whether to display the campaign or not.
- Activate: Save the campaign as to be displayed. If the starting time of the campaign is earlier than when it was created, it will be displayed in the game right away. If the starting time of the campaign is later than its creation time, the campaign won’t be displayed instantly but will be displayed after the starting time.
- Deactivate: Save the campaign as not to be displayed. It won’t be displayed regardless of the campaign’s starting time, and you need to change it to Activate from the campaign list or campaign modificaiton screen in order to display.
Banner Settings
You can use the Web Banner or register multiple banner images. For banner images, you can register them all at once or one by one. Basic languages of the banners that are registered at Basic Settings must be registered. You can only set up a route for banners you’ve registered languages for.
- Promotion Interstitial Banner Image Size (Recommended)
- 1080×720 for landscape games and 720×1080 for portrait games.
- Please create the banner as a double-size image and register it if you want to display a high-resolution banner in a PC environment.
1. Bundle Registration
Click on Bundle Registration to register multiple banners at once, and you must follow the file naming rules in this case. Also, please note that banners won’t be displayed properly if you use an apostrophe, which is one of the special characters. There will be no restrictions on image file formats, but 300k or less capacity is recommended taking into account global users in a slower network environment.

- File naming rule: ~_banner width_language code(ex. Ace Fishing_640_ko)
- Language Code: You can also check the language codes in English with English displayed in parenthesis.
| language | code | language | code |
| Korean | ko | English | en |
| Janpanese | ja | Chinese Simplified | zh-hans |
| Chinese Traditional | zh-hant | German | de |
| French | fr | Russian | ru |
| Spanish | es | Poruguese | pt |
| Indonesian | id | Arabic | ar |
| Vietnamese | vi | Thai | th |
| Italian | it | Turkish | tr |
2. Individual Registration
Click on each empty banner area to register. When registering individual banners. there will be no restrictions on naming the files, but the banners won’t be displayed properly if you use an apostrophe. There will be no restrictions on image file formats, but 300k or less capacity is recommended taking into account global users in a slower network environment.
3. Multiple Registration
To check which banners are most effective, you can register three banners in the same campaign. Banners that are registered multiple times in a single campaign are exposed randomly in one slot. For example, if you register A, B, and C banners in one campaign, you will see a random banner among A, B, and C in one banner slot. This feature is available only for interstitial banners and cross banners.
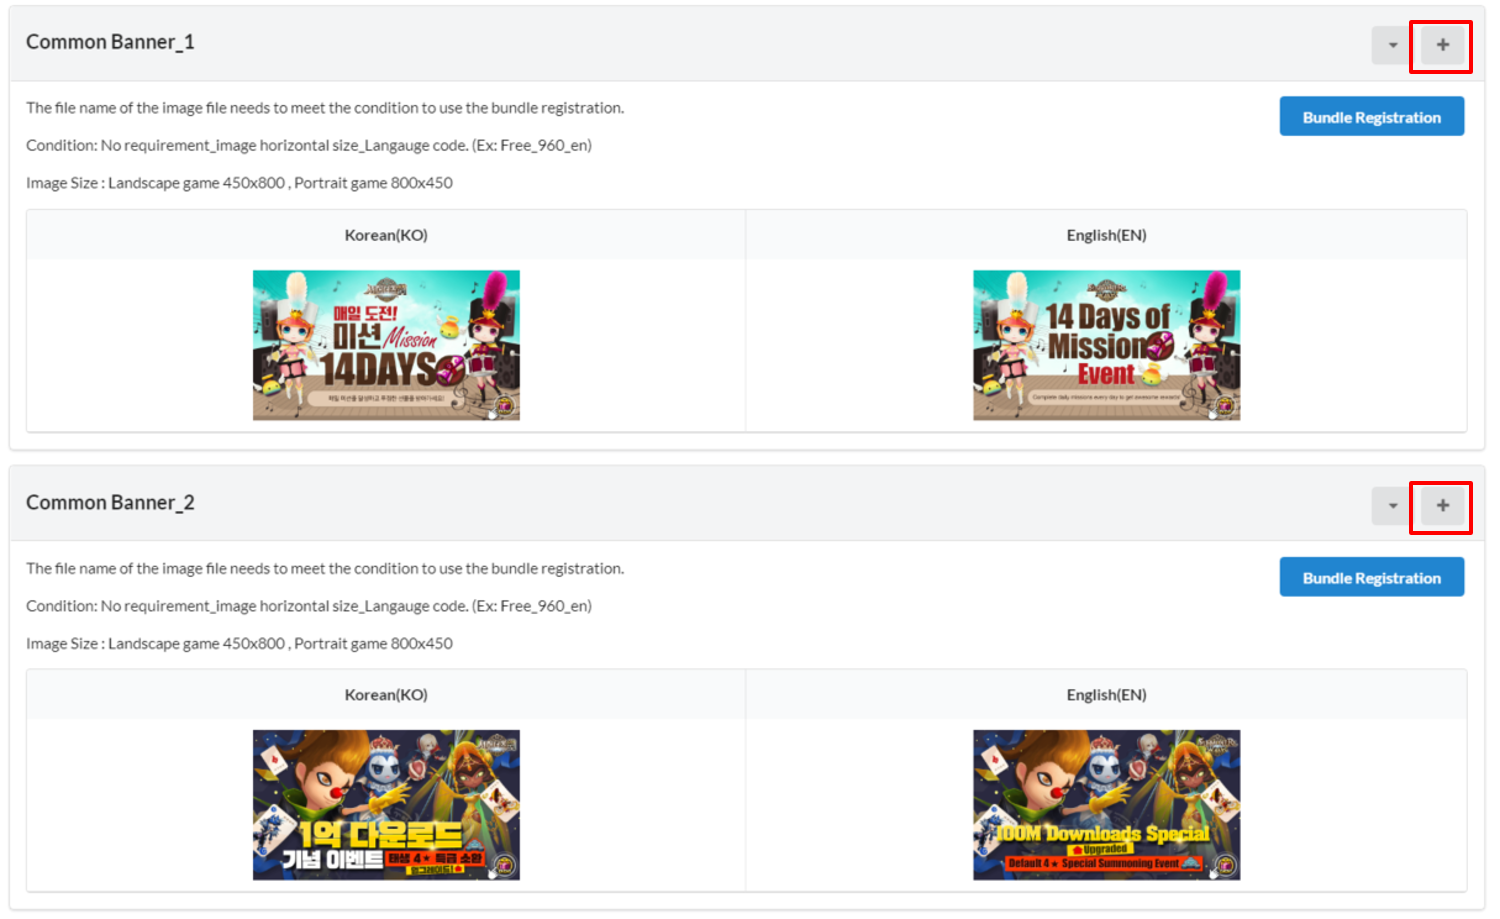
When registering banners, you can tap the + Button on the right to add a banner group and register the banner image of your choice. Common banner 1 and 2 are randomly exposed in the same slot when you register like the above.
4. Banner Deletion and Replacemen
If you click on the uploaded banner image, you can see the original image via a pop-up window. You can either click the Upload Button at the bottom to replace the banner, or click Delete to remove it.

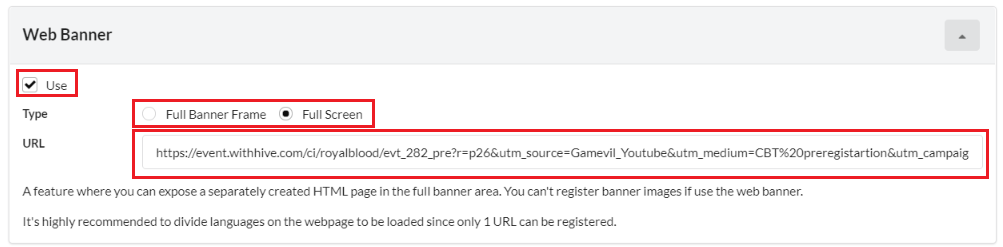
5. Register Web Banner
You can use Web Banners to expose external web pages, such as web animations created with HTML5 rather than images, directly to the banner area. Please make sure to check Web Banner Usage Process, test in advance, and register when using web banners. Since only one URL can be registered, the web page should support multiple languages. This feature is not supported for the rolling banner.
After checking the “Use” box, select the type of banner you want to expose and enter the URL. URLs must be entered in the form “https”. Http addresses may not be exposed properly on iOS.
- Interstitial Banner Frame Example
Displayed on the basic interstitial banner frame. The web page must be created to fit in the interstitial banner frame since scrolls do not work in the browser.
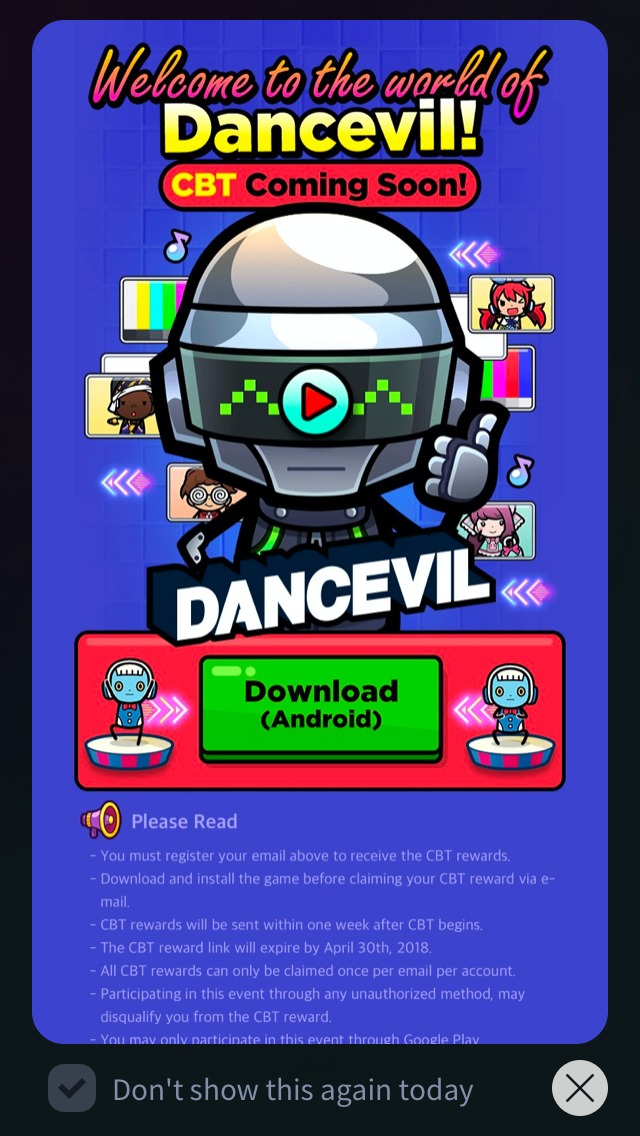
- Full Screen Example
Displays as the same as the custom view without using the banner frame.

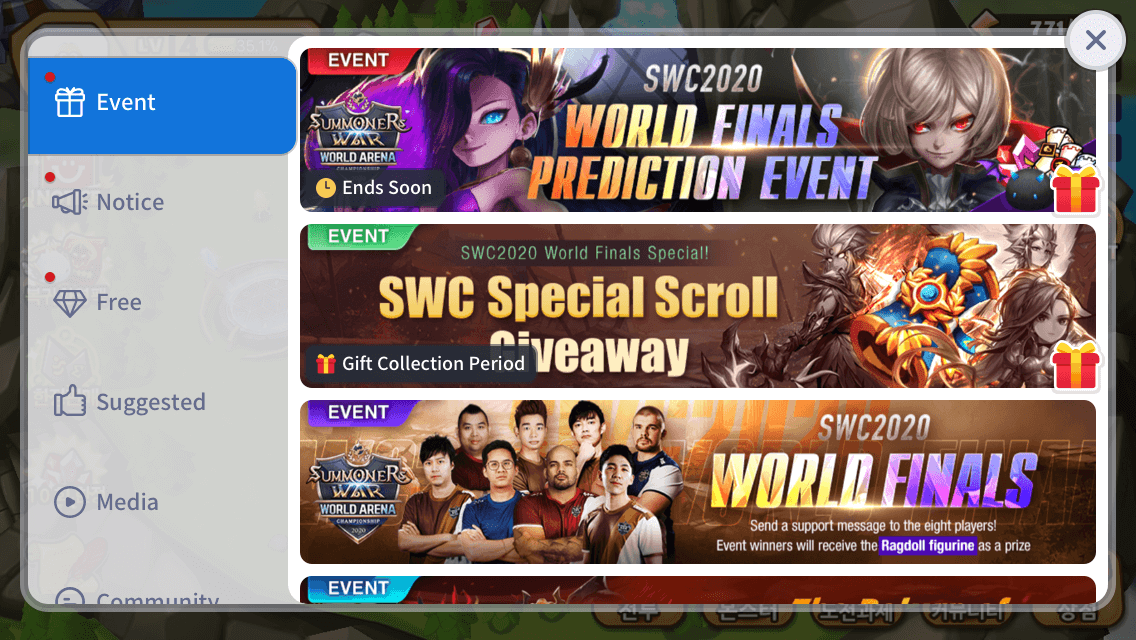
Period Notification Badge Settings
To warn you that the end is near or to let you know when you can accept gifts, you can put a badge on a general news banner.
Set the exposure time for each badge. The general banner’s bottom left corner has the badge revealed.
Hive SDK 4.16.4 or later version is required to access this feature.
![]()
-
End notification badge
- Expose the badge that says Ends Soon.
-
Gift receipt notification badge
- Expose the badge that says Gift Collection Period.
Route Settings
Enter the route to be moved to when you click on the image banner. You can select different types of route per language and you can only set up routes for the language of which the banner is registered. It won’t work even if you enter the route if you use the web banner.
1. Internal/External Link
- You can enter the URL for each language and you’ll be moved to the URL of basic language if you don’t enter the language. With the internal link, you’ll be moved to the page via the browser within the game without exiting the game. With the external link, you’ll be exiting the game by using an external browser app.
- Please include “https” when you enter a URL. (See the following example)
- https://www.withhive.com
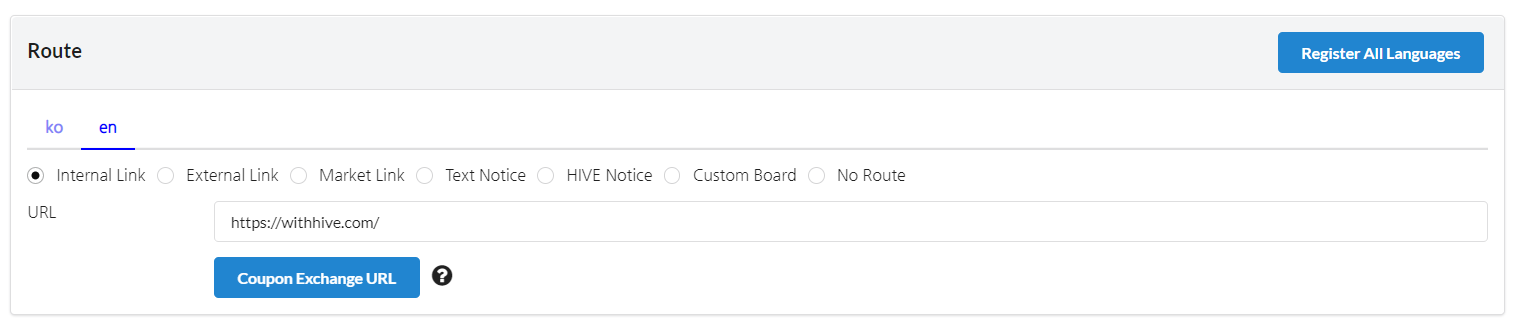
- https://www.withhive.com
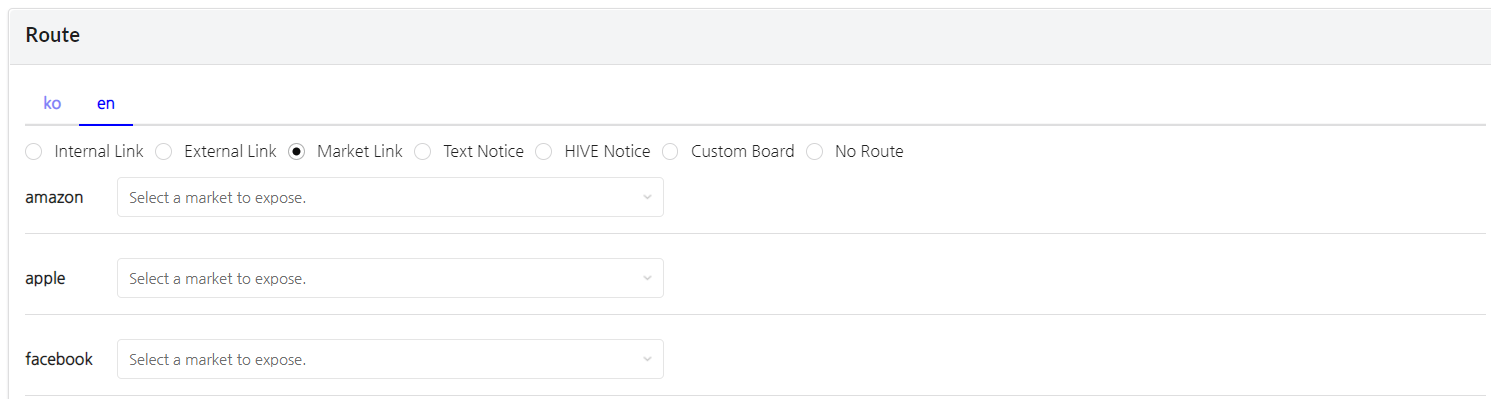
2. Market Link
You’ll be moved to the download URL registered to App Settings.
Two or more directional links can be set for each market. It determines the country according to the device IP and directs to the country-related link.
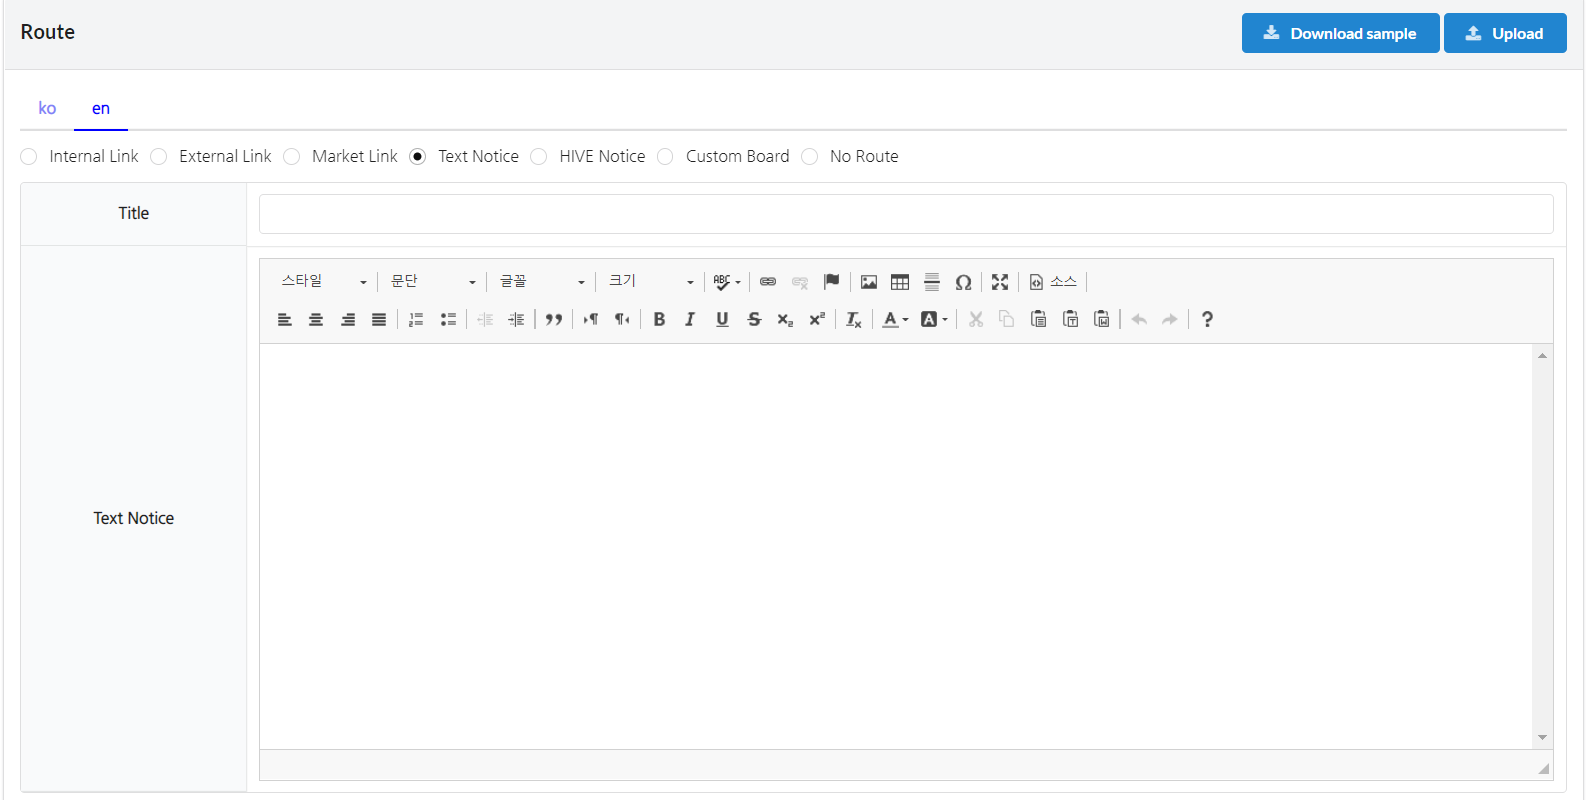
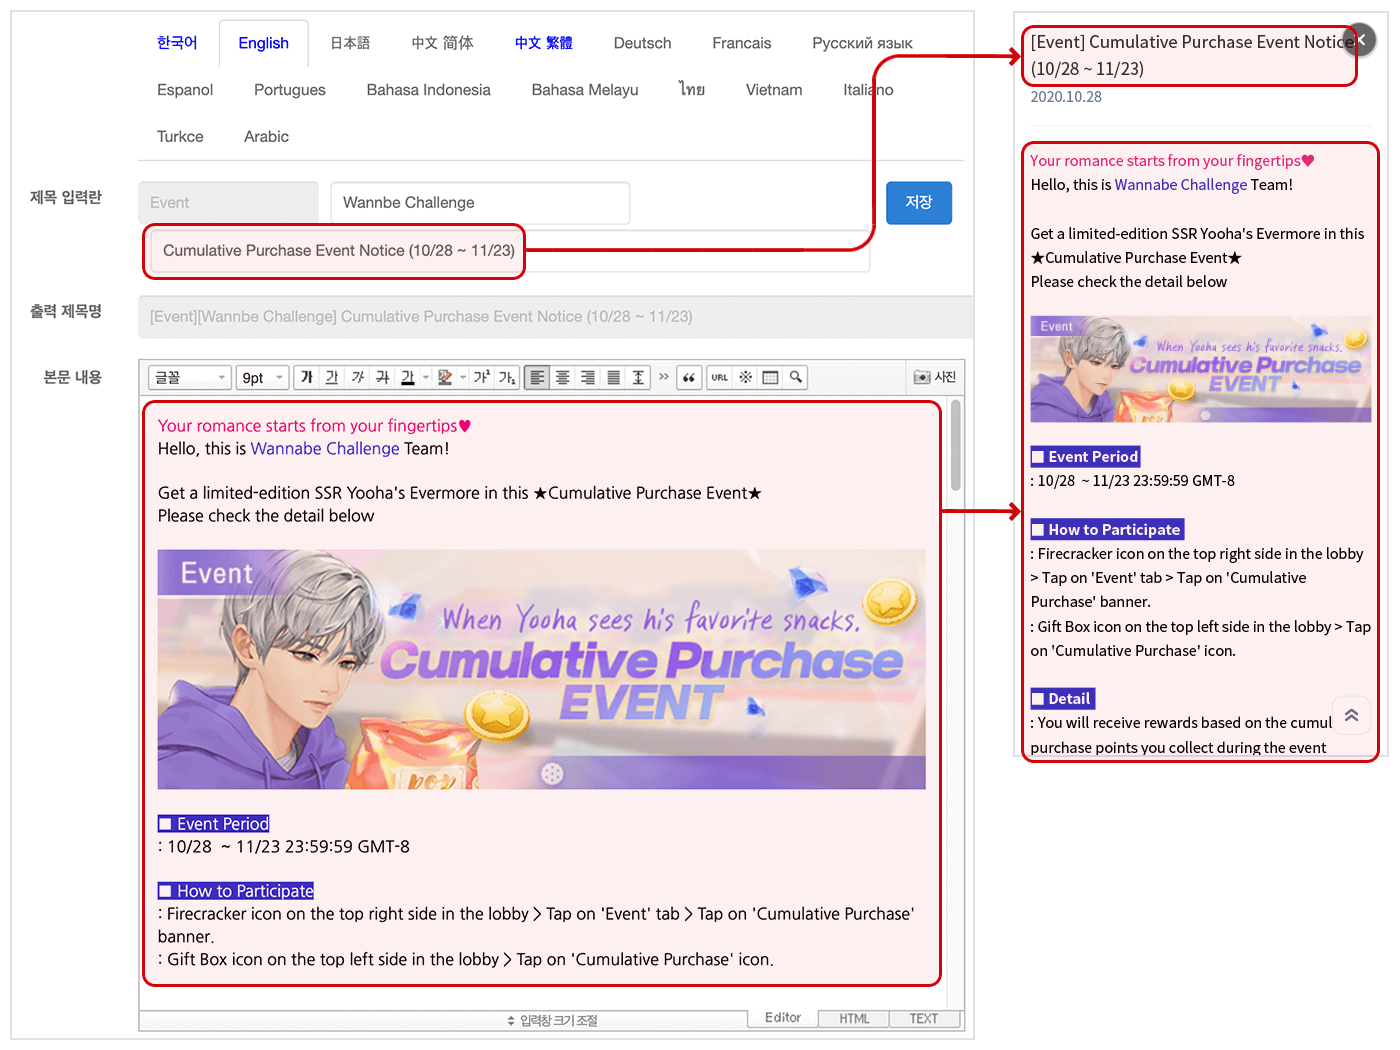
3. Text Notice
You can enter the details for each language via Editor.
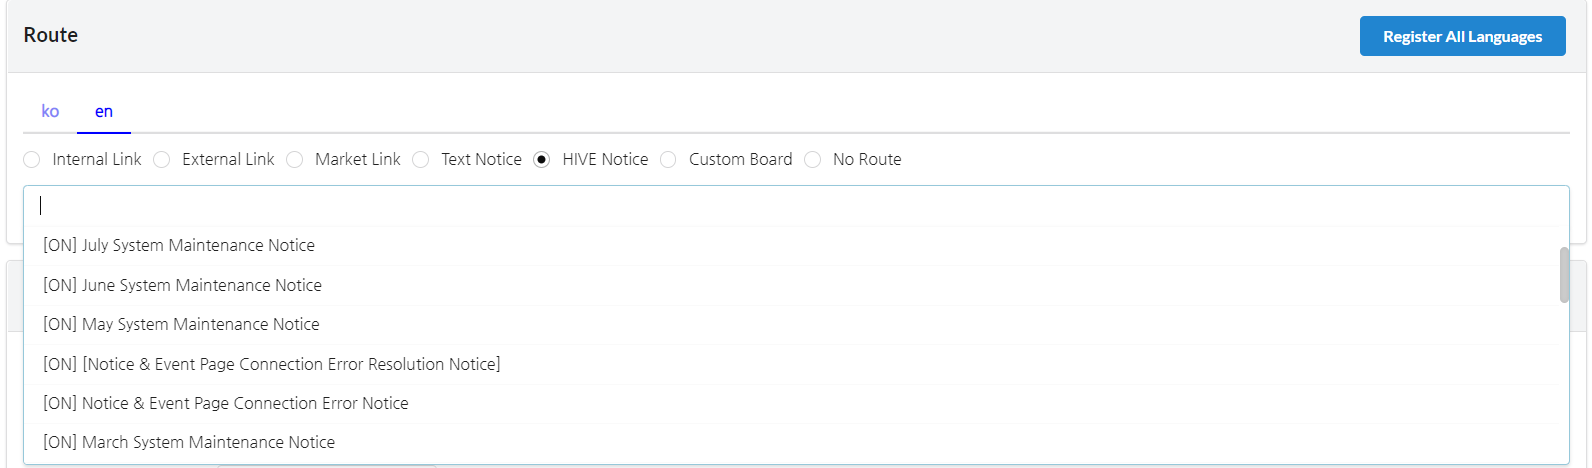
4. Hive Notice
You can import up to 50 in-game notices and Hive notices that are being exposed and select. If there’s an image included in the notice, please check and make sure the image path starts with “http”. When dragging and pasting an image registered externally, the image area may be displayed as an empty box on iOS if the website where the image is registered doesn’t support http. “Http” is supported if you’re uploading an image via Editor on Notice.
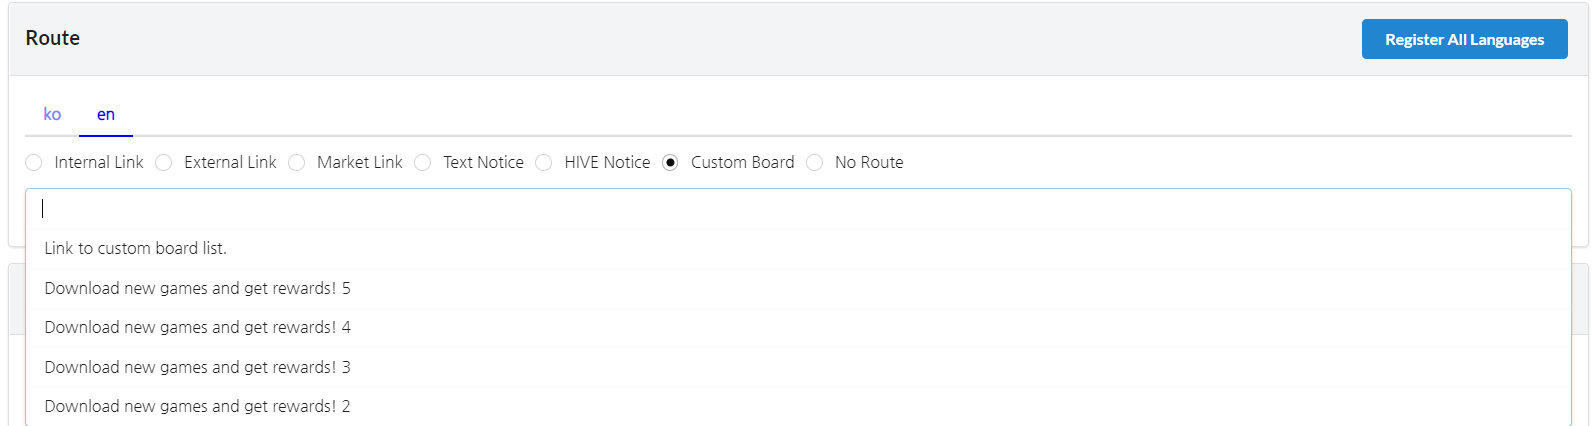
5. Custom Board
The posts registered to the game’s customized board will be displayed as items, and you can select them as paths.
6. No Route
Please select if there’s no route to move to. When you select the “No Route”, only banner images will be displayed, and users won’t be able to tap or click. In order to set up “No Route” for rolling banners, you need to change the settings so that no actions will be processed when users click.
Exposure Condition Settings
You can set up the country, server, exposure method, etc. for banner exposure. Set up the exposure condition and click Save.
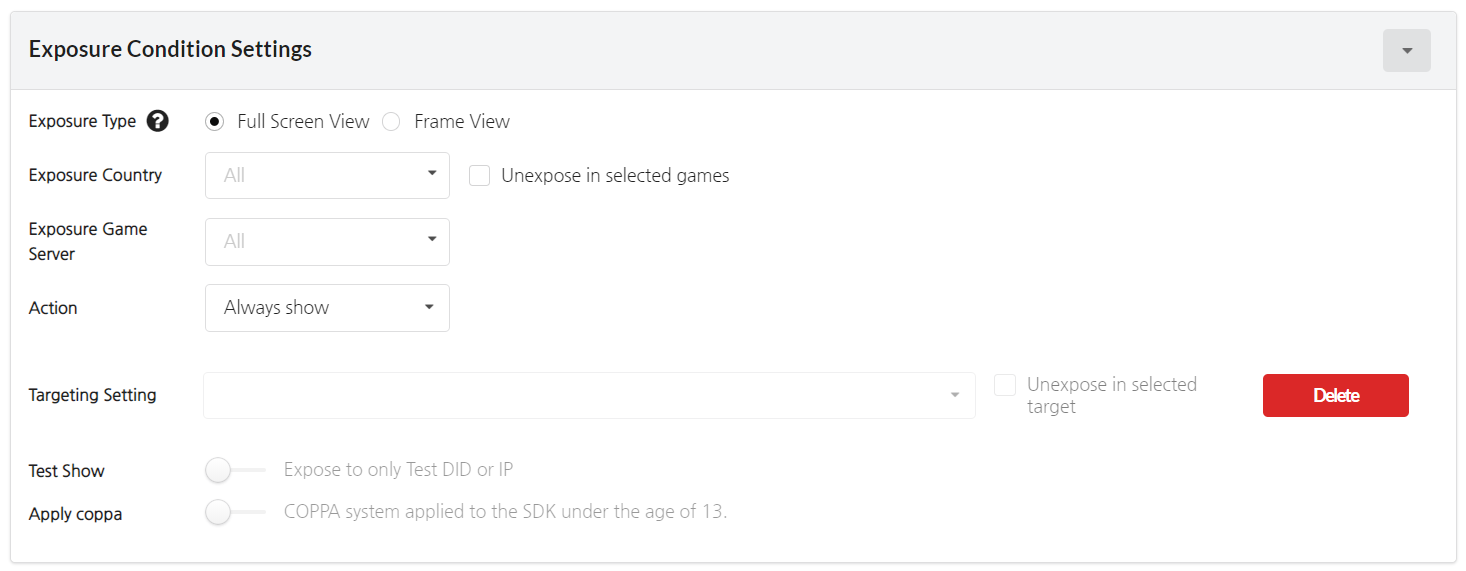
- Exposure Type
- Full Screen View: The in-game web view is displayed in full screen.
- Frame View: The in-game web view is displayed in the frame.
- You can select multiple countries to expose the banner to and you can expose the banner to all countries except for the selected country if you check on “Don’t show on selected country” Box.
- Exposure Game Server: You can select which servers to expose the banner to among the game servers registered at the App Settings.
- Select an exposure method on Action. Can only be set up for interstitial banners and spot banners.
- Always Show: The banner will be shown at all times during the campaign regardless of whether users click or not. If you choose to use the web banner, only “Always Show” method will be available.
- Don’t show when clicked: The campaign is not exposed again once users click and move to the campaign. The non-exposure period can be set up to 30 days.
- The targeting setting is used to expose the campaign to specific users only.
- Invited User Targeting : Conducts a targeting campaign for users who have received friend invitations. You can set the banner to be displayed only to invited users who have installed the app for the first time, and you can select the frequency of banner exposure.
※ After registering the targeting campaign, the targeting banner can be displayed to invited users. - Select Targeting User : The ‘Select Targeting User’ area will be displayed when you select an invitation campaign. Select ‘First Installation User’ if you want to display the banner only to the first installation users among the invited users. Select ‘Include Reinstallation’ to display the banner to all users who have installed the game through the invitation, regardless of whether they installed it for the first time or reinstalled it.
- Exposure Frequency : You can set the banner exposure frequency. During the campaign period, you can set it to expose for the first time only/once a day/always expose.
- You can set up segments in the Segment Menu of Analytics 2 and proceed with targeting campaigns. Please refer to the Hive Analytics 2 Guide for more info on how to use targeting. This feature is not supported for the rolling banner.
- Invited User Targeting : Conducts a targeting campaign for users who have received friend invitations. You can set the banner to be displayed only to invited users who have installed the app for the first time, and you can select the frequency of banner exposure.
- Click “Test Show” if you want to expose the banner only on the test device. The banner will only be shown on the Test DID that’s registered for the game. Refer to Test DID Registration to more info.
- You can select whether to expose the banner or not when you use SDK with COPPA adopted.
Copy and Register Campaign
You can copy and register the campaign that’s already registered at Normal/Interstitial banner.
- Click “Campaign Load” on the top right corner of the campaign registration screen.
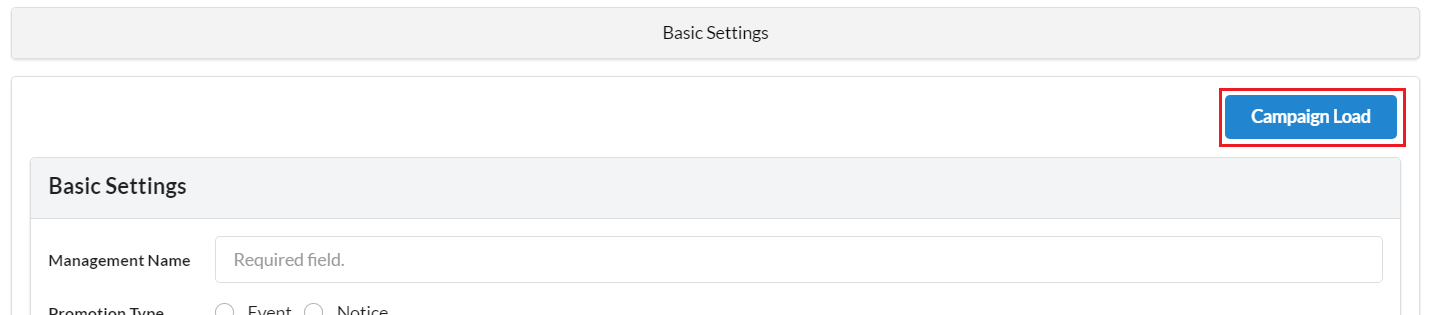
- Select a campaign to copy via the pop-up window. You can select one of the campaigns registered to either Normal/Interstitial Banner Tab.
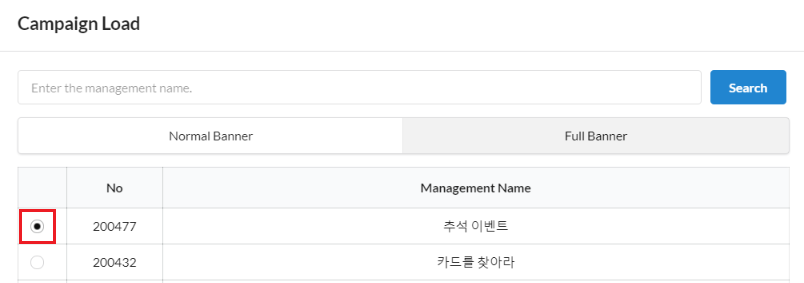
- The selected campaign will be automatically copied and entered. You can re-enter the information on parts that need to be modified and click “Save” to create a campaign.
Registered Campaign Management
You can change the exposure status, order of the banner, and preview the campaign for each language at the campaign list.
Setting Banner Groups
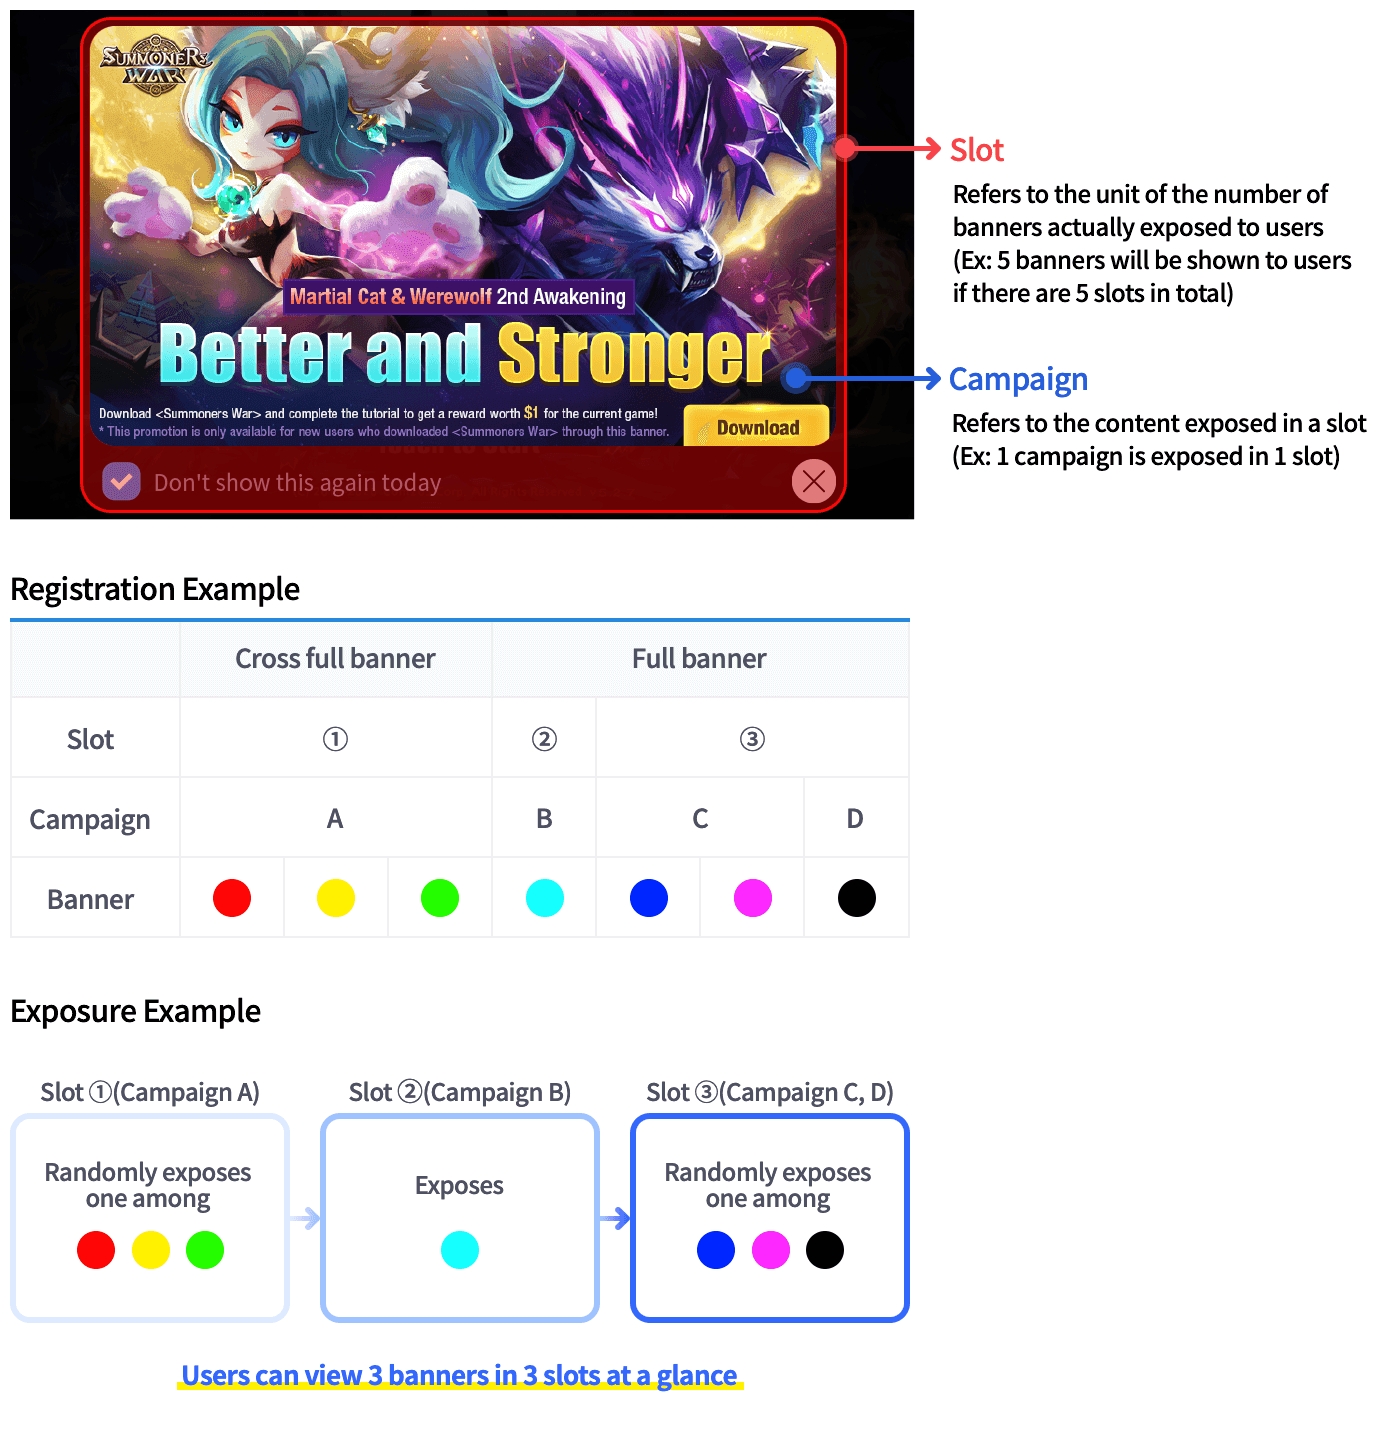
There could be many banners that you want to expose if you have a lot of events, yet the number of banner slots you can expose in the game is limited. In this case, you can group multiple campaigns into one group to expose different banners. Campaigns in the same group are exposed randomly in one slot. For example, if you group campaigns A, B, and C into one group, these three campaigns will be exposed randomly in one banner slot. This feature is available only for interstitial banners and cross banners.
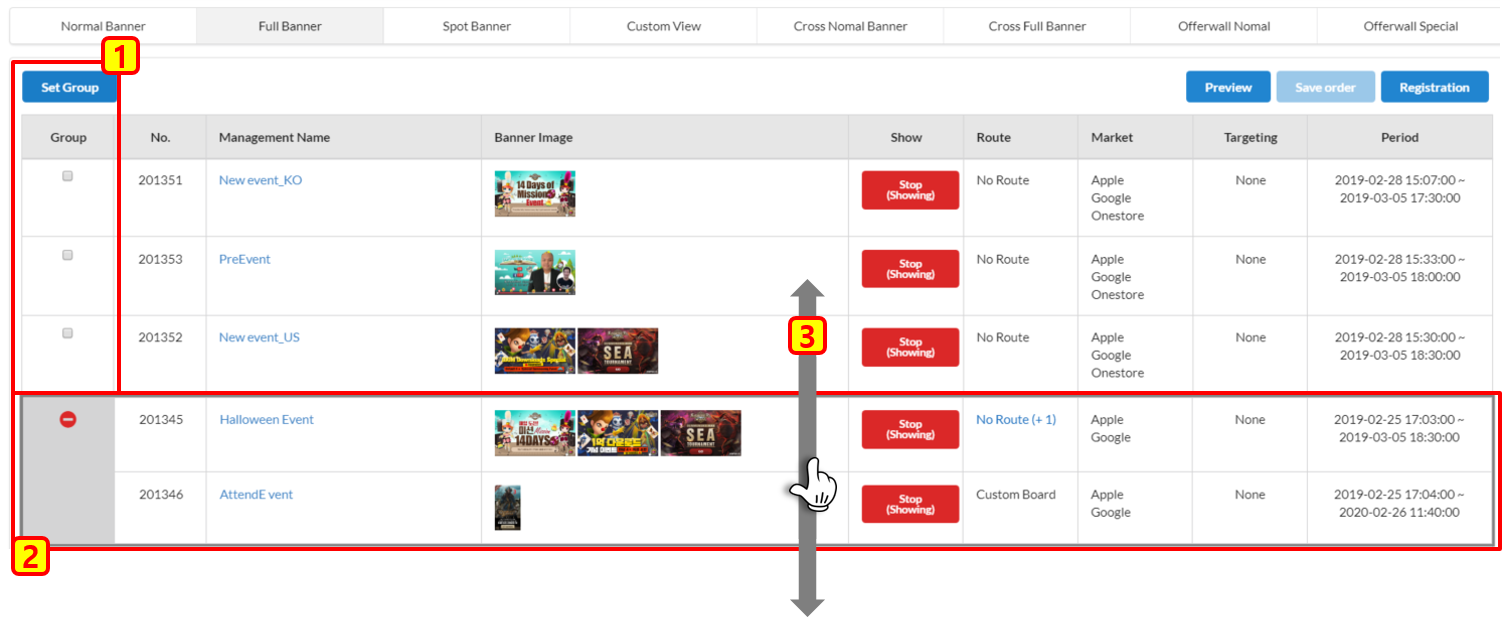
- Click the campaign you want to set as a group, and then click the Group Settings Button. You can only set up to 5 banners that are currently being exposed, and banners that are on different pages or have expired cannot be selected. The priority of groups will be determined based on campaigns with the highest priority within the groups.
-
If a campaign is already grouped, you can ungroup it by using the Cancel Button on the left. Also, if the campaign period ends within the group, the campaign will be automatically ungrouped. If you want to add a campaign to a group that has already been set up, you’ll need to add it after the group has been ungrouped.
-
You can adjust the priority by dragging the group in the same way as the campaign.
Add/Remove Campaigns within Banner Groups
You can remove campaigns from a banner group and add new campaigns.
① Click the gear-shaped Manage Group button at the top left of the group.
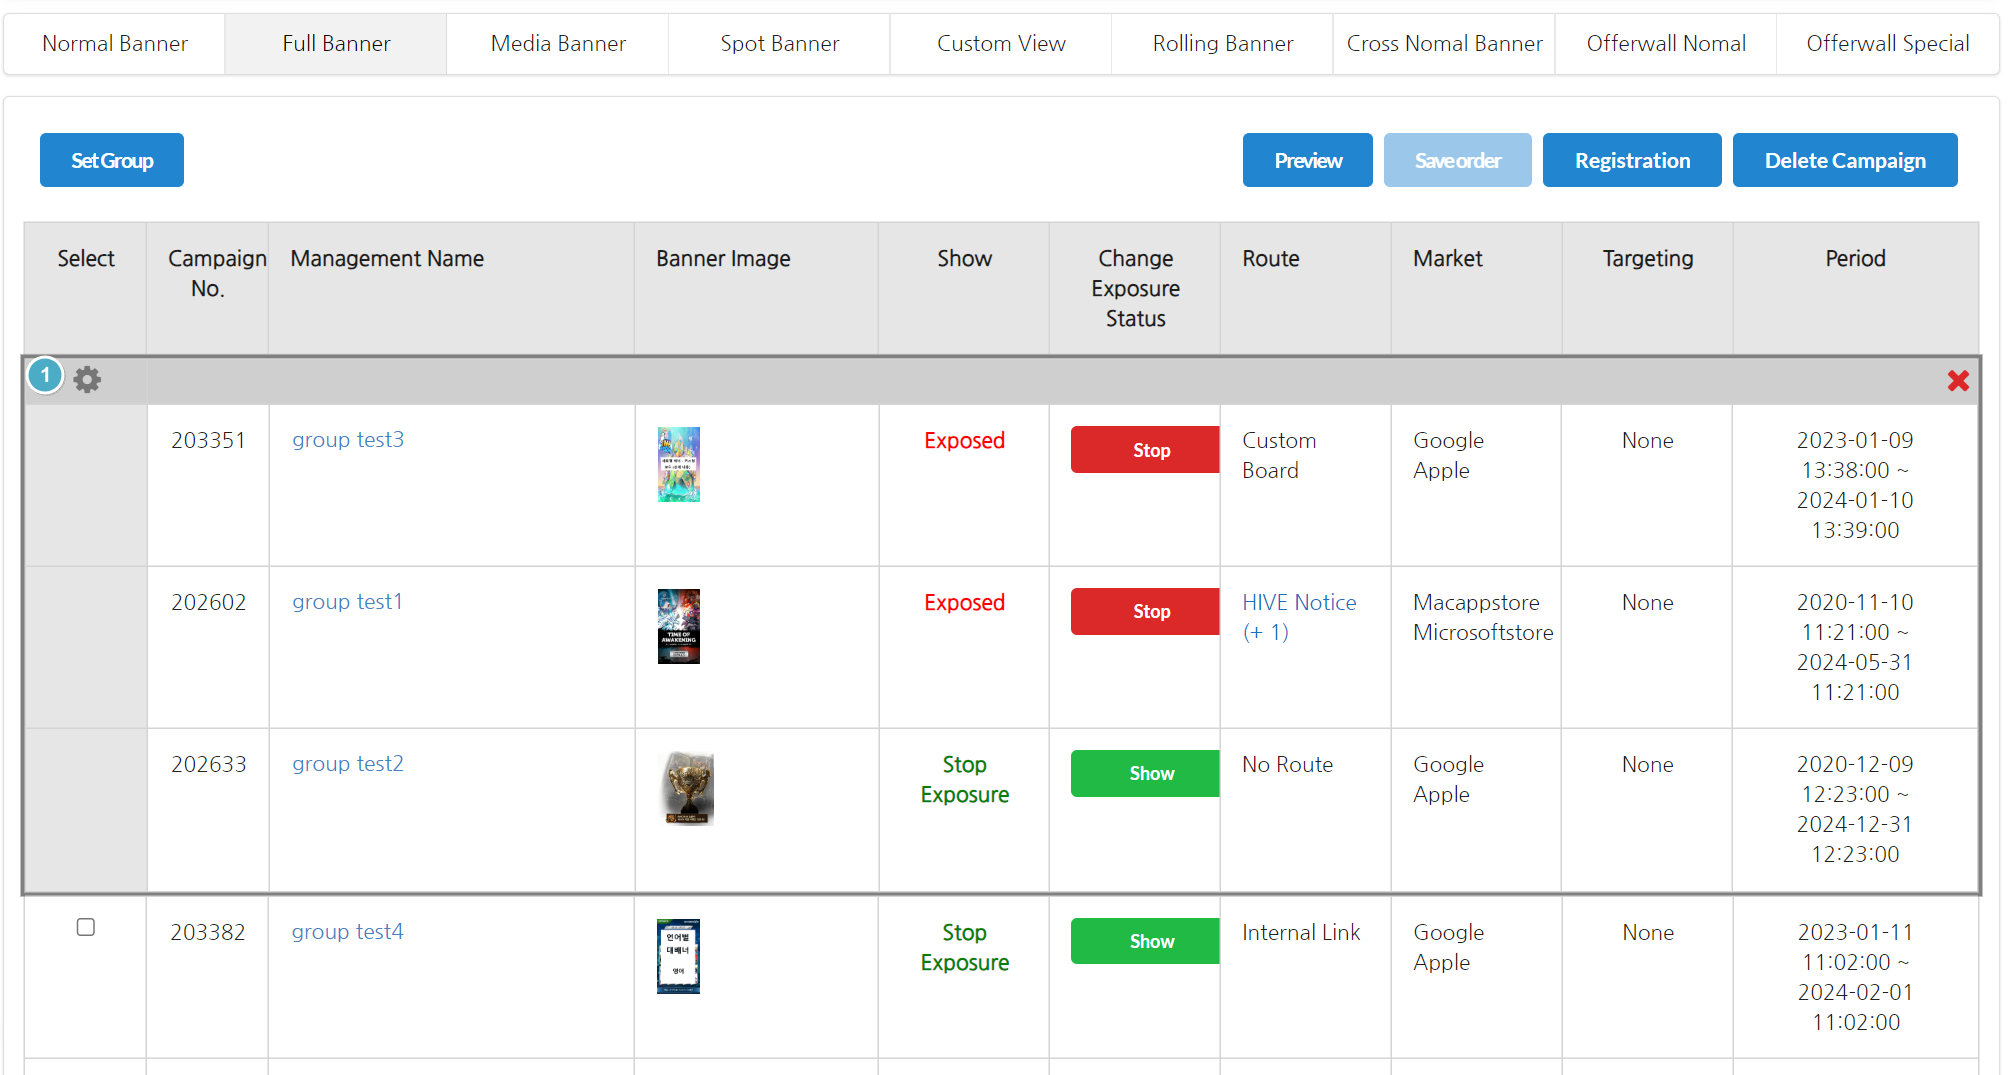
You will see a button to add or remove campaigns within the group.
②It’s a button to remove a campaign from a group. Click to remove the campaign from the group.
③It’s a button to add a campaign to the group. Click to add the campaign to the group.
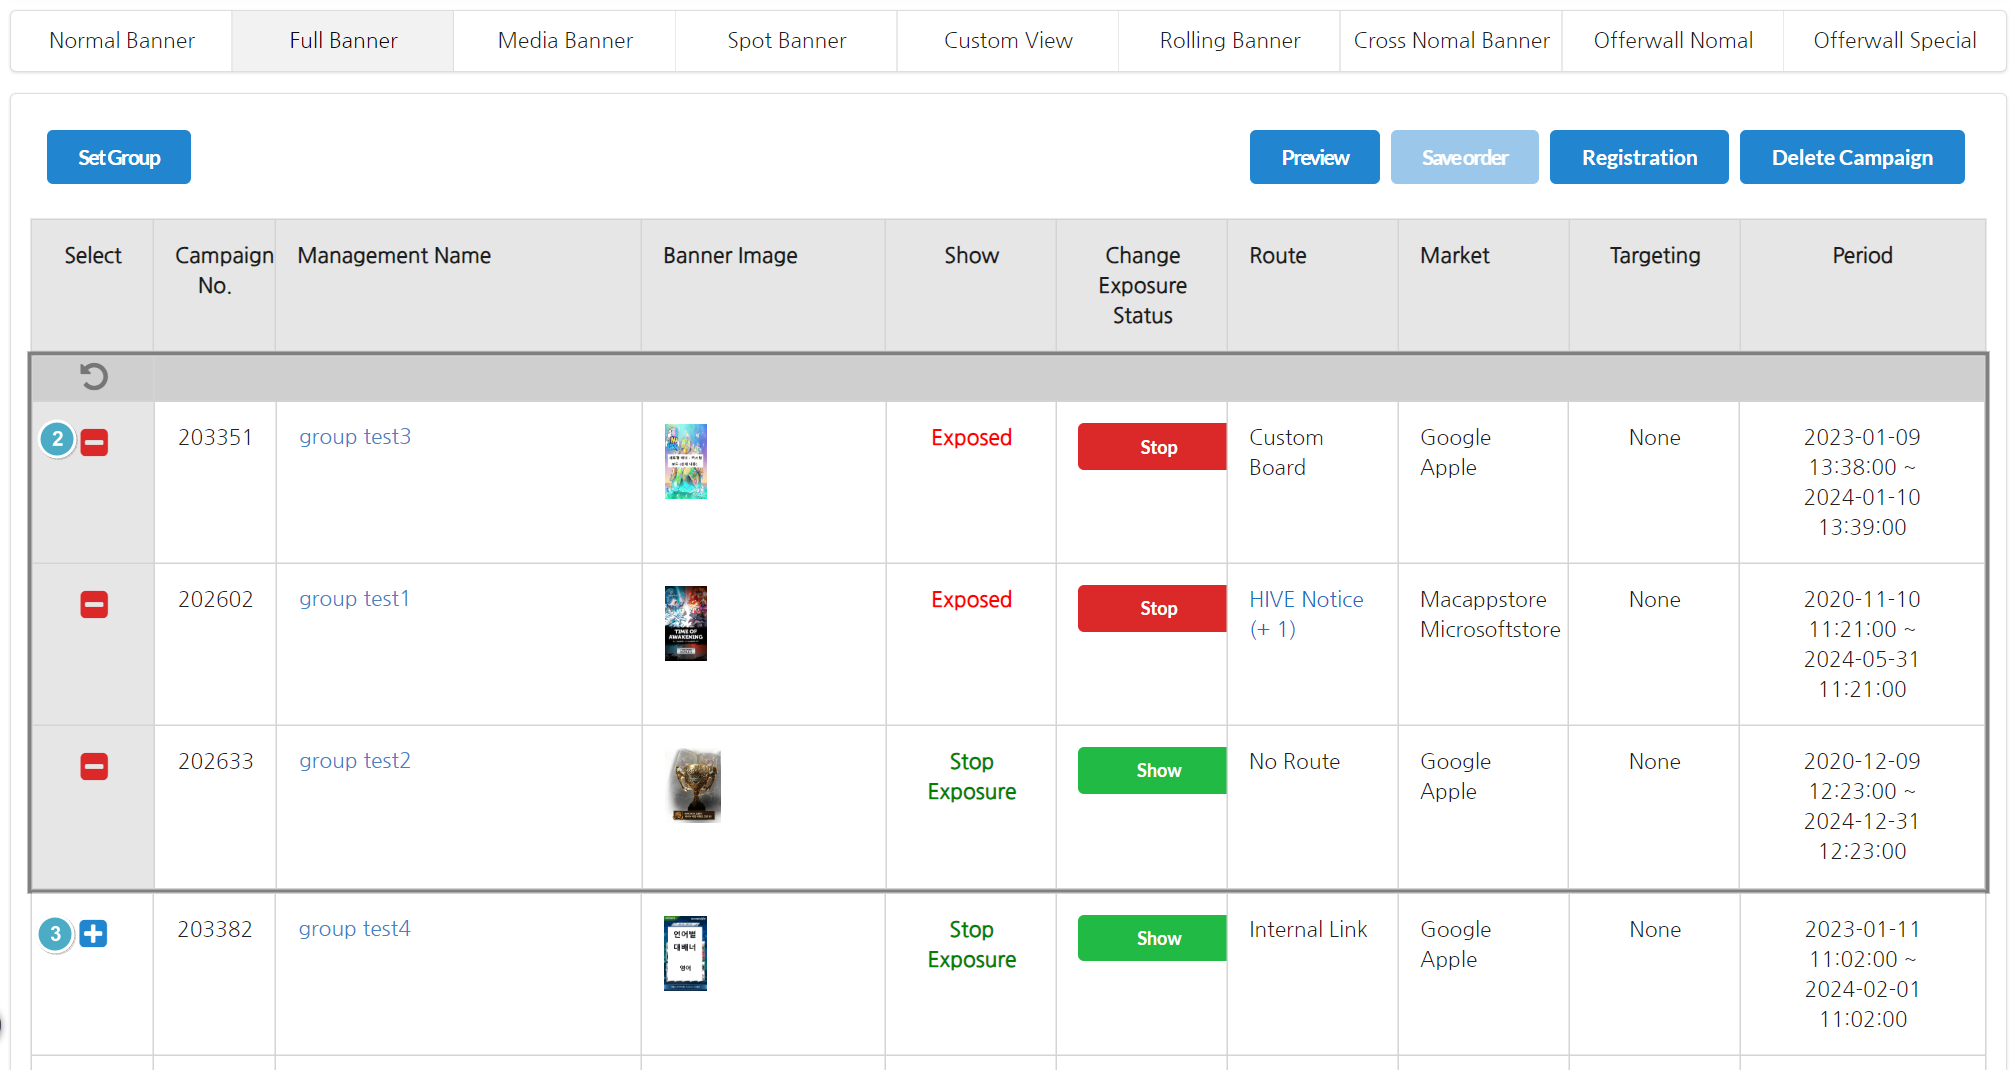
If you have completed setting up campaigns within the group, click the go back button at the top of the group. You will be returned to the list of existing campaigns.
Search Registered Campaign via Filter
You can search registered campaigns using the Filter based on department, author, and language. This filtering feature will only be applied to campaigns registered after Oct. 11th, 2016.
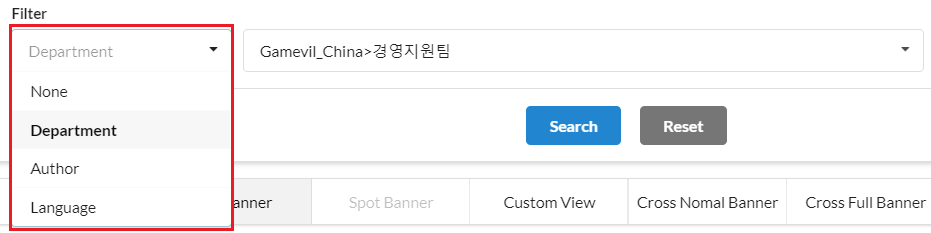
- Department: You can use filter based on the author’s department; English name for the department is currently not supported.
- Author: You can use filter based on the author’s name. You can search by English name if the backoffice language supports English.
- Language: It shows the list of banners registered for selected languages by filtering. For example, if you choose to filter based on Chinese, banners registered for Korean, English, and Japanese won’t be found.
Exposure Status Modification
You can modify the exposure status of a campaign that’s already registered from the list.
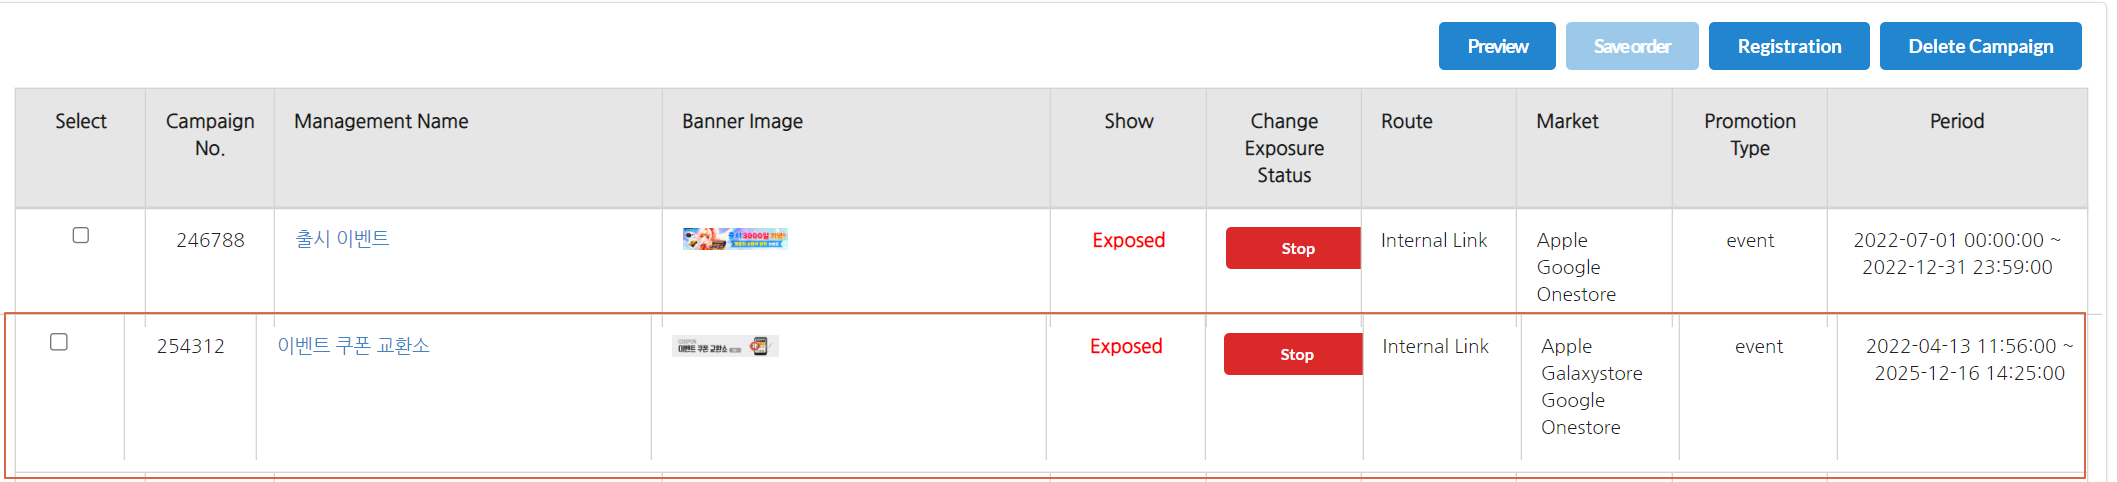
1. Stop (Being Exposed)
The banner is currently being exposed. Click on the Stop Button to hide the banner.

2. Show
The banner is currently not being shown. Click on the Expose Button and the banner will be exposed if it’s during the campaign period. If the campaign period has ended, the status will be changed to the end state.

3. End
The banner will be changed to the end state automatically when the campaign period ends. The campaign that has already ended won’t be changed even if you click the button.

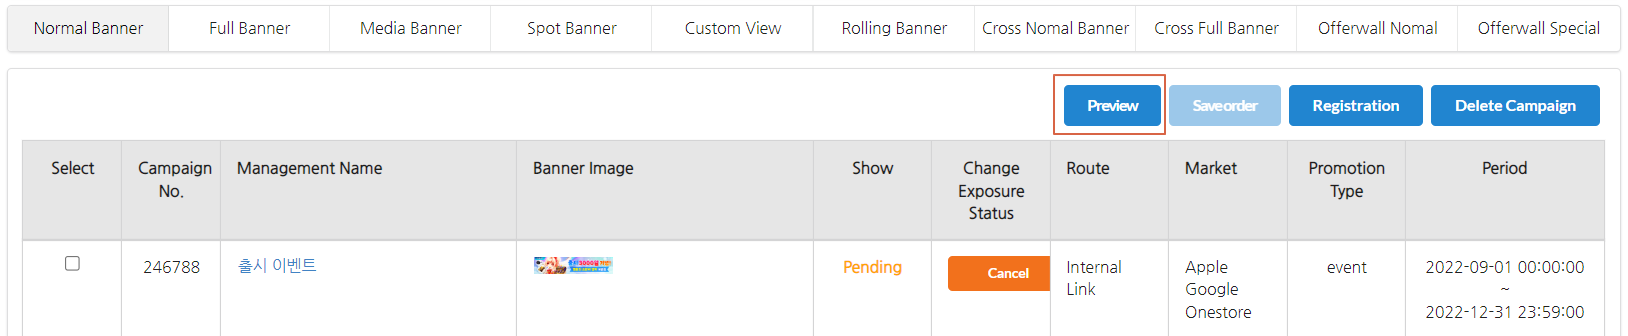
4. Cancel(Ready)
The banner is on standby for exposure since the campaign period has not begun yet.

Preview
You can preview how your campaigns are exposed by language, and change the order in which banners are exposed. However, banners that are registered in bundle can’t be arranged in different orders for each language.
1. Click “Preview” Button
Select a game and click “Preview” at the Normal/Interstitial Banner campaign list.
2. Preview Screen
Preview Screen shows a screen that will be exposed on an actual device based on the language that is set up as default. For example, if the default language is set as English, even campaigns that are not registered for Thai banners will be shown in English if you select Thai.

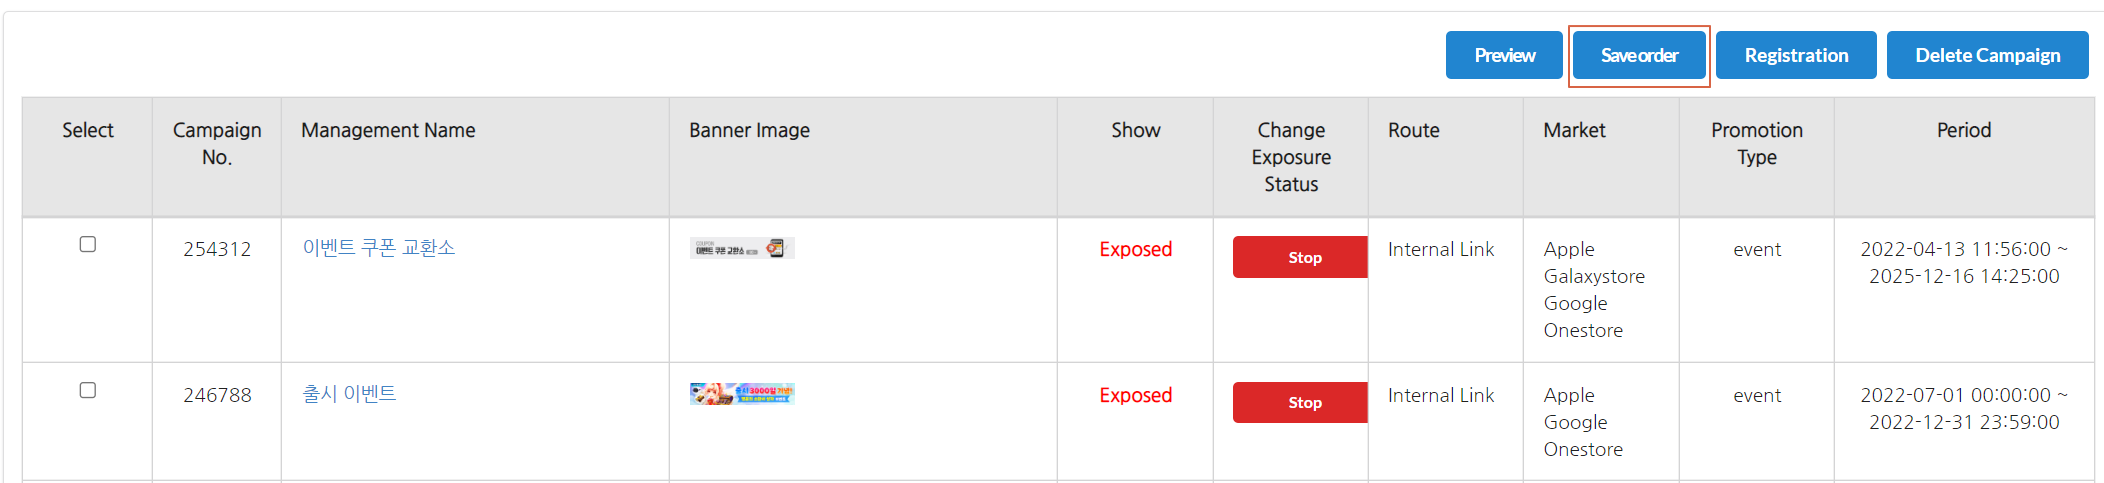
Banner Order Modification
You can change exposure order of banners that will be displayed in News or Interstitial Banners. The order of exposure can only be changed with banners that are being exposed. For Interstitial Banners, the banner at the very top of the list will be exposed first.
Click and drag the campaign of which you want to change order, and move it to the desired location.
Click “Save Order” Button to save.
Campaign Modification/Deletion
You can either modify or delete the campaign. You can only delete campaigns that are deactivated.
- Click “Management Name” from the list or preview.
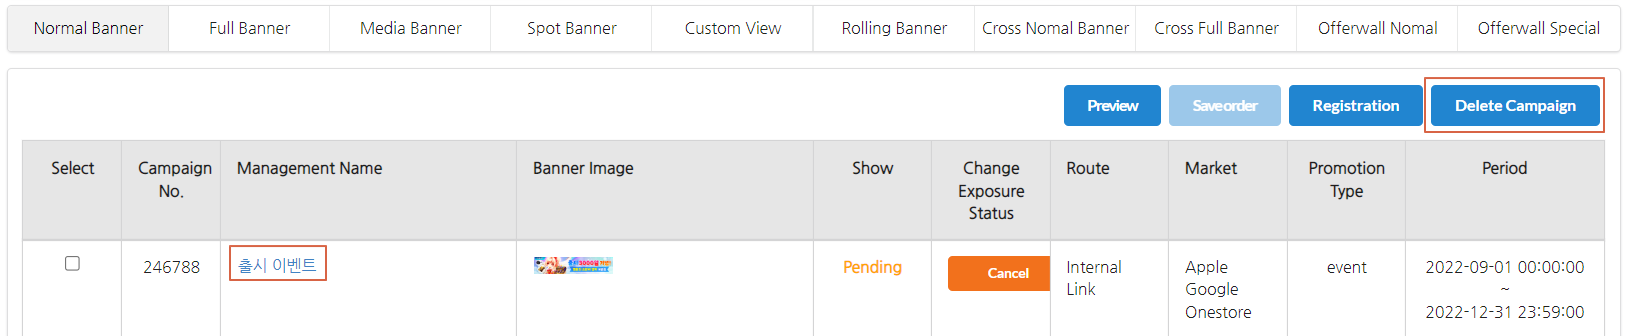
- Modify the detailed info and click “Save”. If you want to delete, the campaign must be under “Deactivate” status at Basic Settings > Activation.
Basic Language Settings Example
Basic Language is a feature that enables you to choose how to respond to languages that don’t have any registered banner in the campaign. You can select “None” or one of the 16 languages.
1. None
Banners in unregistered language won’t be shown.
2.If you select one of 16 languages
For languages that aren’t registered to the campaign, a banner in designated language will be shown.
3.If there are no banners to expose
If you haven’t set up basic language for all your campaigns and haven’t registered banners for a particular language, there will be no banners to expose, so the News Page Event will be blank. In order to prevent this, all English banners that are under “being exposed” status will be shown.
If you select one of 16 languages as basic language, the banner of the selected language will be displayed.
Therefore, if you use both “none” and the “basic language”, the banner of basic language will be shown for unregistered languages, and no banners will be exposed for the banners set as “None”.
4.Campaign Settings Example
The following is an example of a case where you set the basic language for each of the 3 campaigns as follows and decide not to support Thai for all 3 of them.
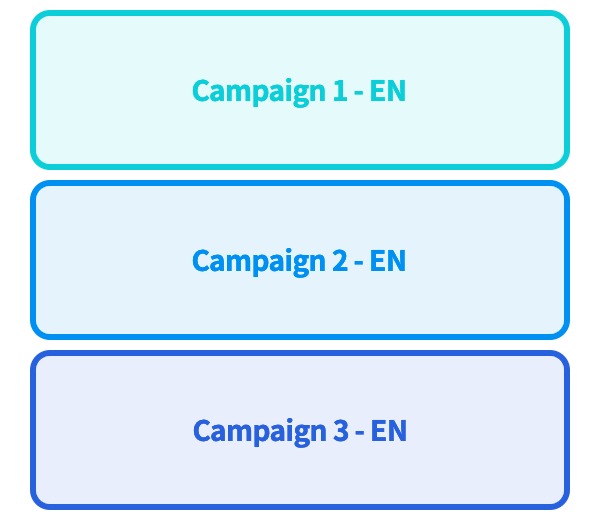
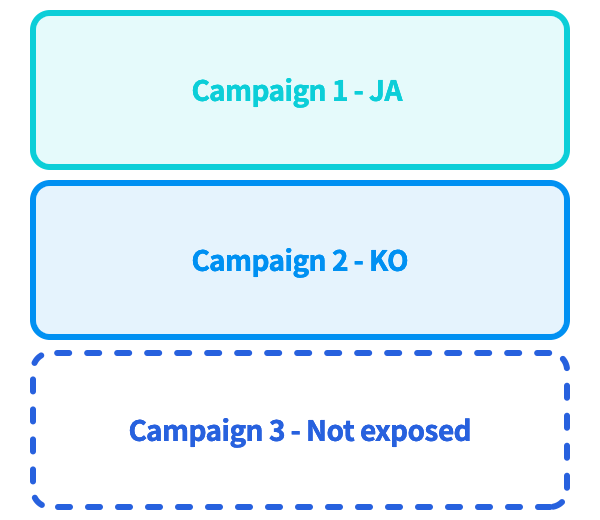
- Case 1[Backoffice Basic Language Settings]Campaign 1 – Japanese / Campaign 2- Korean / Campaign 3 – None
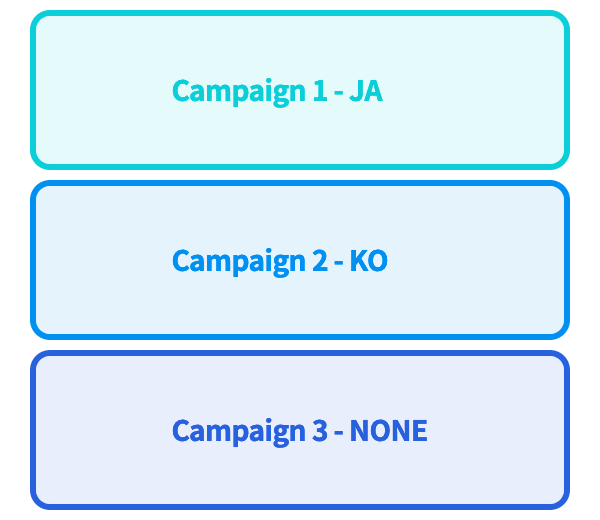
[How the campaign is displayed when it’s set as languages other than Thai – Ex: Korean]Campaigns 1,2,3- Relevant Language

[How the campaign is displayed when it’s in Thai]Campaign 1 – Japanese / Campaign 2- Korean / Campaign 3 – Not exposed
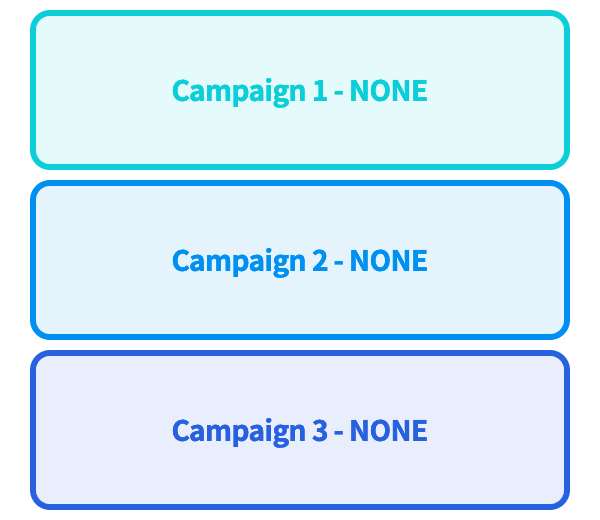
- Case 2[Backoffice Basic Language Settings]Campaign 1 – None / Campaign 2- None / Campaign 3 – None
[How the campaign is displayed when it’s set as languages other than Thai – Ex: Korean]Campaigns 1,2,3- Relevant Language
[How the campaign is displayed when it’s in Thai]Campaigns 1,2,3 – English