This is how you can use the HIVE console group management menu. Please connect to HIVE console (http://console.withhive.com) and log in first.
You can find the group settings menu to manage the authority by going to the location below.
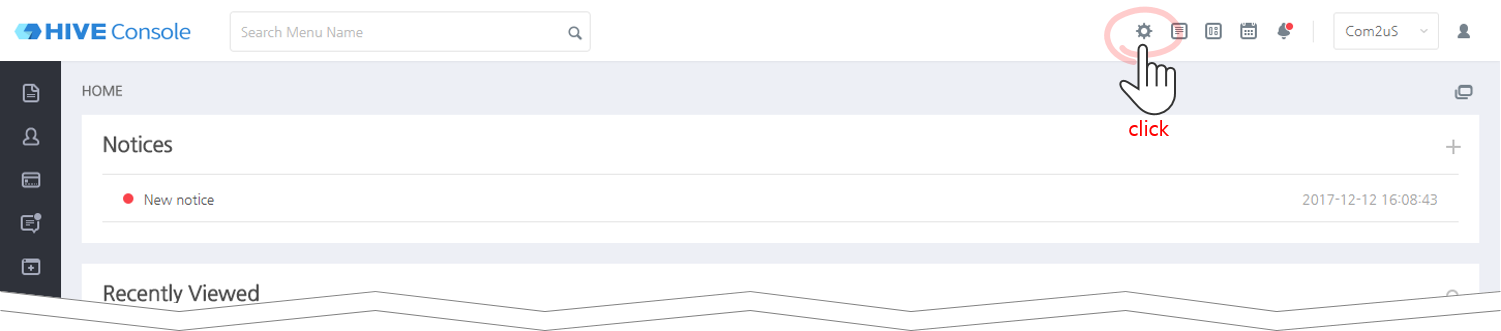
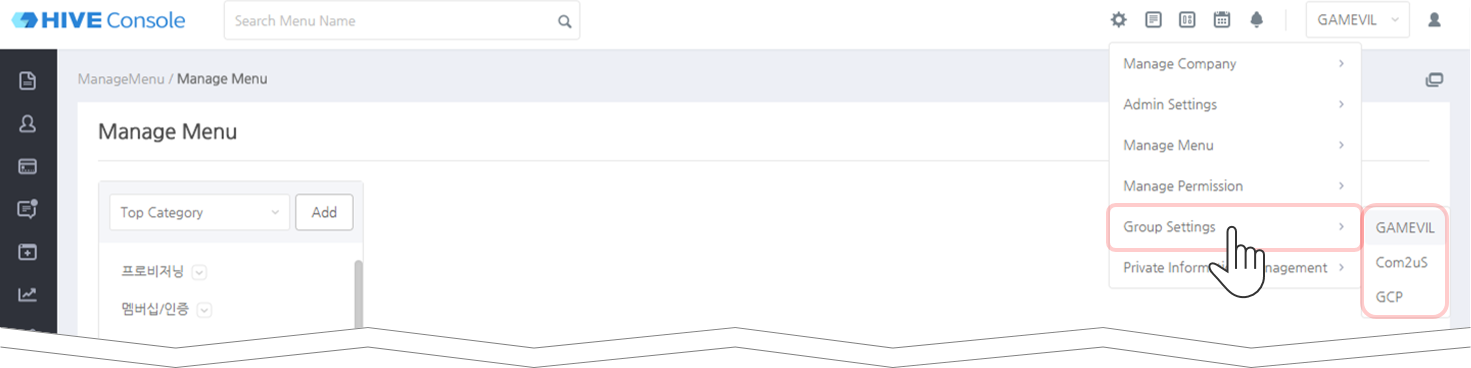
The drop menu will be shown when you place your mouse on the management button and you’ll be able to find the group settings menu here. Please select the company name to enter the menu.
Adding a new group
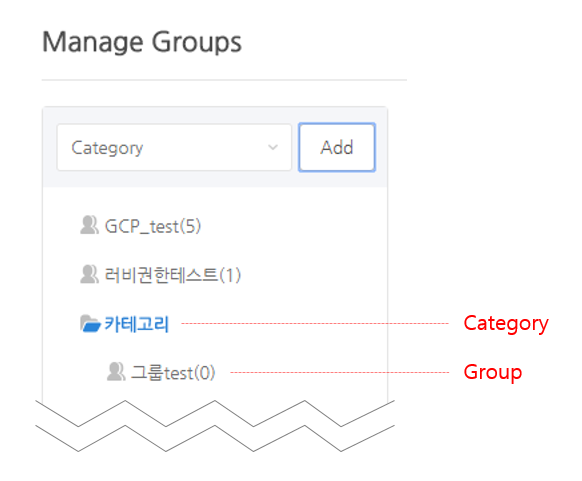
This is the screen you’ll see when first entering the menu. Any existing categories or groups created are displayed.
The blue folder icon items are a categories. Categories can be managed without creating, because they are divided folders that are used to facilitate grouping when there are a large number of groups.
Gray people icon items are groups. Please group together the user units that will perform the same role. The role of a group is not affected by the category’s Depth. Even if you place a group in a tree structure, such as placing a category in a category, the parent group does not affect the permissions of the subgroup. Please be careful when using categories and tree structures.
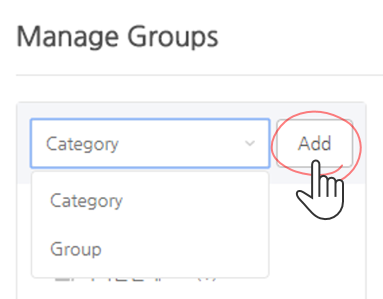
Please select from the combo box what you want to add to add a new group or category. After selecting, press the Add Button and the group or category will be added to the bottom.
Select a group or category to set up a name, and drag and drop to place it where you want. If you change the order of the categories, all the groups belonging to the category are also moved together.
The number on the right of the group name means the number of group members belonging to the group. When the group is deleted, all the information of the group member is also deleted, and the permission is removed.
Group settings
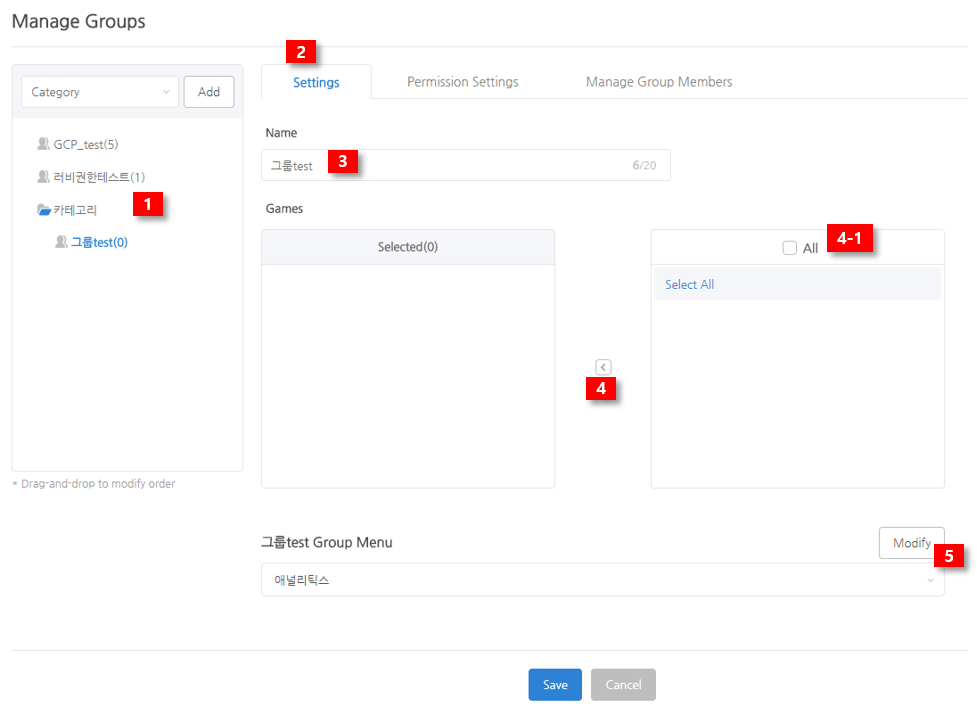
[1] Group selection
A tab menu will be shown on the right for the group settings when you select a created group name.
[2] Settings tab
Set up the basic info of the group by clicking on the settings tab.
[3] Name
Enter the group name. Please make sure to name a group since a name won’t be assigned to a group when a group is created. The name can be 20 Korean letters long.
[4] Game authority settings
You can set up the game authority of the group. The games that can be selected will be shown in the list box on the right. Only the games that are possessed by the company that’s granting the authority can be added to grant authority.
Please contact the system manager of the Platform Department if you need authority for a game that belongs to another company. Please note that you need to request through the authorization manager since you need the permission of each company’s authorization manager.
[4-1] Checking all games
Select all games available to give the access authority in the current group.
If you select “Select All” option in the box below and click [4], the left arrow button, all games currently registered on AppID system are given the access authority; games to be added will be unavailable to have the authority.
If you check [4-1], “All” checkbox, however, all games in the box below are unavailable to check or uncheck individually; games to be added will automatically have the authority. Make sure to select appropriate options in accordance with the features of authority by group.
[5] Menu authority settings
You can select the menu that the group can access in HIVE console. Please click on the Modify Button to enter the Modify Menu first.
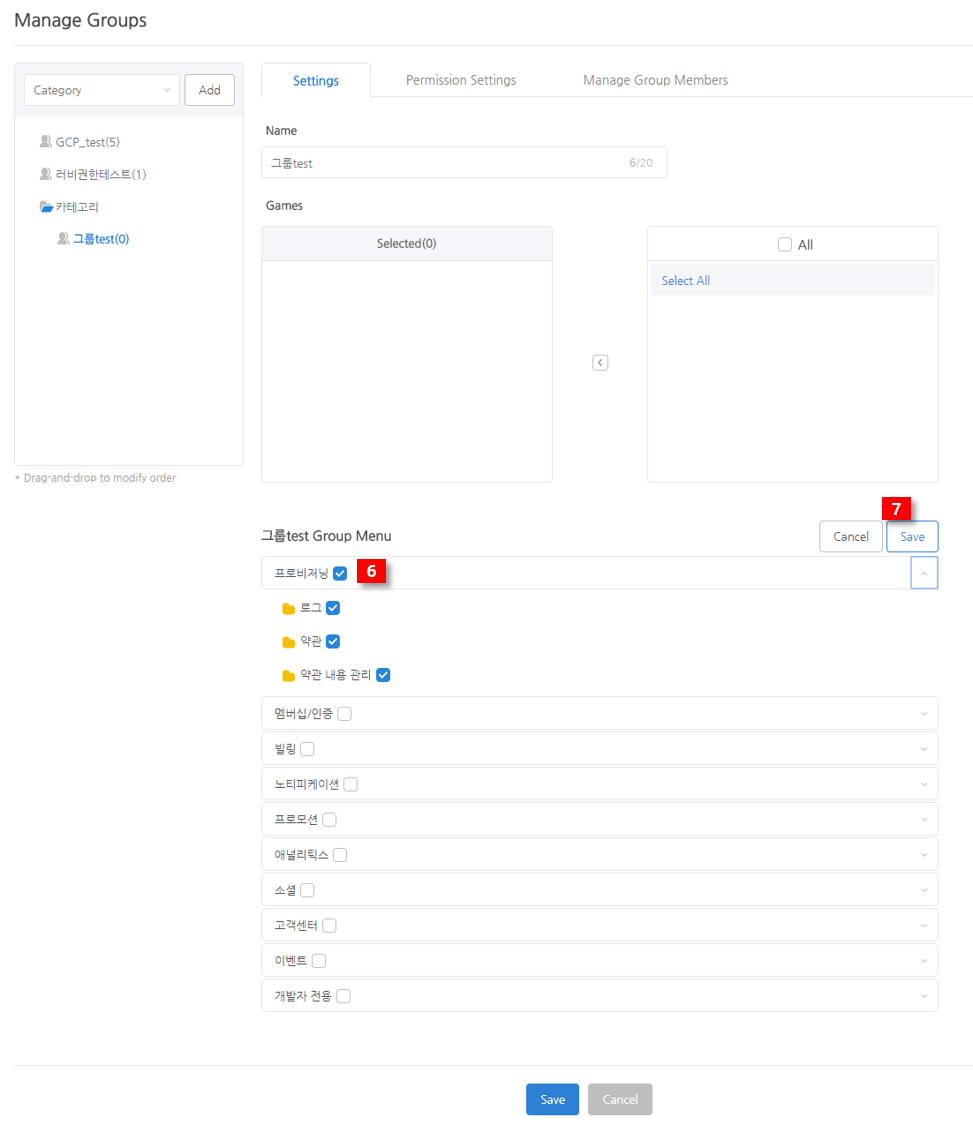
[6] Menu selection
All back office menu lists that are registered on the HIVE console will be shown. Please check the menu to grant authority. If you check the checkbox on the right side of the menu name, you can also check the sub-pages or categories in a lump. (You can also uncheck menus in the same way.)
[7] Menu selection
You must click on the Save Button after selecting menus. (*It’s not the Save All Button on the bottom.) Please click on cancel if you don’t wish to save.
Permission settings
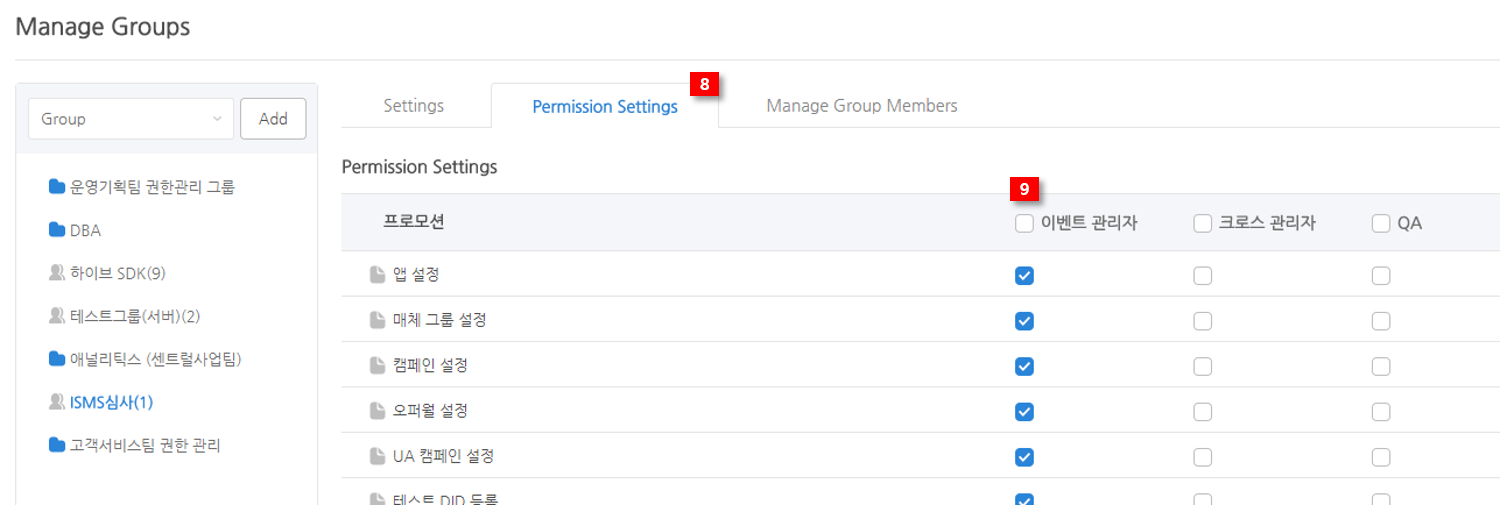
[8] Permission settings tab
Click on the permission settings tab to set up the permission.
[9] Permission settings
You can set up the permissions for the menus that were assigned to this group from the settings tab. If you do not have any authorities, you will not see any menu here so please go to the settings tab to grant authority on the available menus.
If you grant the menu authority in the Settings tab, you’ll be able to view the menu automatically. If you simply want to access the menu and make it viewable, you do not need to set up the permission. If you want to give additional administrative authorities in addition to viewing such as write, you need to grant permissions here.
Since the way the permissions operate according to each product or menu may vary, please assign it according to the request of the user’s request, and if necessary, you can know more details about how the permission works through the product guide of the product. If you need a detailed product guide, please contact the Platform Planning Team of the Platform Department.
Group member management
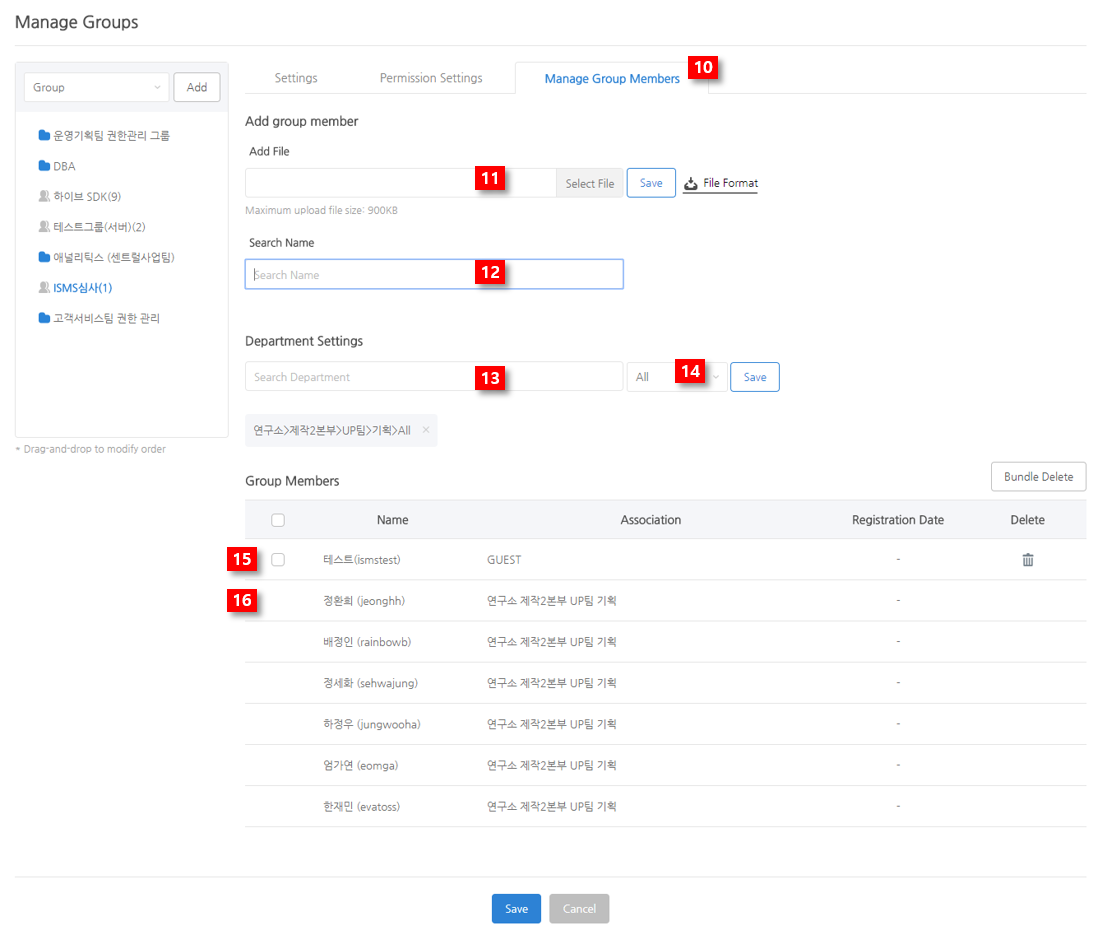
[10] Group member management tab
Click on the group member management tab to add a group member.
[11] Adding group members with a file
If the number of group members to add to the group is too large to add manually, you can upload them in batches through the specified file format. Click on the file form button on the right side of the input form to download the form, and follow the guide to enter the user to add and upload.
When downloading the file form, there is only one ID field, and there is no detailed guide such as whether to delete the header part and enter from line 1. You need to check with the development team on how to use the form.
[12, 15] Adding group members with name
You can add a group member by searching the name of the member of the company. If you search for a name, you can automatically find the presence of a member and the information when a user is registered in groupware. If the group member you want to add is correct, you can click the search result area to add the member to the group member list.
[13, 16] Adding group members with department search
Group members can be added to a group in bulk by searching with department names. If you enter text (ex. Business), the text you entered automatically searches all department names included in the organizational chart. If you enter larger department names, there will be many sub-departments, which can increase the number of search results. When you select a search result, all the subordinates in that department and any future departmental staff (such as new employees) will be automatically added to the group.
[14] Adding after position filter with department search
When adding group members by department, only certain positions of that department can be added as a group member. For example, if you select manager as the position after selecting Platform> Platform Planning Team, only the managers of the team will be added to the group.
Please note that only the people of the selected position will be added when you use the position filter. Make sure to select the positions manually if you want to add people of other positions.