Prepare Admob Data for Entry
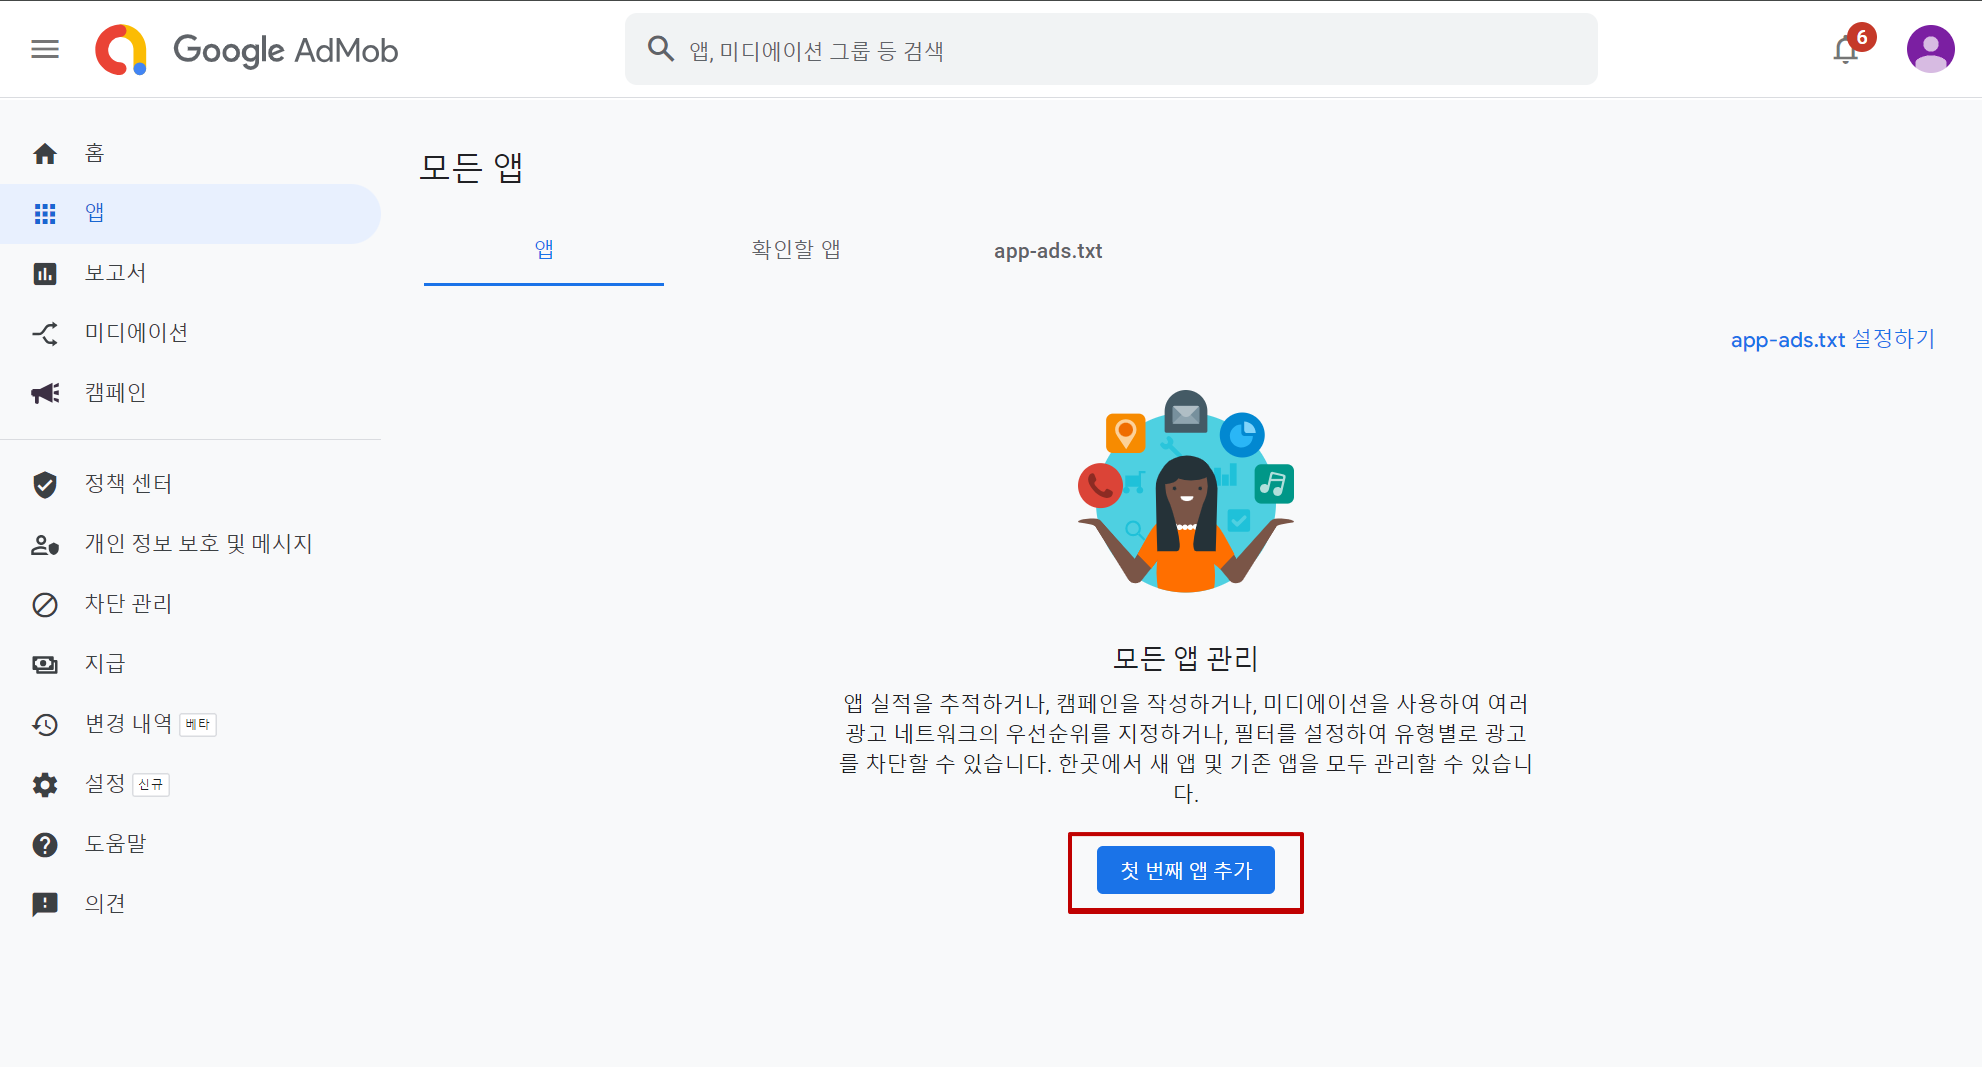
- Please log in at https://apps.admob.com.
- Is the app you want to use registered? Please add the app if it is not already registered.
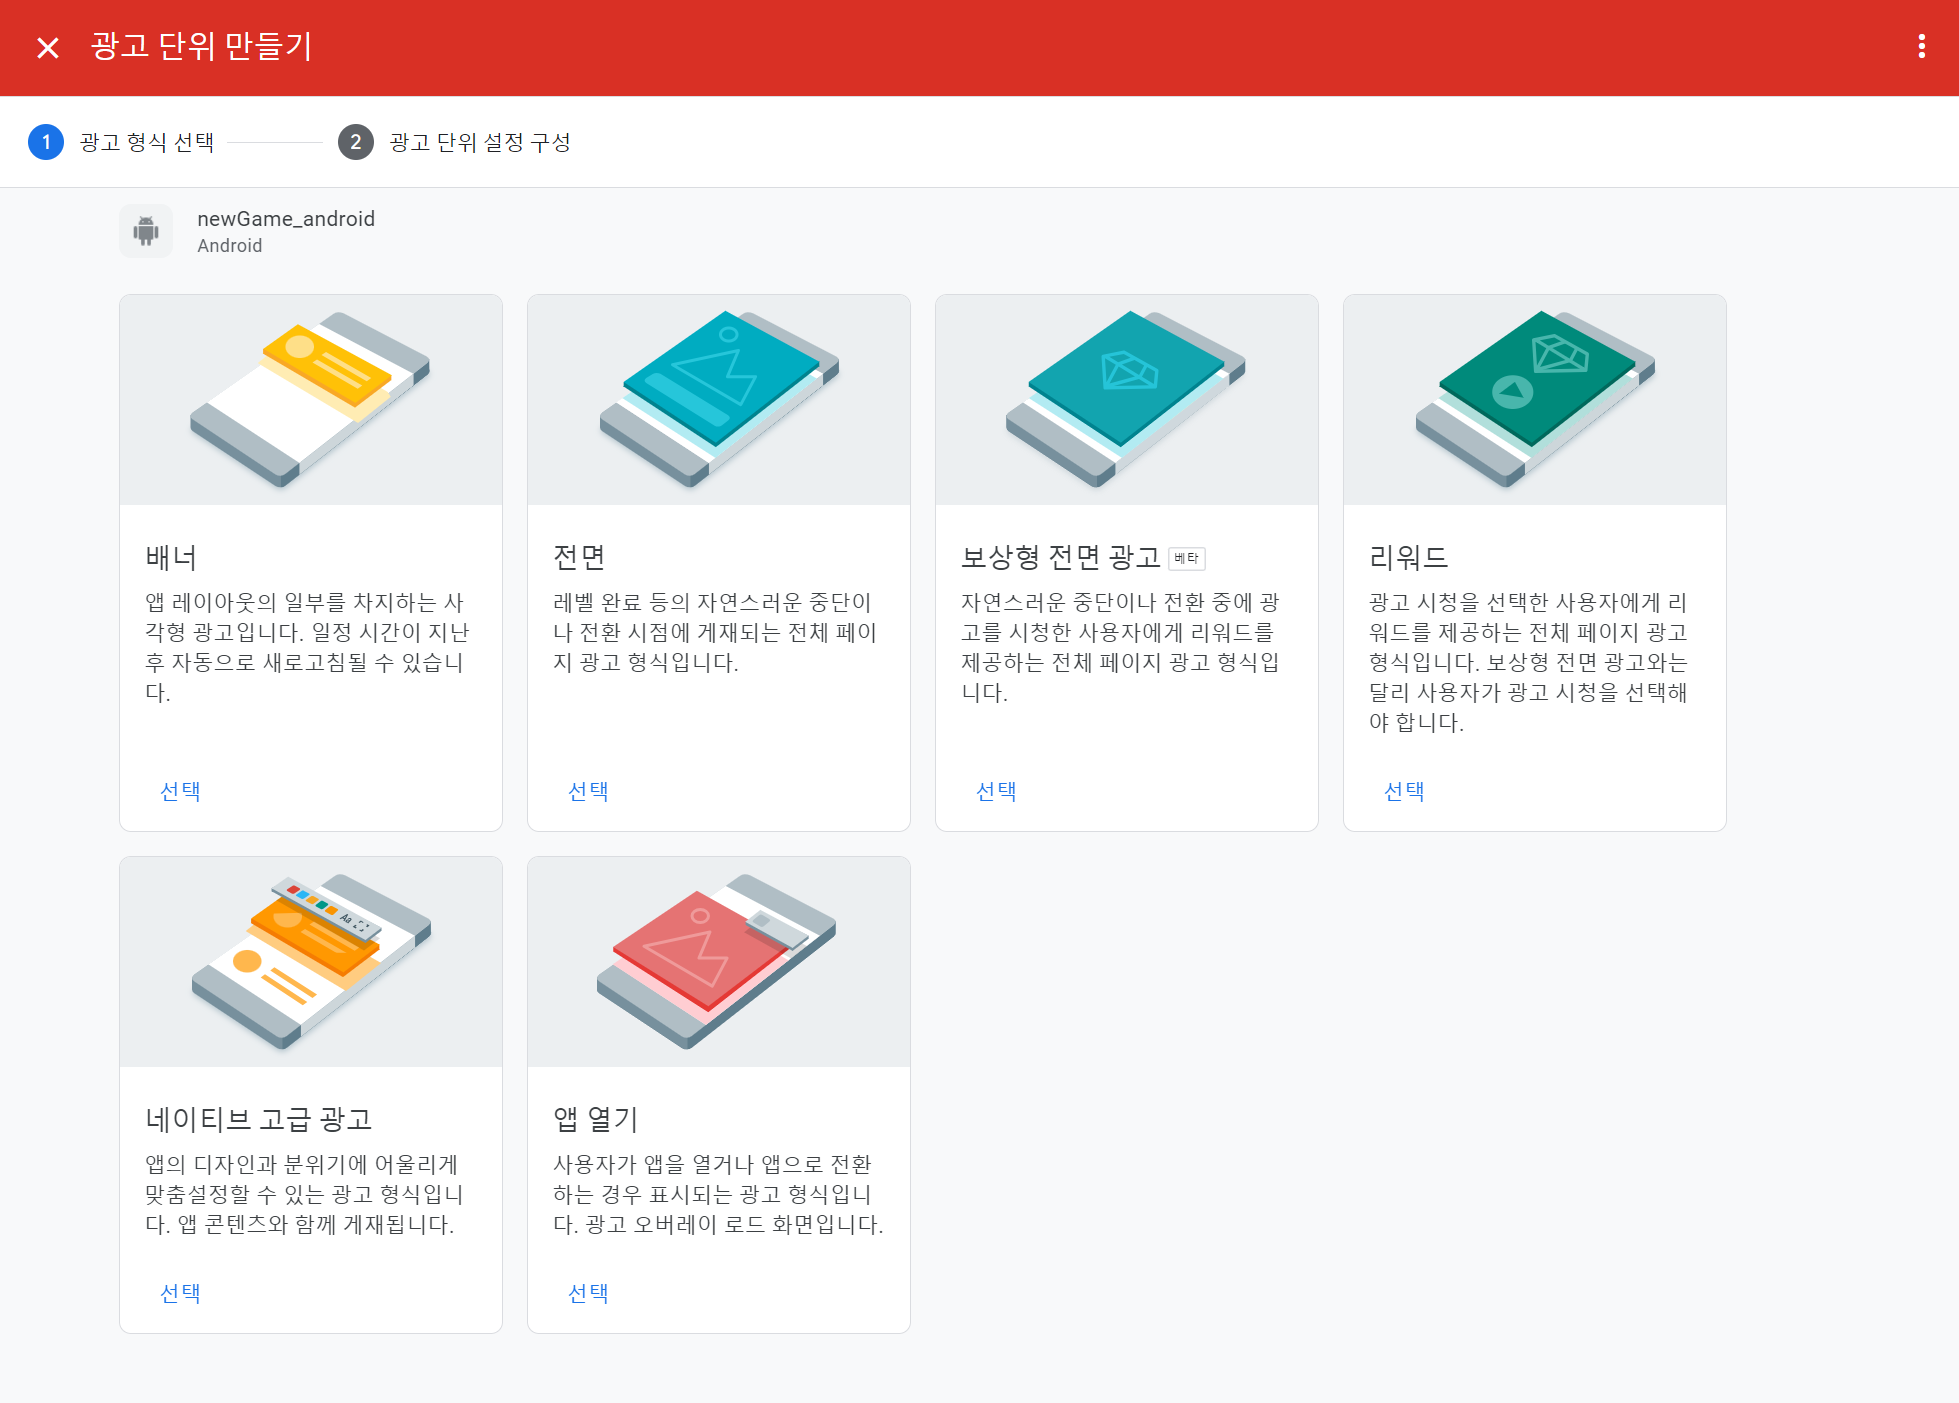
- After you’ve registered your app, you’ll need to generate an ad unit ID. Please generate an ad unit ID by selecting the ad format that will appear on your app.
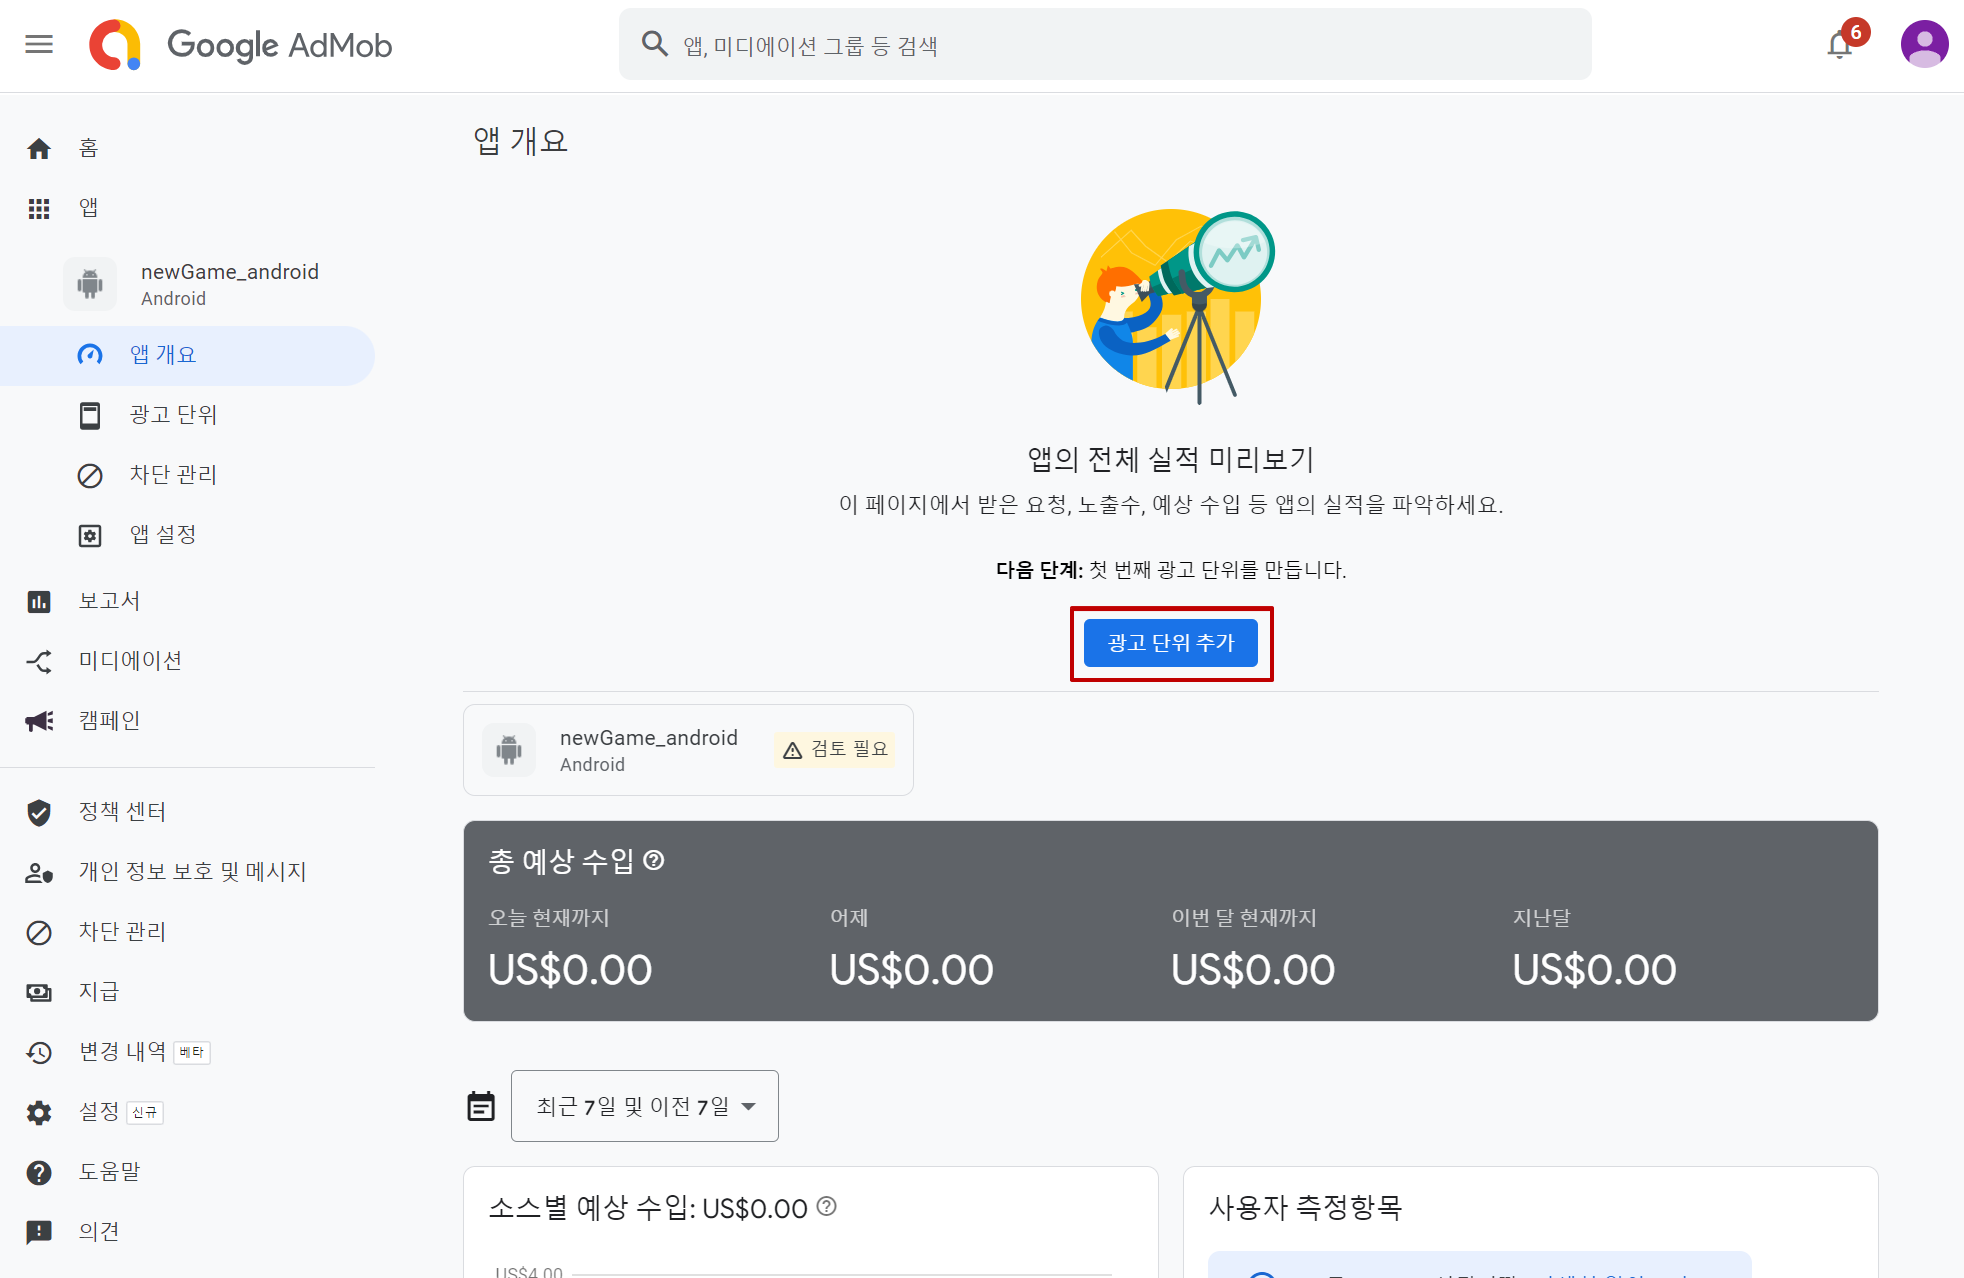
((For example, there is a game called ‘newGame_android.’ Let’s make a banner ad unit that will appear in the ‘newGame_android’ game.)
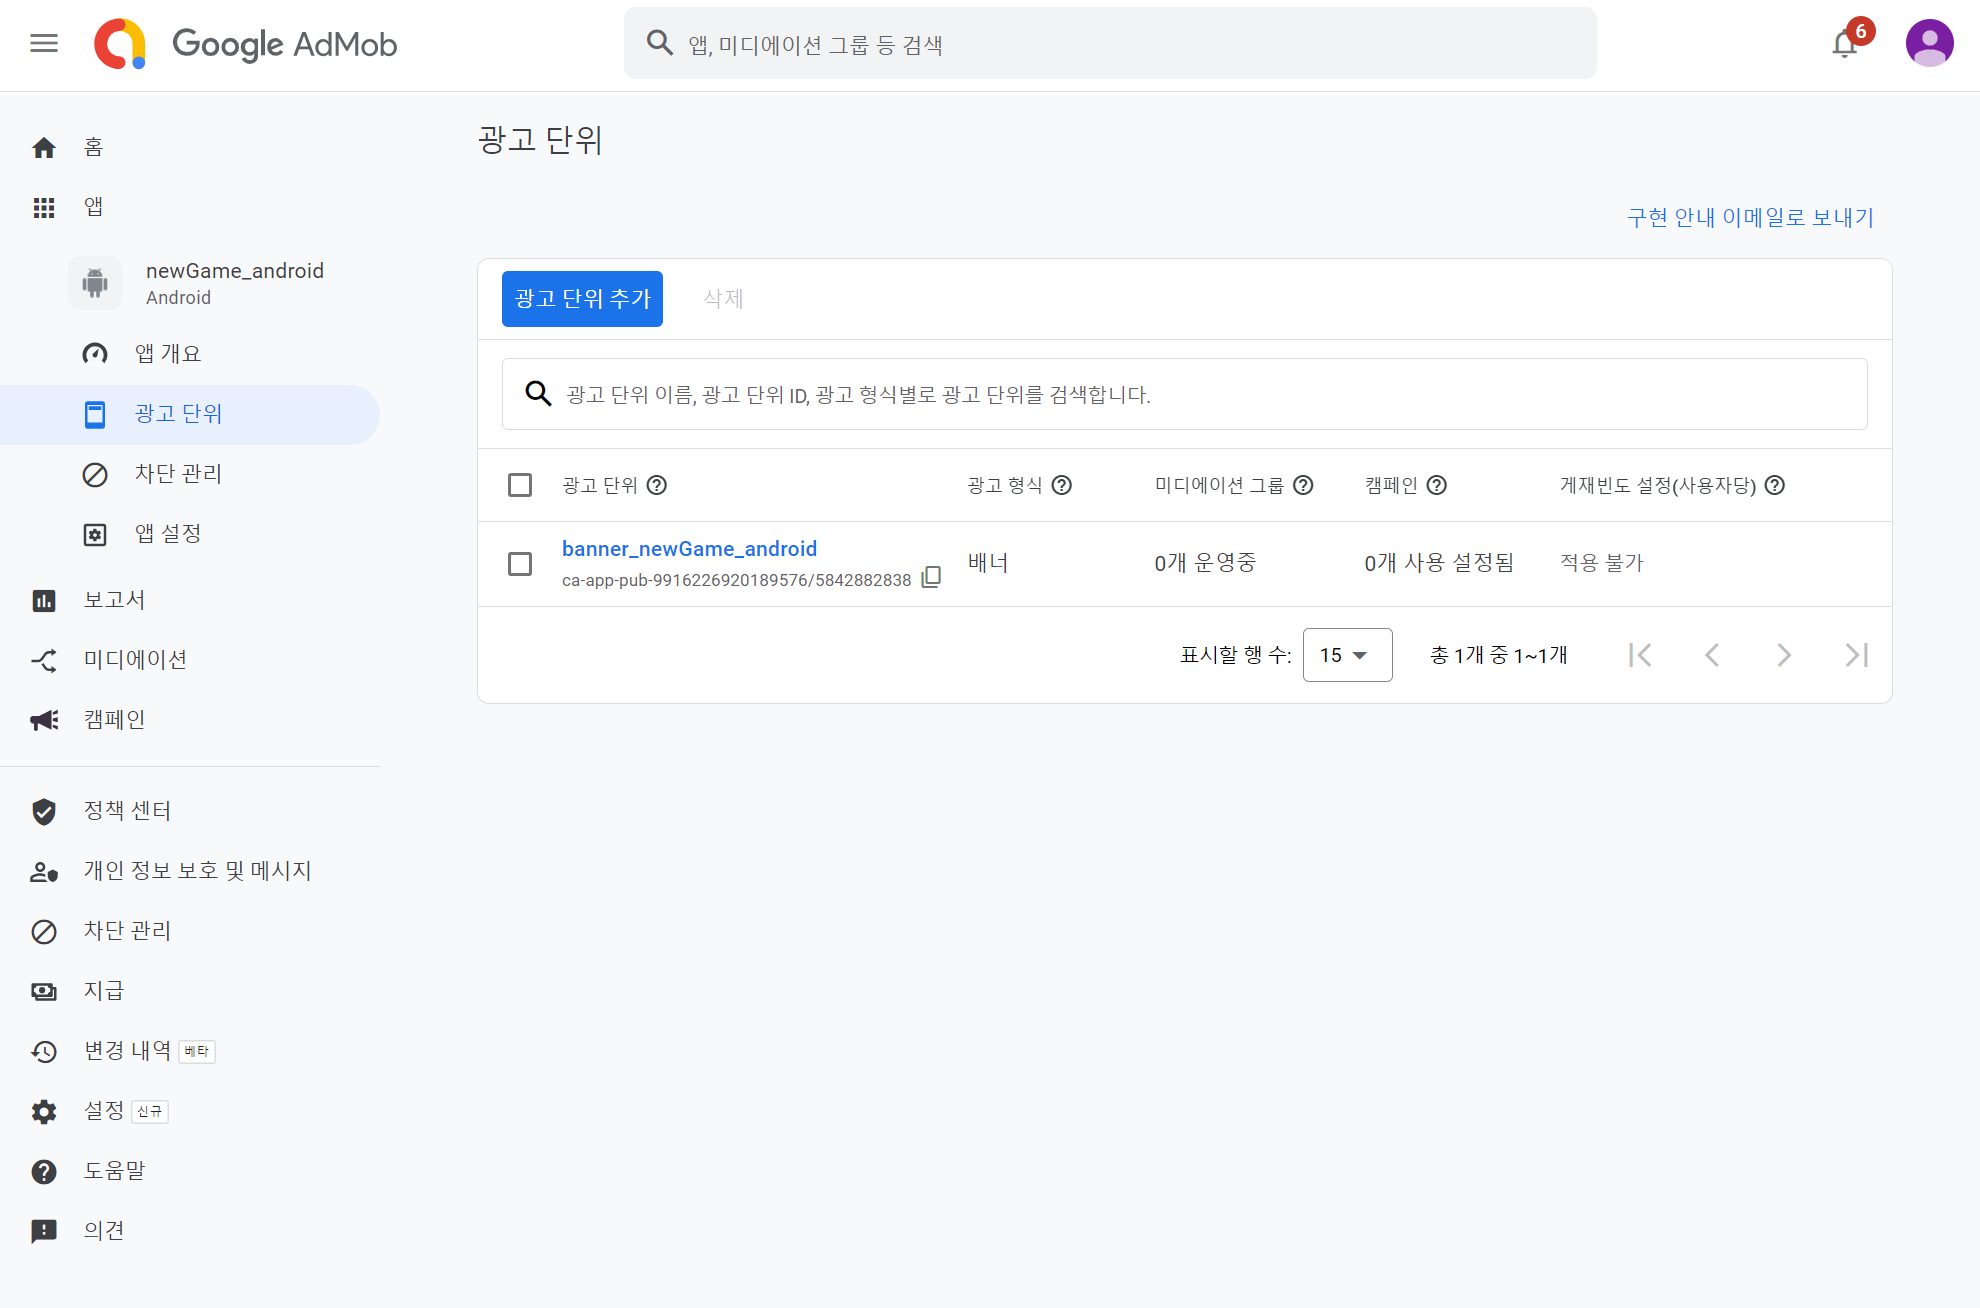
- You now have all of the Admob information to enter after creating your ad unit ID. Please go to the Hive Console.
Link AdMob API
Start
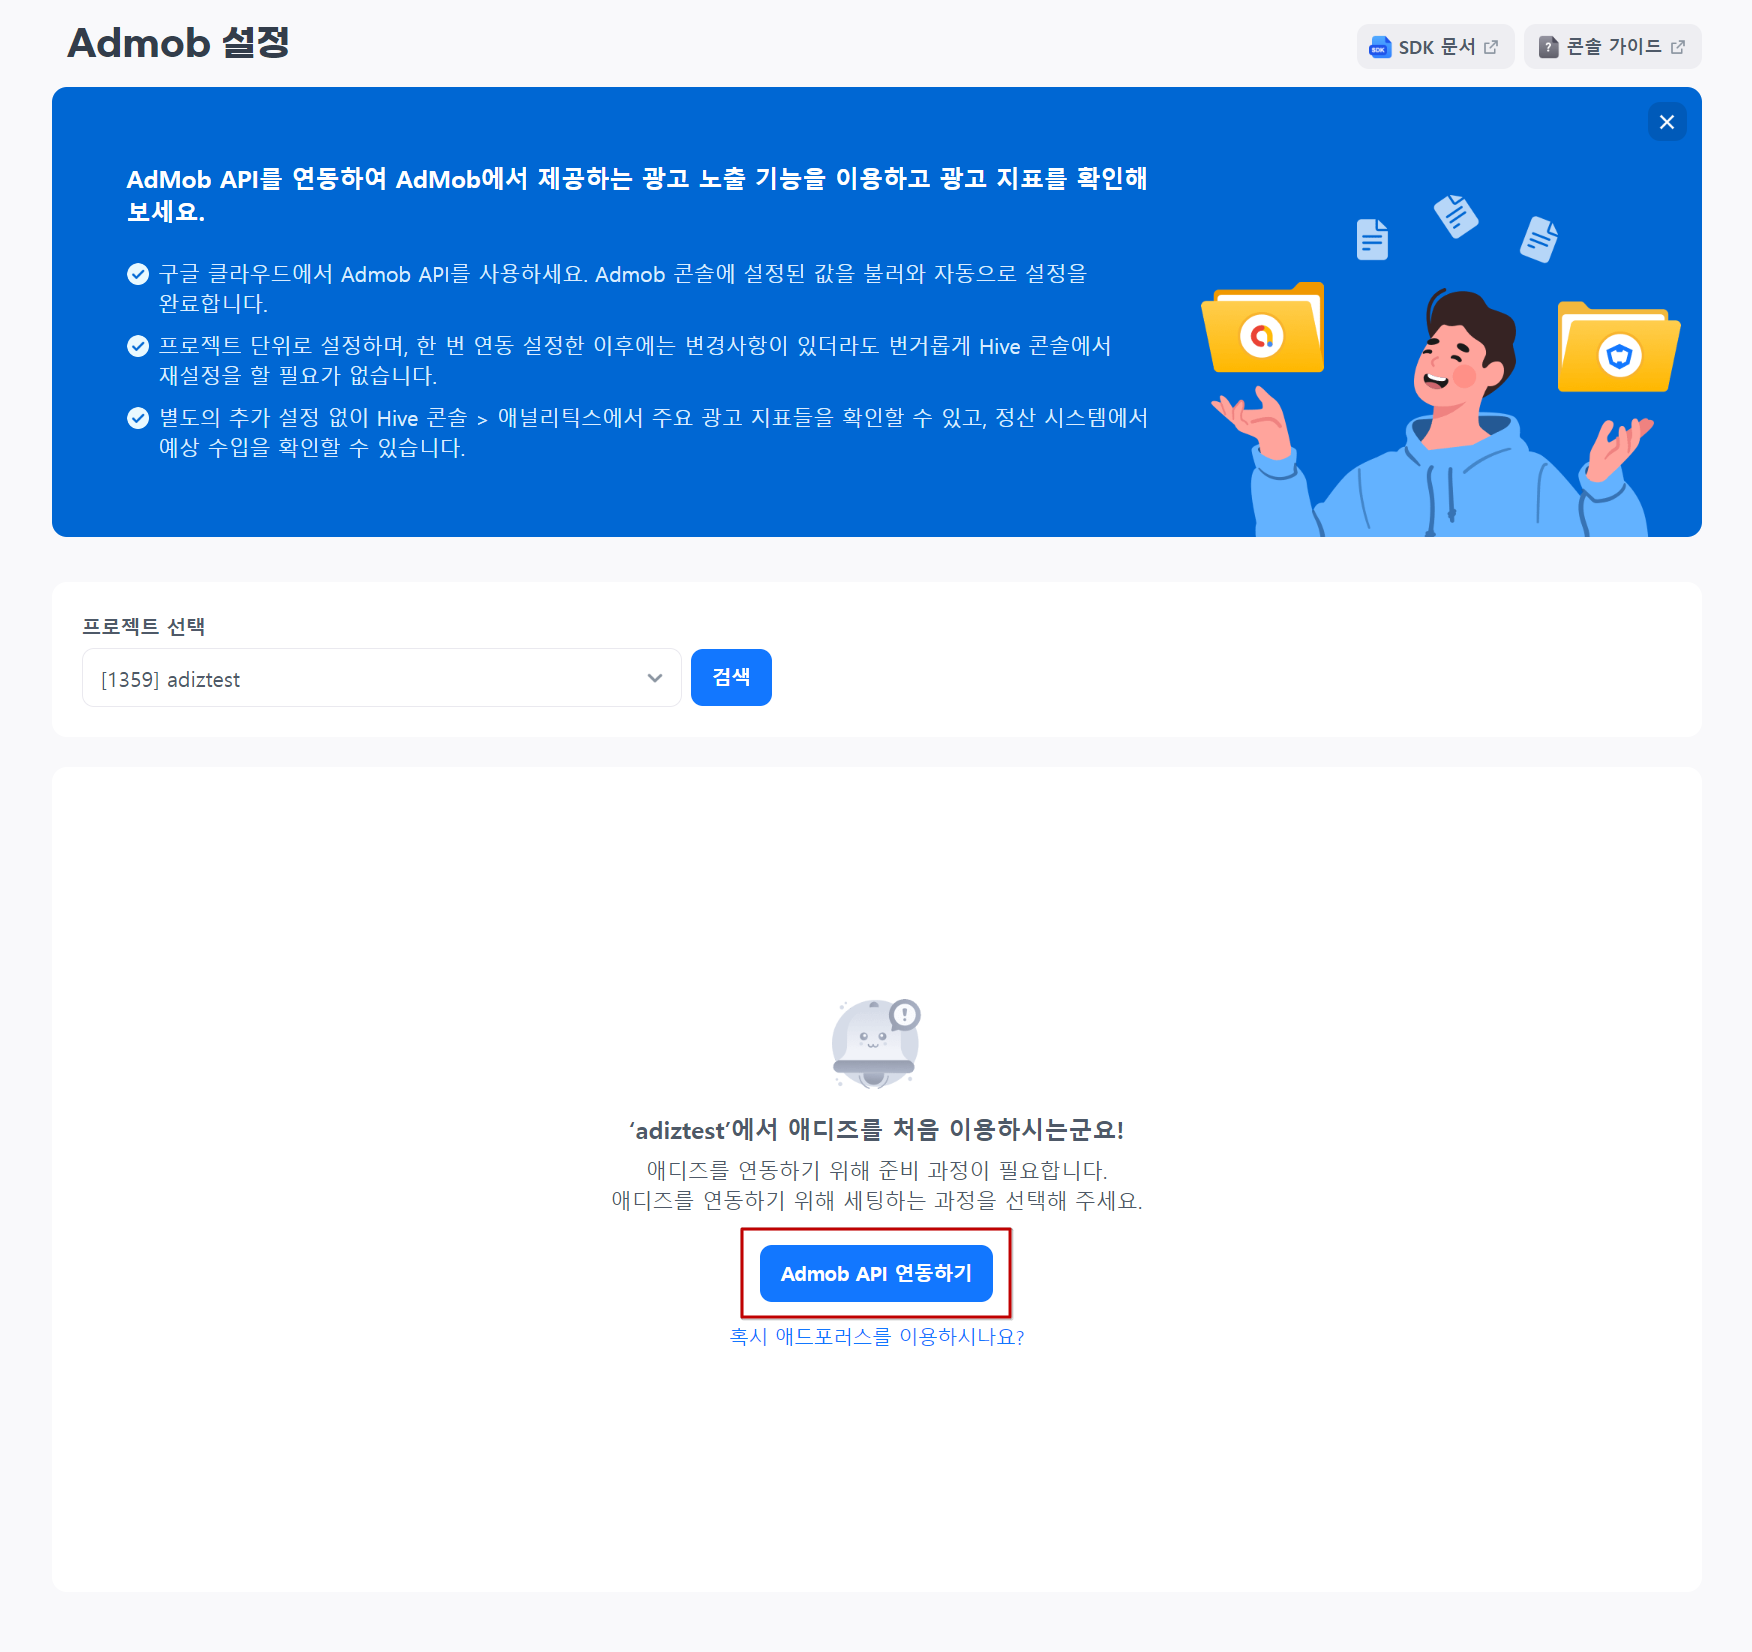
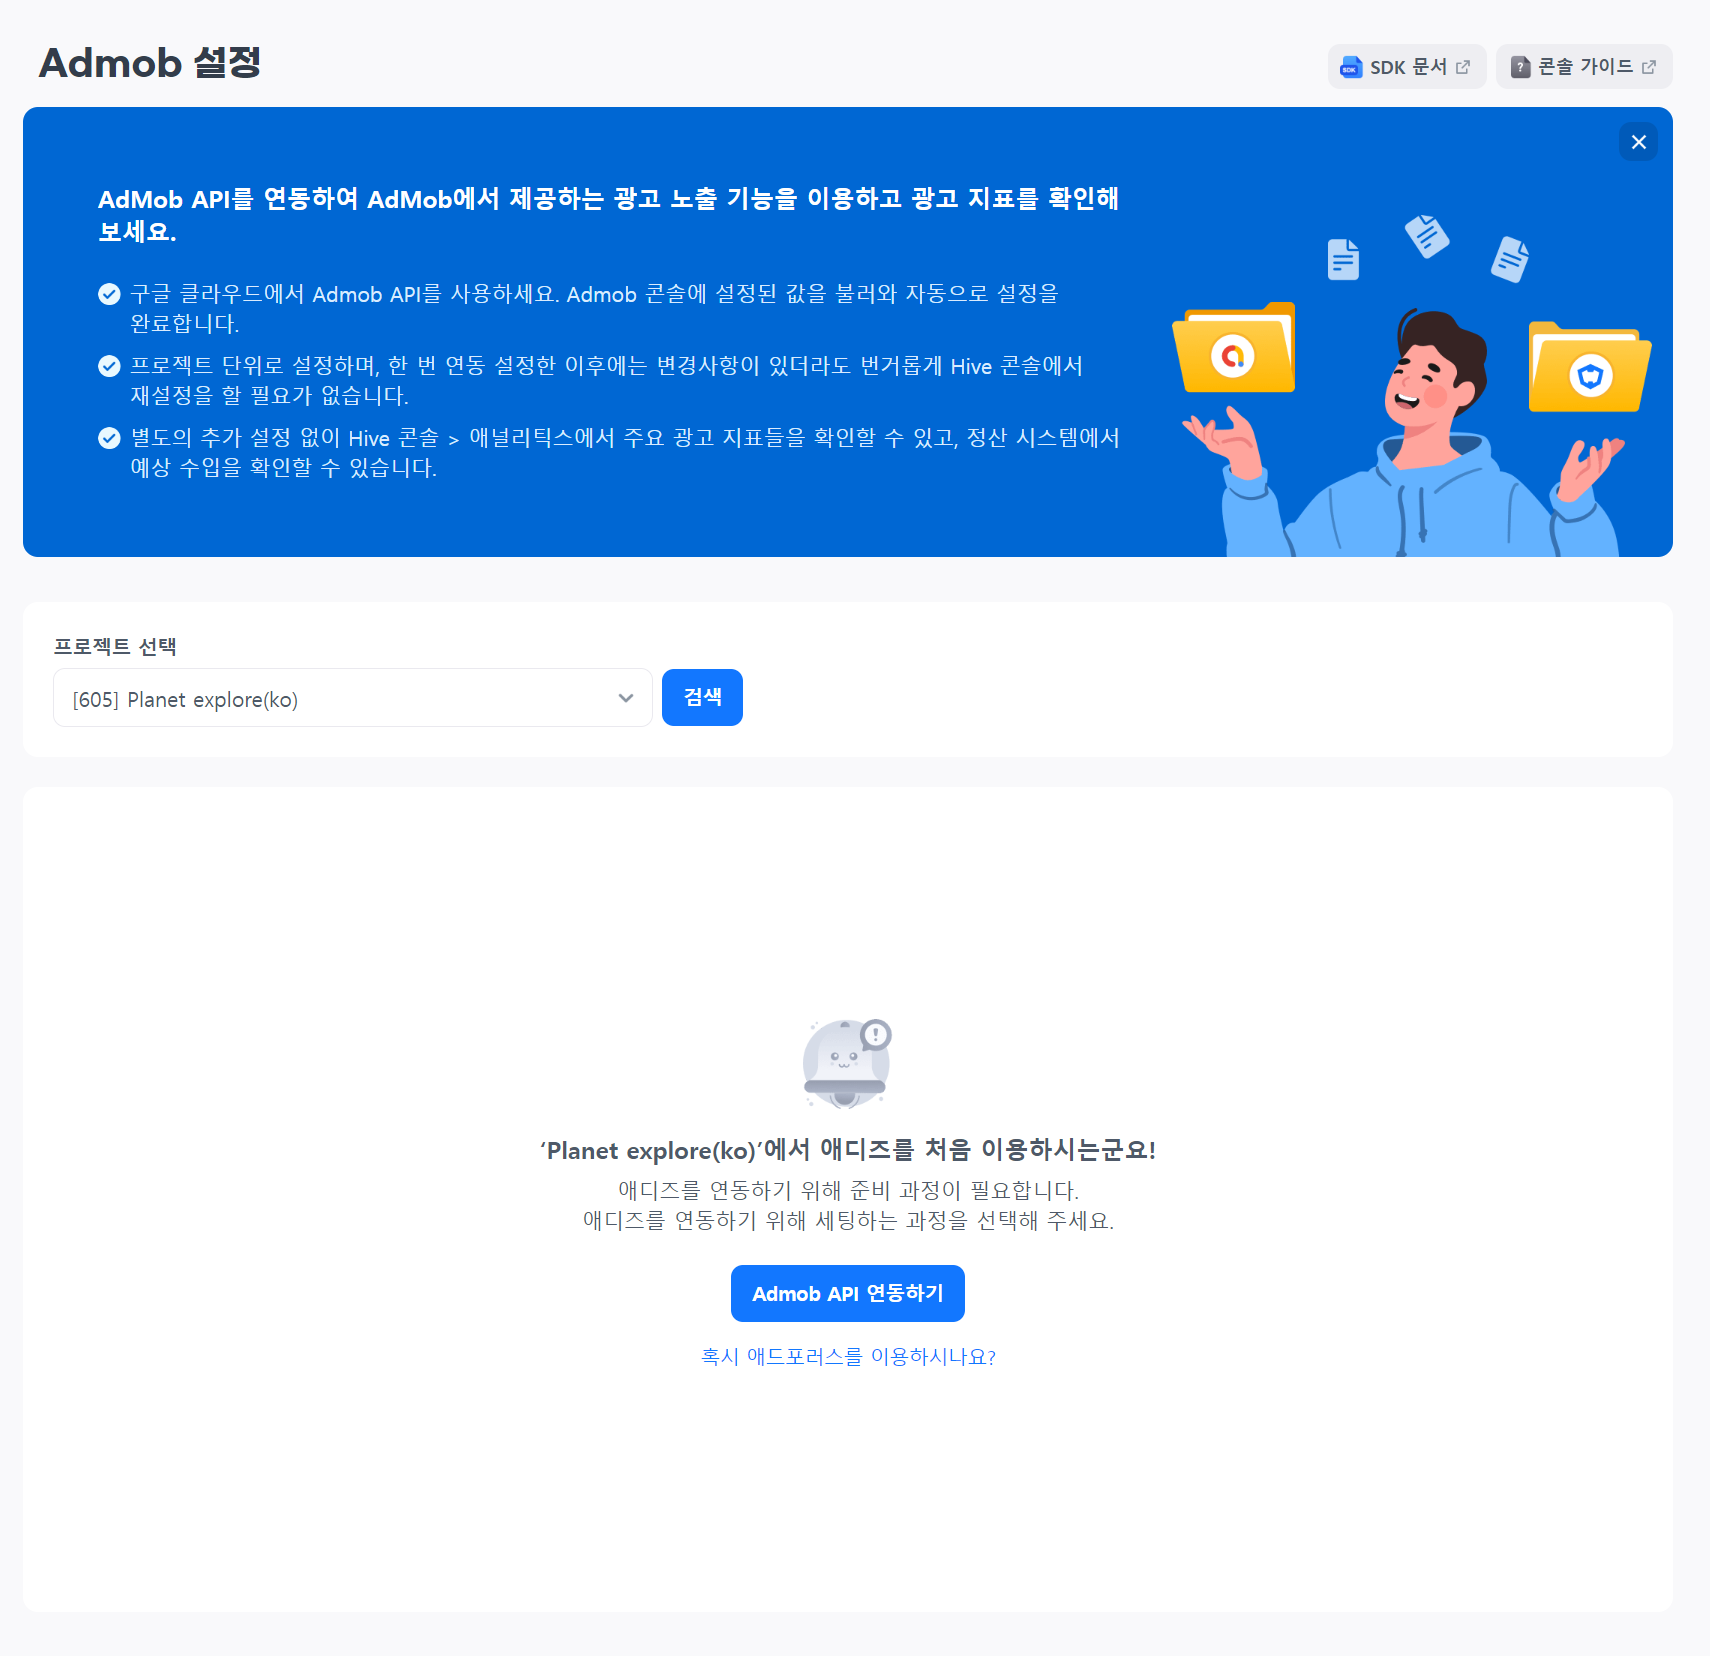
1. Go to Hive Console > Adiz > AdMob Settings. Select the game you want to sync with, and click the “Link AdMob API” Button.
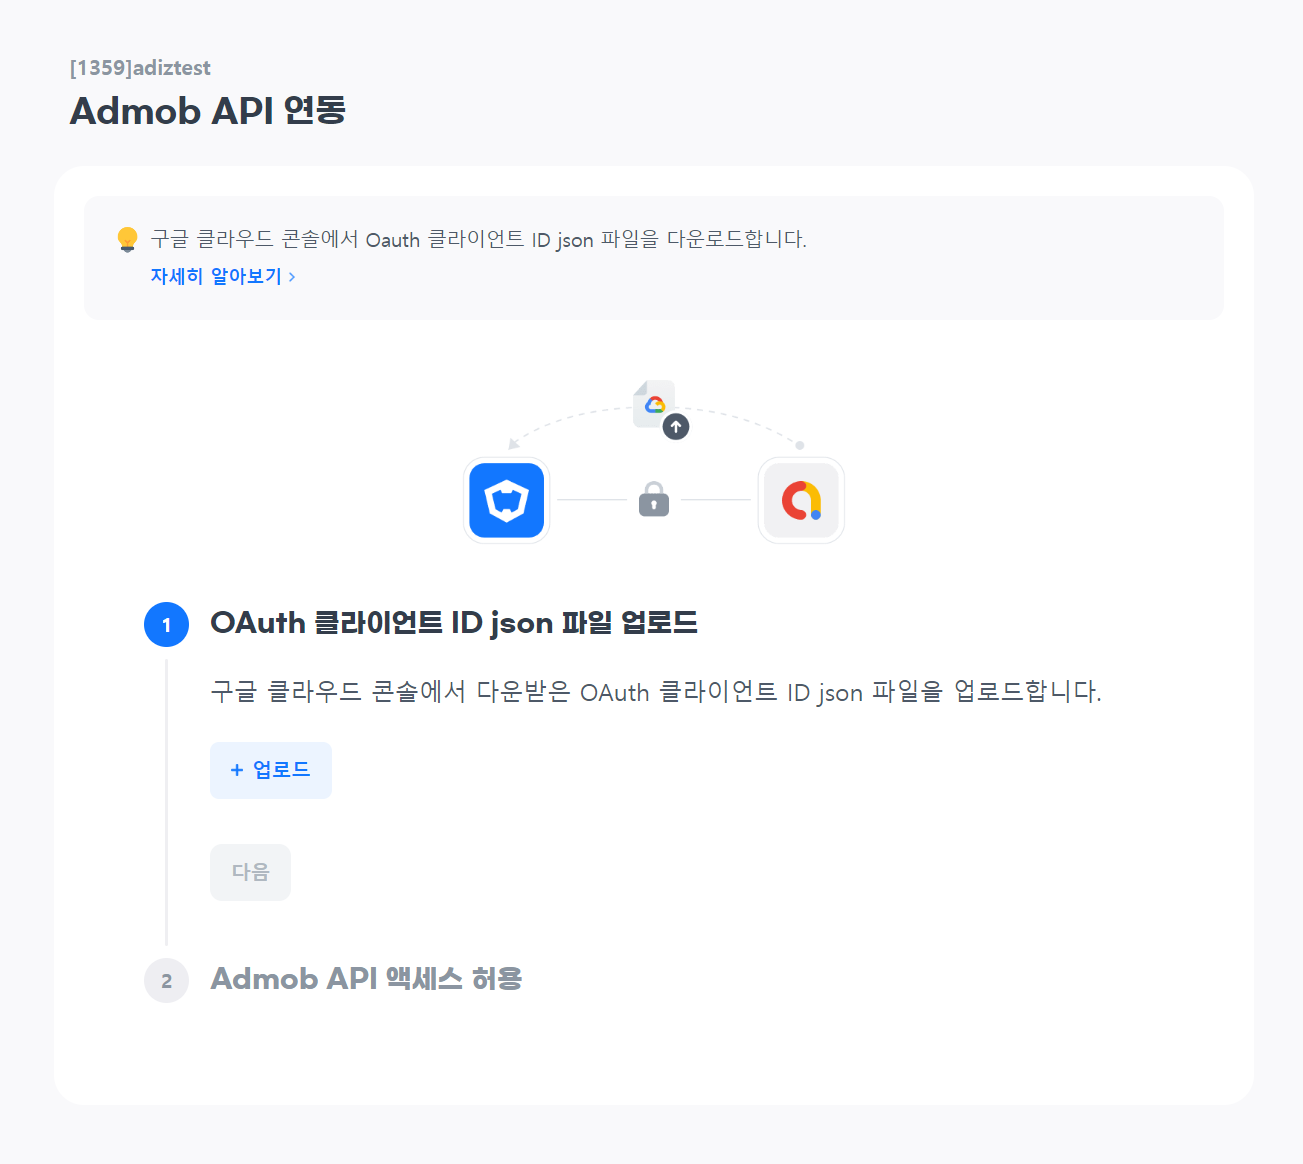
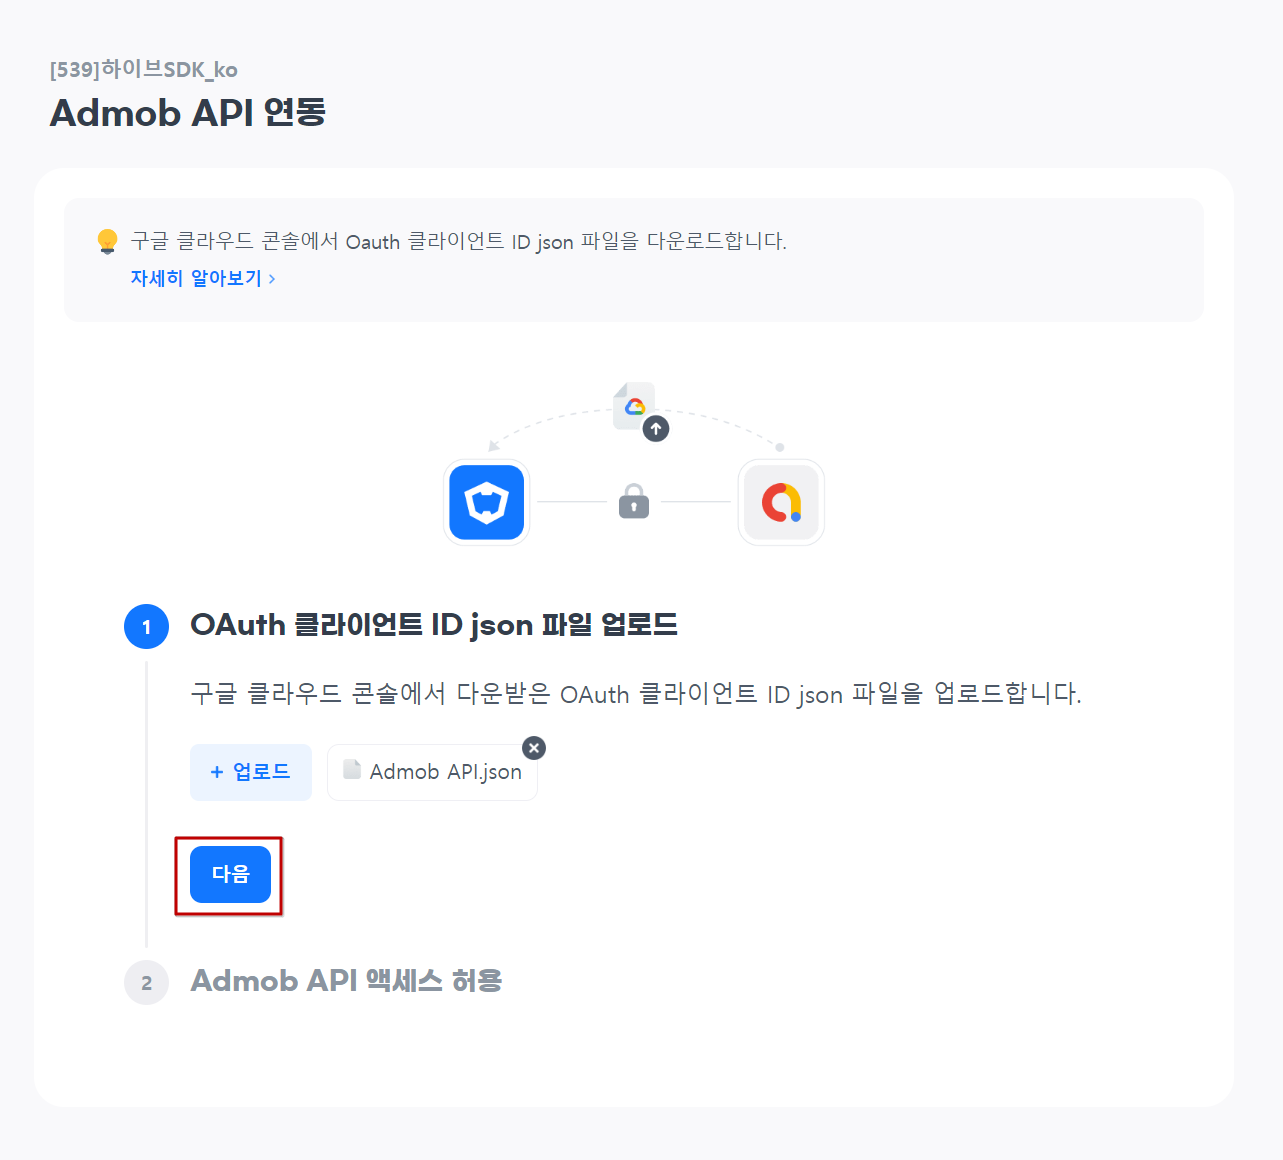
2. Upload the OAuth client ID json file downloaded from the Google Cloud Console.
If you do not have an OAuth client ID json file, prepare it by following the guide. (Go to Create OAuth client ID)
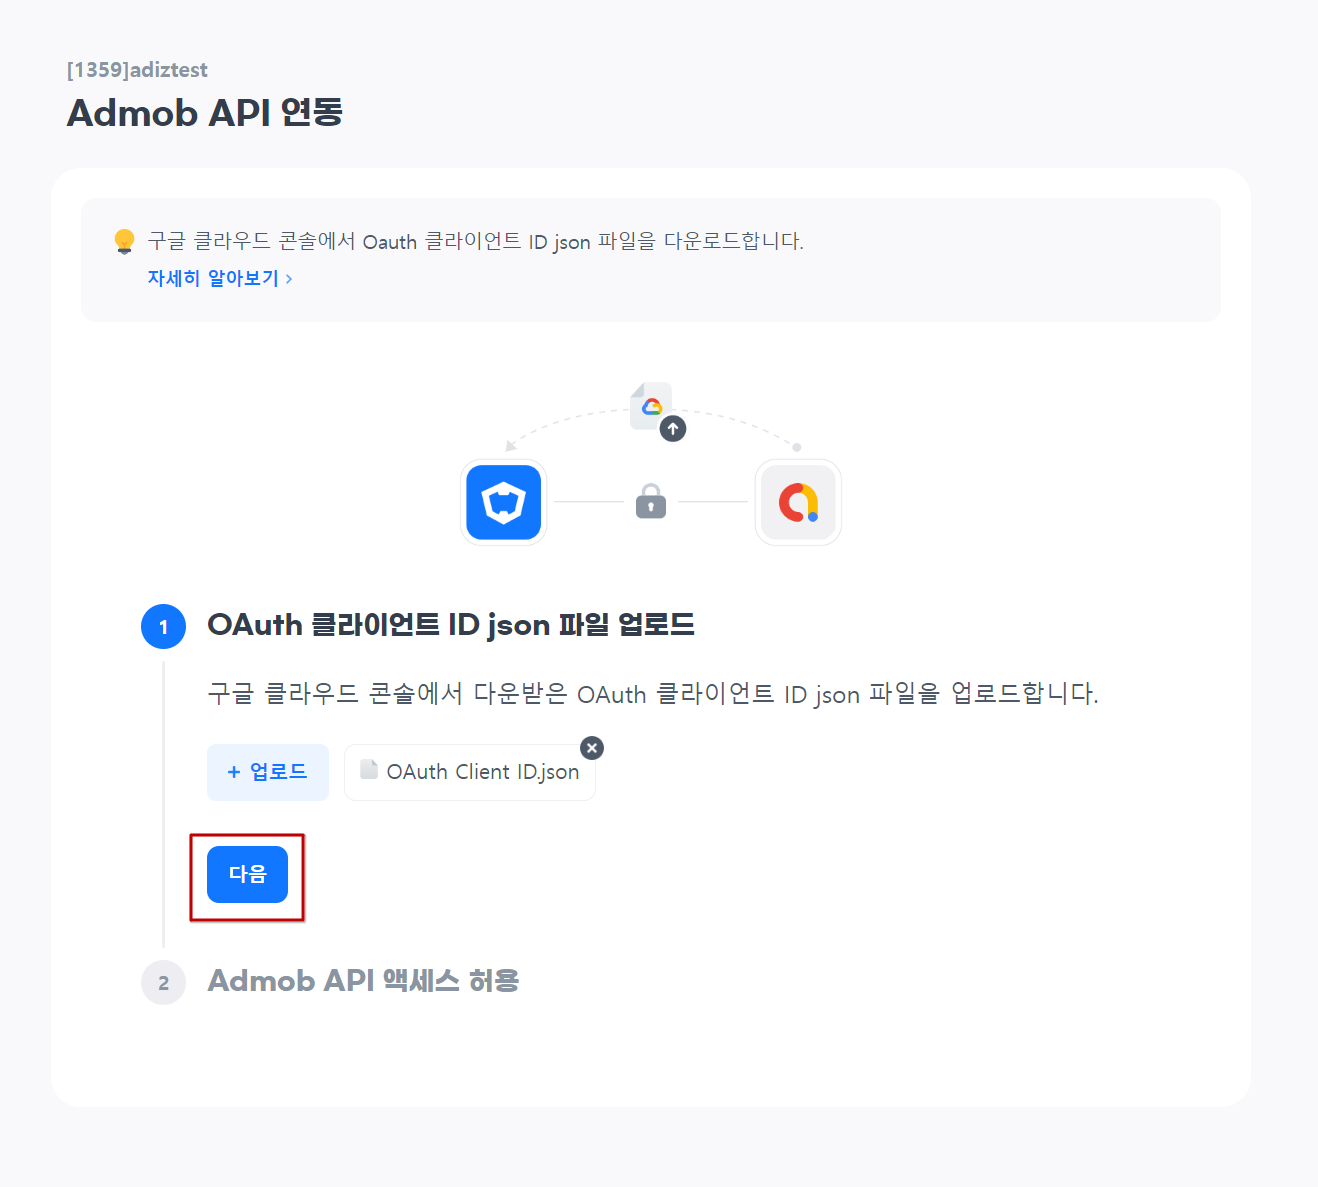
3. If you’ve uploaded the json file, click Next.
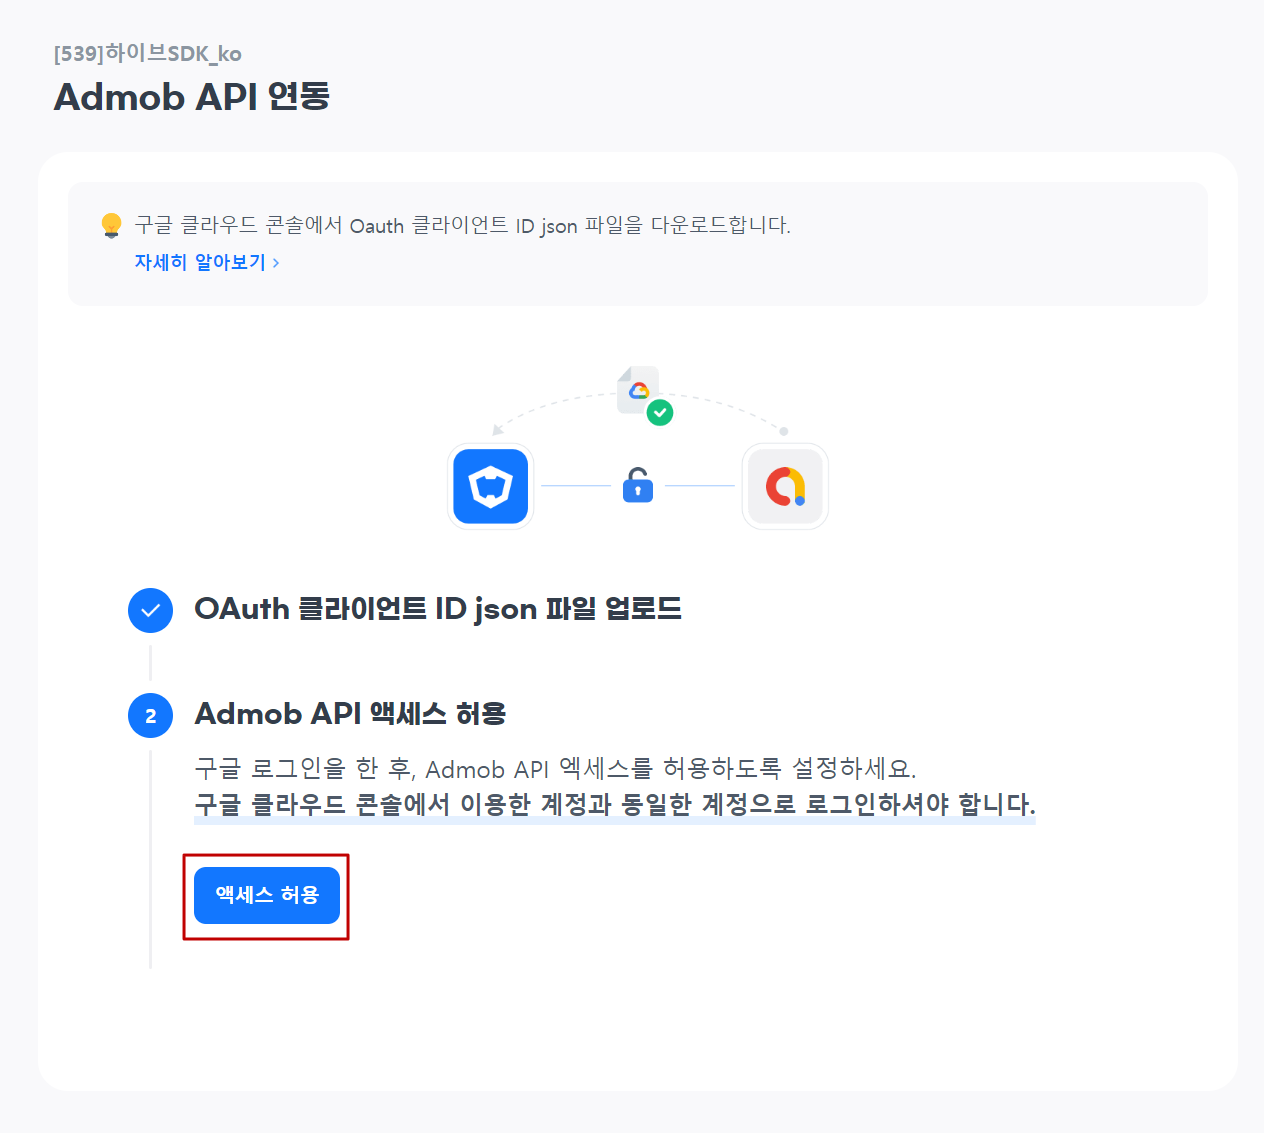
4. Finally, click the “Allow Access” Button. After logging in to Google, set it to allow AdMob API access.

5. 5. Once you allow access, the linking is complete. You’re not set to use AdMob. Go to the management page and start using AdMob.
AdMob Management Information
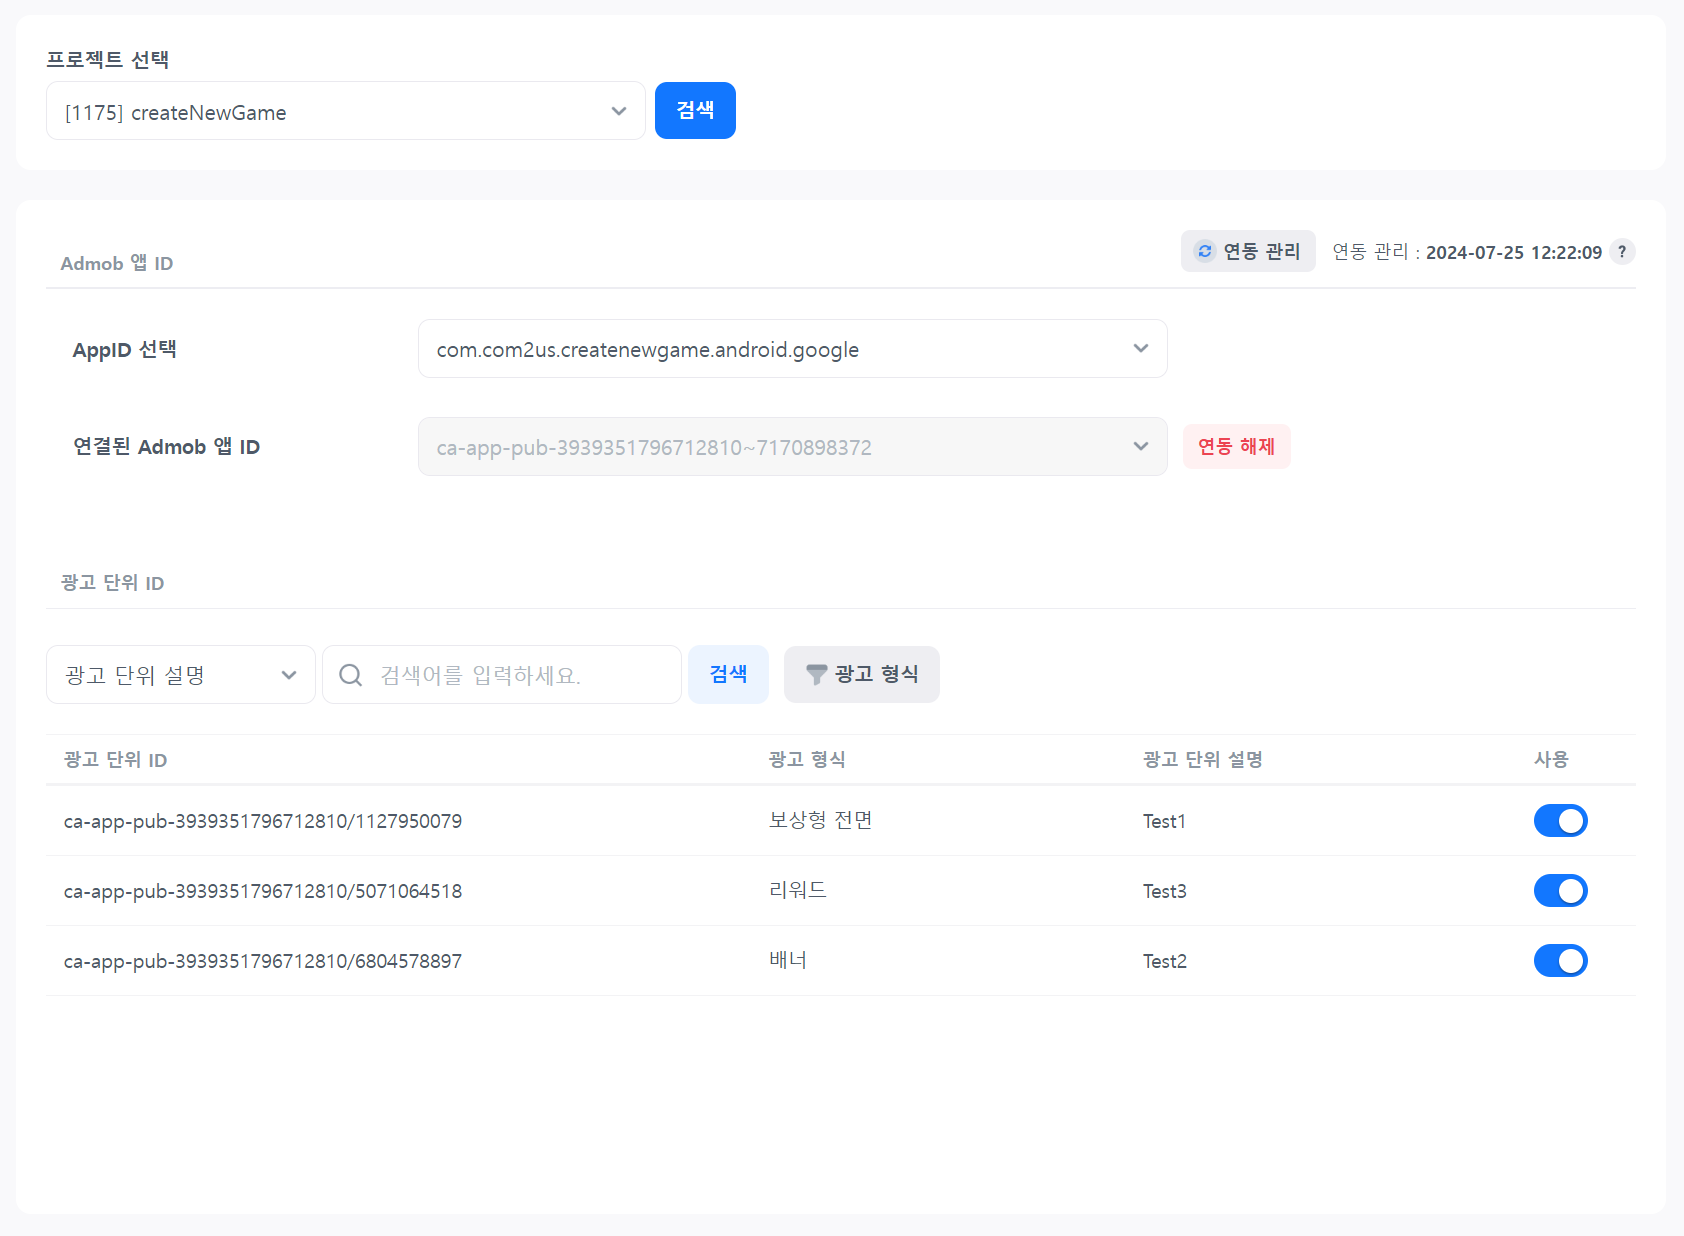
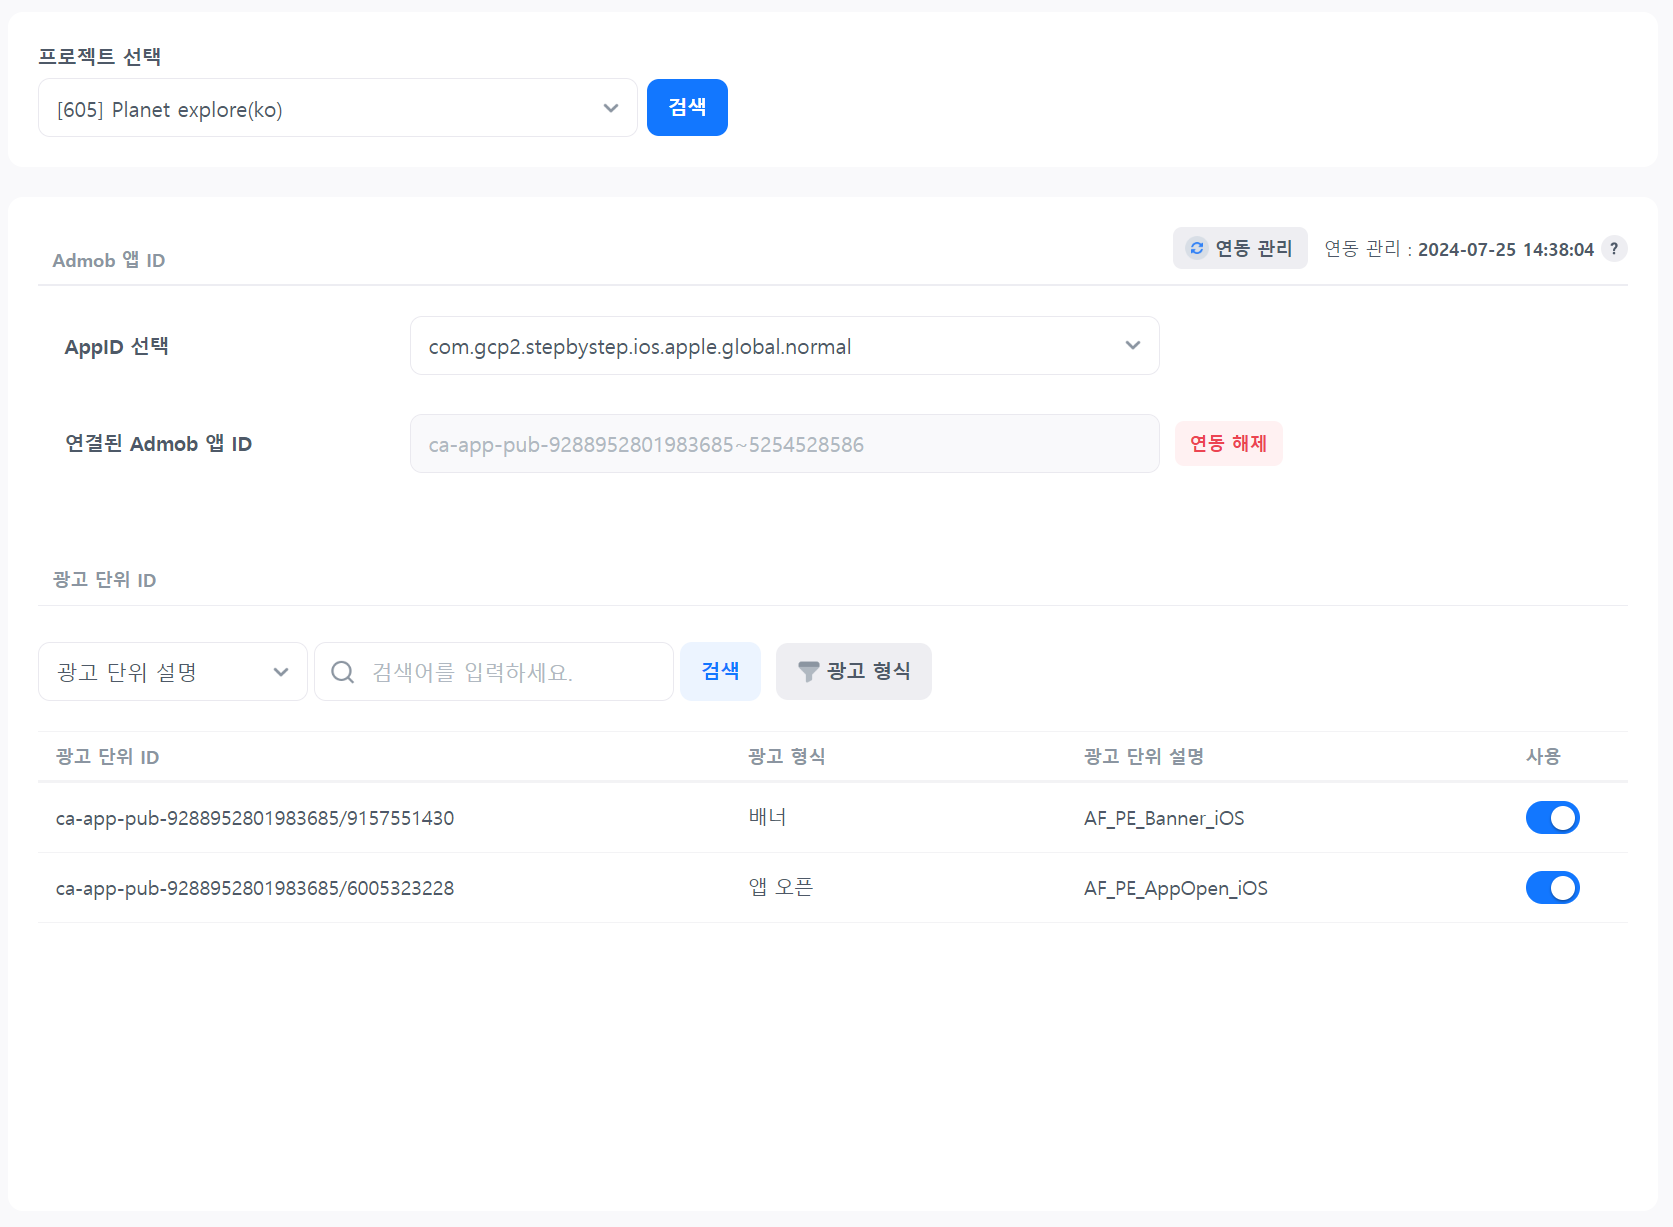
After the linking is complete, you can check the AdMob App ID and ad unit ID imported from the AdMob console.
Connect Hive App ID and AdMob App ID
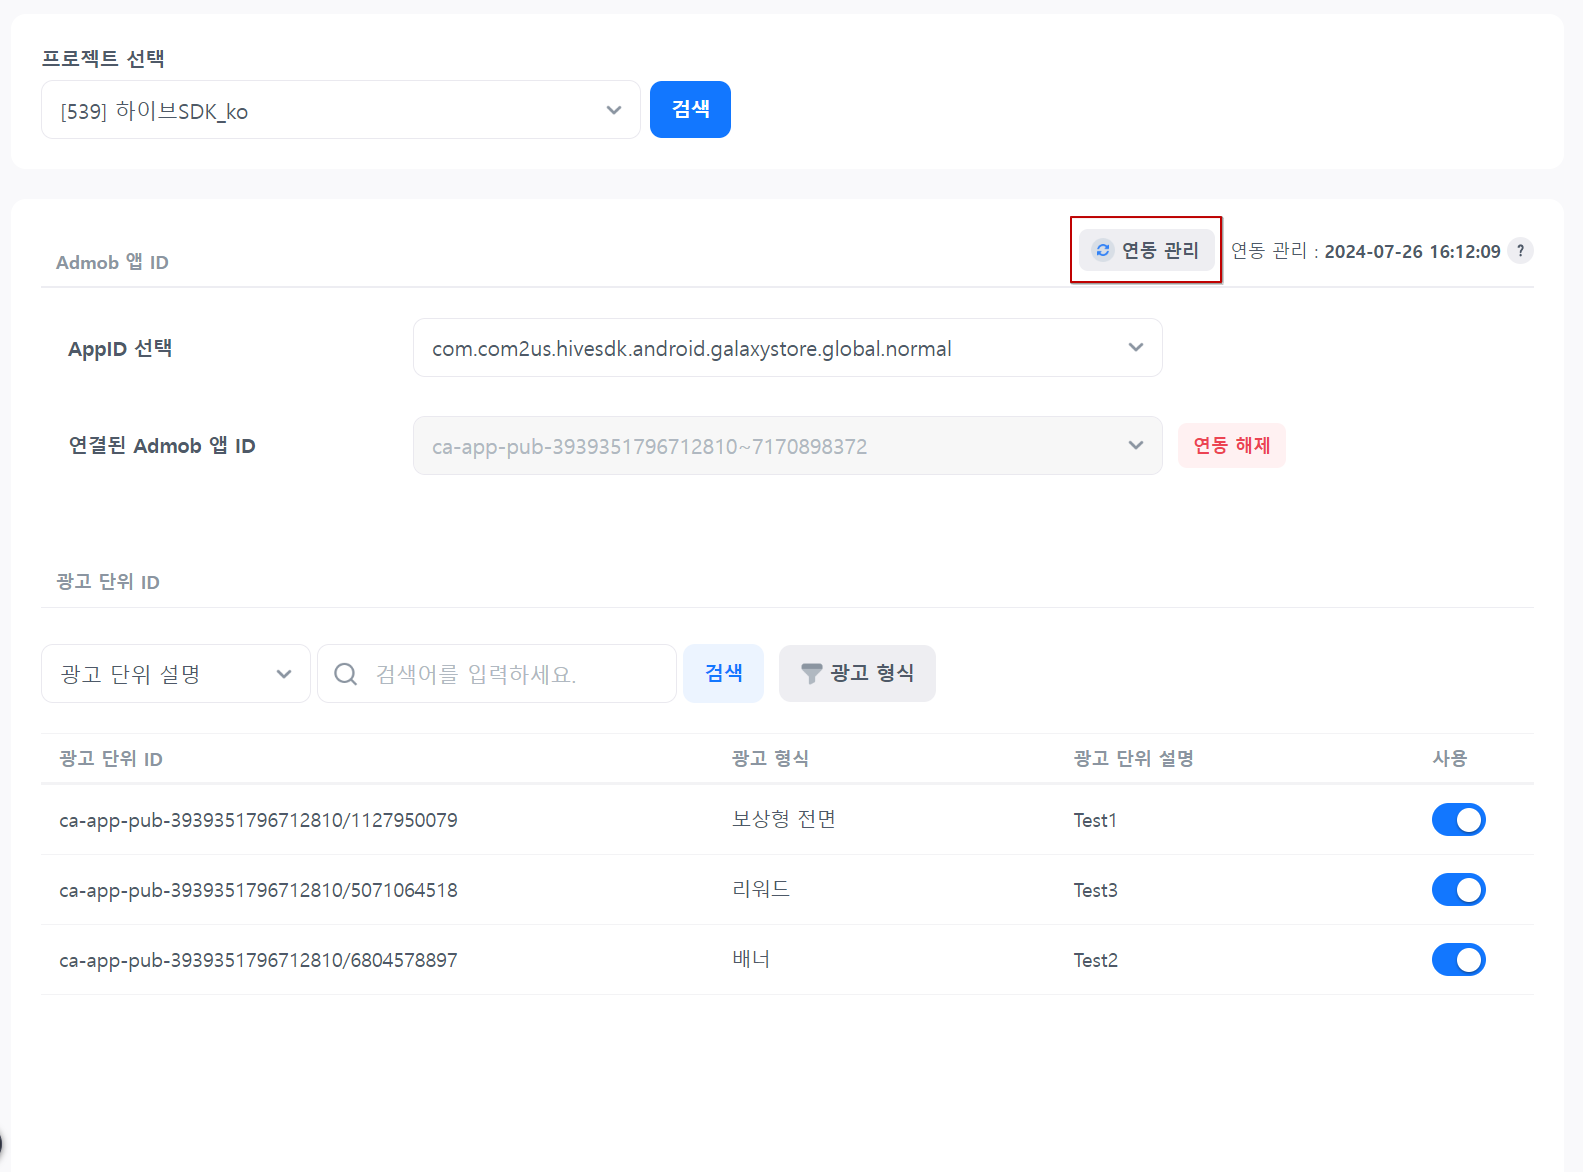
Once the AdMob API linking is complete, you can check the AdMob App ID in the Hive console in your account.
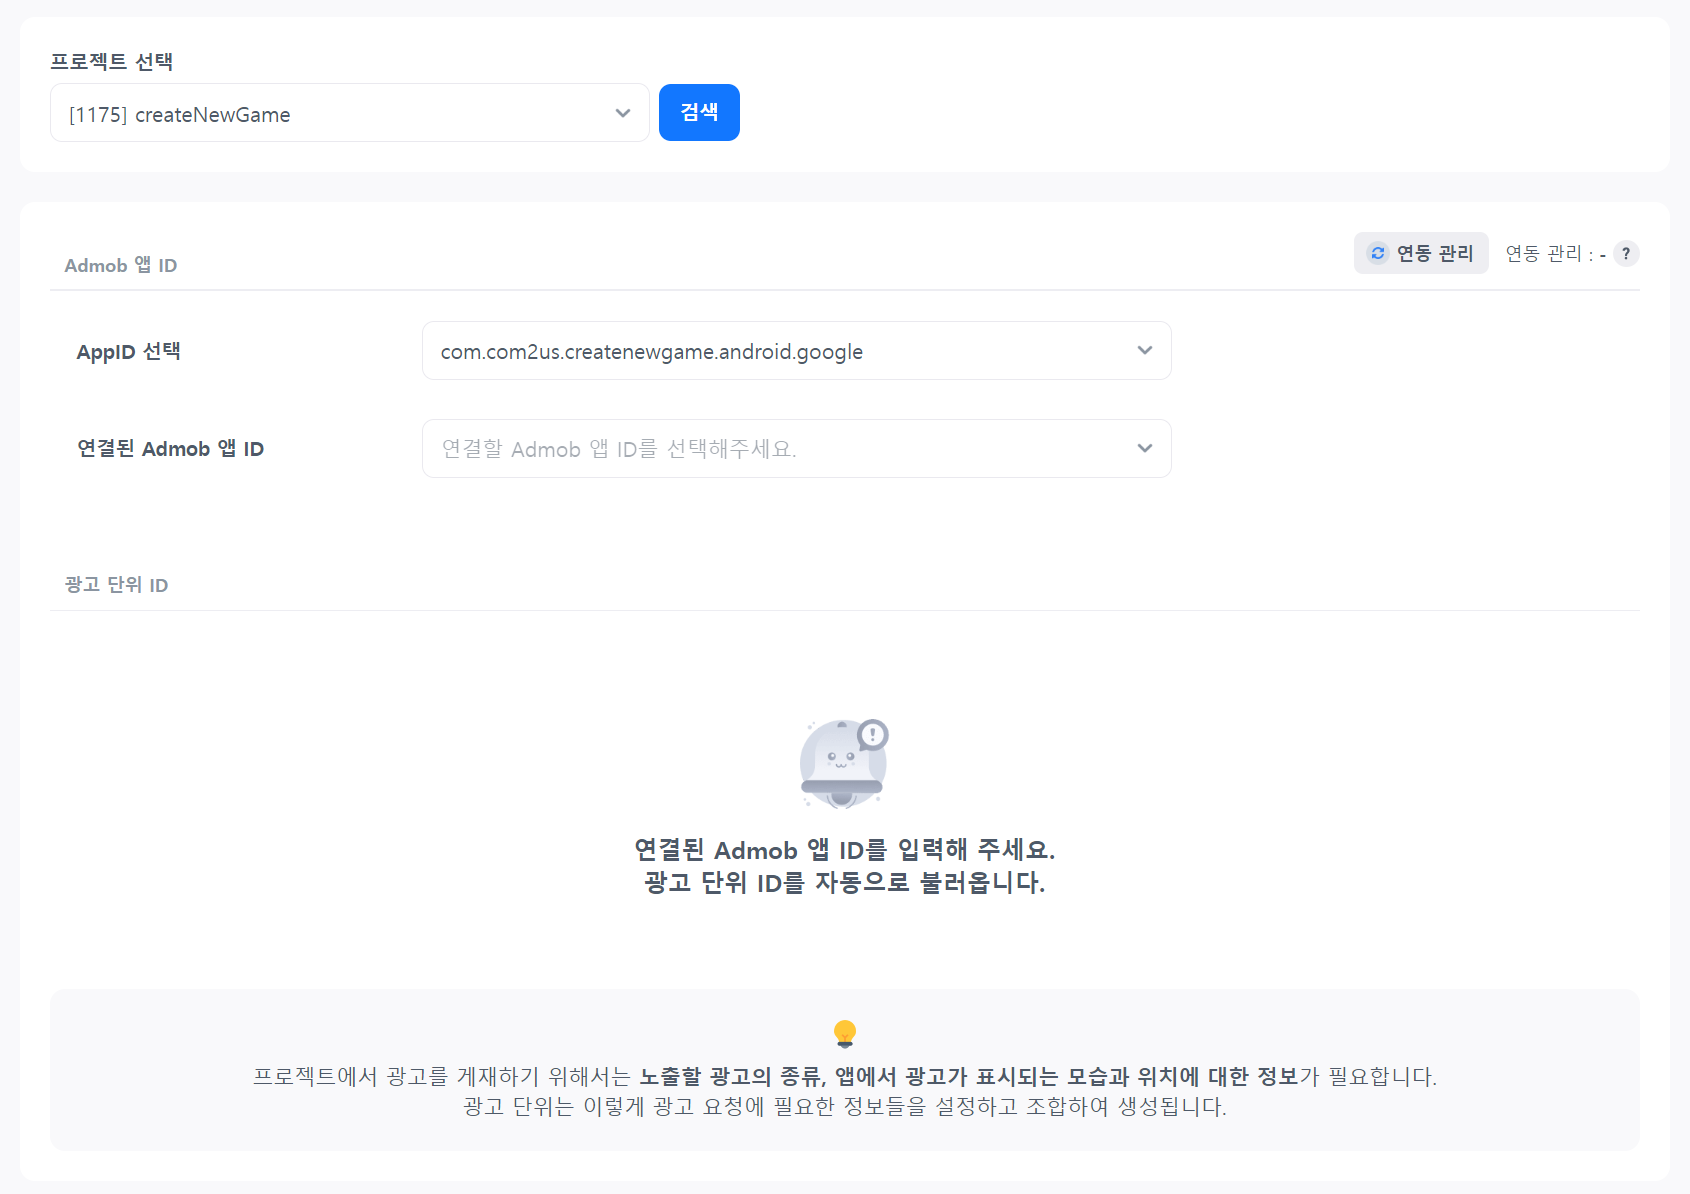
First, select the Hive App ID, then click “Connected AdMob app ID”. The imported AdMob App ID will be displayed.
Select the AdMob App ID to be linked to the Hive App ID.

The ad unit ID linked to the selected AdMob App ID will be automatically displayed.
Remove Link
You can disconnect the Hive App ID and AdMob App ID.
If you want to link with another App ID, please remove the existing link first.
You can remove the link by clicking the “Remove Link” Button. When the AdMob App ID link is removed, the link with the ad unit ID will also be removed.
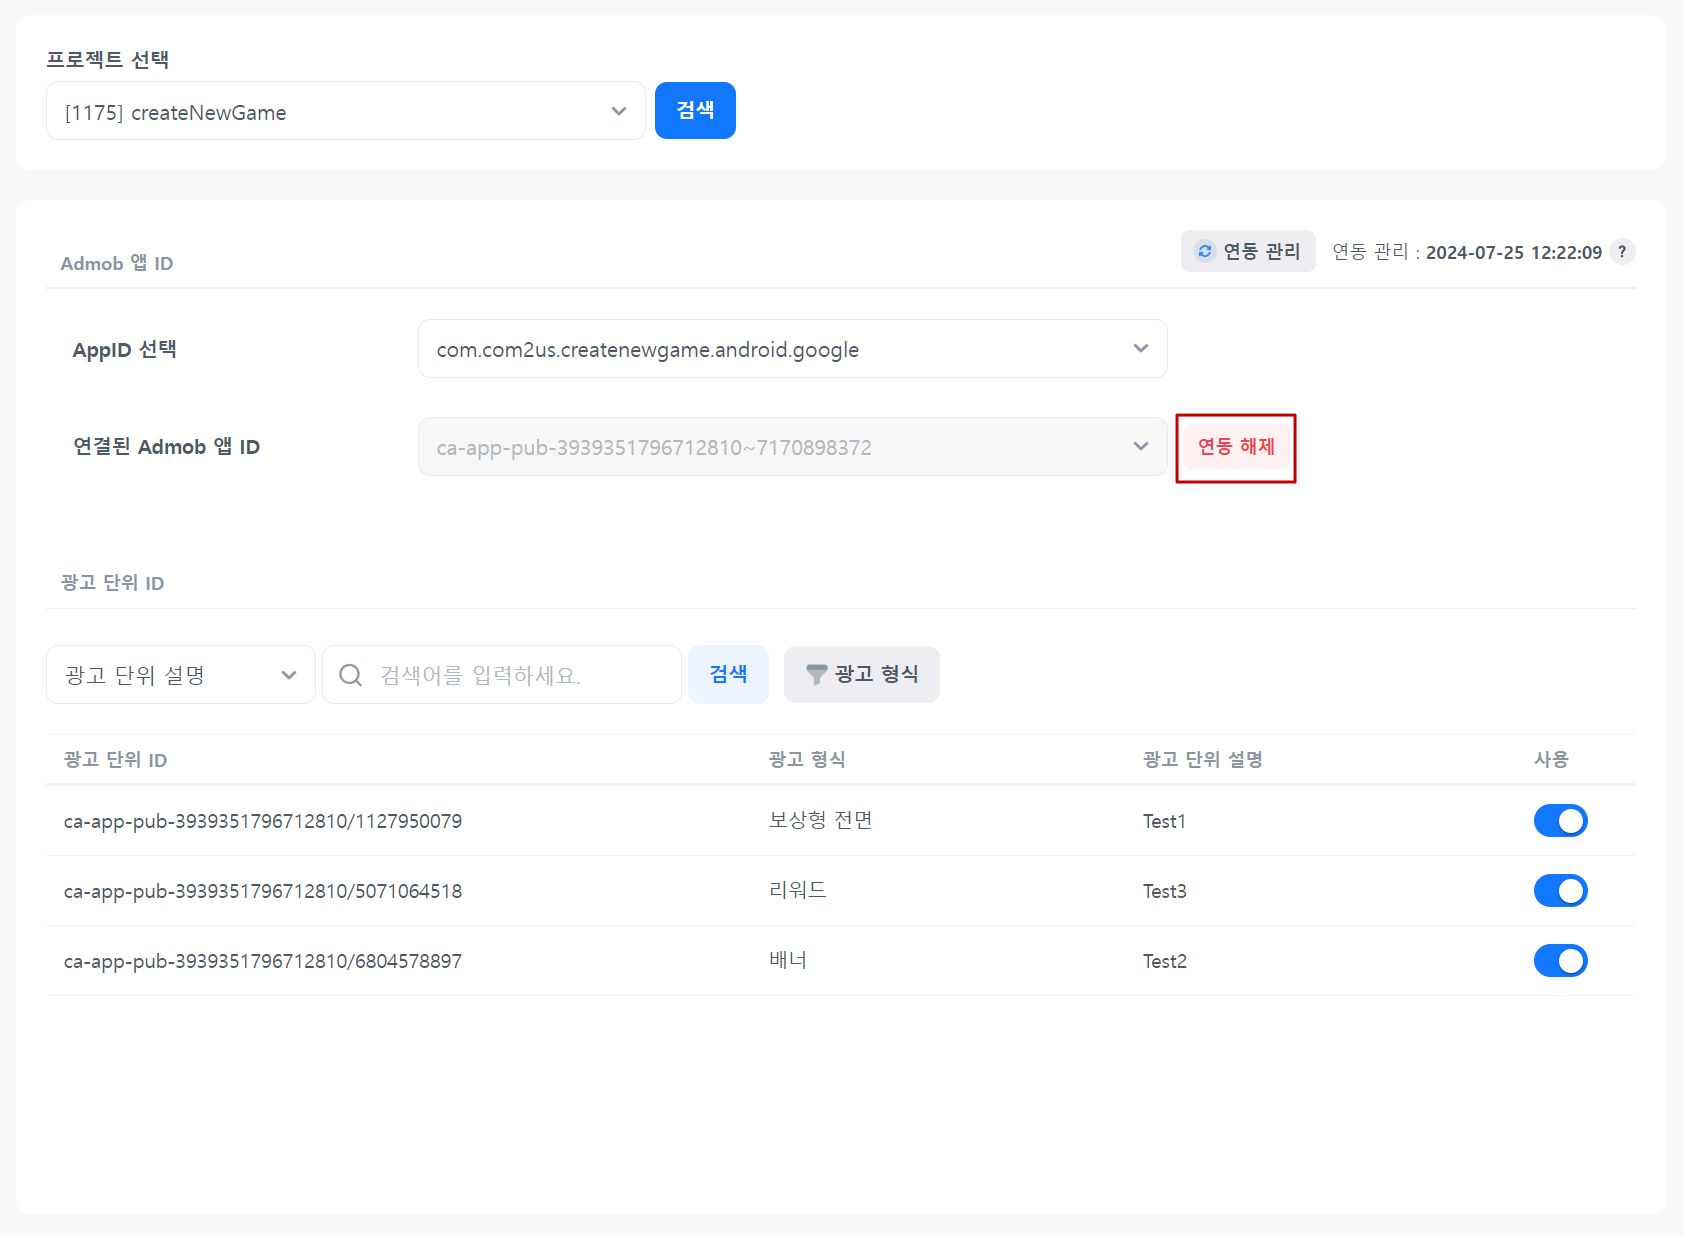
The removed Hive App ID can be linked with another AdMob App ID.
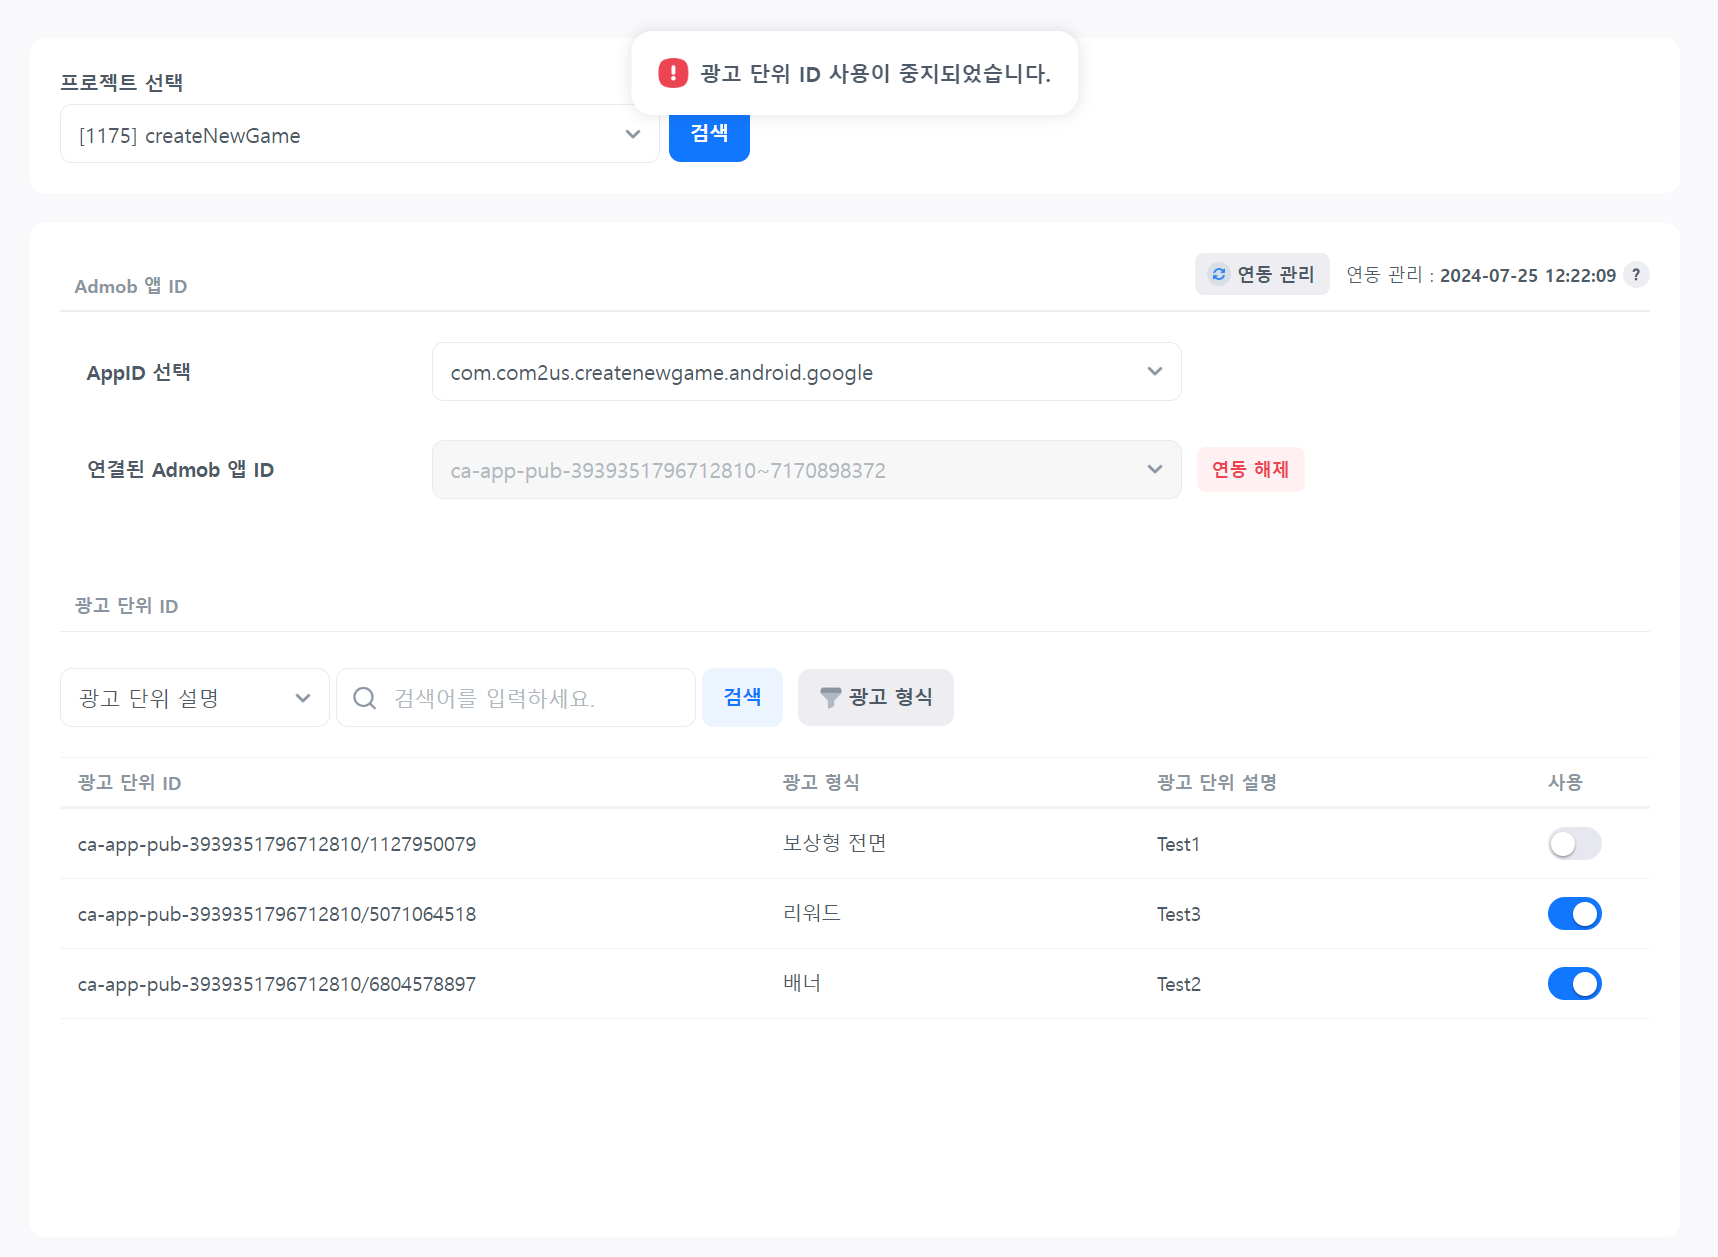
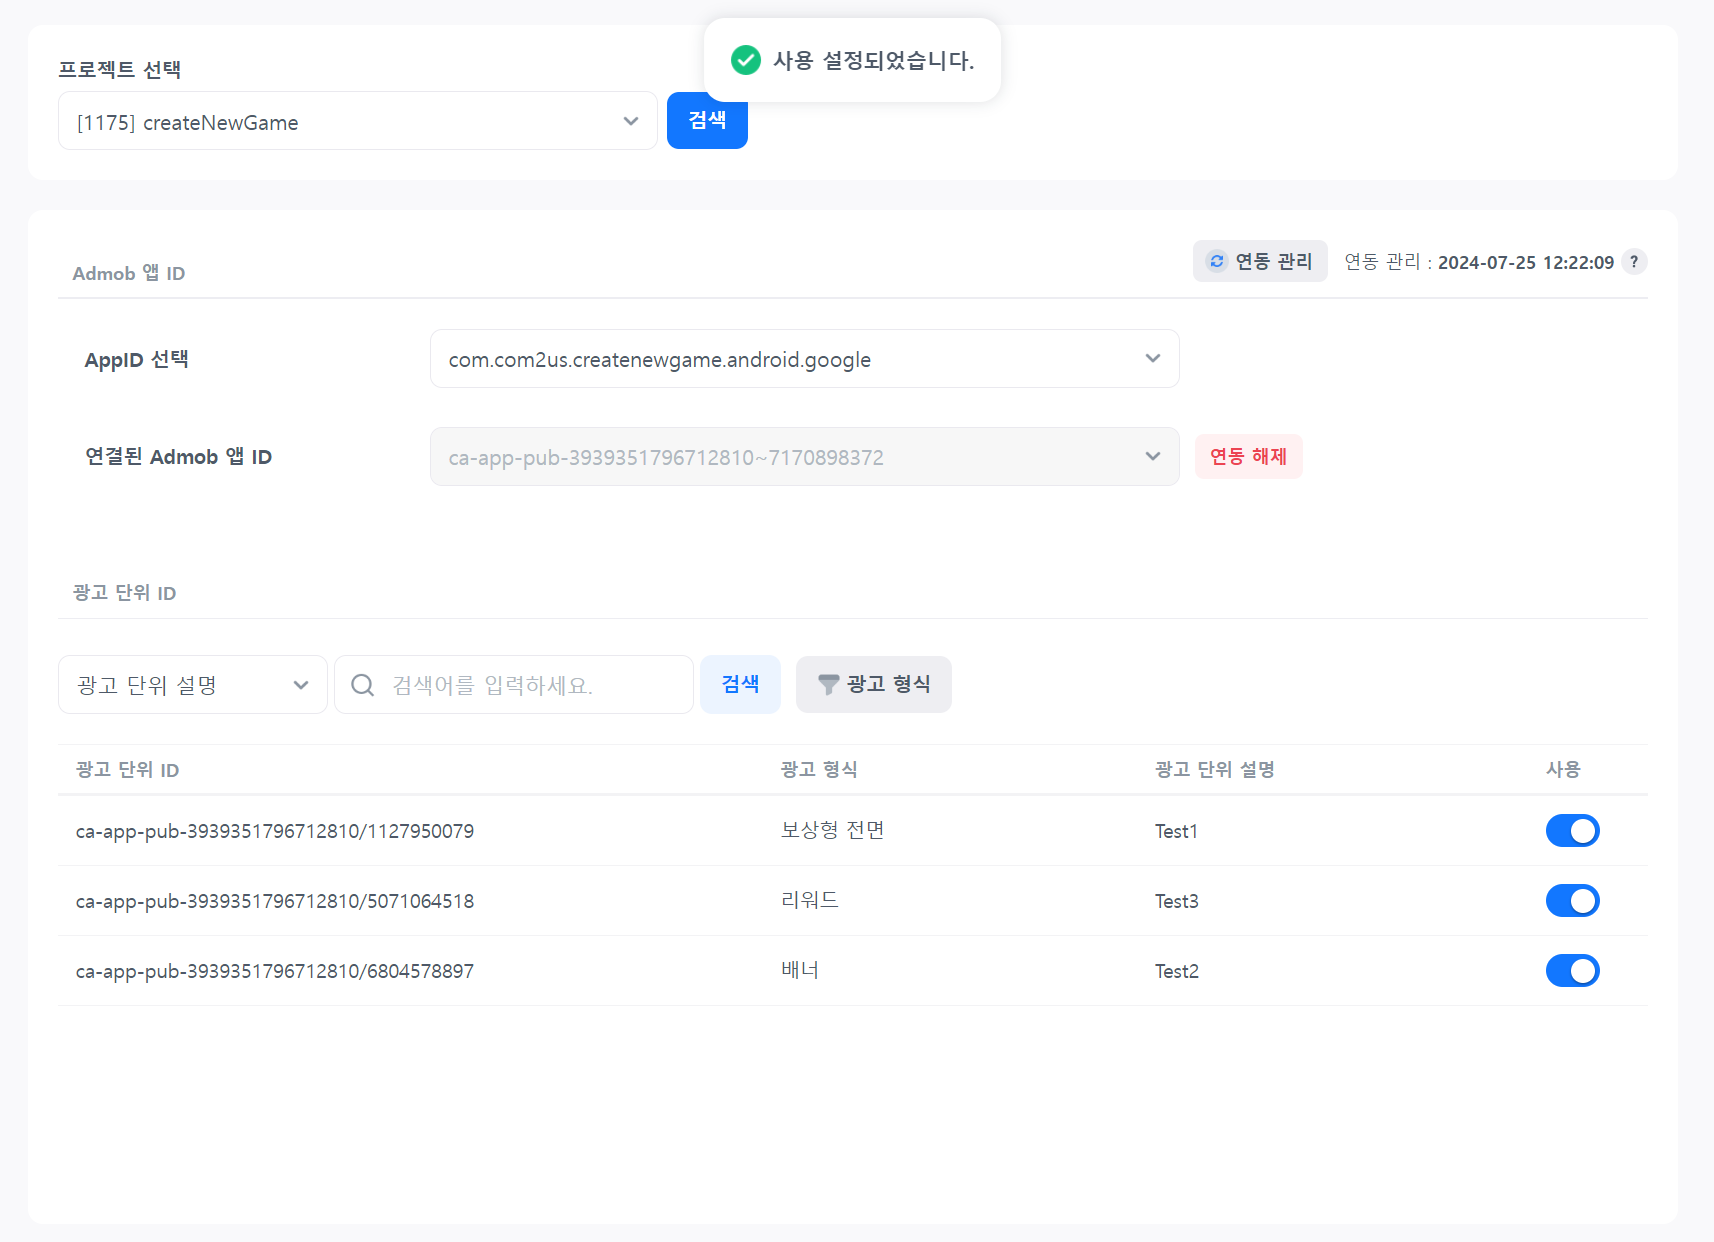
Ad Unit ID Usage Settings
To remove the ad unit ID, turn off the “Use” toggle. You cannot request ads with a disabled ad unit ID.
To reactivate it, change it to the “Use” status.
Creating the OAuth client ID in the Google Cloud Console
- Creating a Project
- AdMob API Usage Settings
- Creating User Authentication Information (Configuring the Consent Screen)
- Create User Authentication Information (Oauth Client ID)
- Creating a Project
- AdMob API Usage Settings
- Creating User Authentication Information (Configuring the Consent Screen)
- Create User Authentication Information (Oauth Client ID)
Go to https://cloud.google.com and log in.
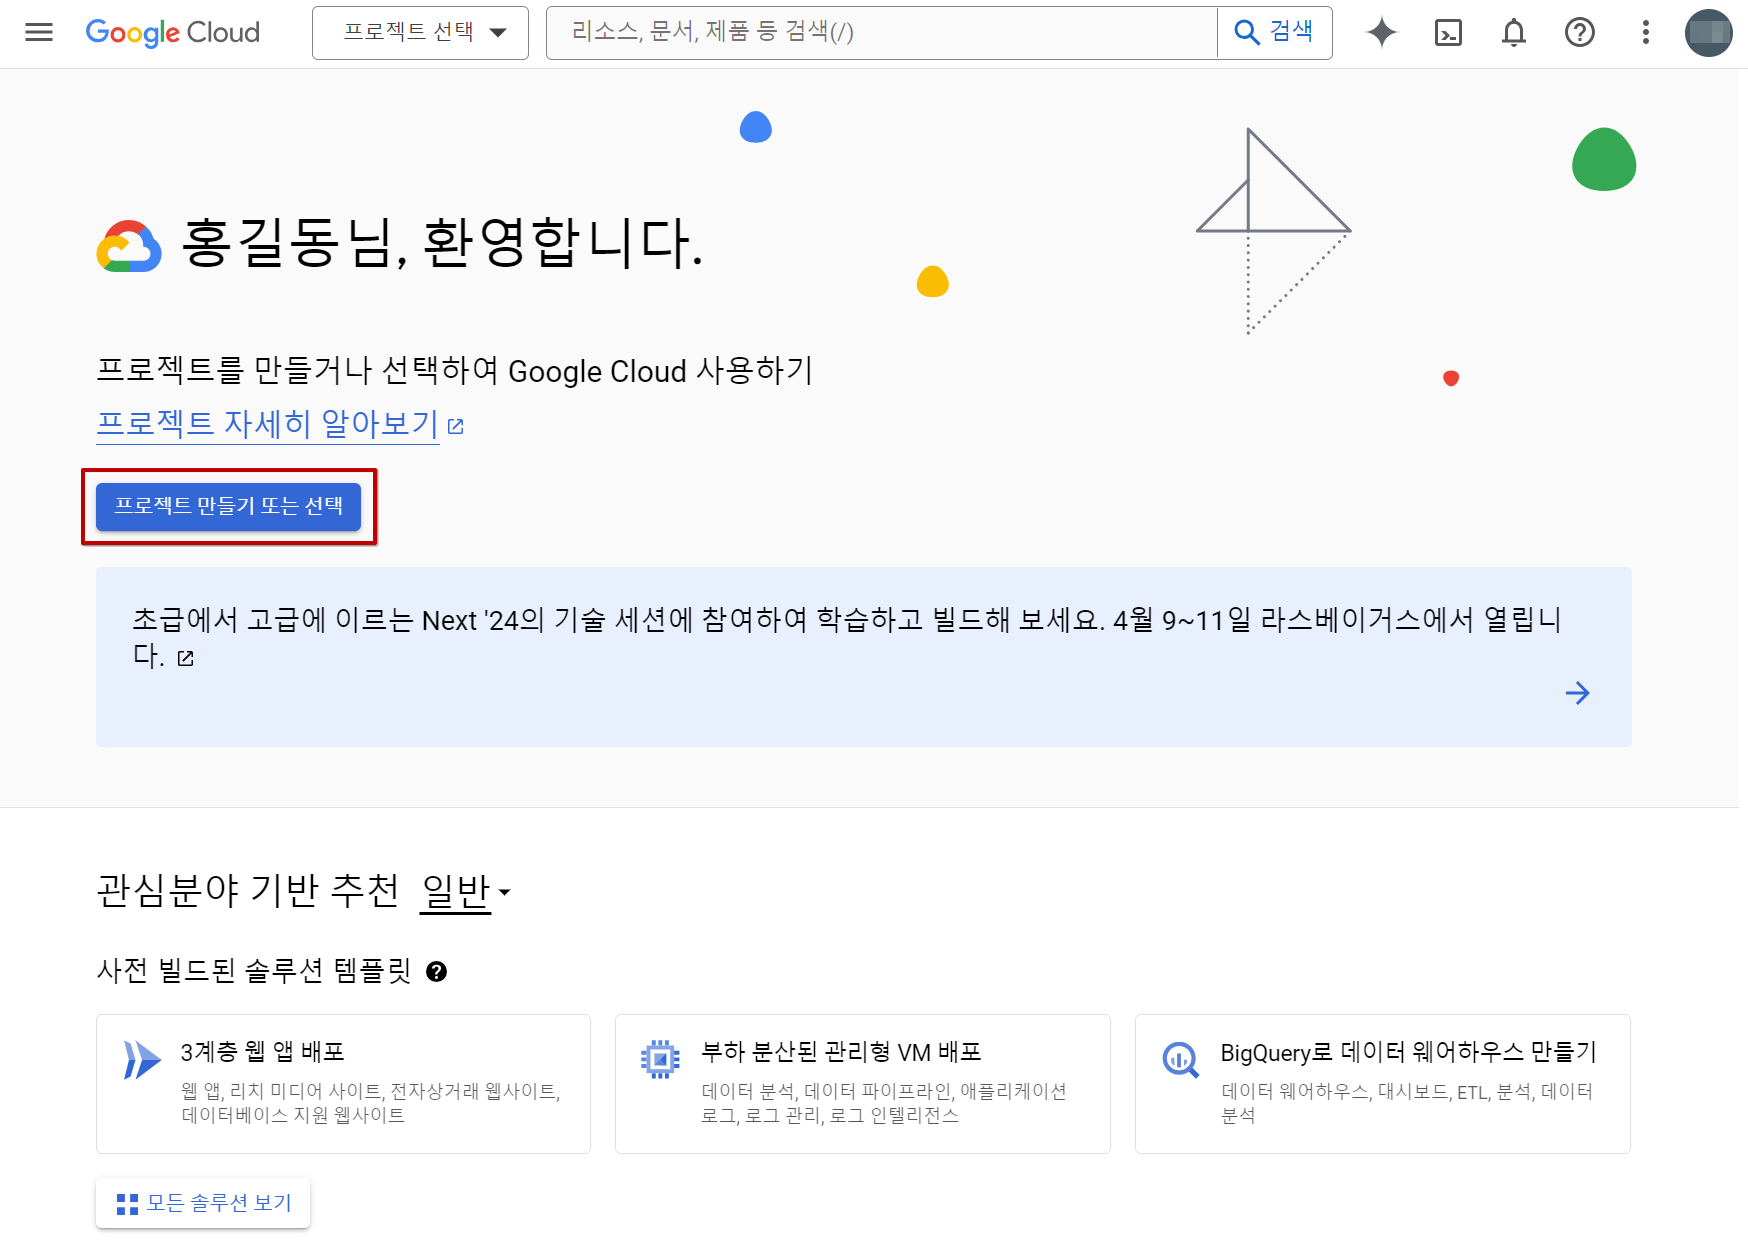
You must first create a project to manage Google services, user credentials, payments, APIs, etc.
Click “Create or Select a Project”. If you have already created a project, click “Next”.
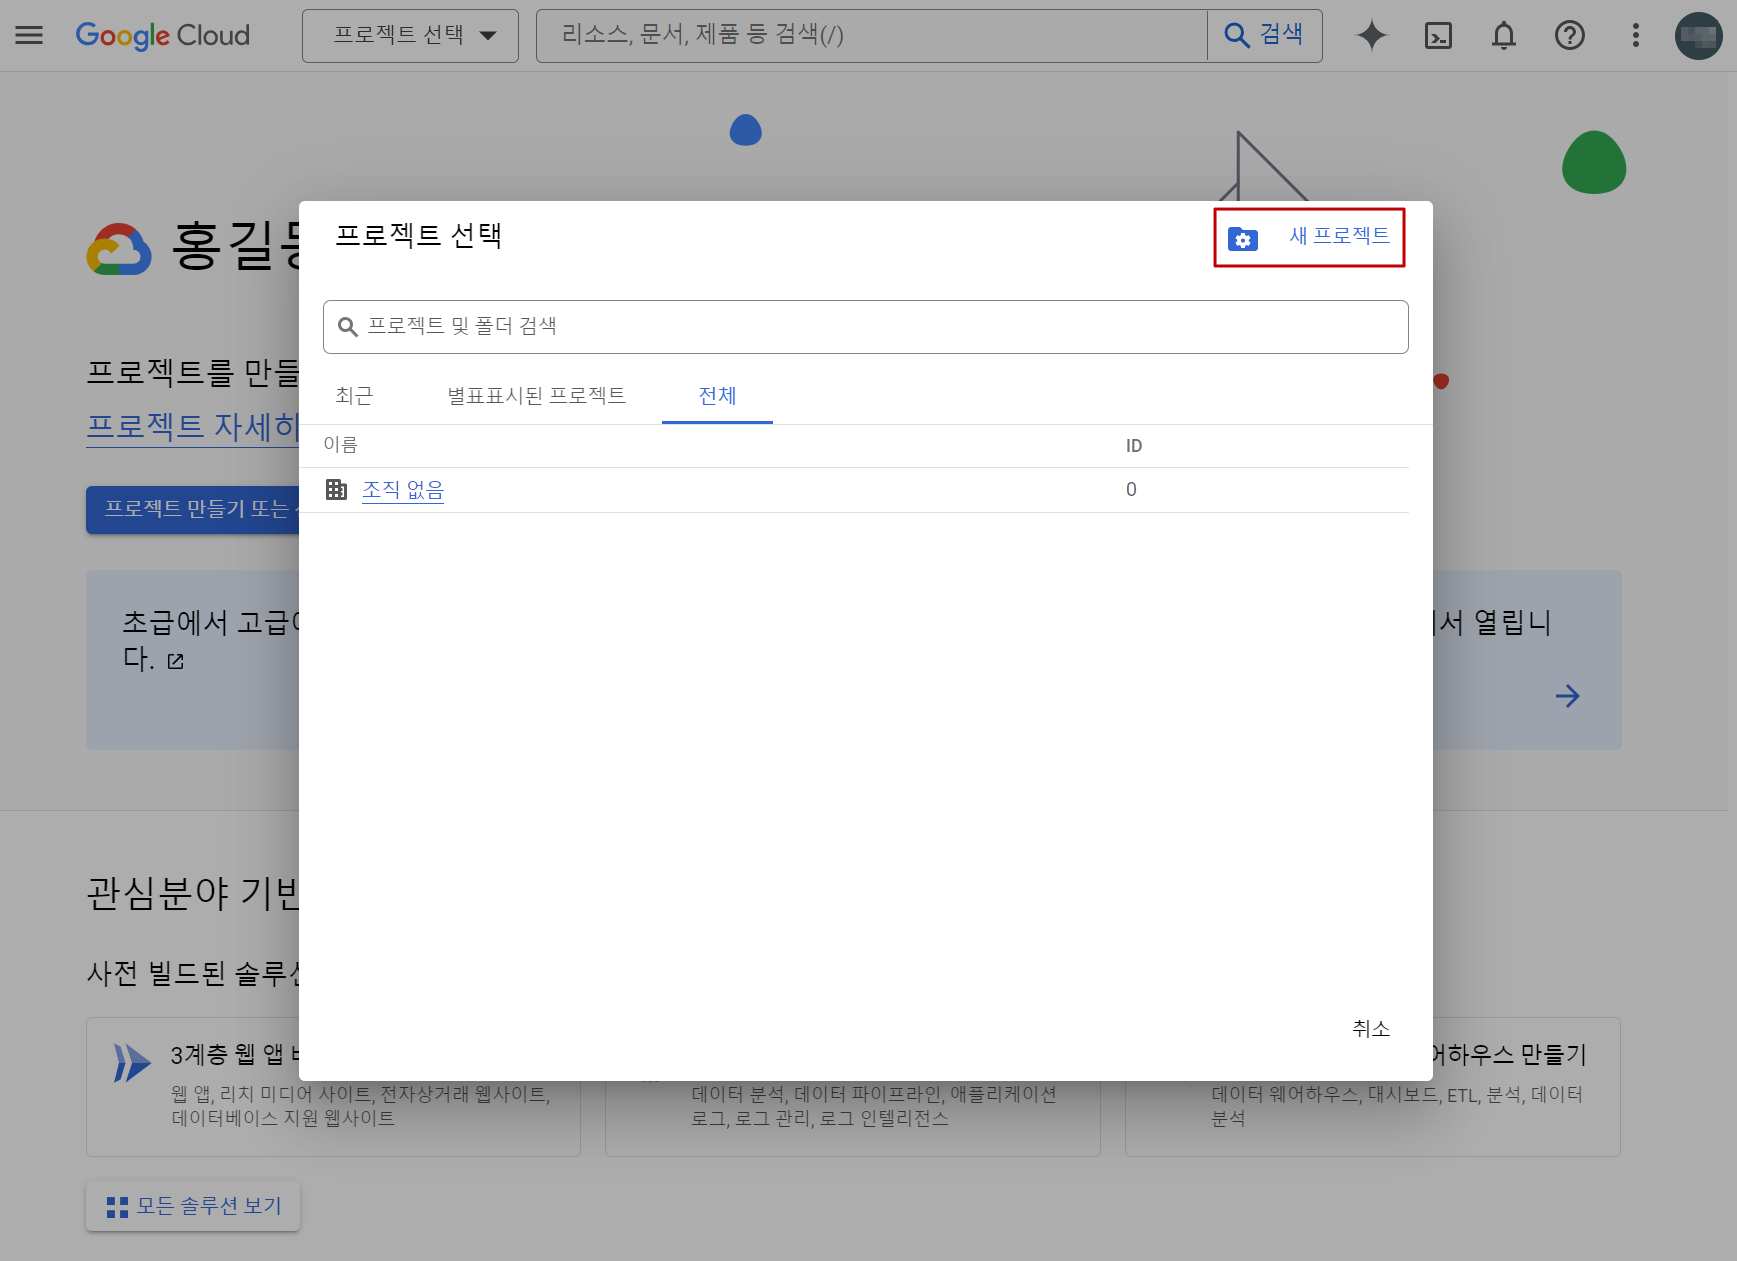
Click “New project”.
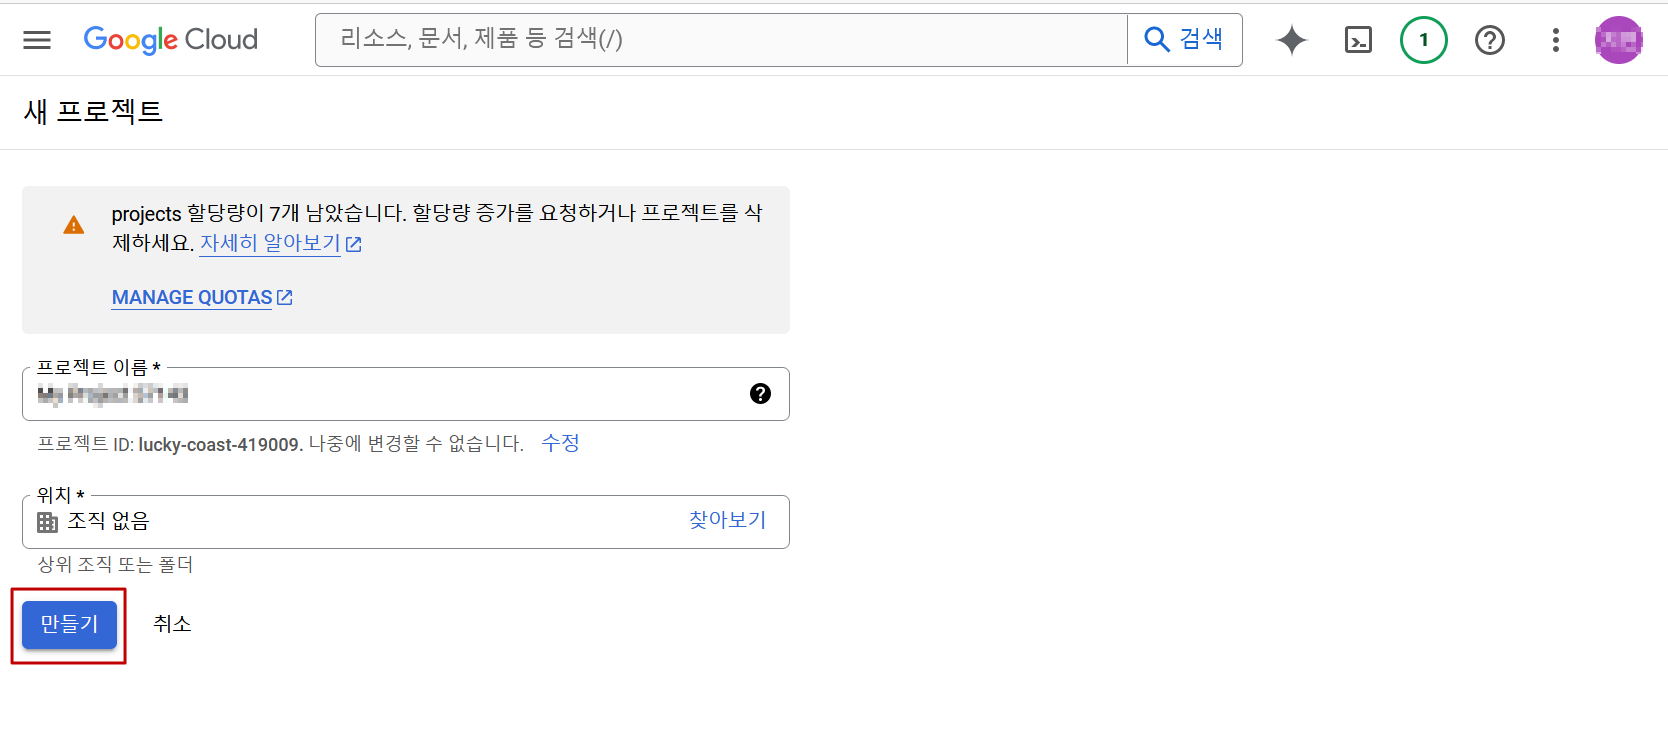
Enter the project name and set the project location. You can also use the automatically set name and location.
Click “Create” to create a new project.
A new project has been created. Please proceed with enabling “AdMob API”.
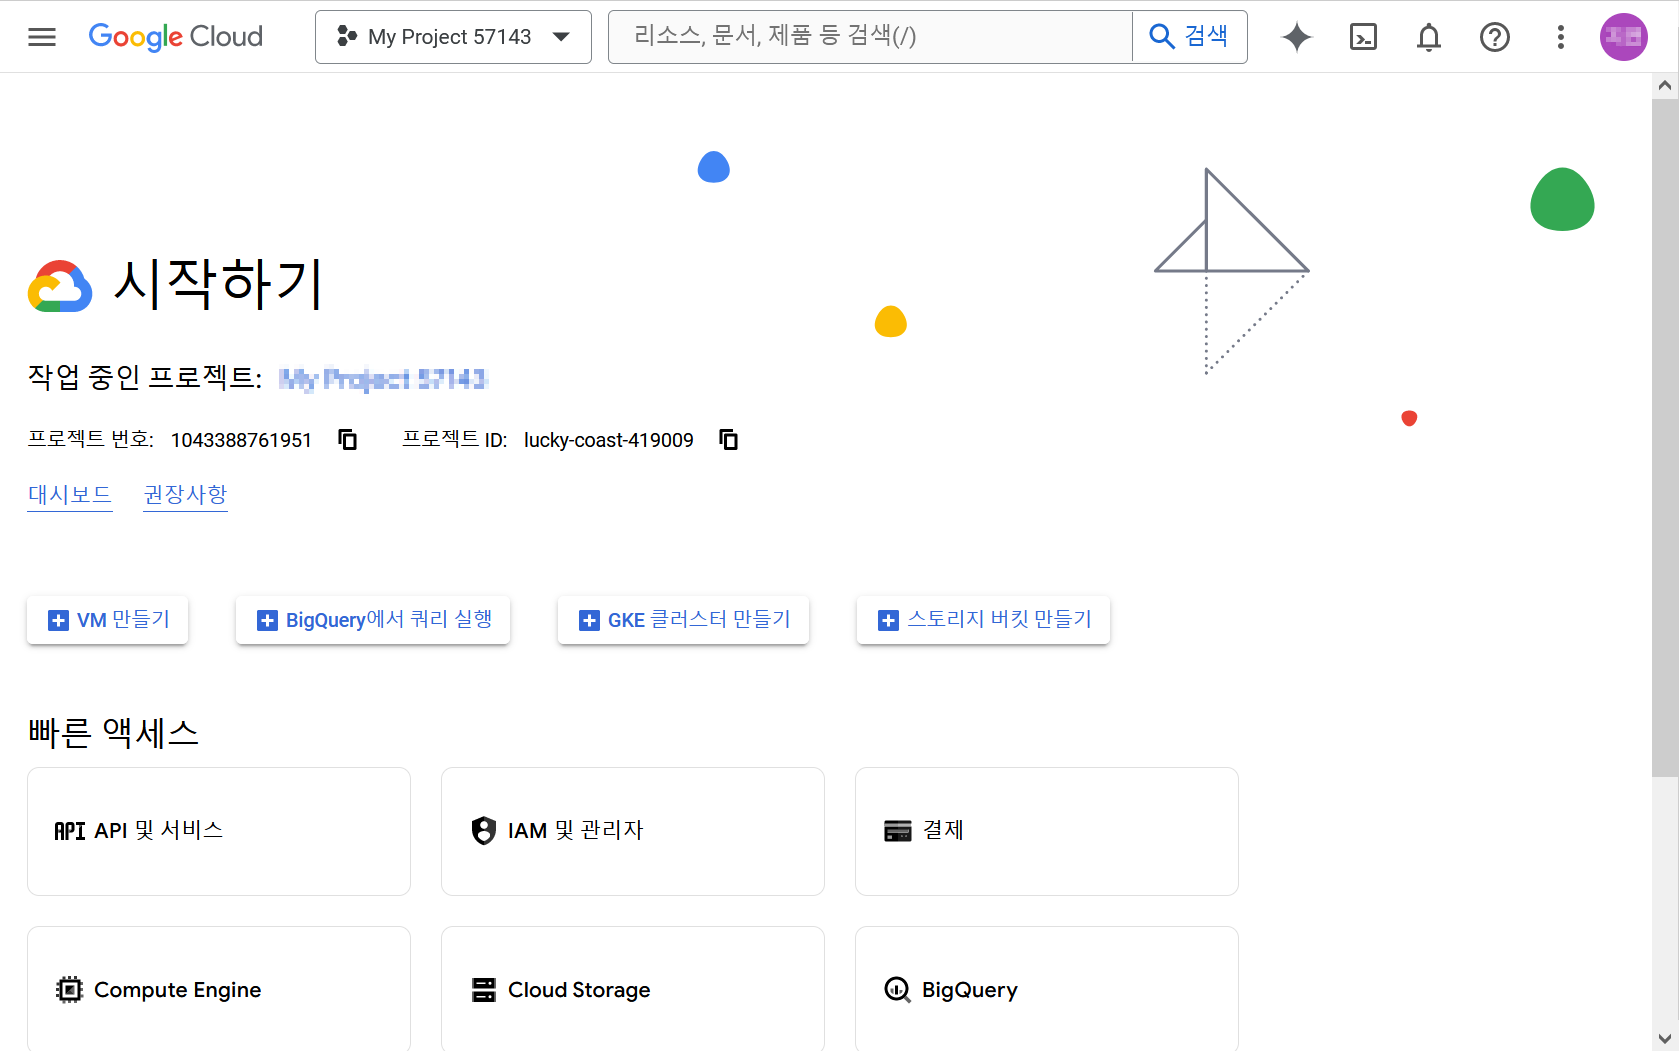
If you have created a project, it is now time to set up the link with AdMob API.
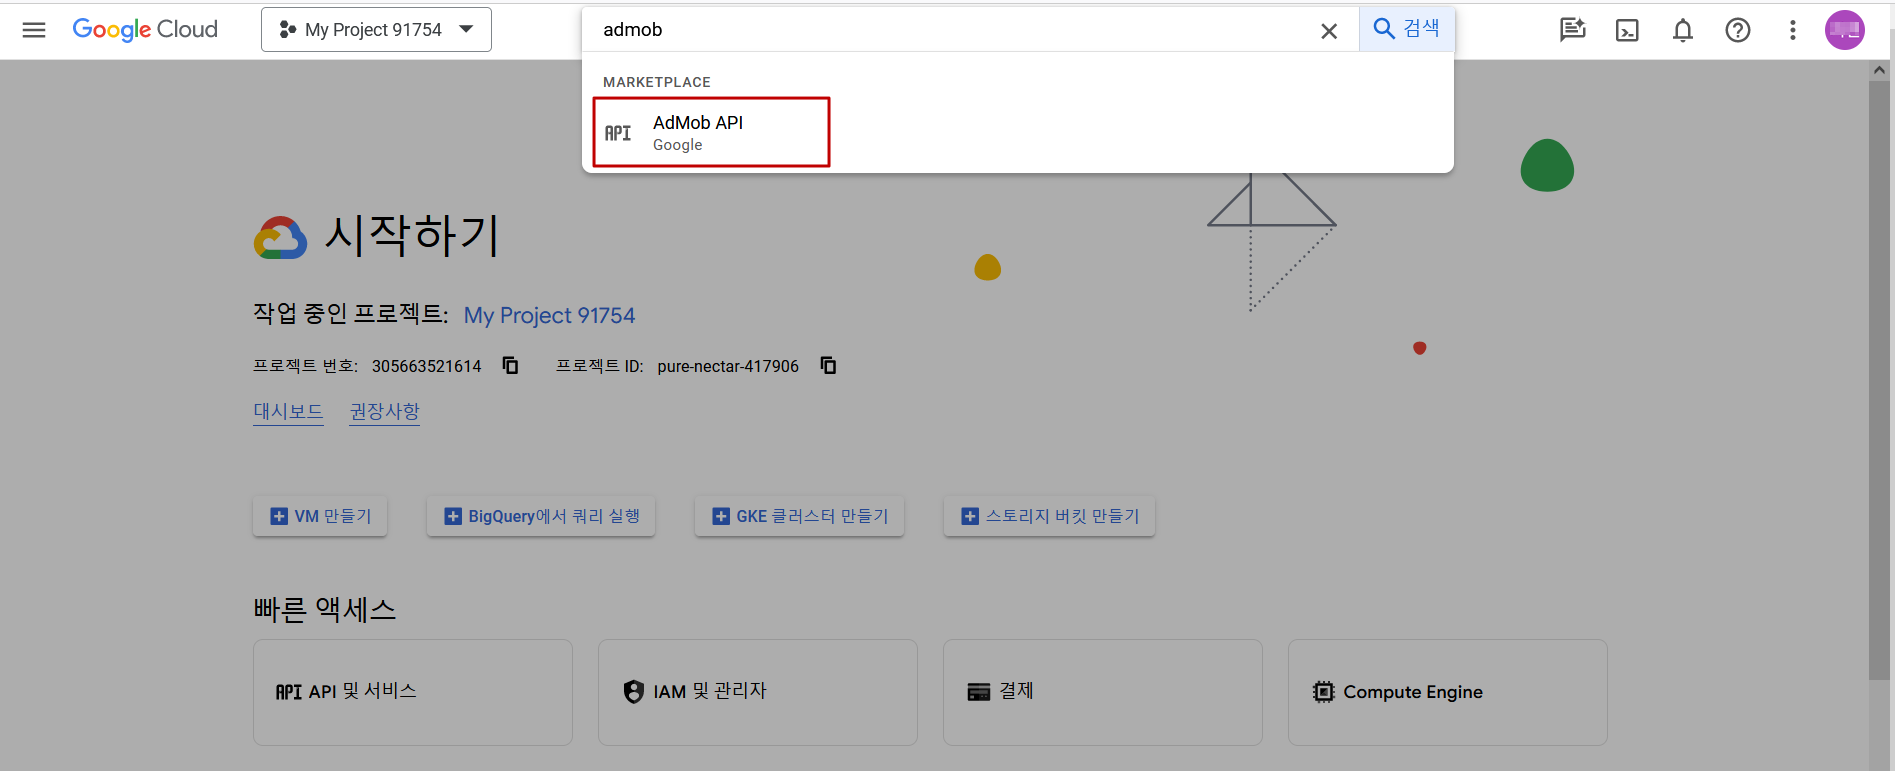
Search for admob in the search bar. If you see “AdMob API”, click it.
You will be taken to the AdMob API Link Settings Page. Click “Use”.
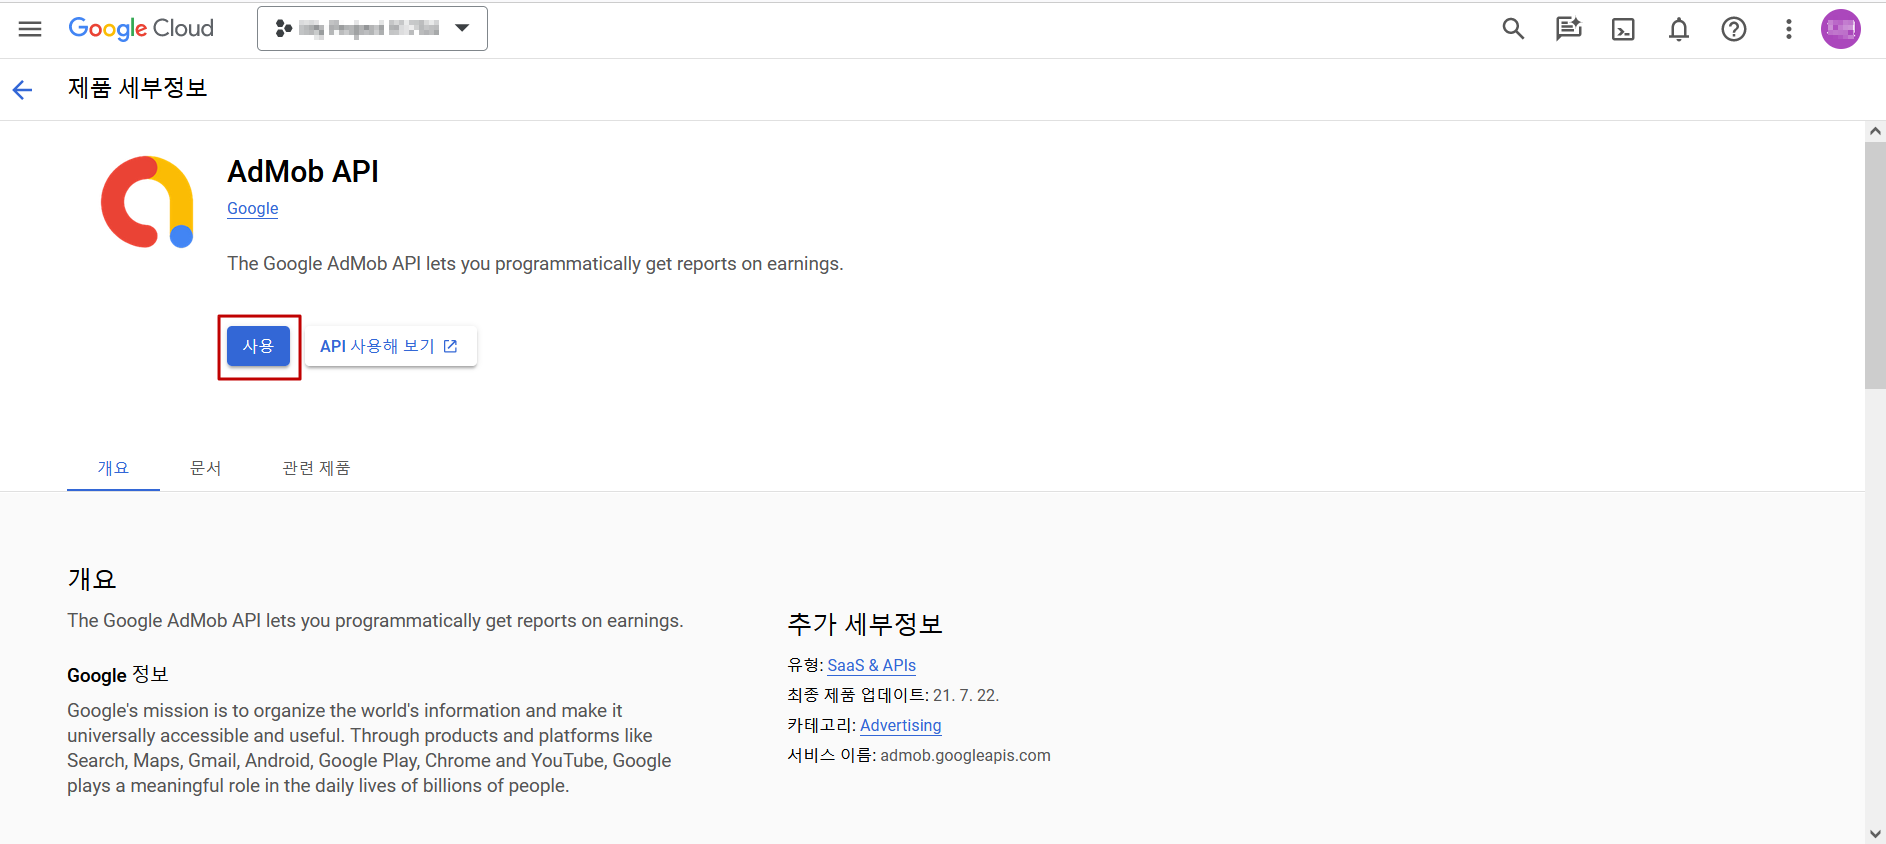
Once it’s been set to use, you will automatically be taken to the AdMob API management page.
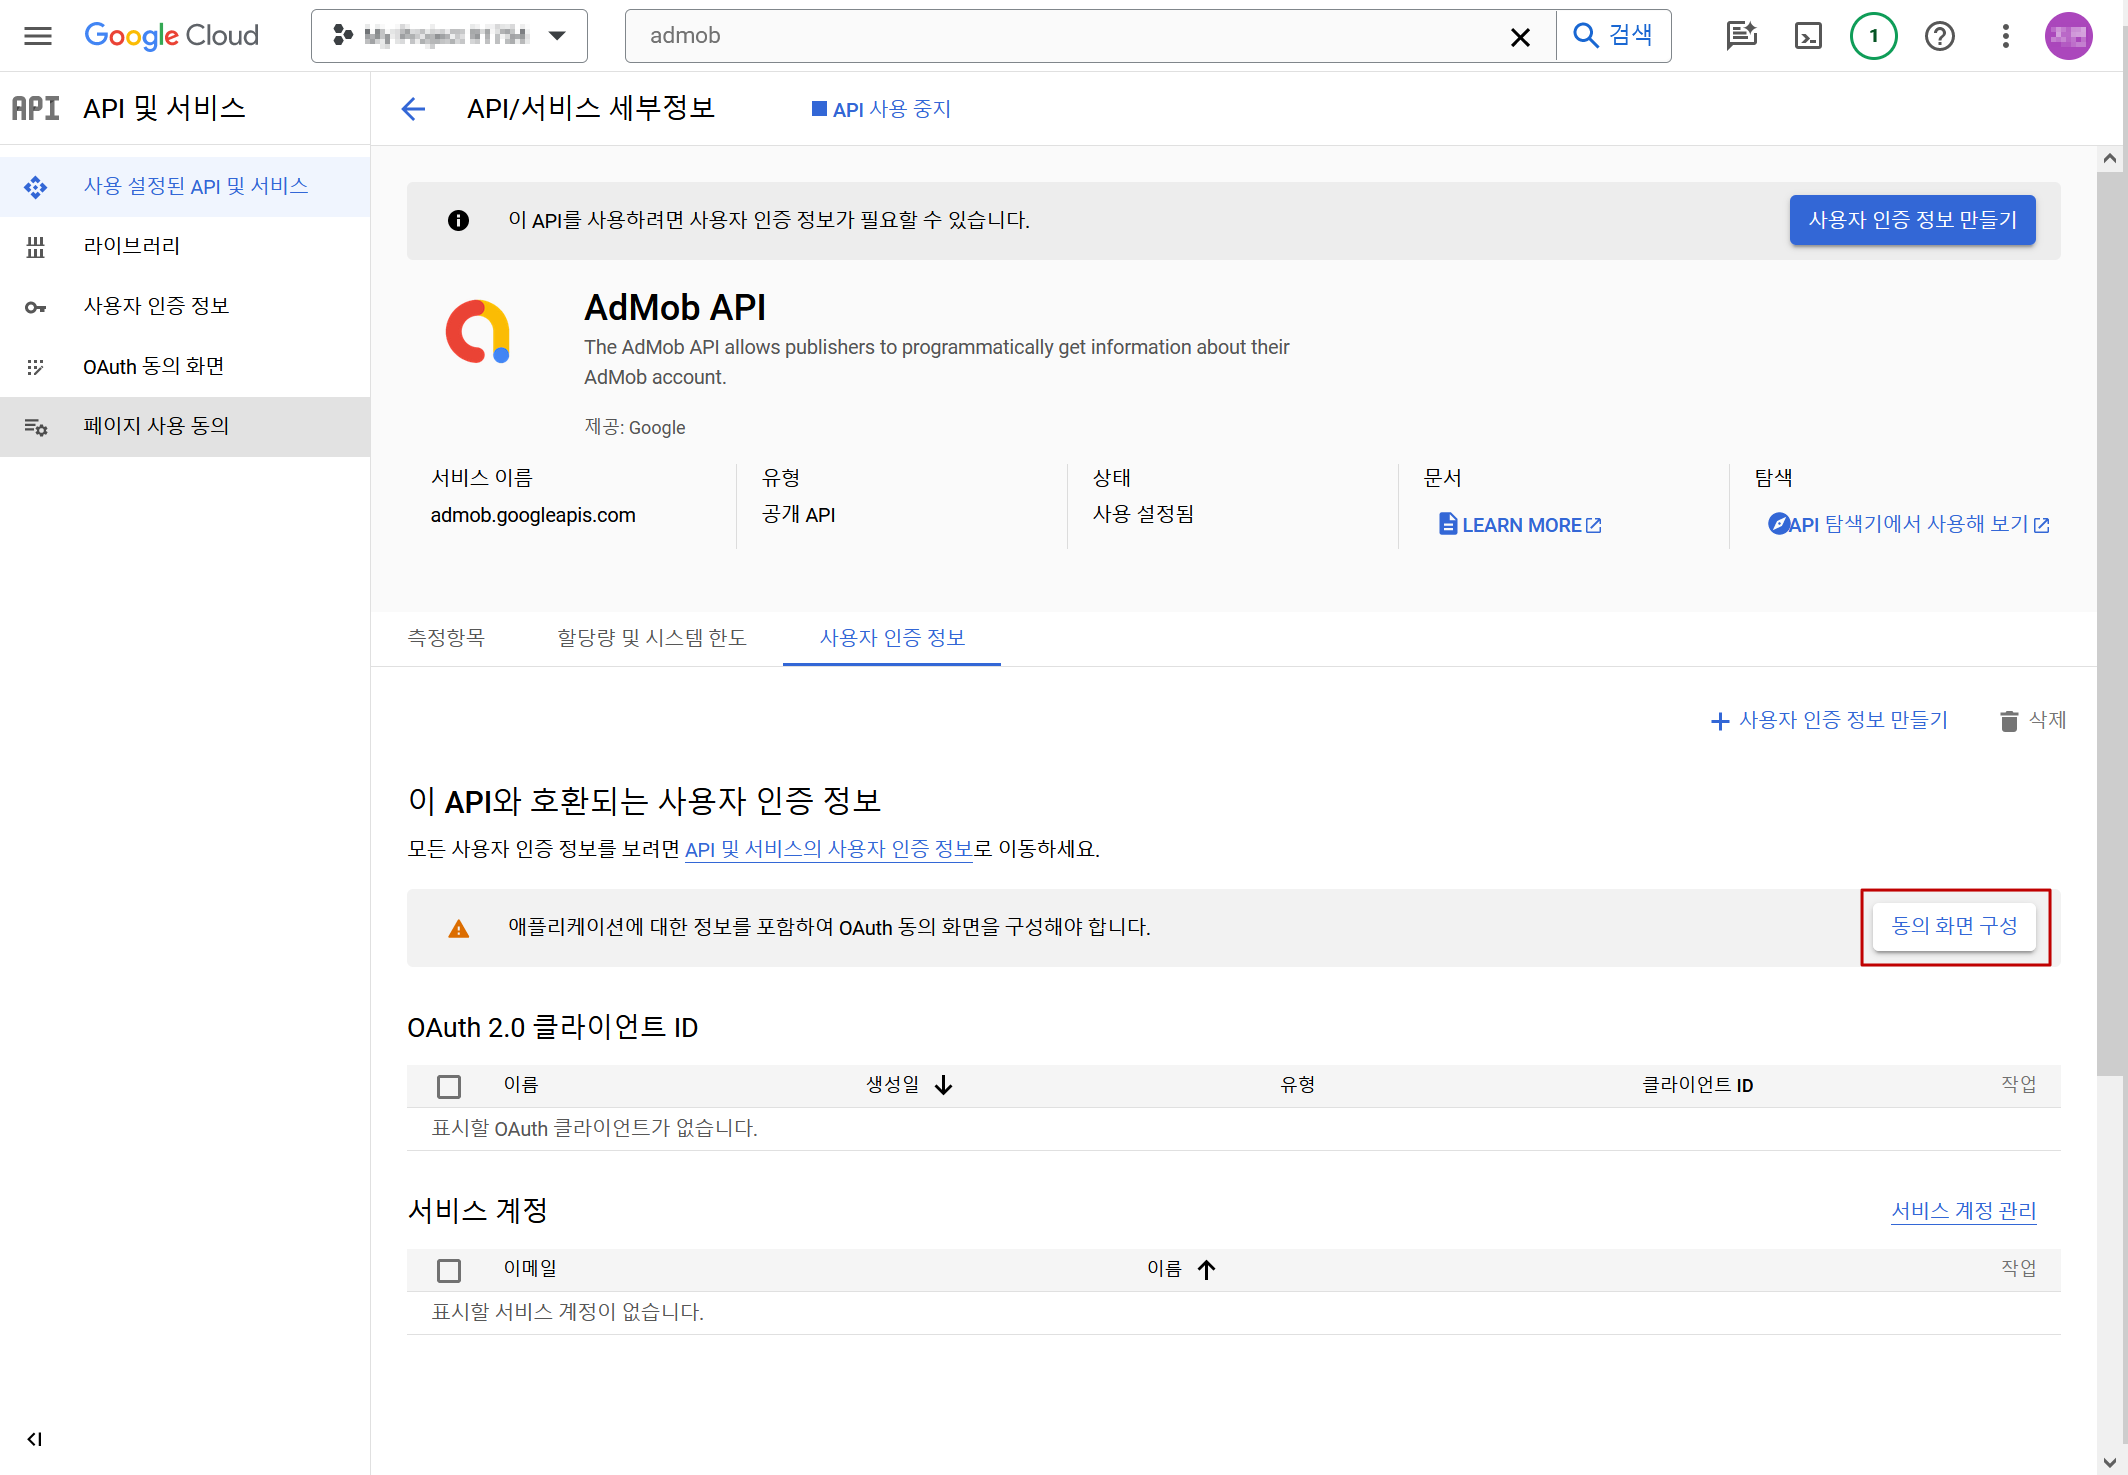
Now, you will need user authentication information to use AdMob API.
Please set it up according to the instructions.
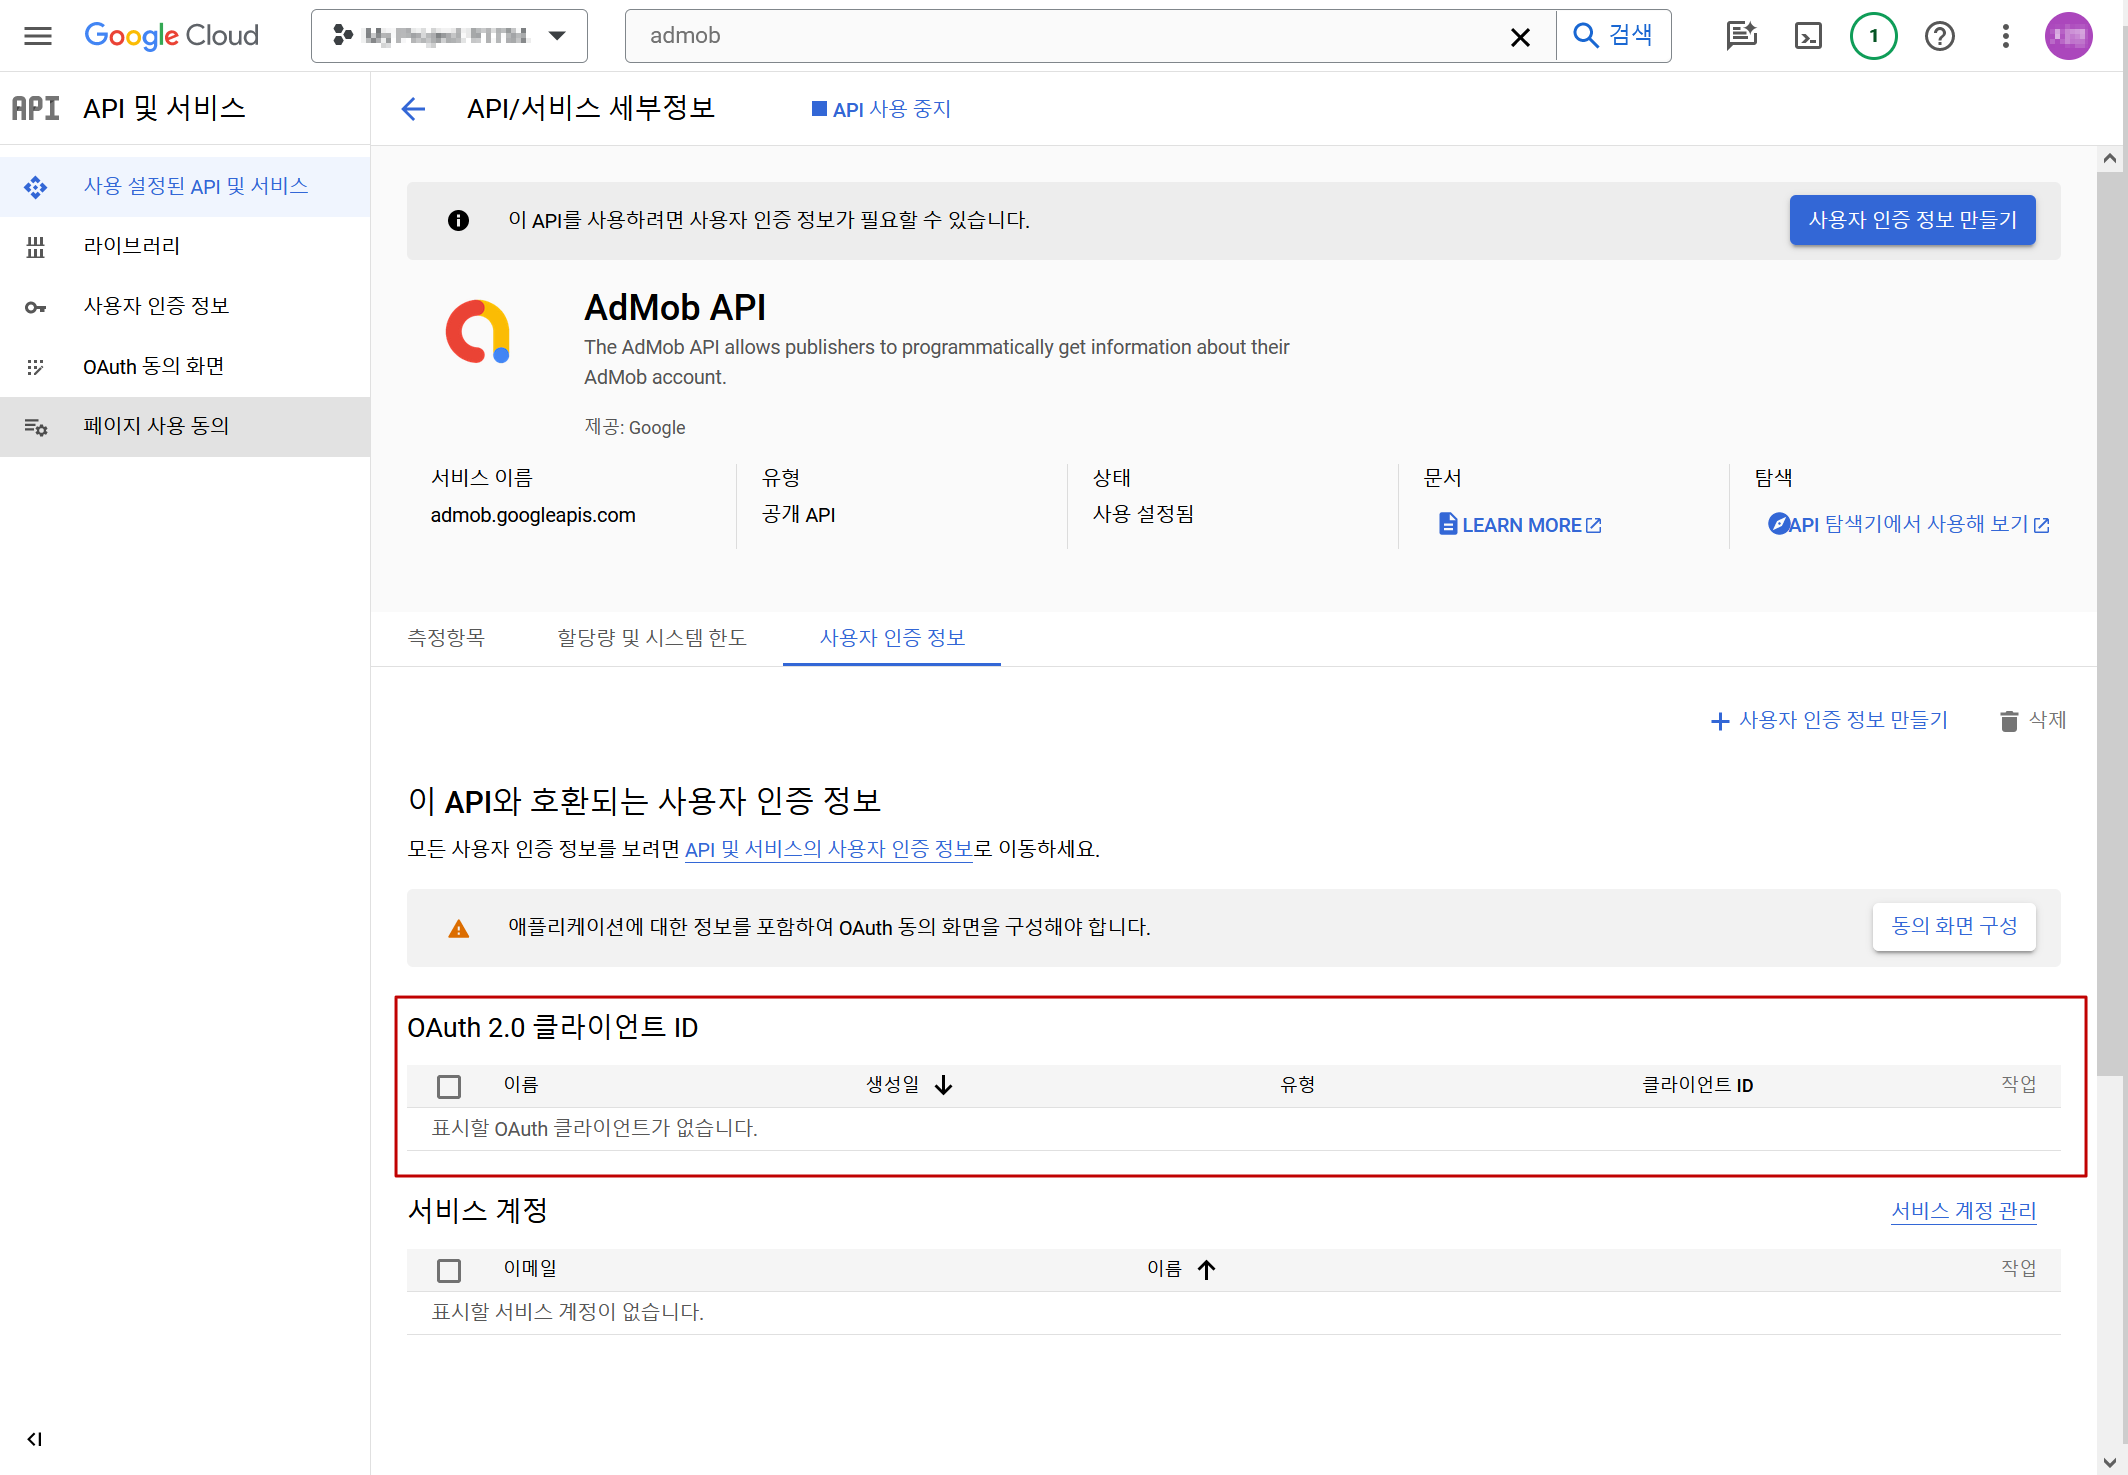
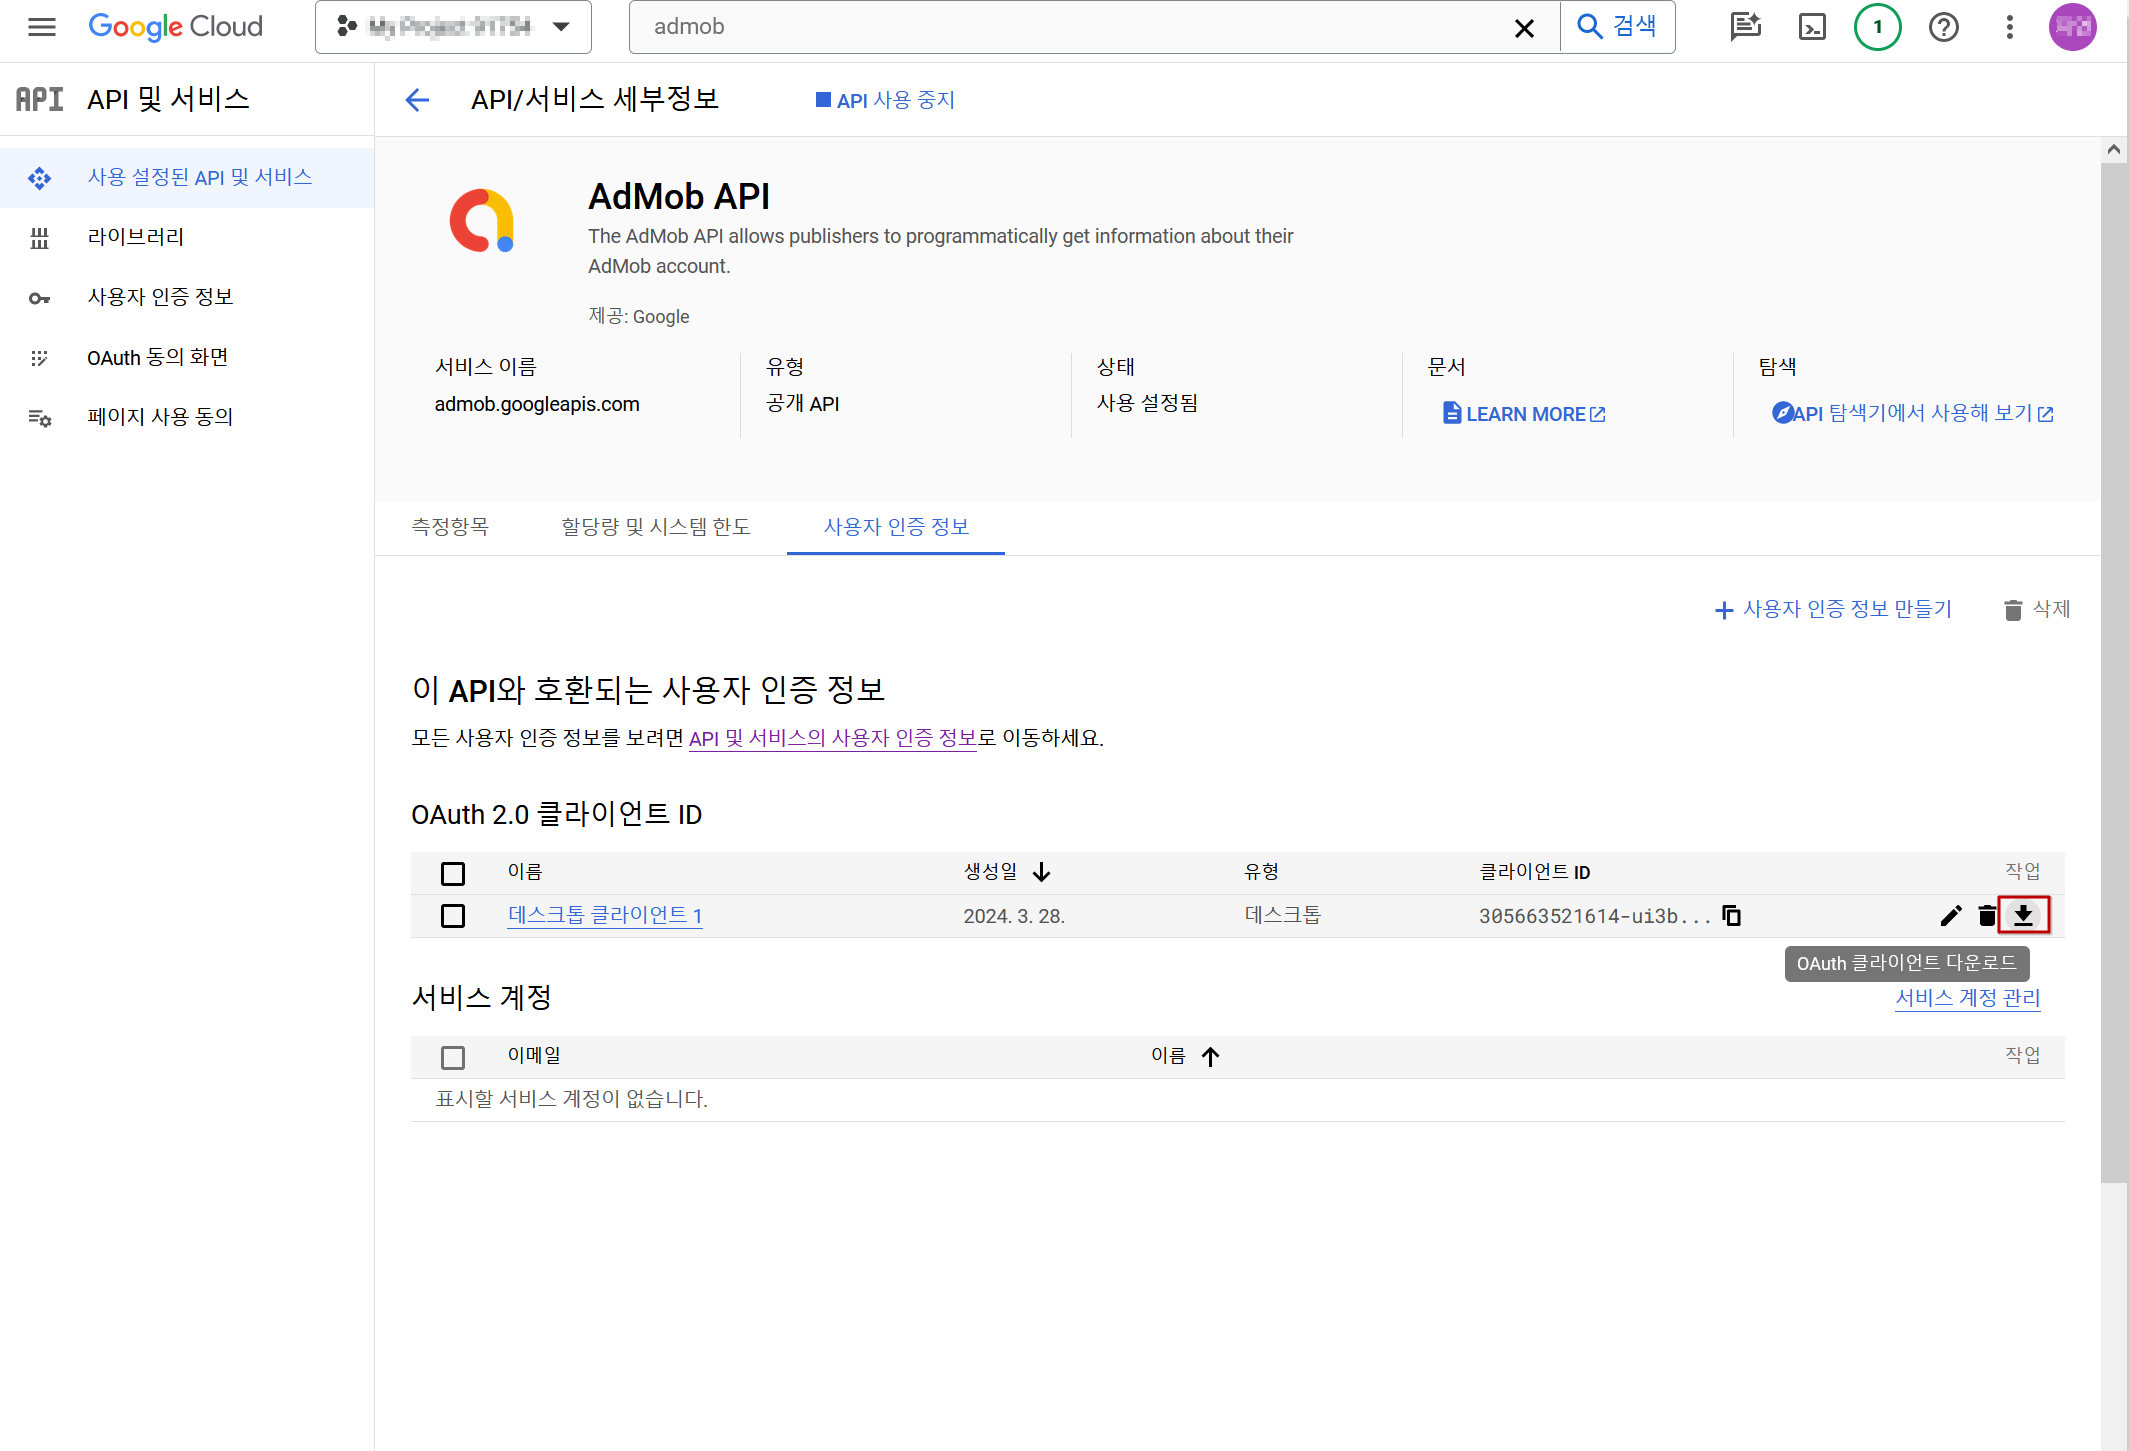
If you have an Oauth 2.0 client ID, click the download button to save the file.
If you are creating user authentication information for the first time, you must first set up the “Oauth consent screen”.
Click the “Configure Consent Screen” Button.
‘Clicking the “Create User Authentication Information” Button will also automatically take you to the Oauth consent screen settings page.
Select “External” for User Type and click “Create”.
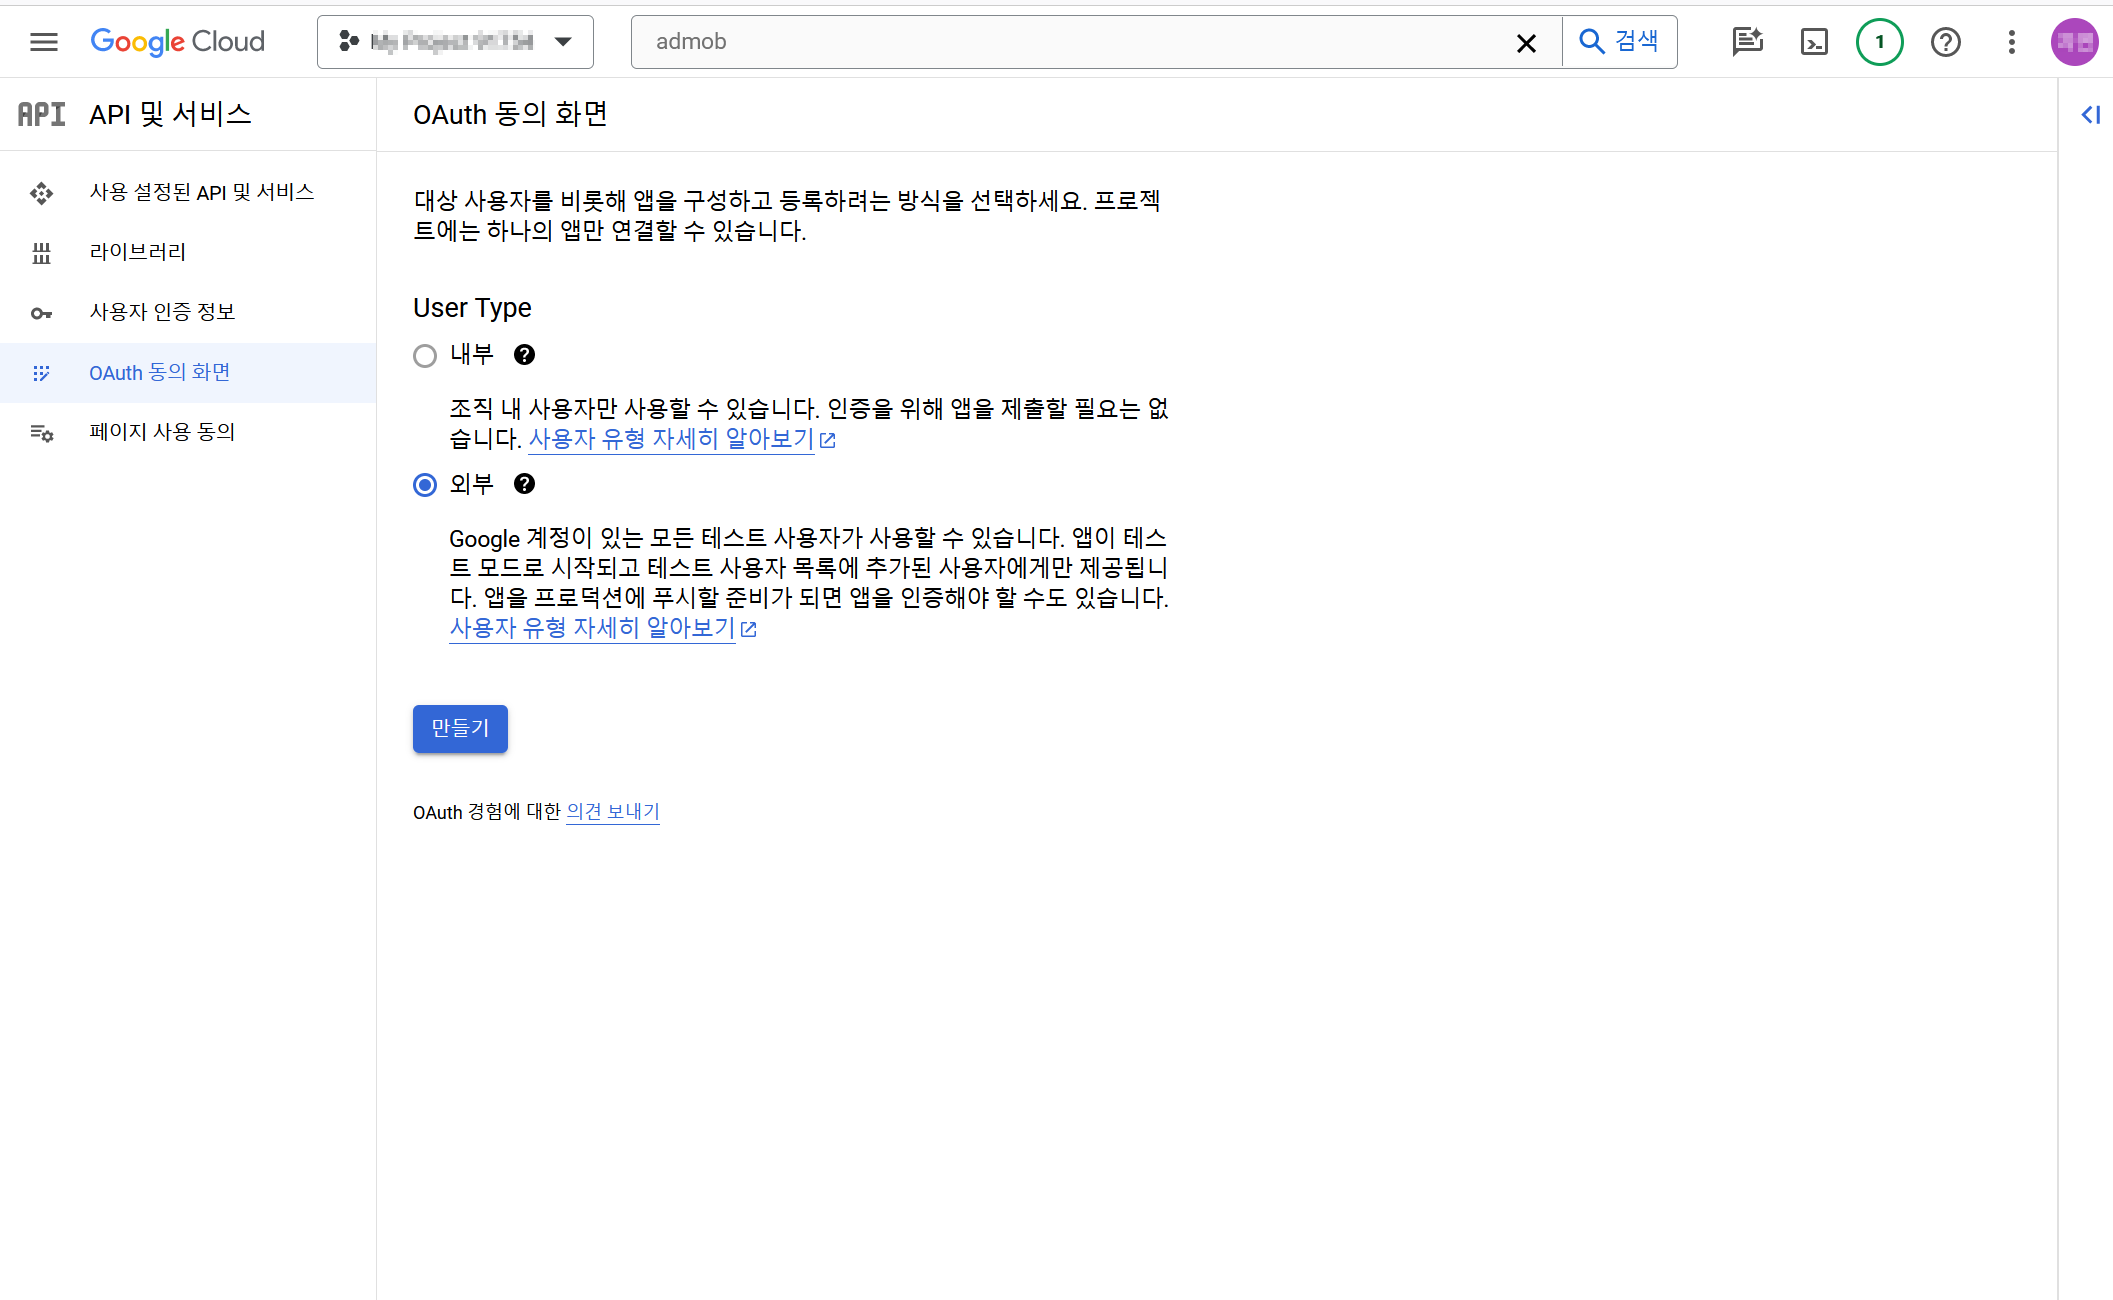
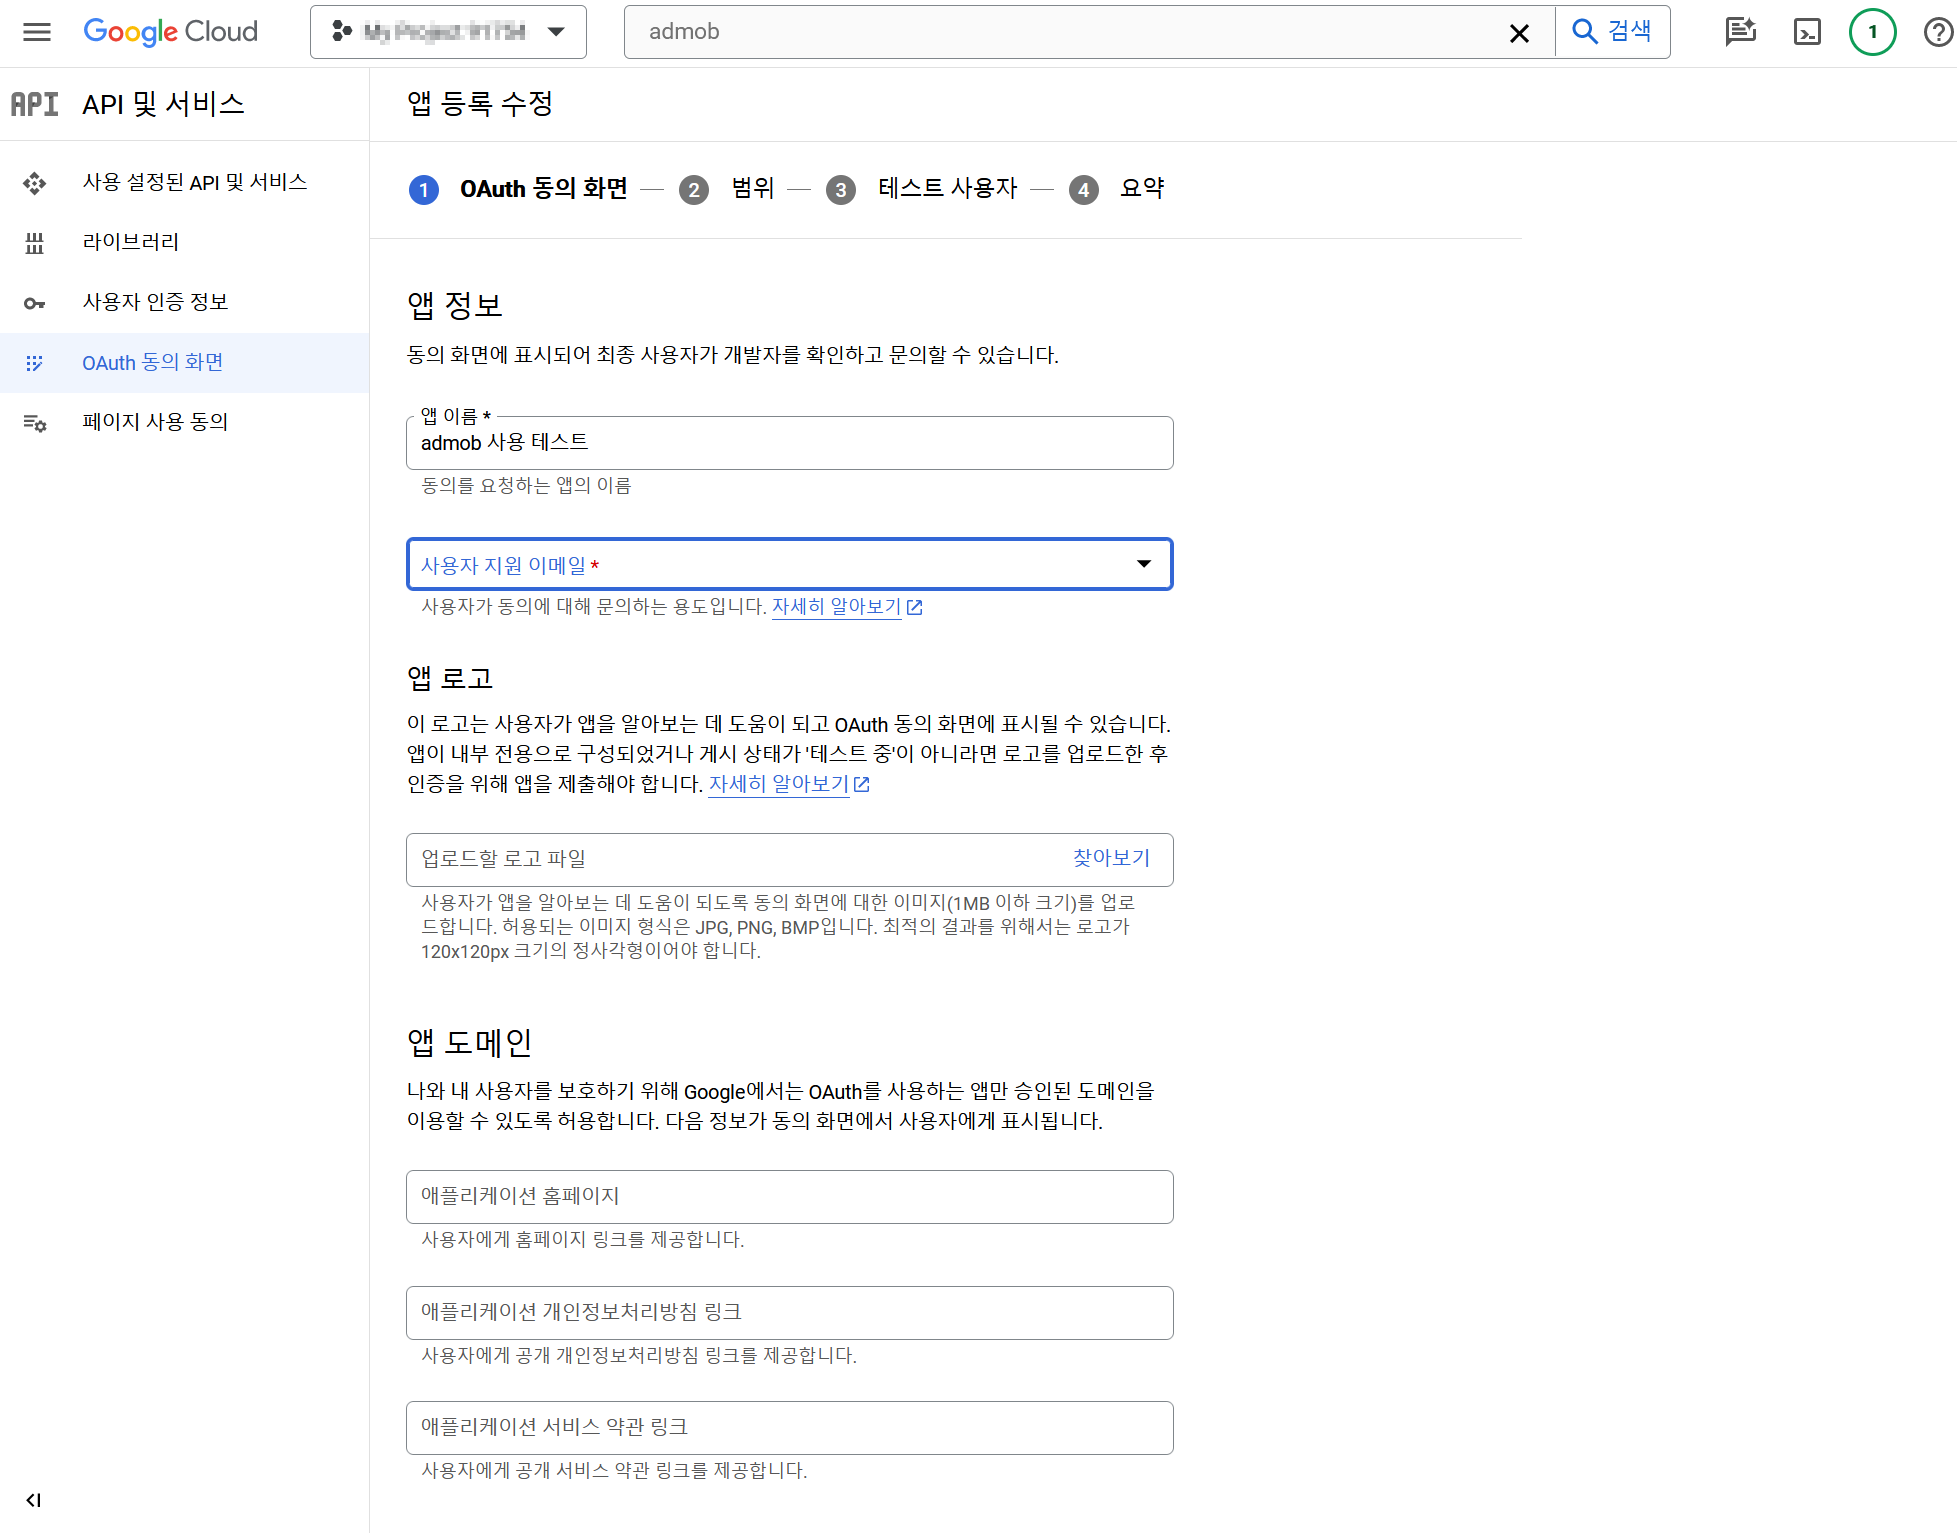
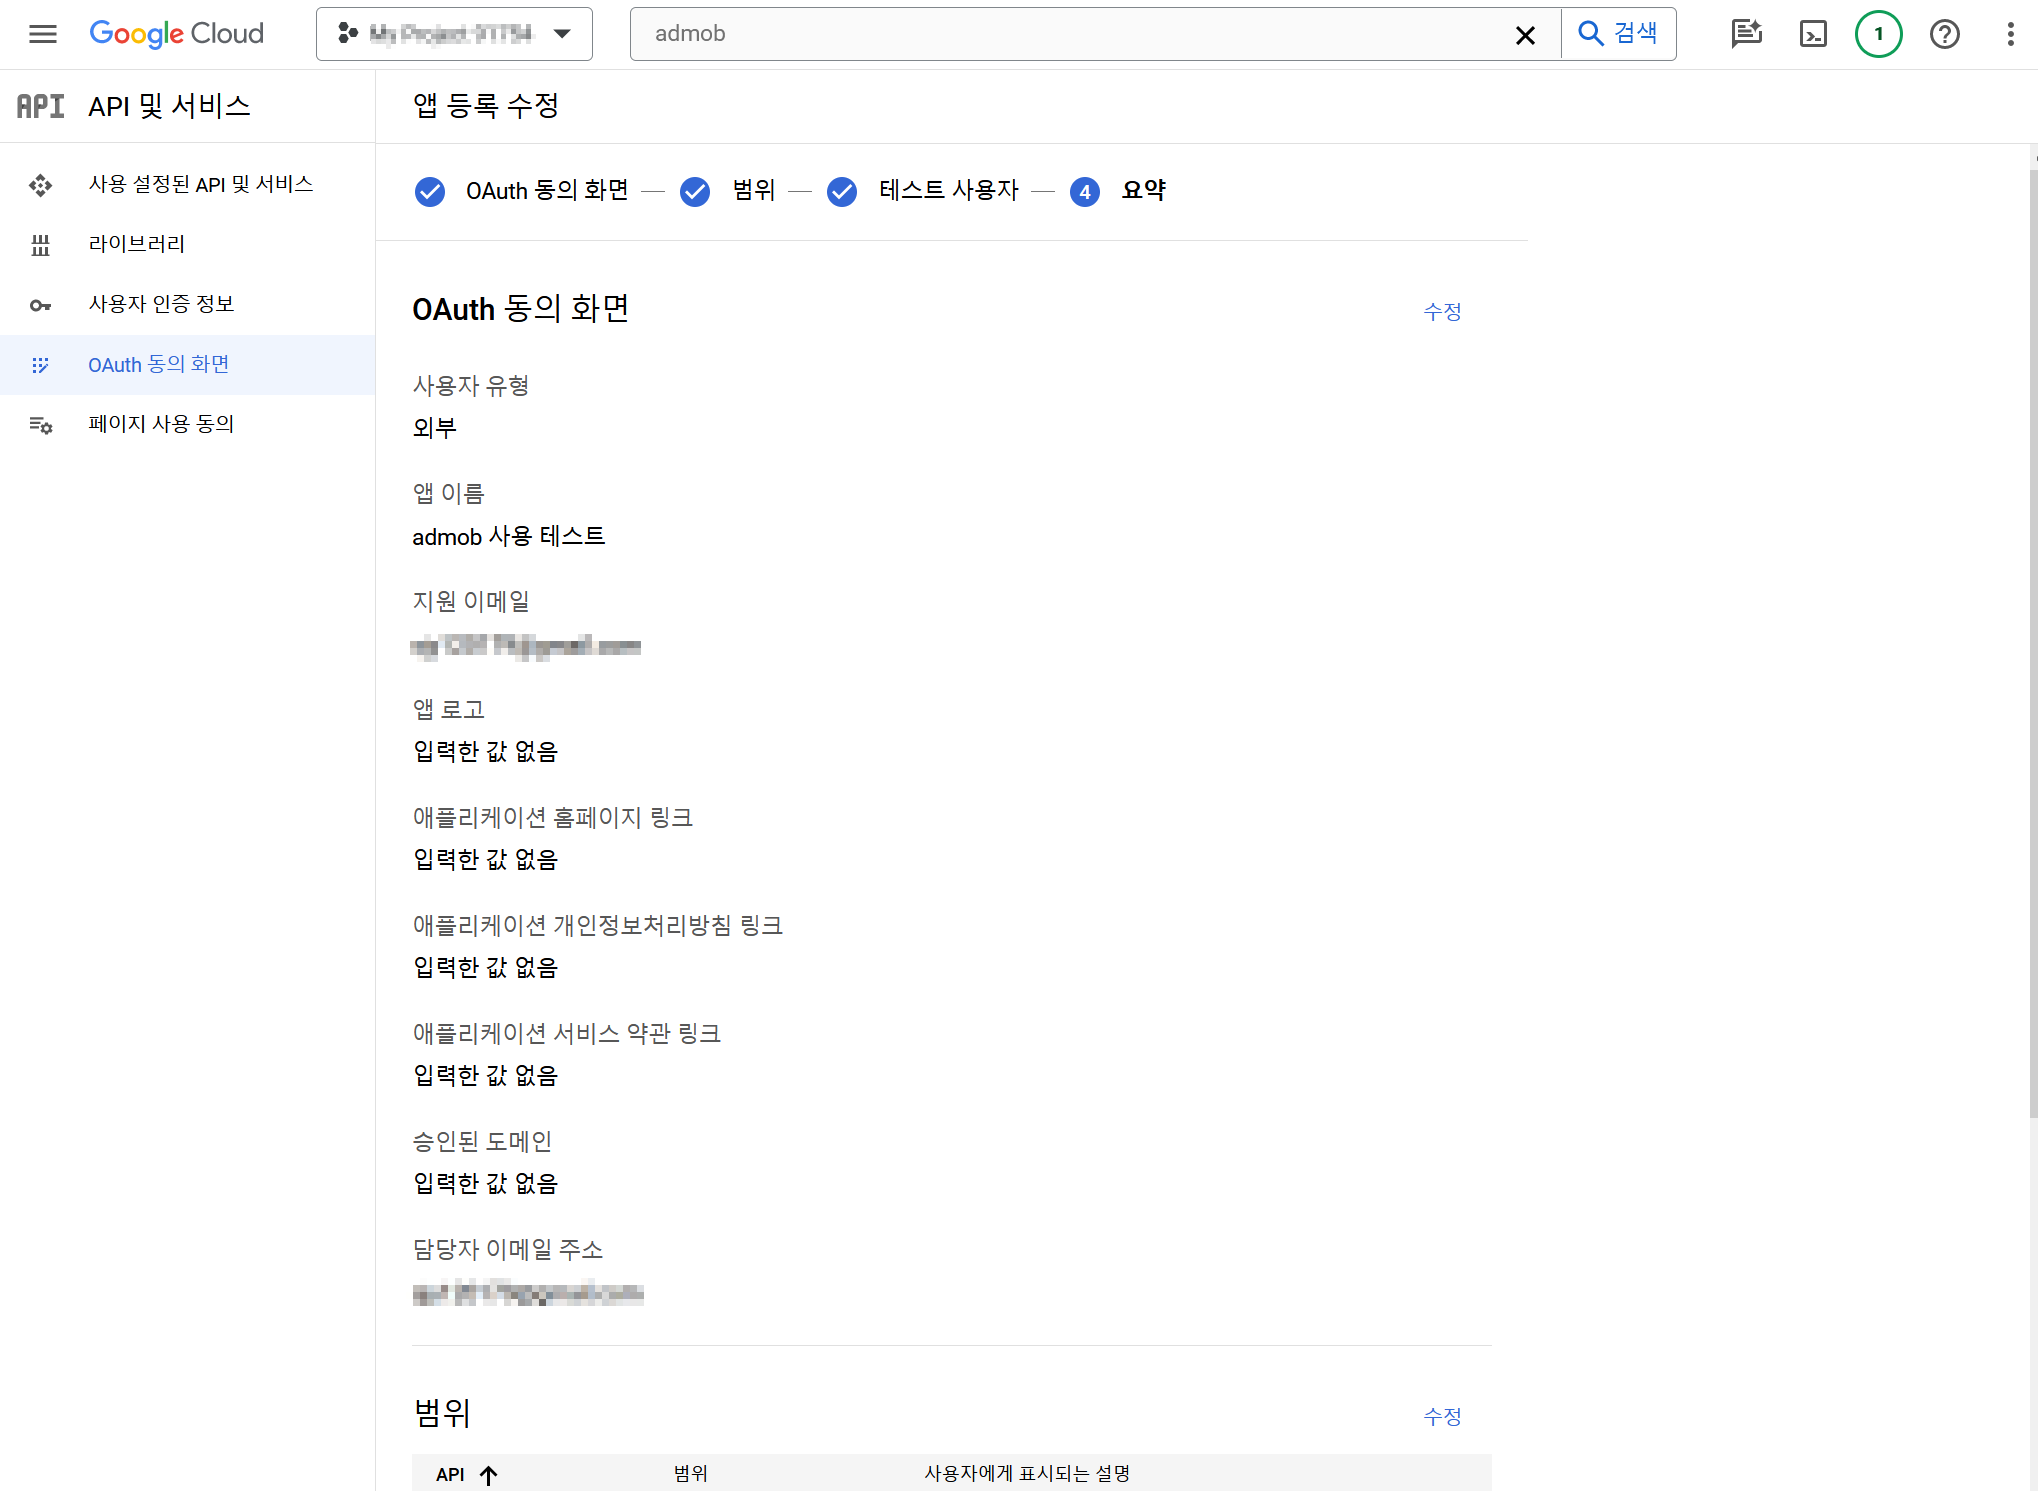
There are 4 steps to set up the consent screen.
In step 1, enter the required information such as the app name/user support email/developer contact information.
After entering, click “Save and Continue”.
You do not need to set the range and test users. Please click “Save and Continue”.
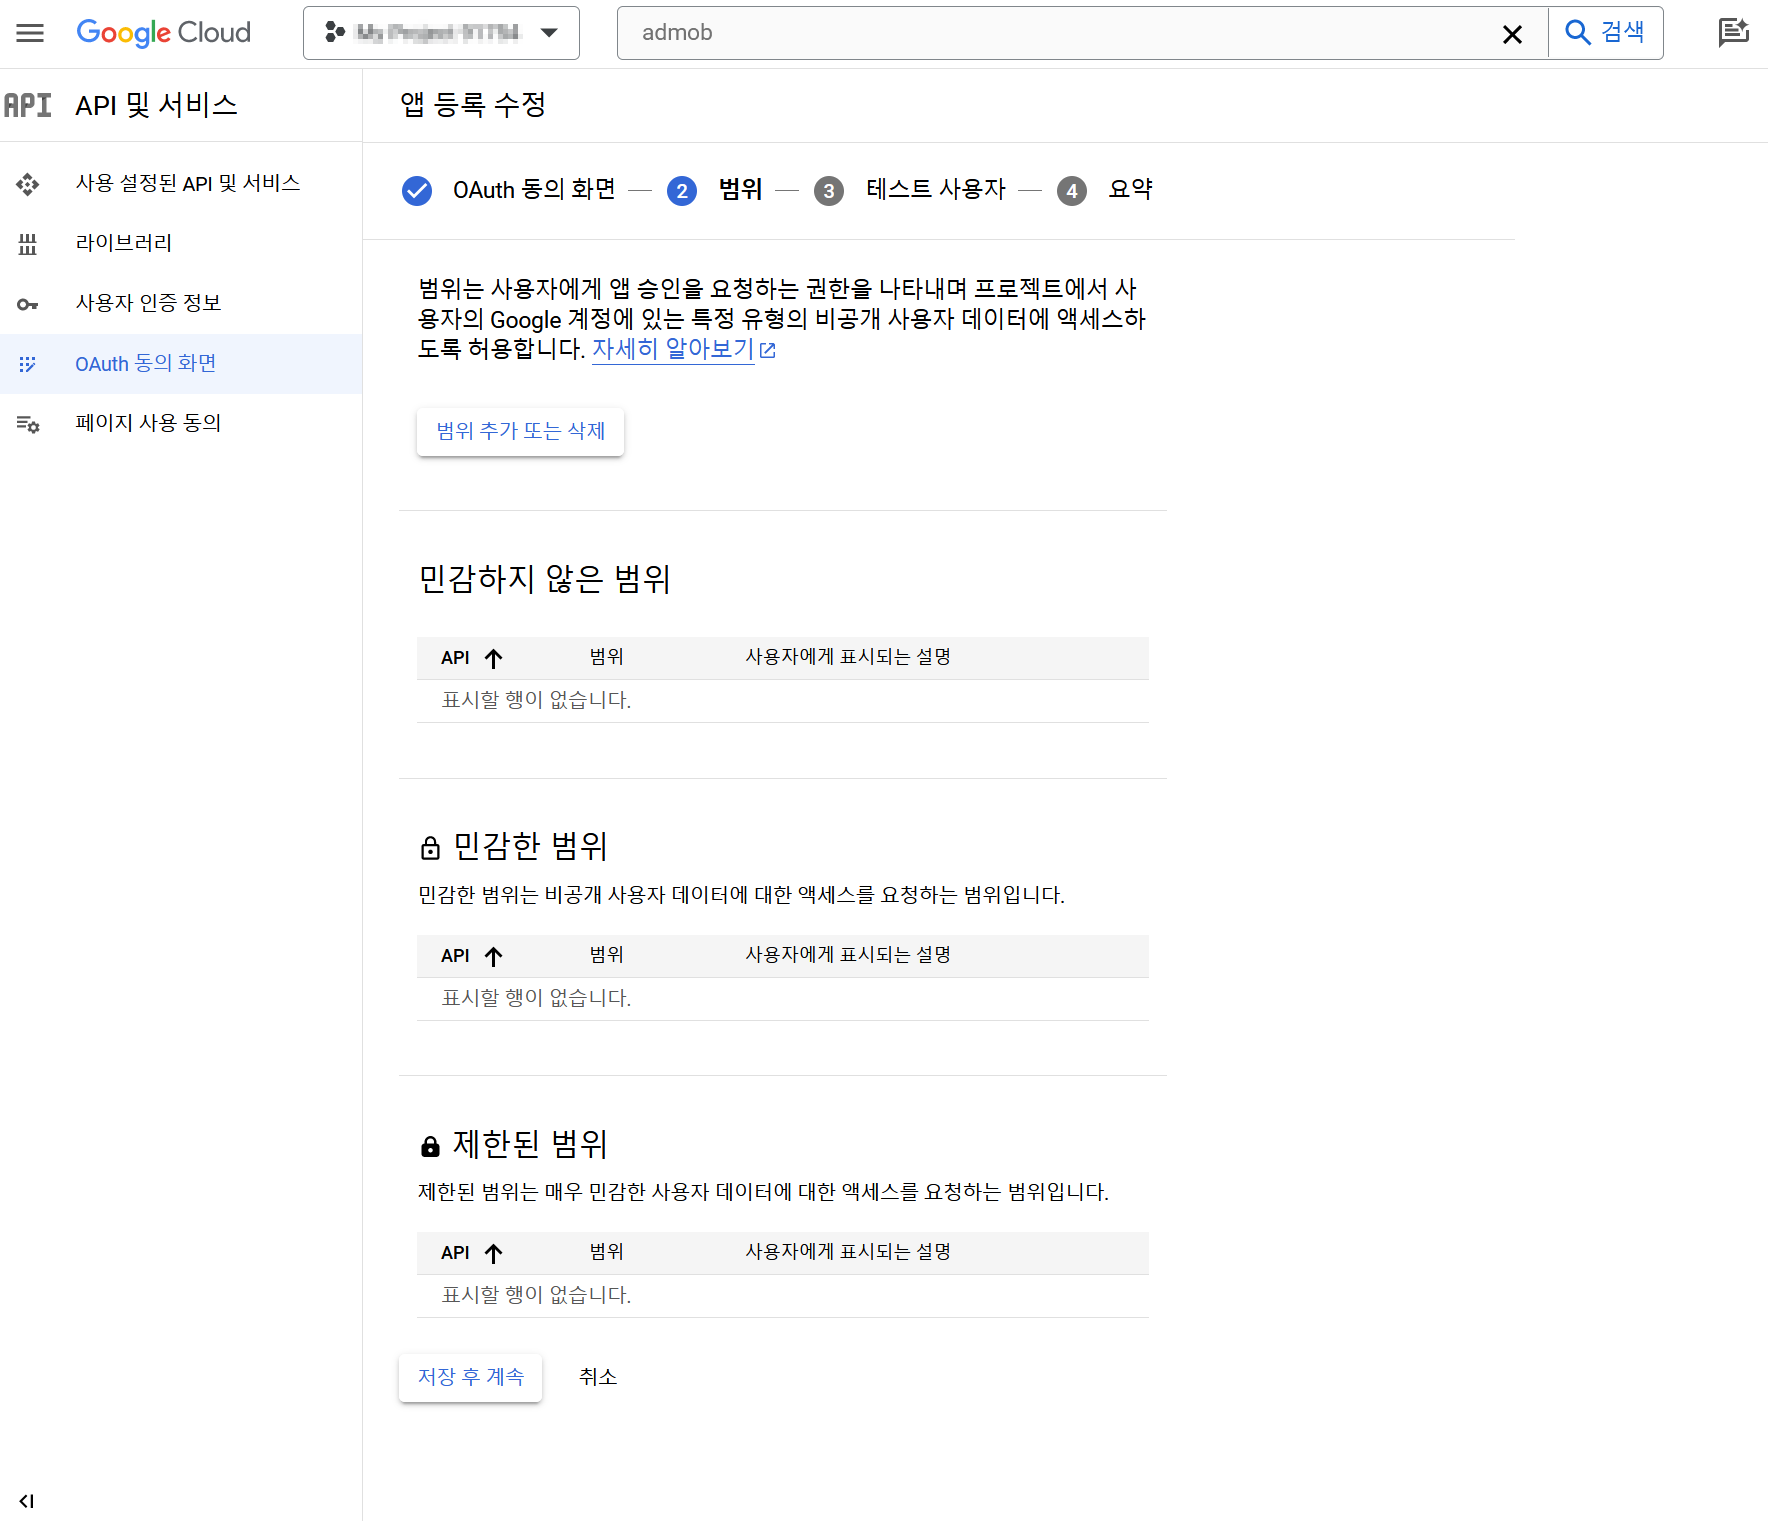
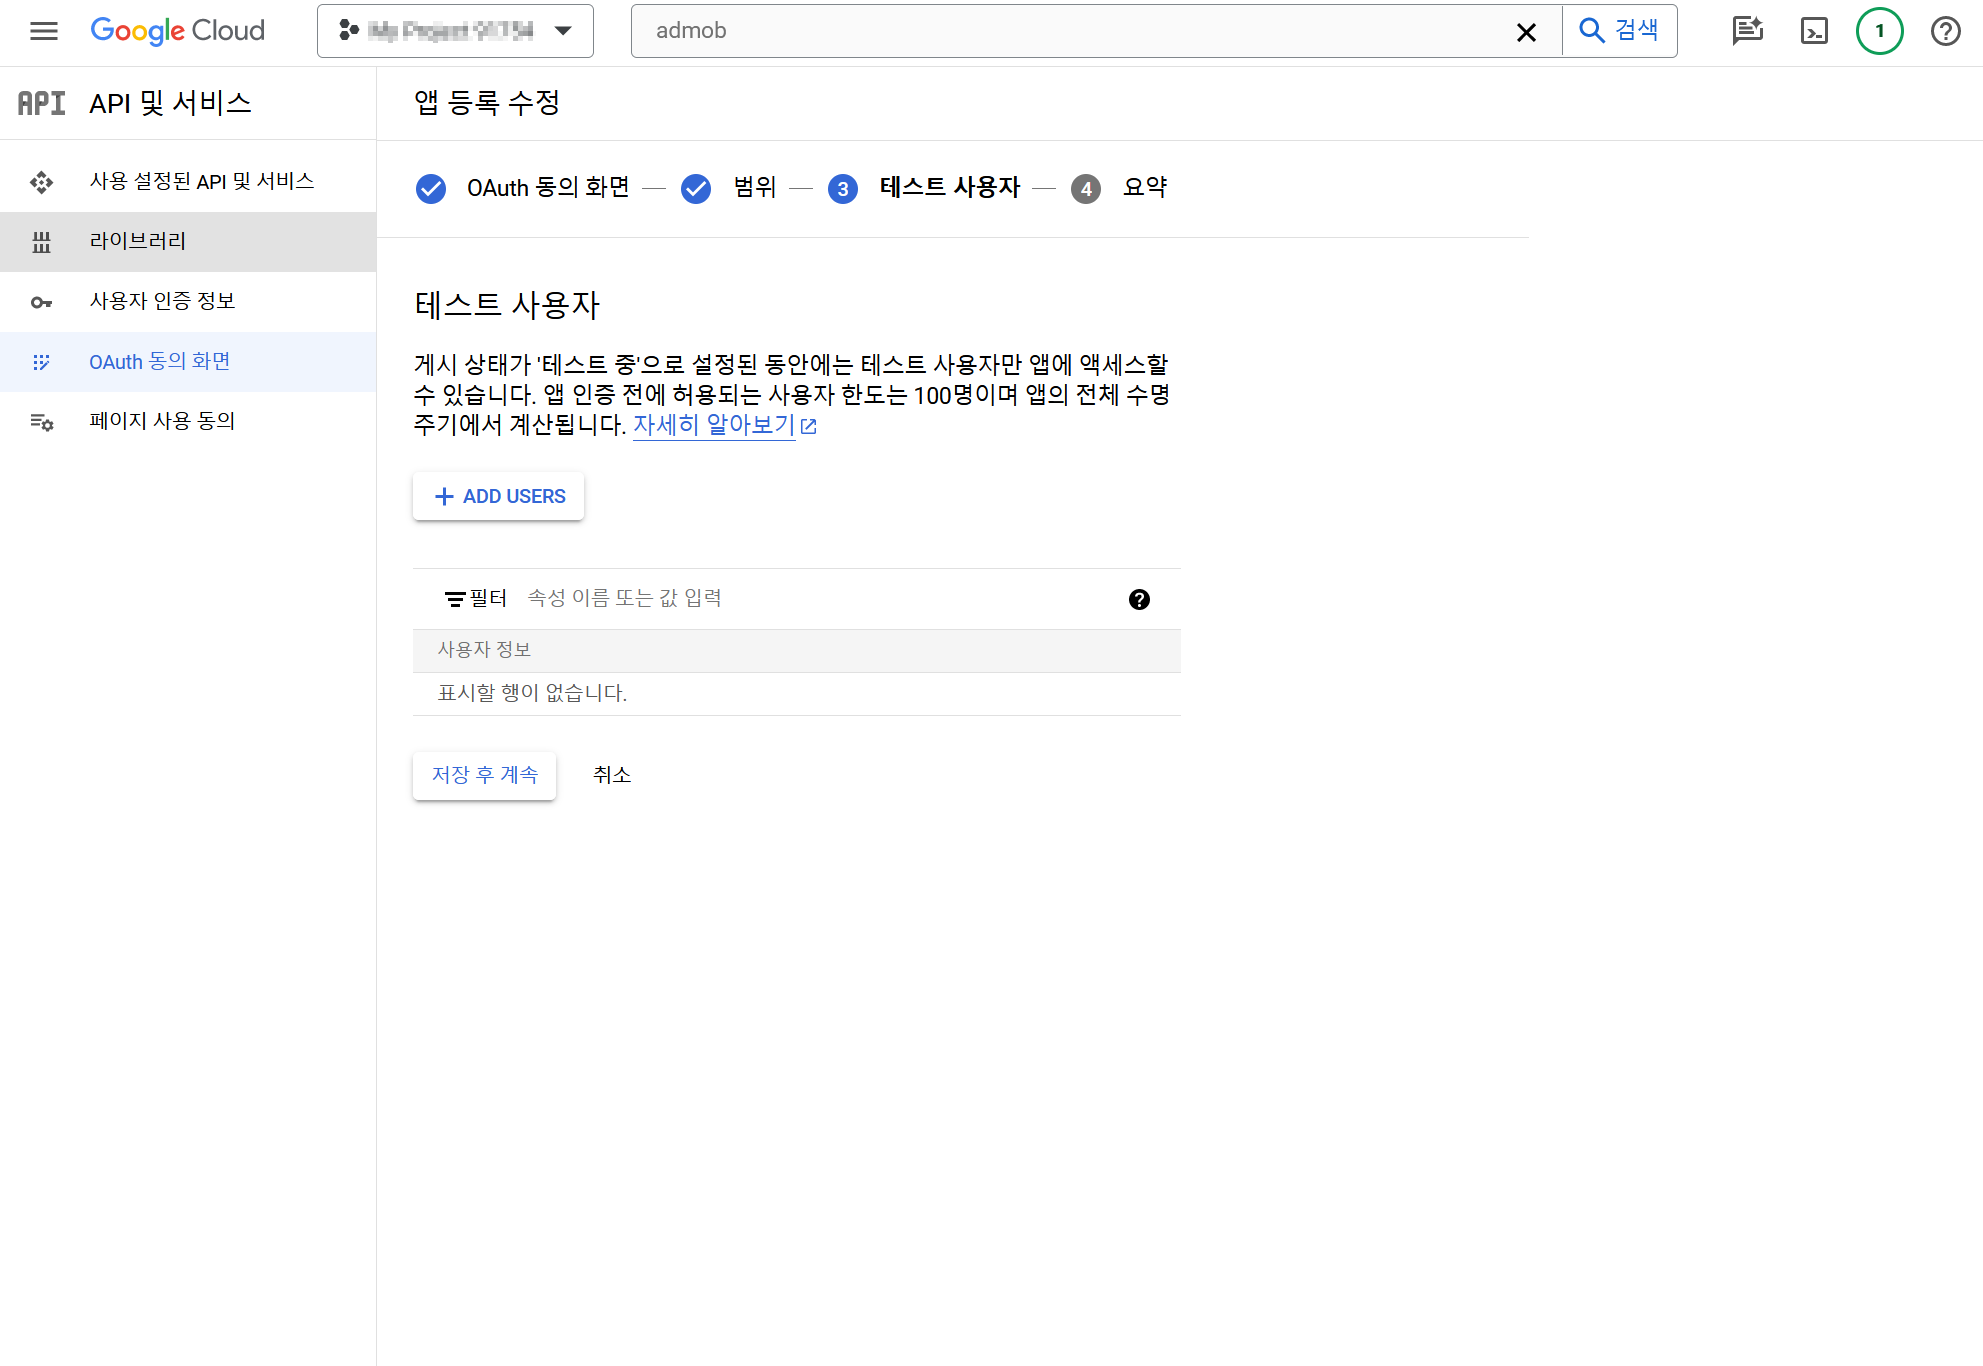
The consent screen configuration is complete. Now, let’s go create an Oauth client.
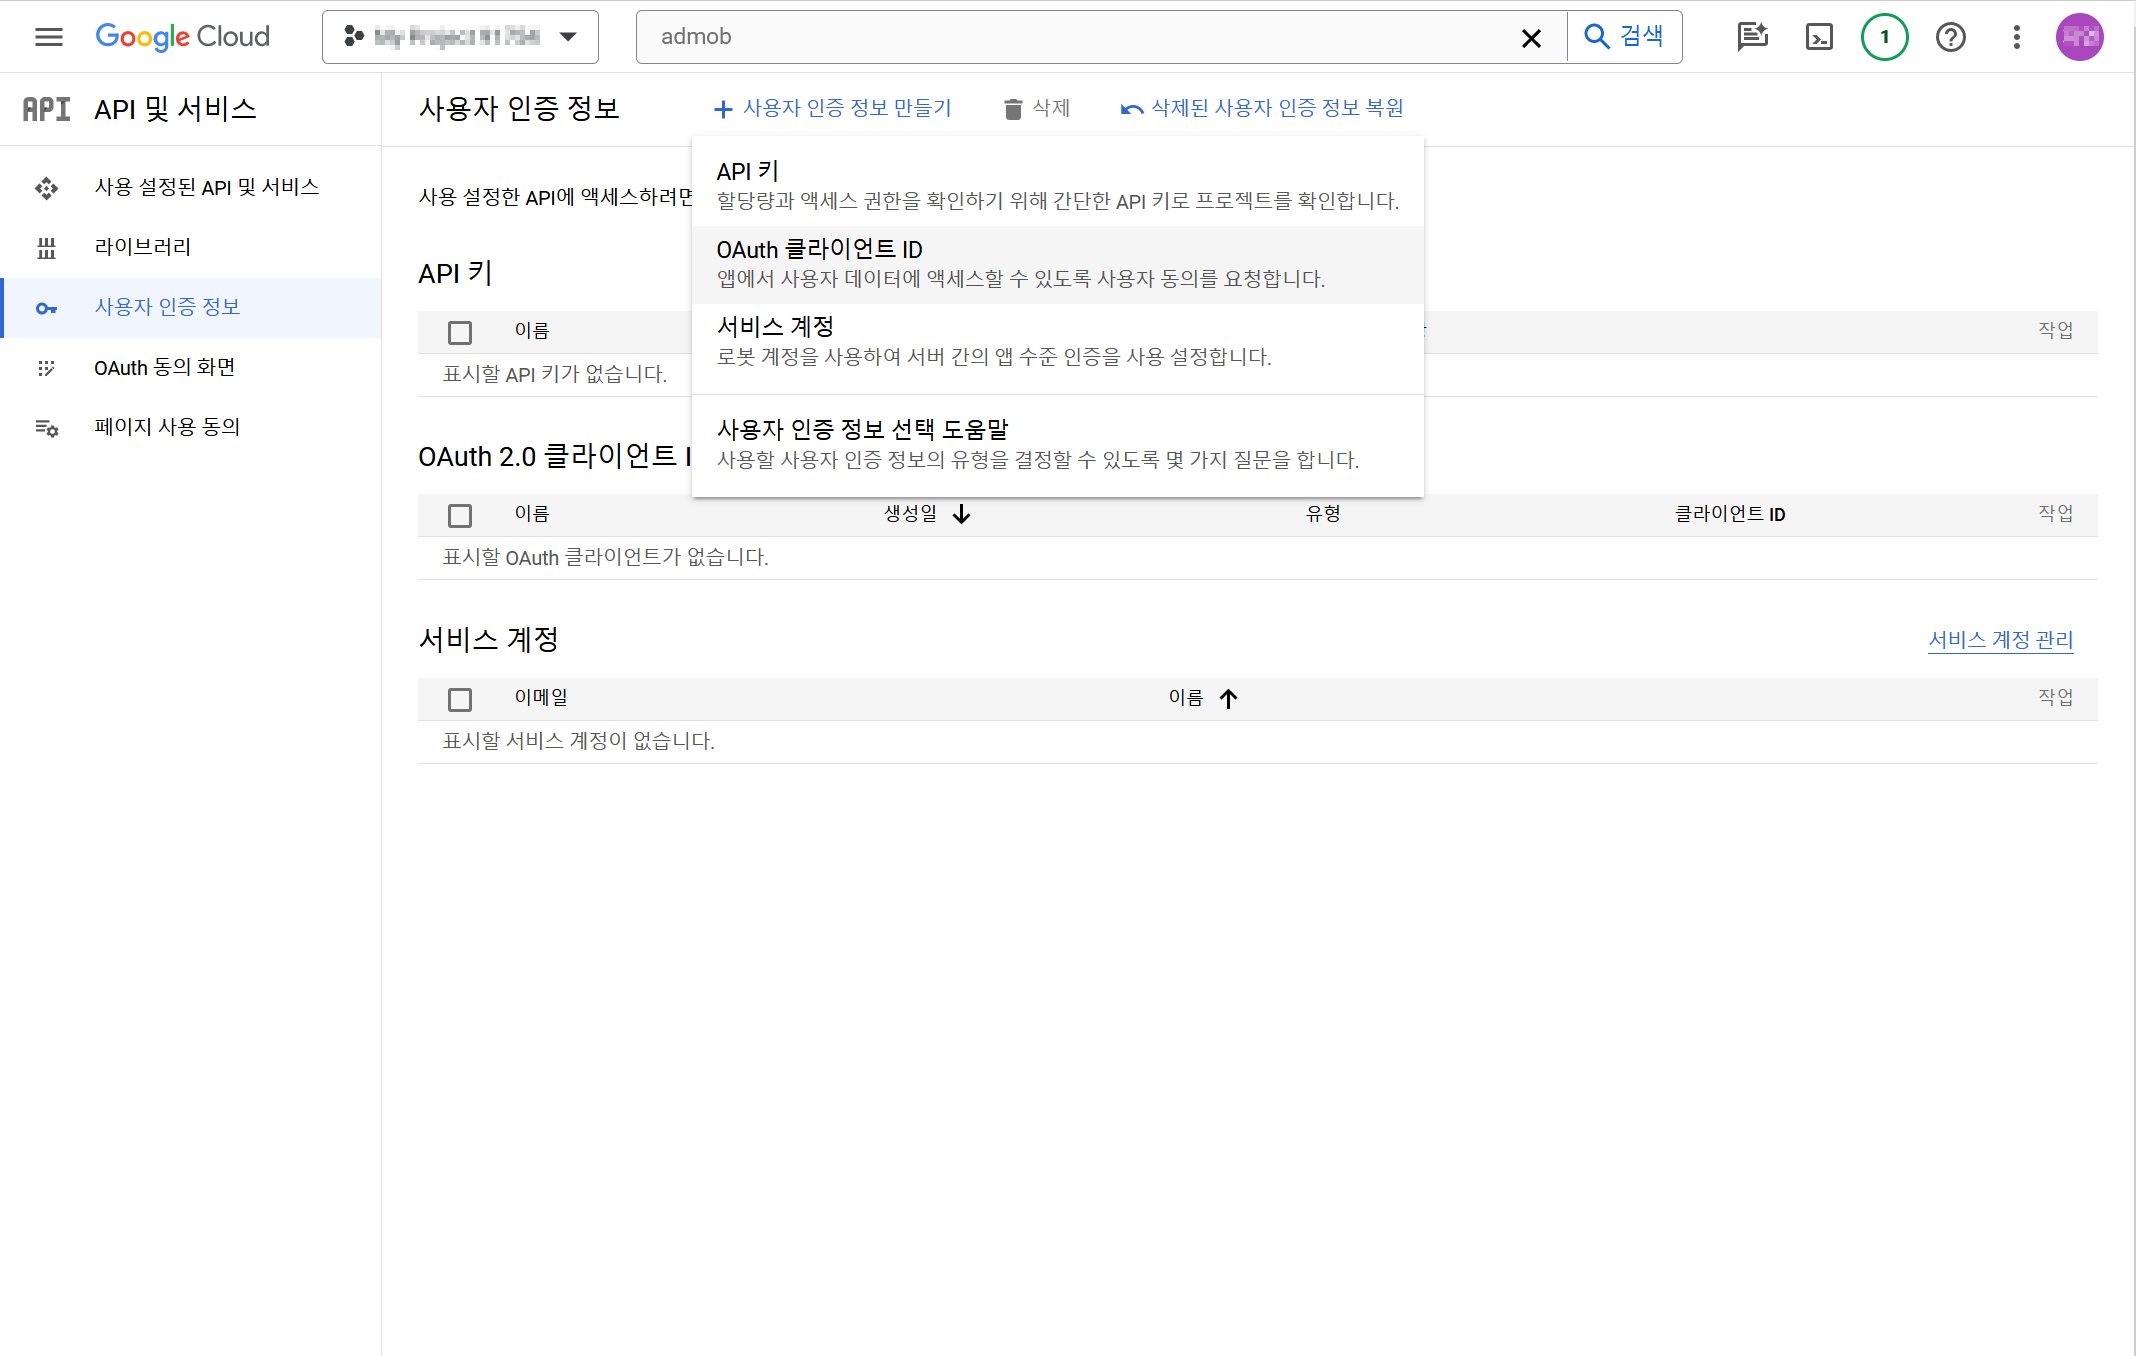
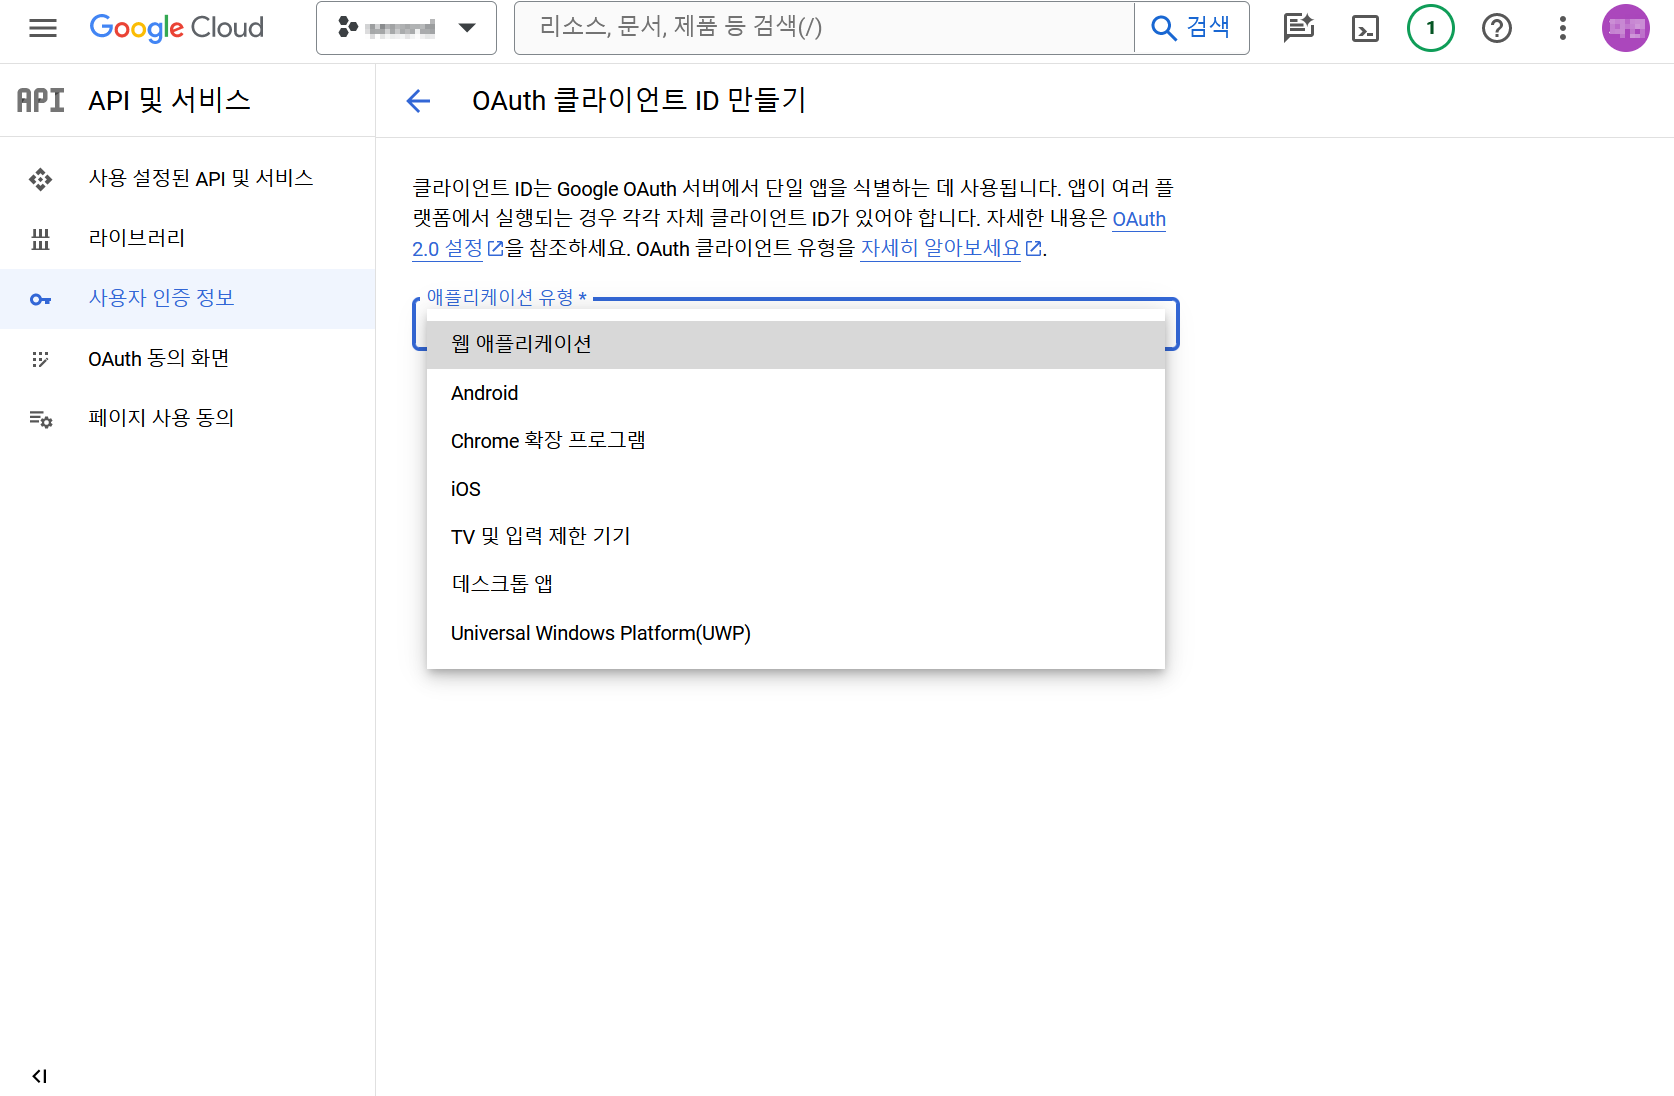
Go to API & Services > User Authentication Information > Create User Authentication Information > Oauth client ID.
Select “Web Application” for the application type.
Enter “https://test-console-promotion.withhive.com/am/mediation/connect” in the approved redirect URI, then click “Create”.
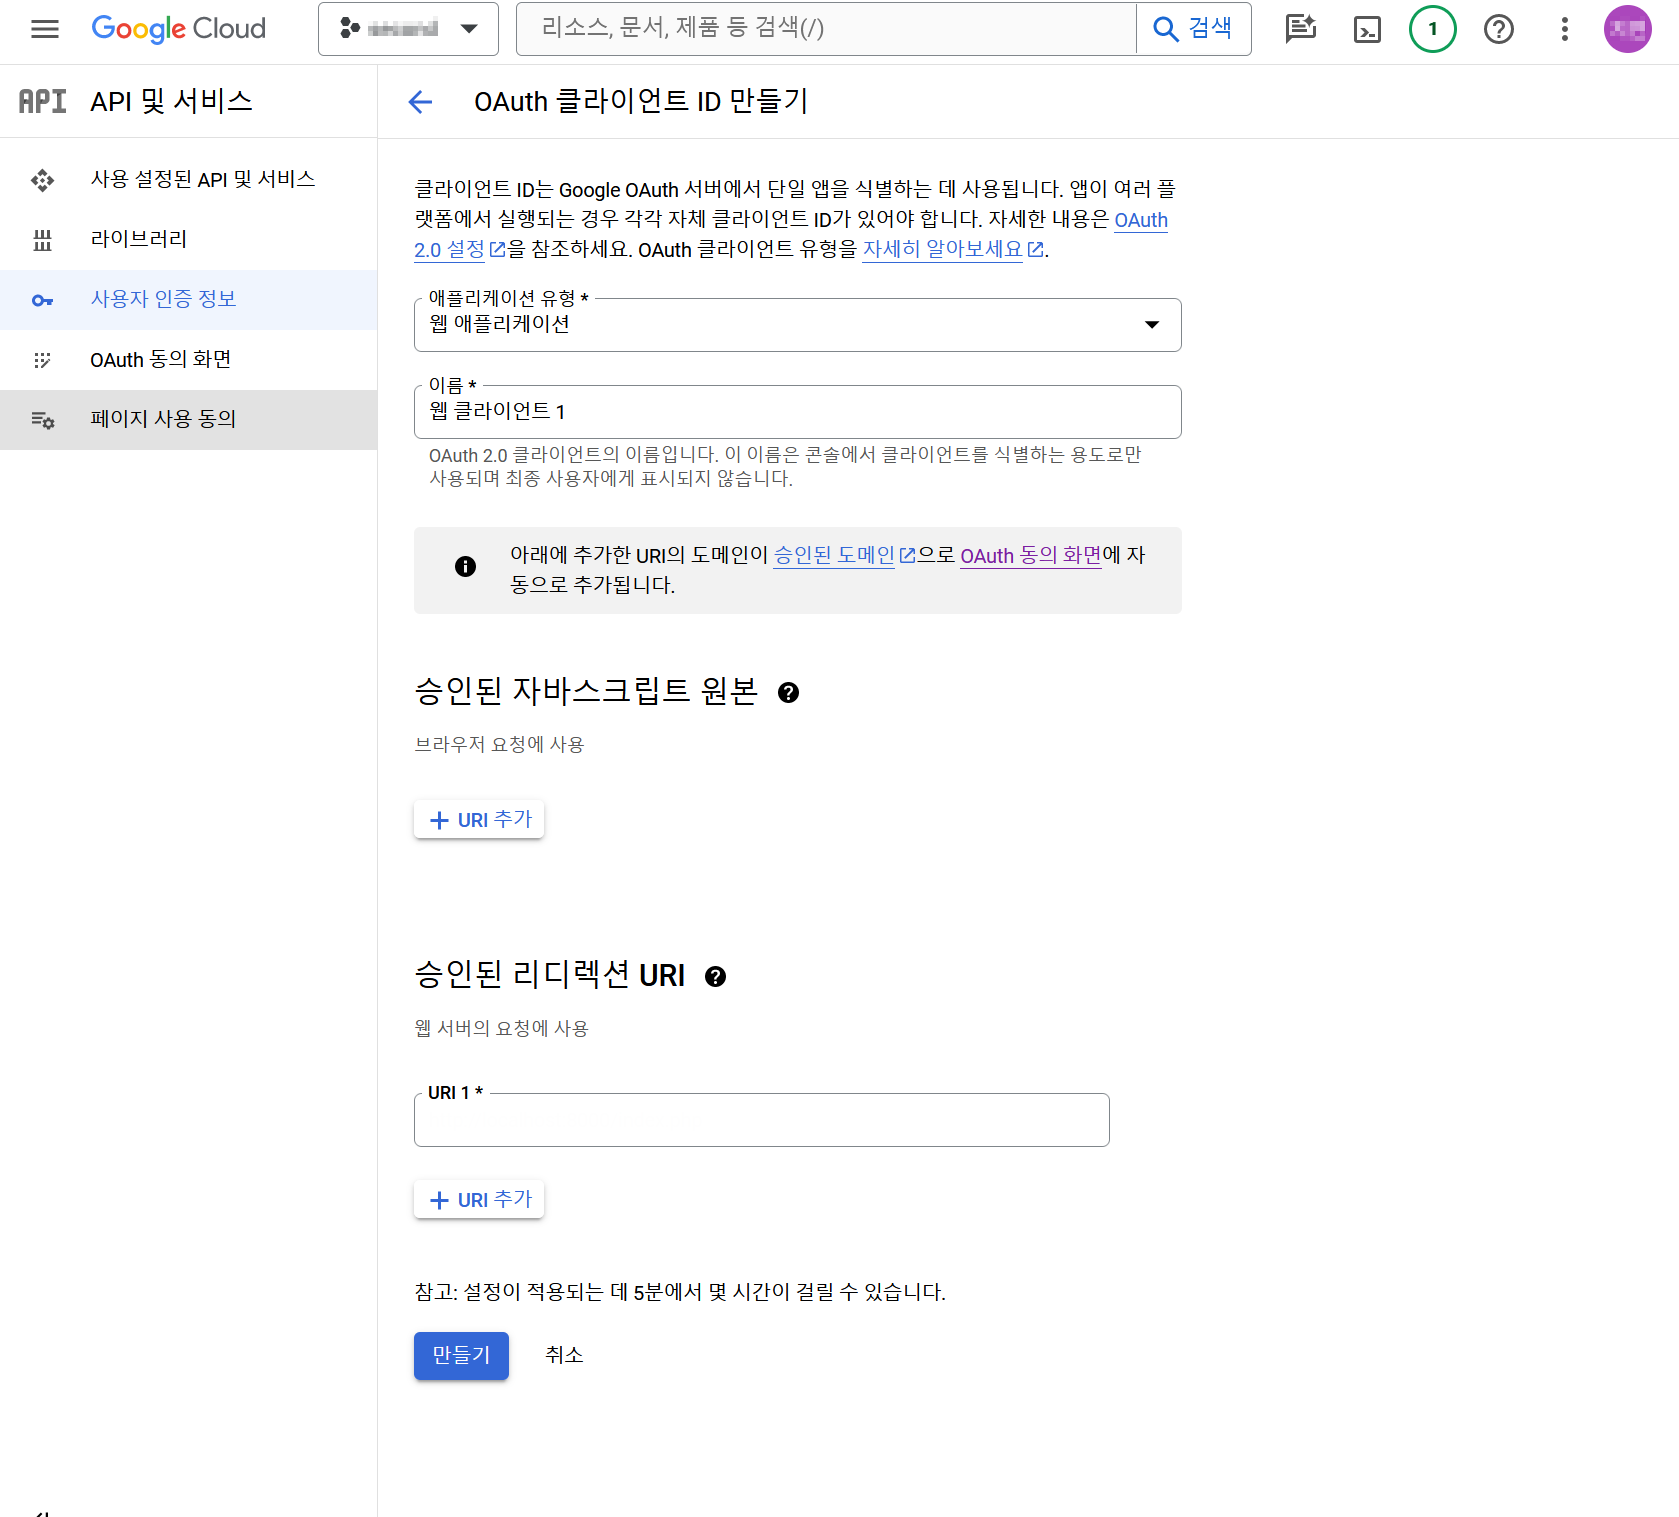
The Oauth client ID has been created.
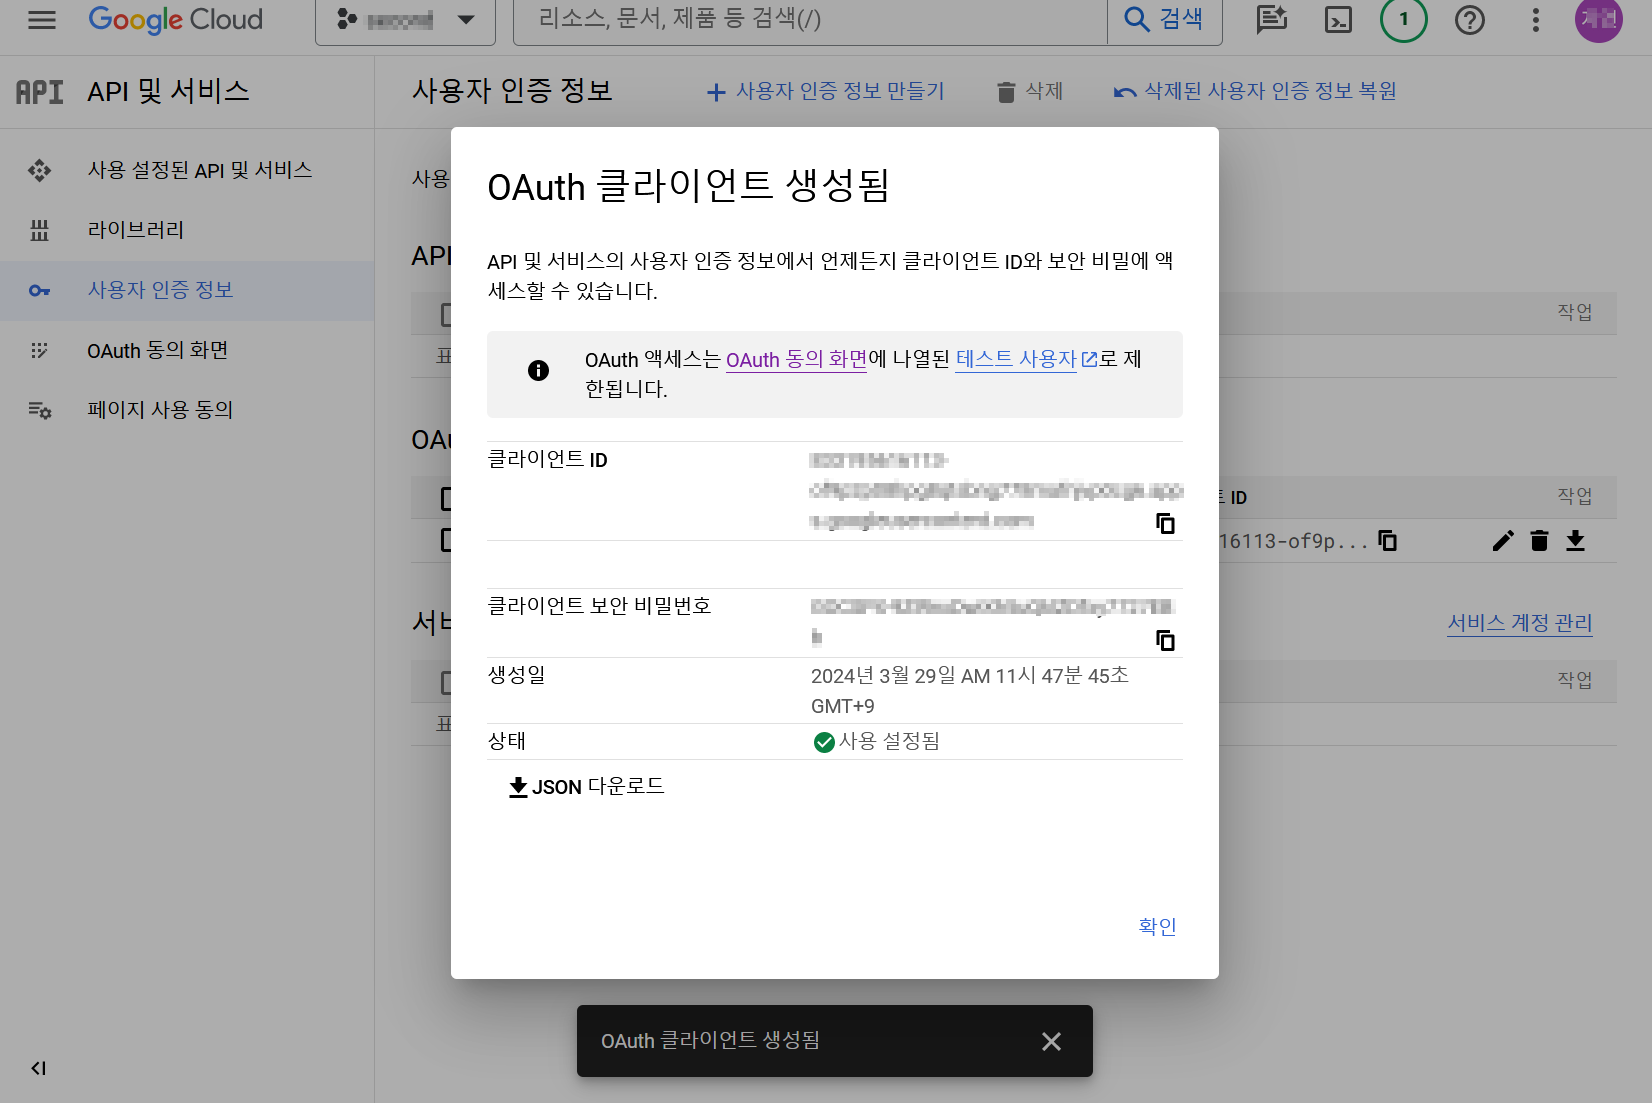
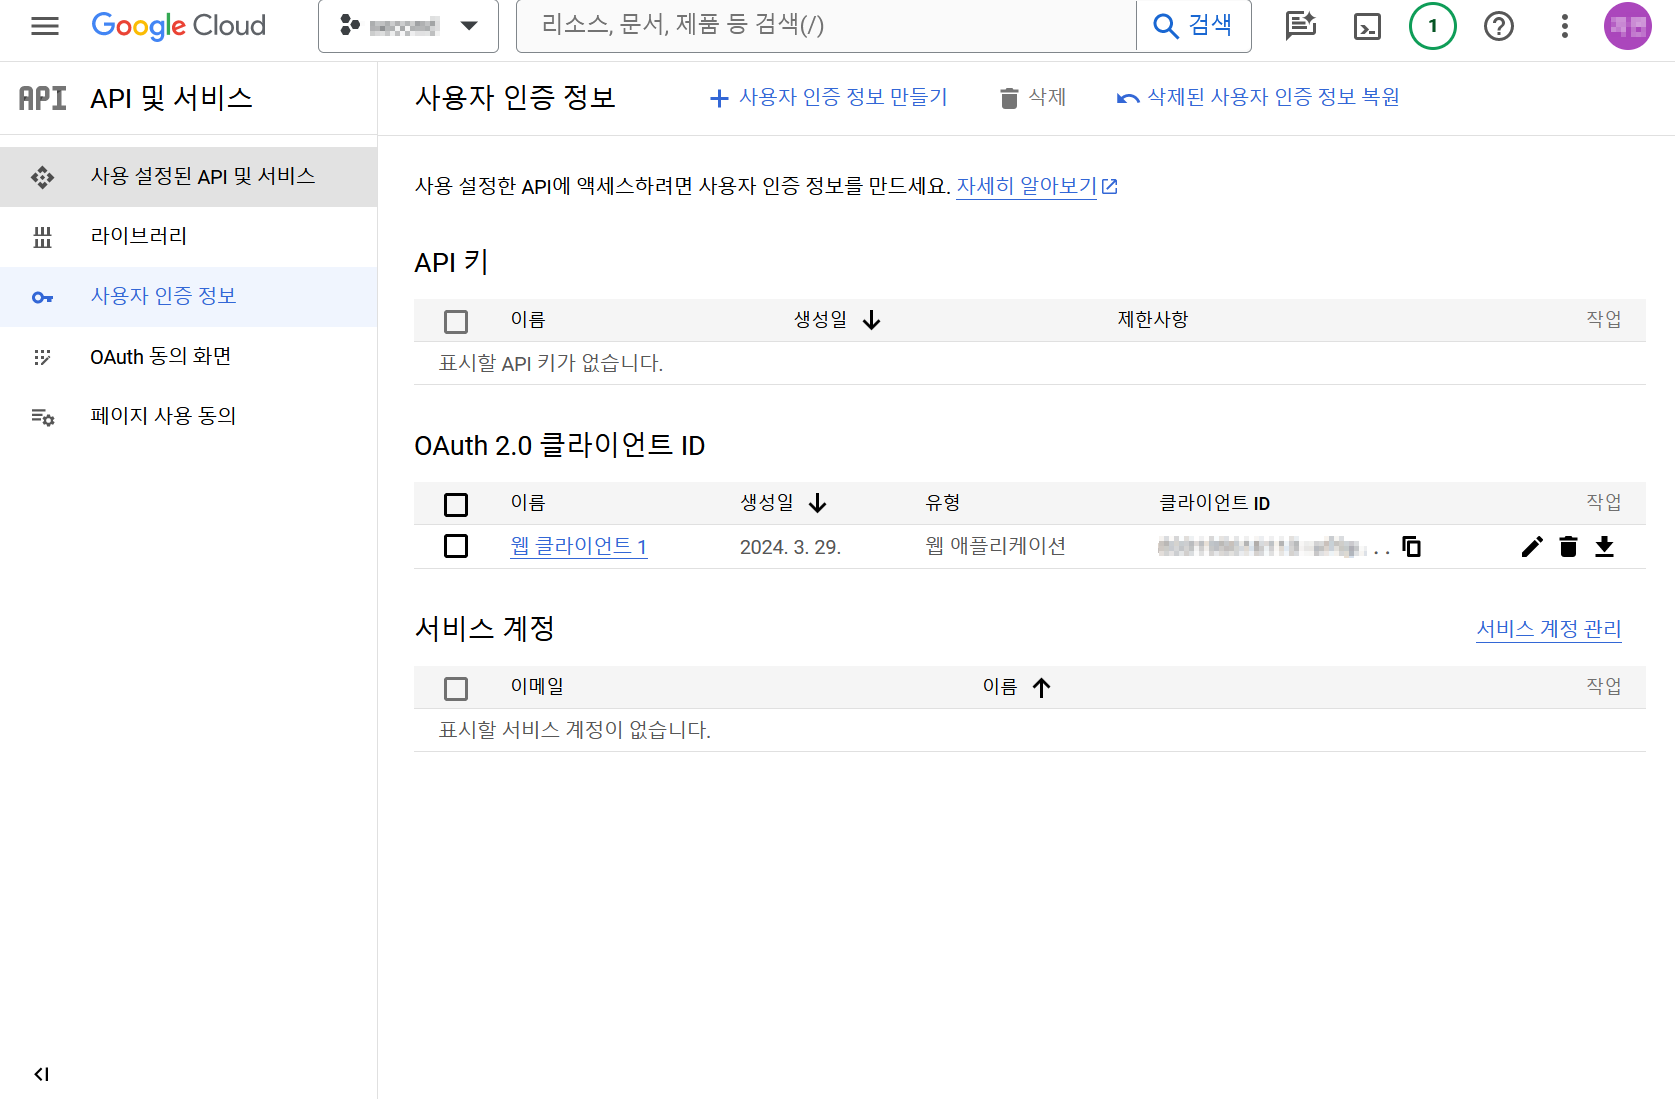
Download the web client json file created in User Authentication Information > Oauth 2.0 Client ID.
How to reconnect when the link expires
A token that can retrieve data is issued after connecting the AdMob API if you allow access.
This token has a validity period, and it expires after the validity period and you can no longer retrieve data through the AdMob API. (The criteria for this validity period are unknown, so you can find out after it expires.)
Therefore, you need to set the access permission setting again to retrieve data. Please follow the instructions to set the access permission settings.
1. Click the “Link Management” Button.
2. Click the “Reset” Button on the link management sheet.
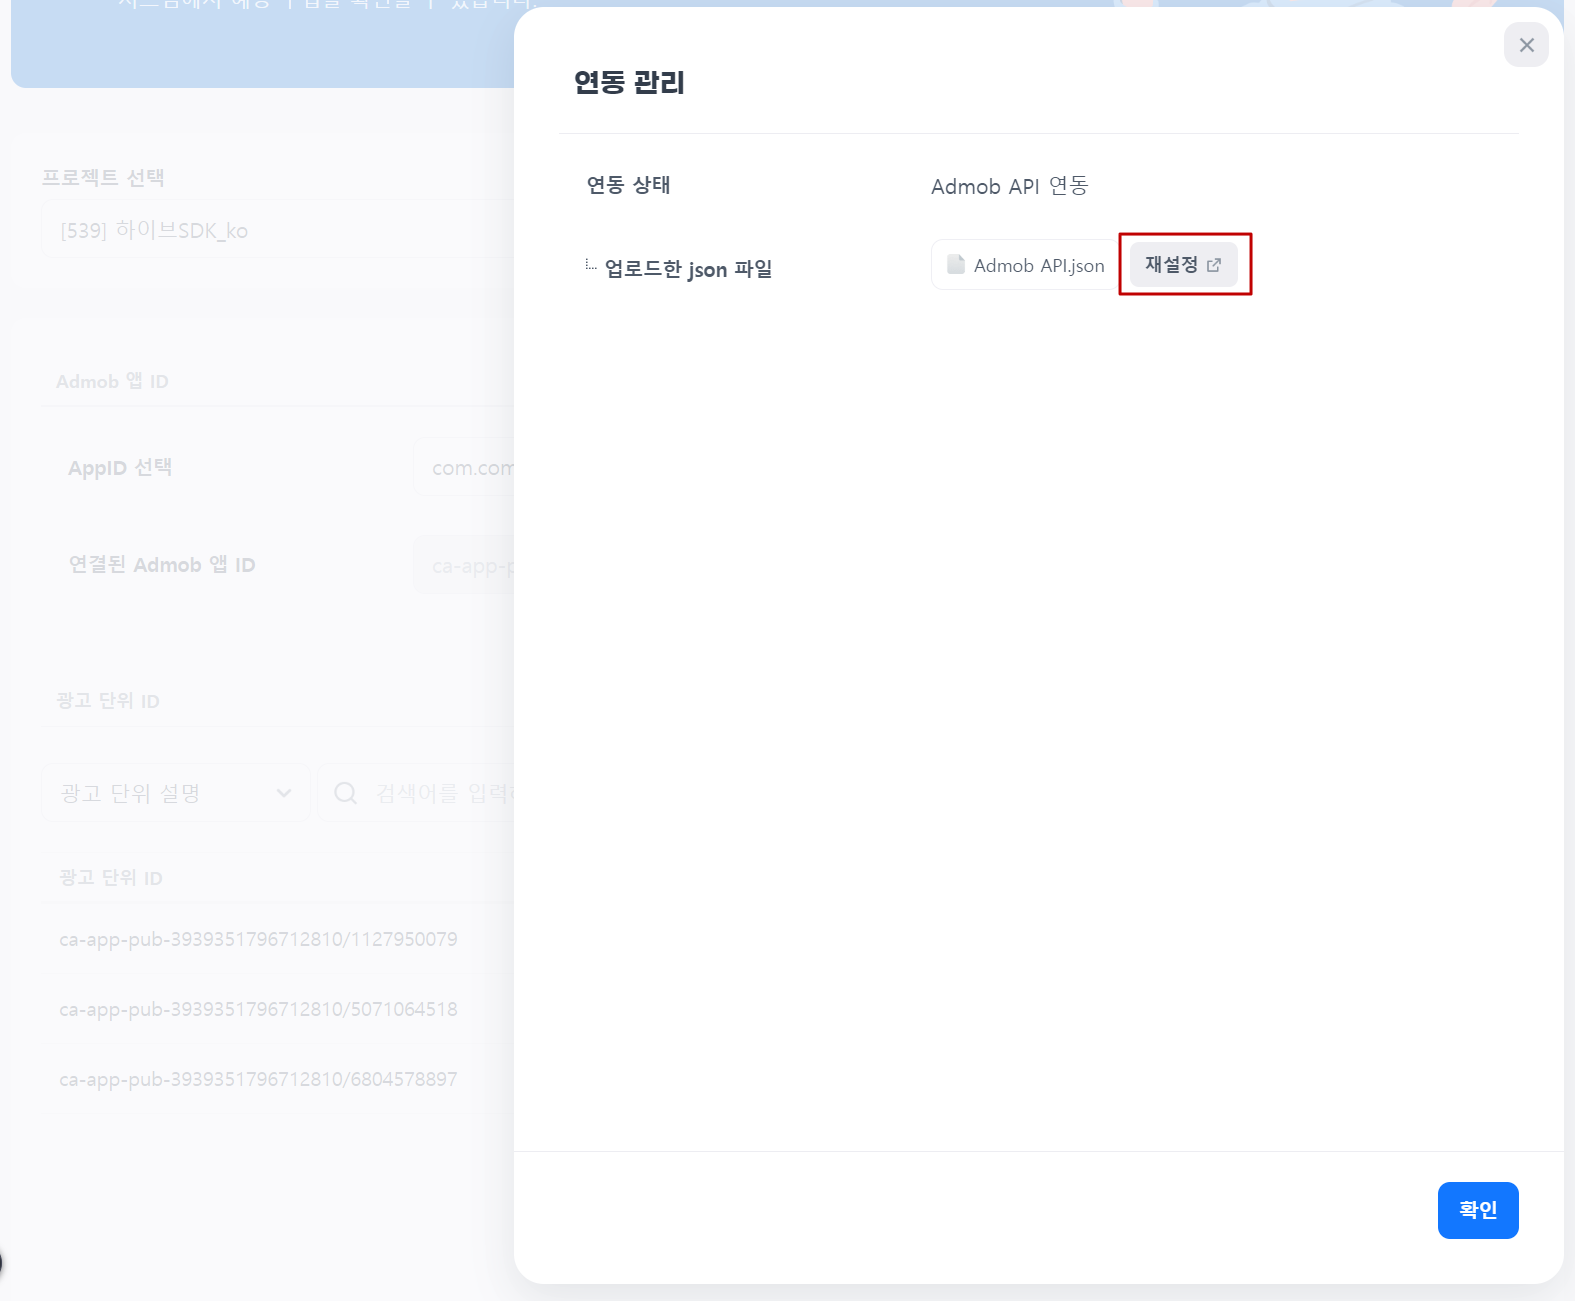
3. A pop-up window will be displayed where you can upload the json file and allow access.
You can check the json file you uploaded previously in the pop-up window. Click “Next”.
4. Click the “Allow Access” Button to proceed with the access permission settings.
Once the access permission settings are complete, you can link again and retrieve data.
Check Report Data
You can check the data exposed through AdMob API link by going to Hive Console > Analytics > Comprehensive Indicators > All Indicators > Ad Indicators > Daily Ad Summary.
Link ADforus
Start
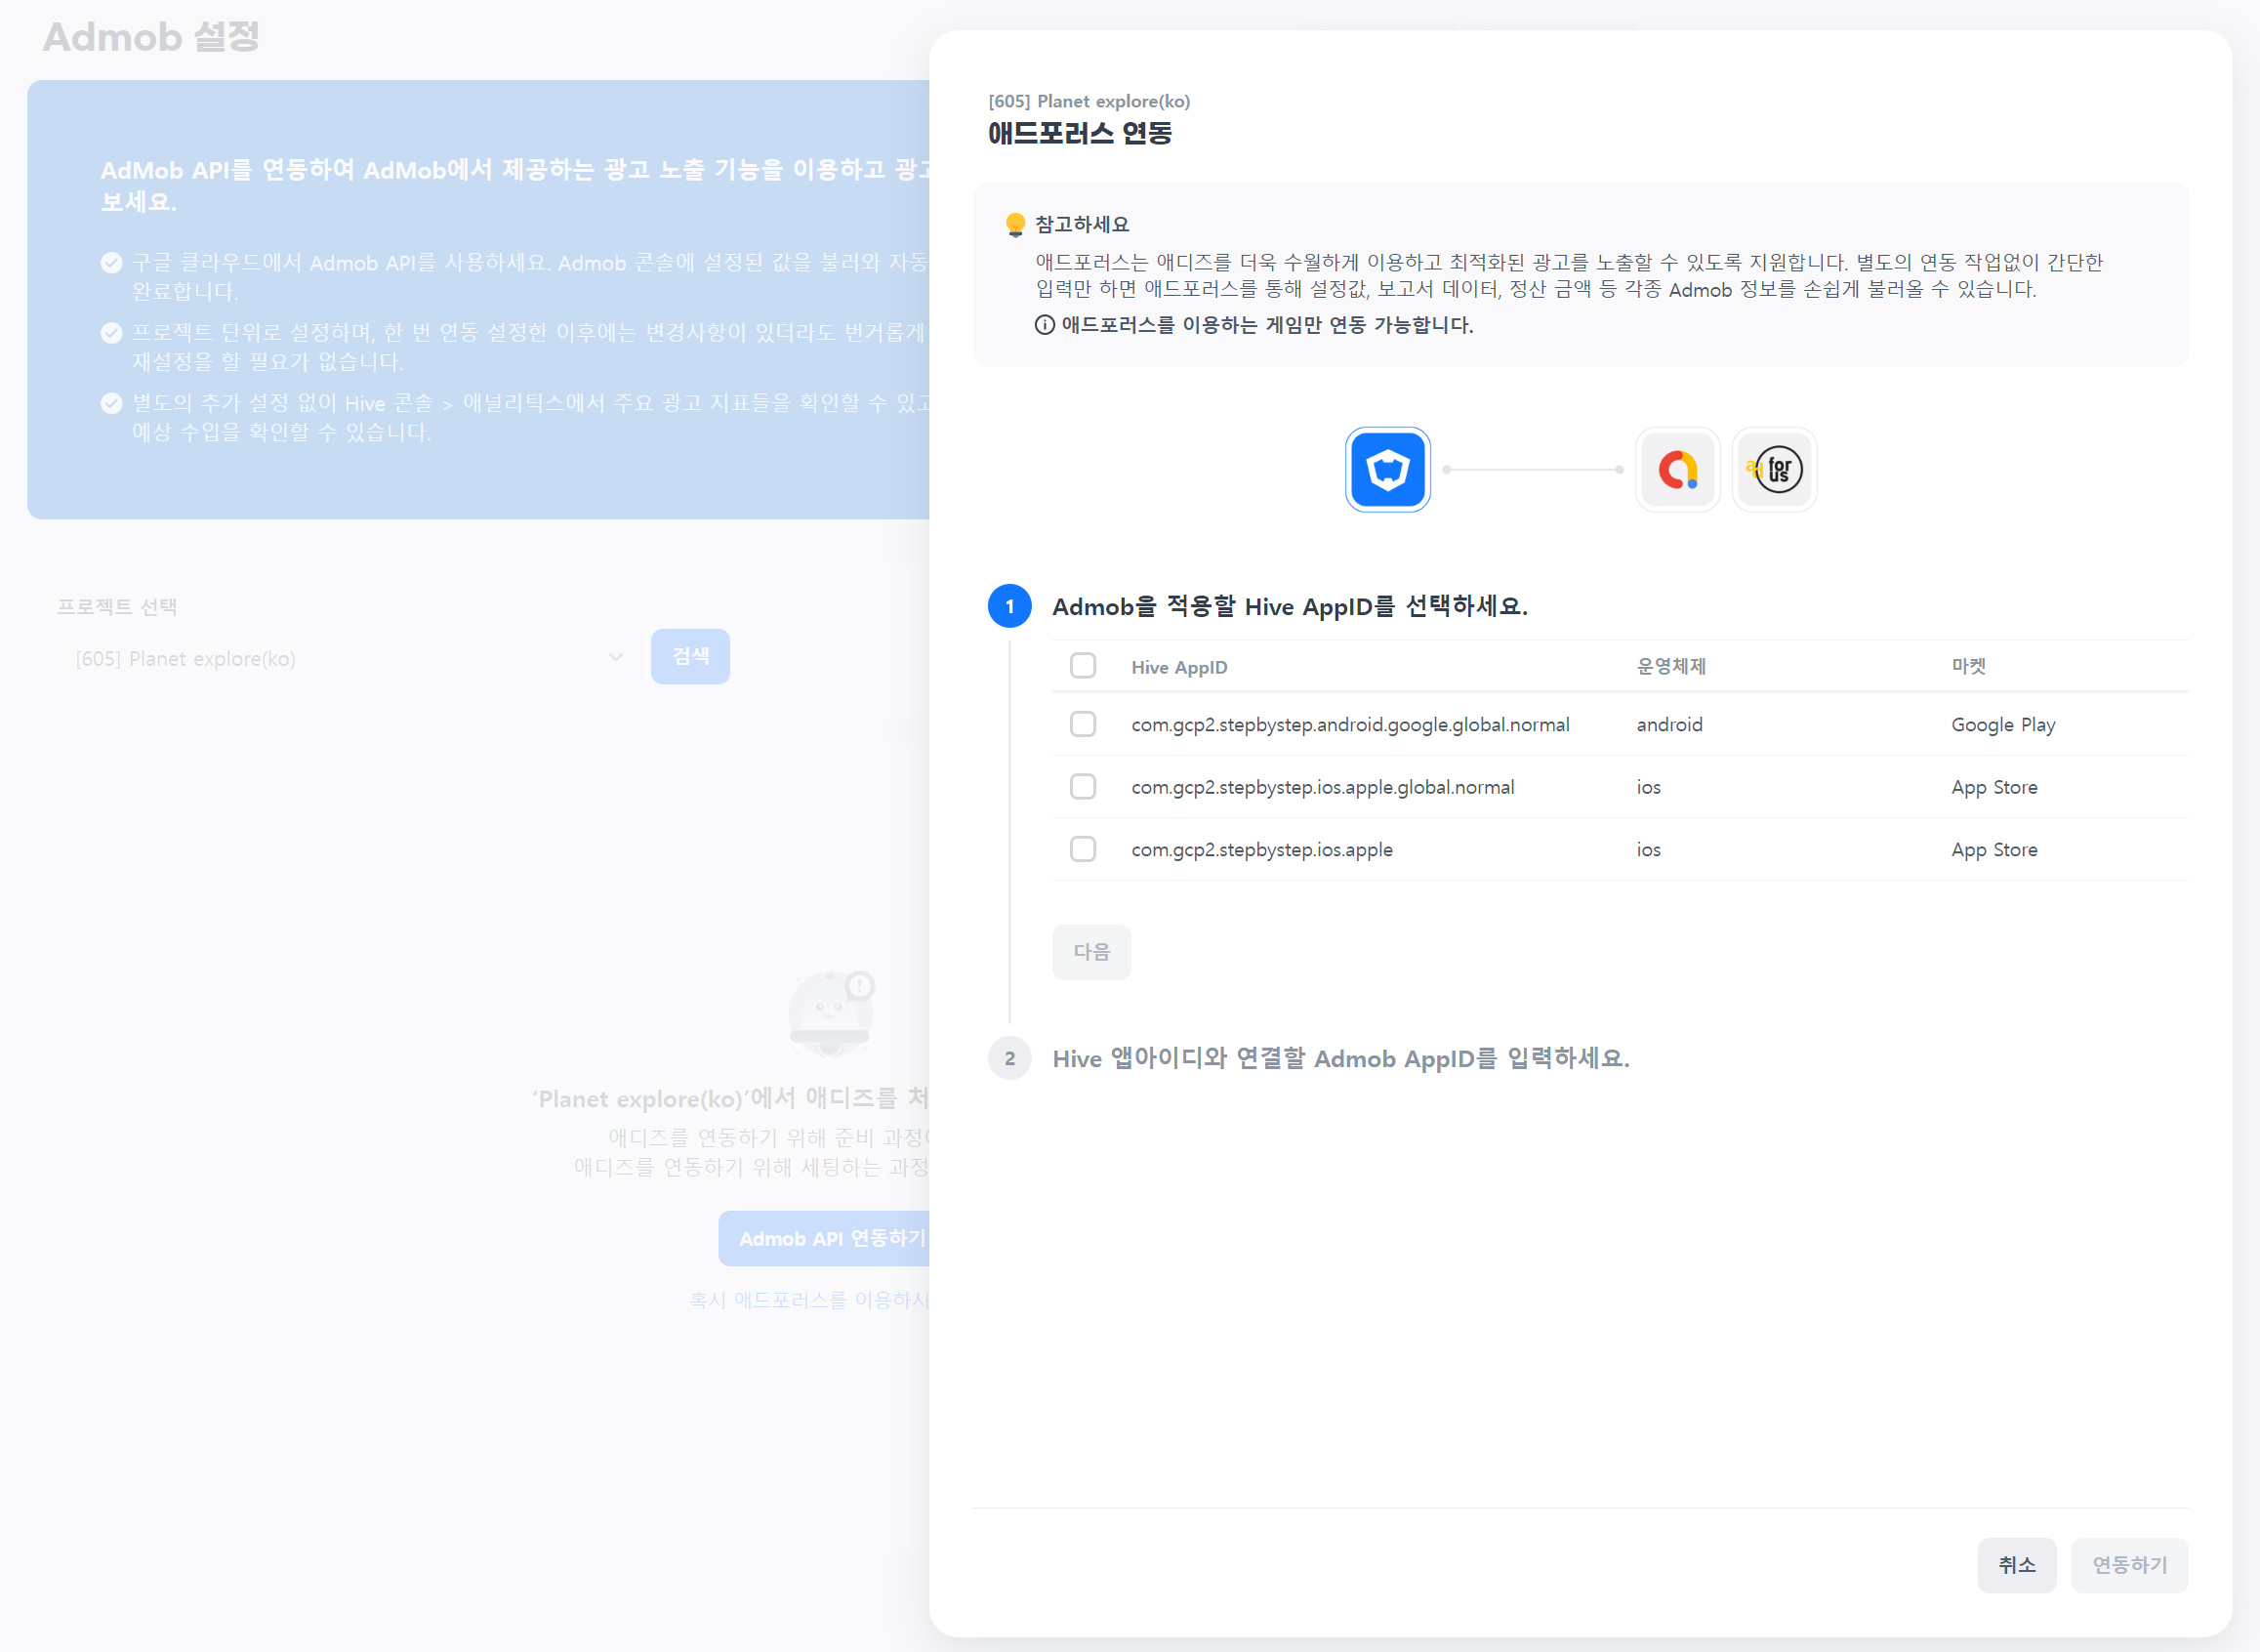
1. Select a game by going to Console > Adiz > AdMob Settings. Click the sentence “Are you using ADforus?” at the bottom of the screen to display the sheet for connecting ADforus.
2. First, select the Hive App ID to display the ad.
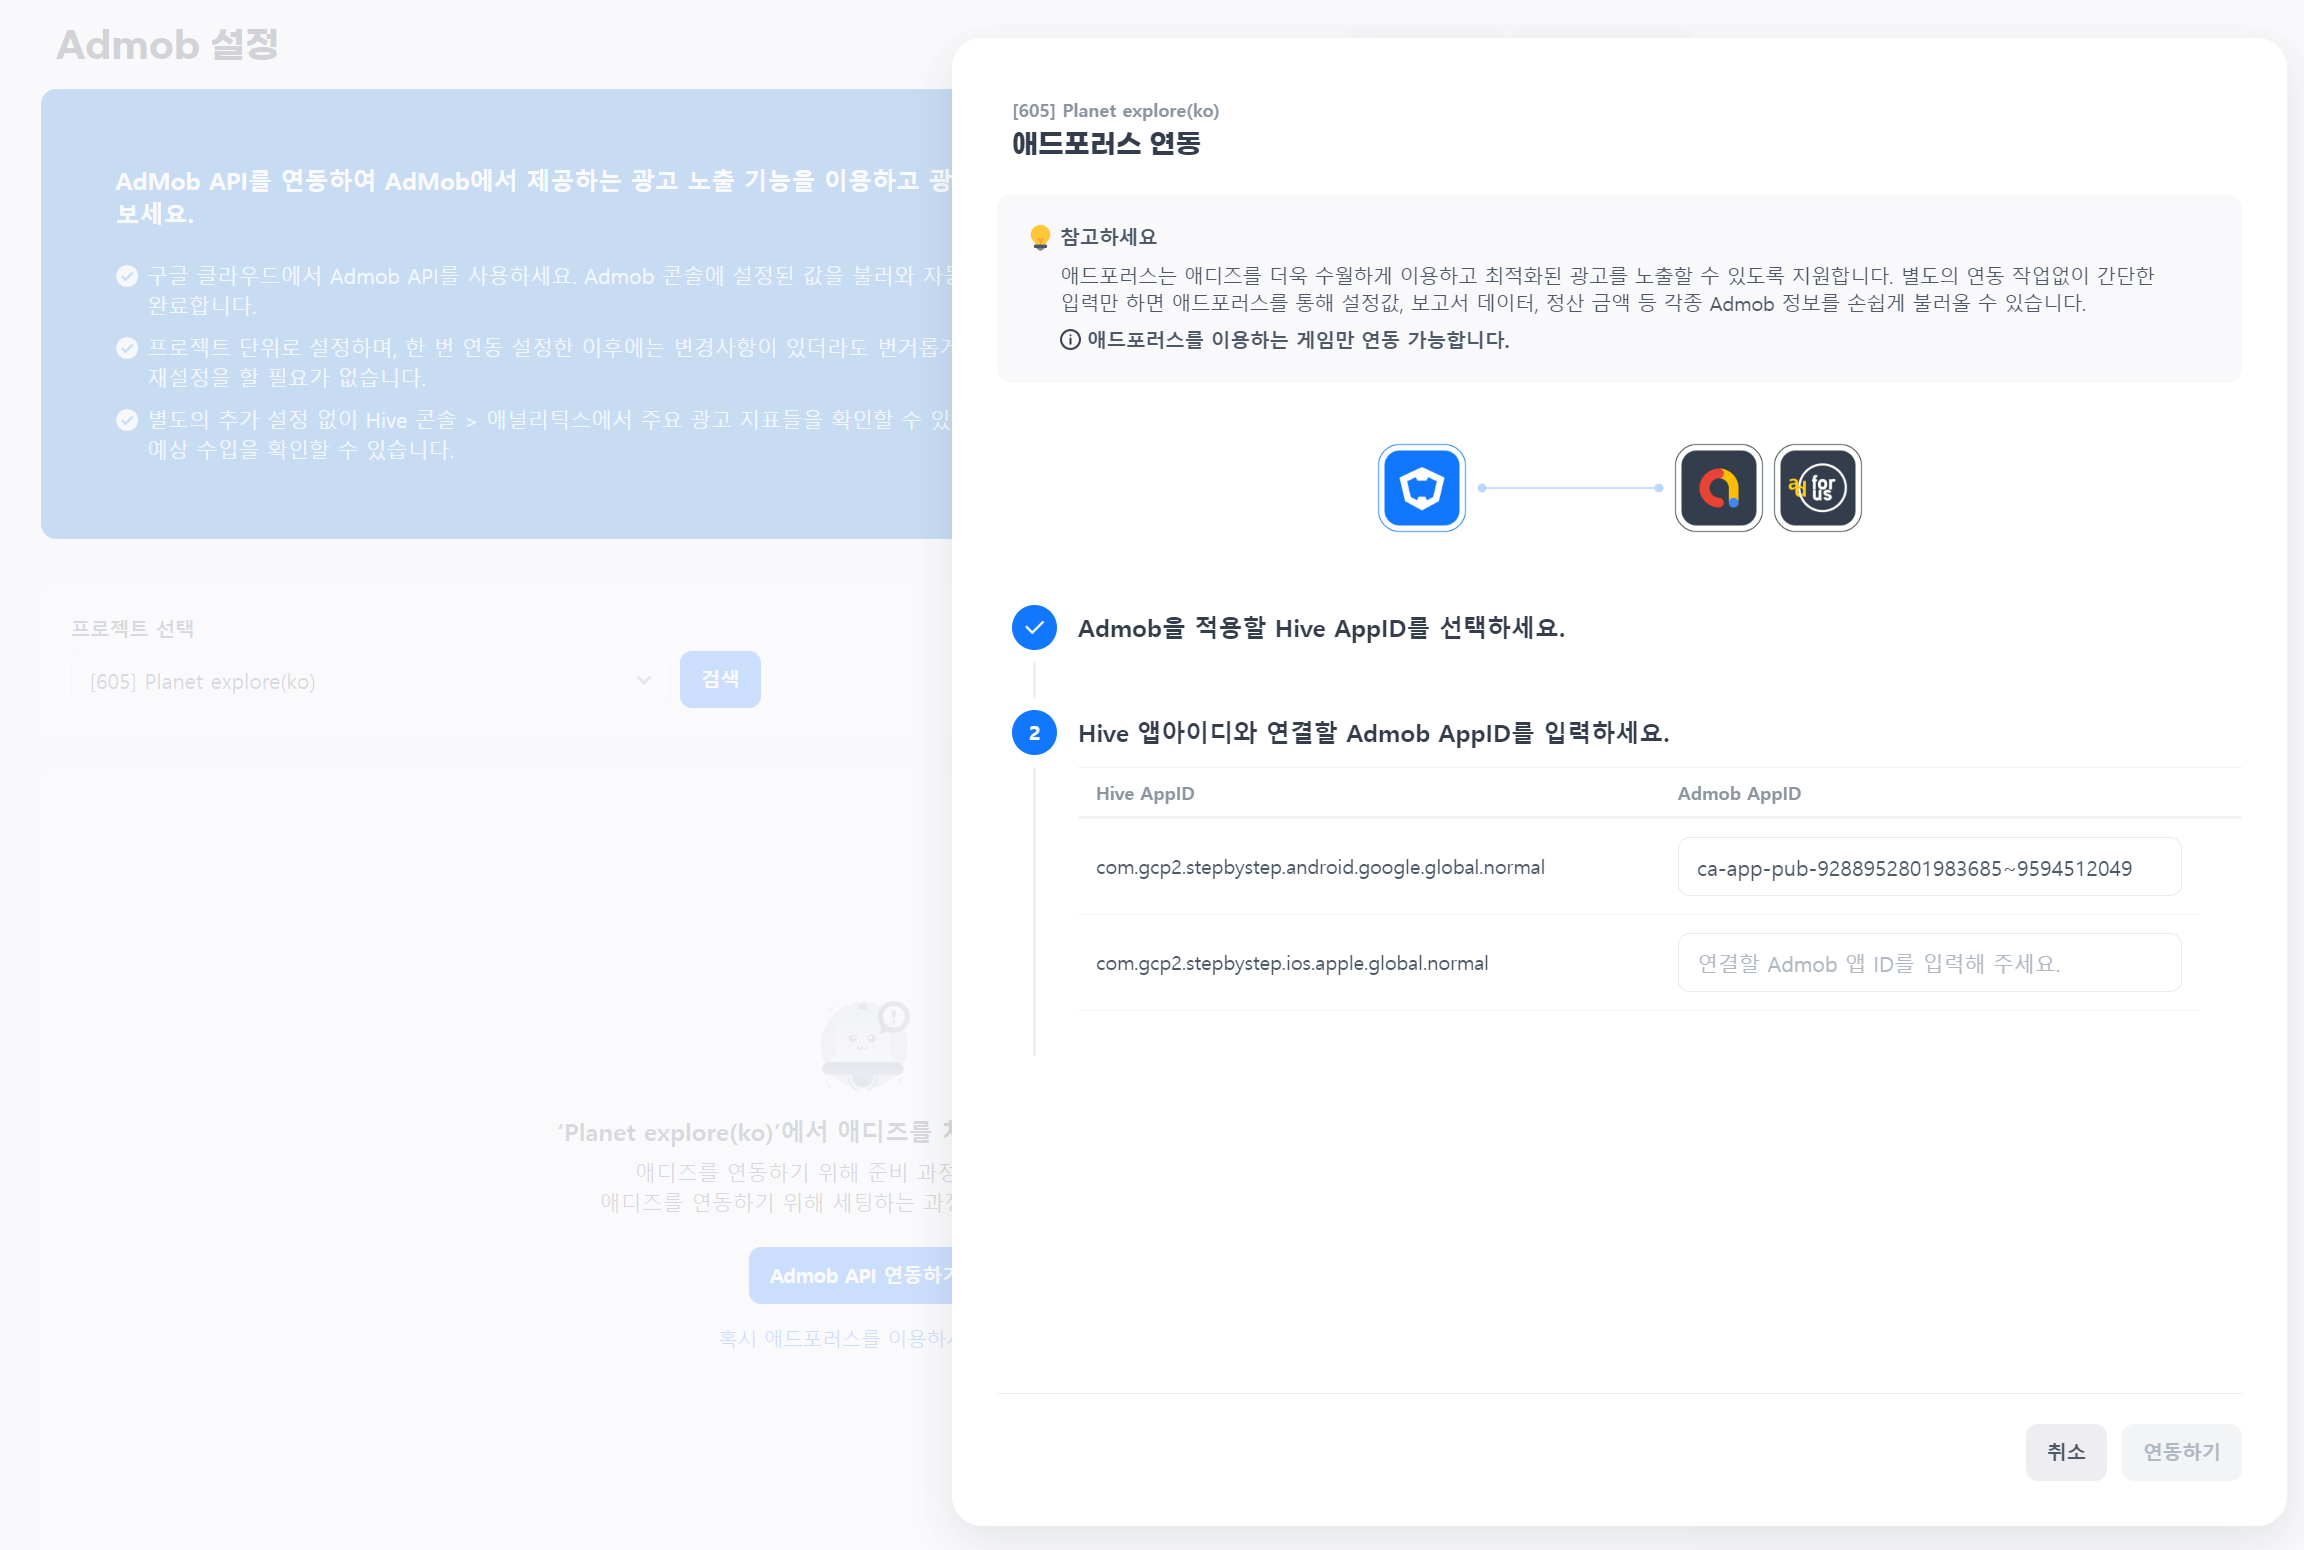
3. Enter the AdMob App ID to connect to the selected Hive App ID.

4. Click the “Link” Button. ADforus link will proceed.
5. ADforus link has been completed. You will automatically be moved to the management page, and you can check the connected ad unit ID.
Manage AdMob Information
After linking is complete, you can check the AdMob App ID and ad unit ID retrieved from the AdMob console.
Additional Linking
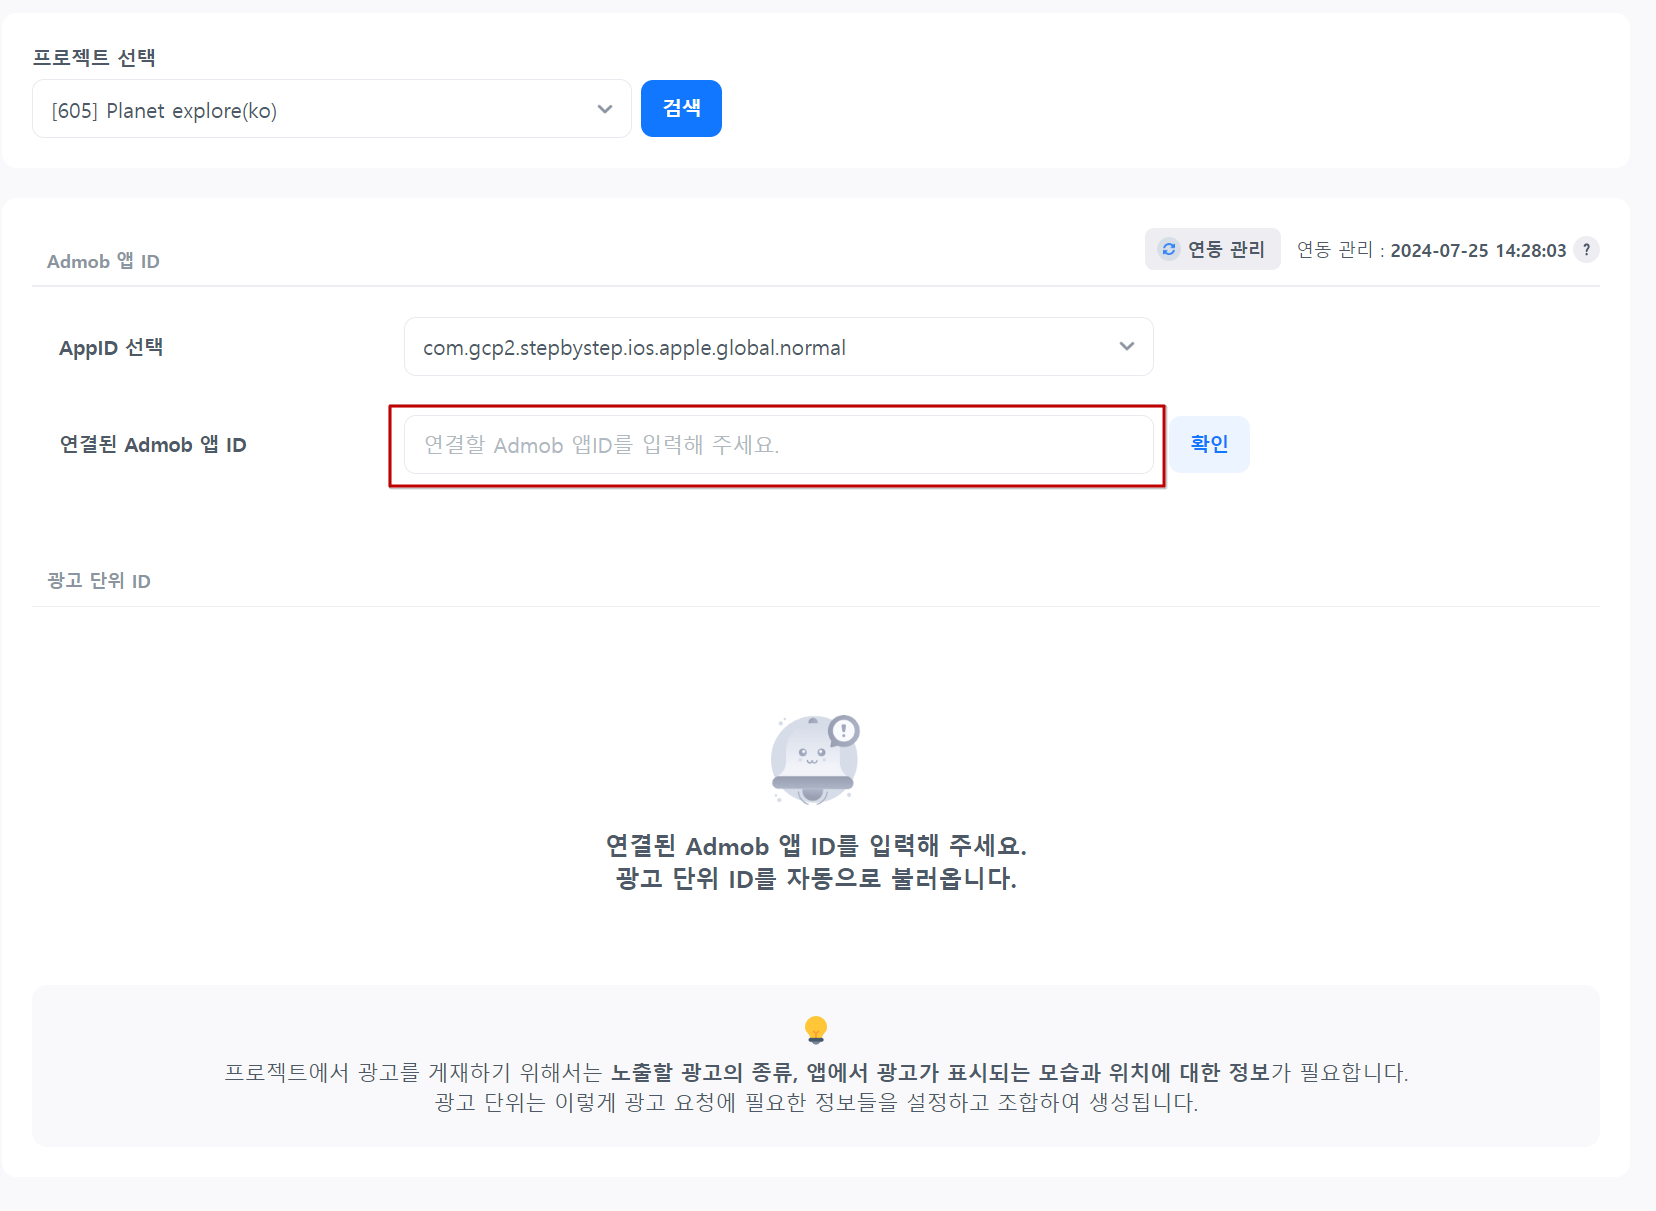
Once ADforus linking is complete, you can check the ad unit ID in the Hive console in your account.
First, select the Hive App ID, then enter the AdMob App ID value in the “Linked AdMob App ID” input field. After entering, click the “OK” Button.
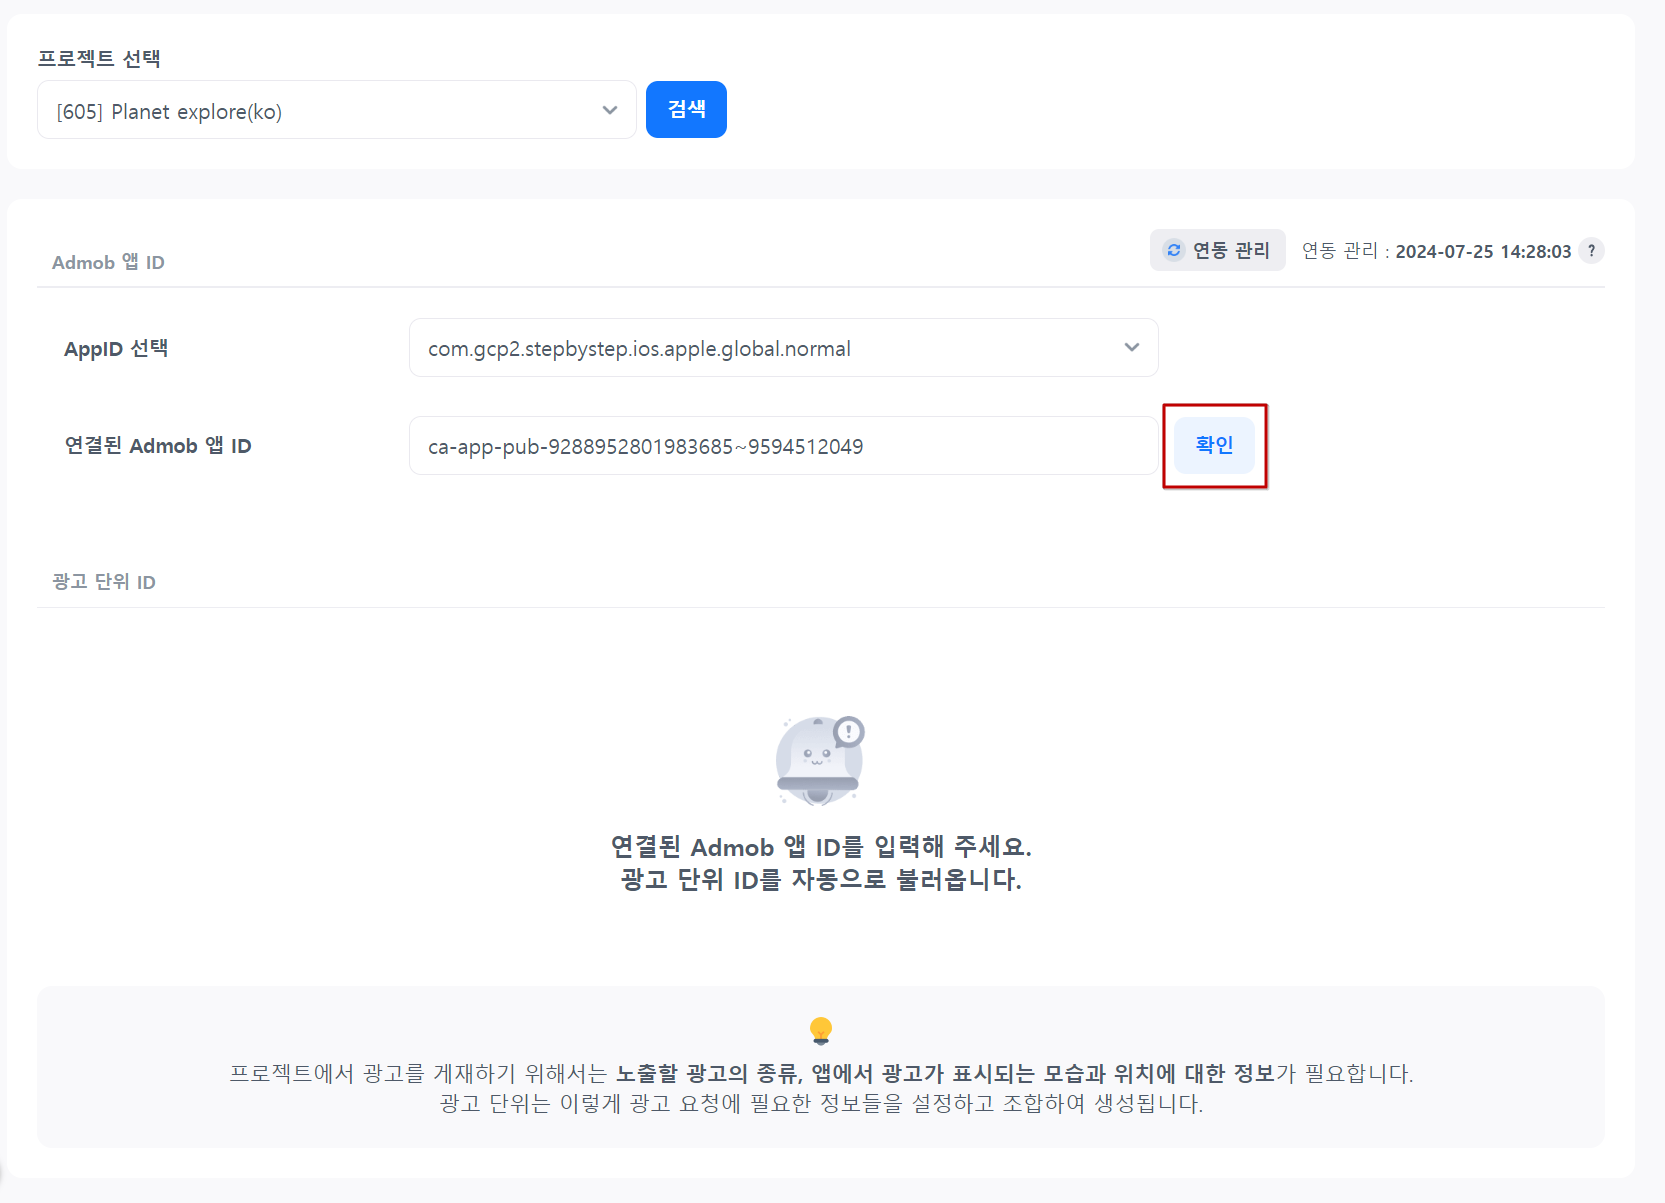
The ad unit ID linked to the entered AdMob App ID will be automatically displayed.
Remove Link
You can remove the link between the Hive App ID and AdMob App ID.
To link with another App ID, remove the existing link.
You can remove the link by clicking the “Remove Link” Button. When the AdMob App ID link is removed, the link with the ad unit ID will also be removed.
The unlinked Hive App ID can be linked with another AdMob App ID.
Ad Unit ID Usage Settings
To remove the ad unit ID, turn off the “Use” toggle. You cannot request ads with a disabled ad unit ID.
To reactivate it, change it to the “Use” status.
Check Report Data
You can check the data exposed to ads through linking with ADforus by going to Hive Console > Analytics > Comprehensive Indicators > All Indicators > Ad Indicators > Daily Ad Summary.