Permission managers (Owner, Admin) can manage member permissions by going to Permission Management > Permission Management v2.

Individual Permission
You can manage individual permissions on a member basis.
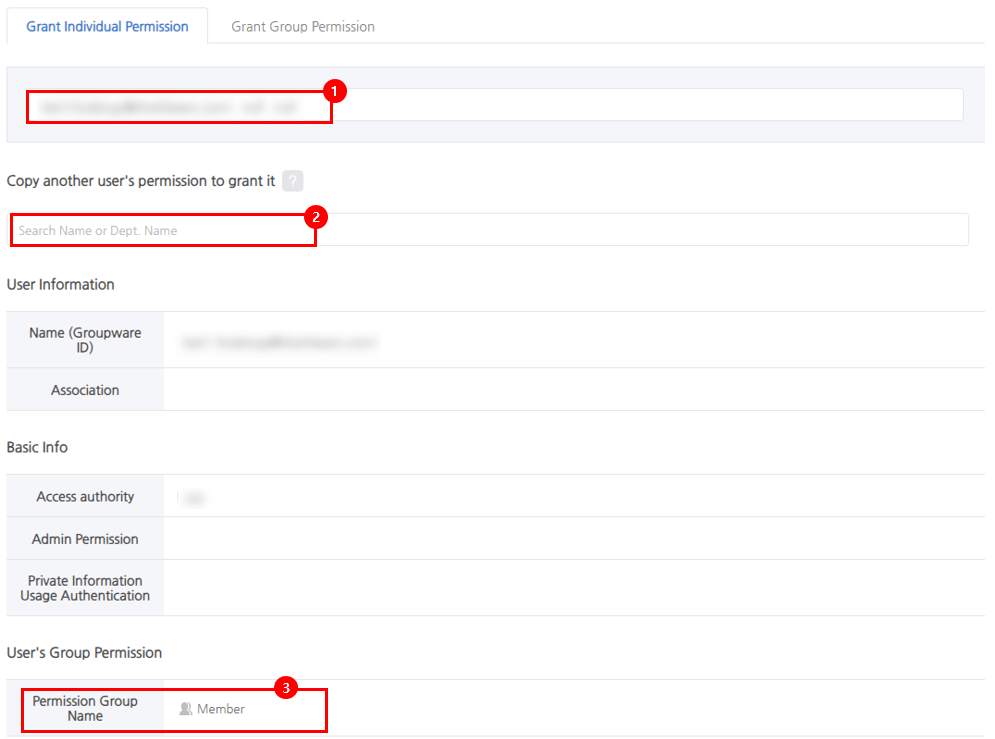
① After searching the member’s name or ID, you can manage console menu permissions.
② Used when you want to grant the same menu permission granted to other members. Search for a member in ‘①’ and then search for and save the Member whose permissions you want to copy in ‘②’, and the permissions granted to “① Member” will be withdrawn and the same menu permissions as ‘② Member’ will be copied. When copying menu permissions, manager permissions and personal information handling permissions are not copied.
③ You can check the group permissions granted to the member searched in ①.
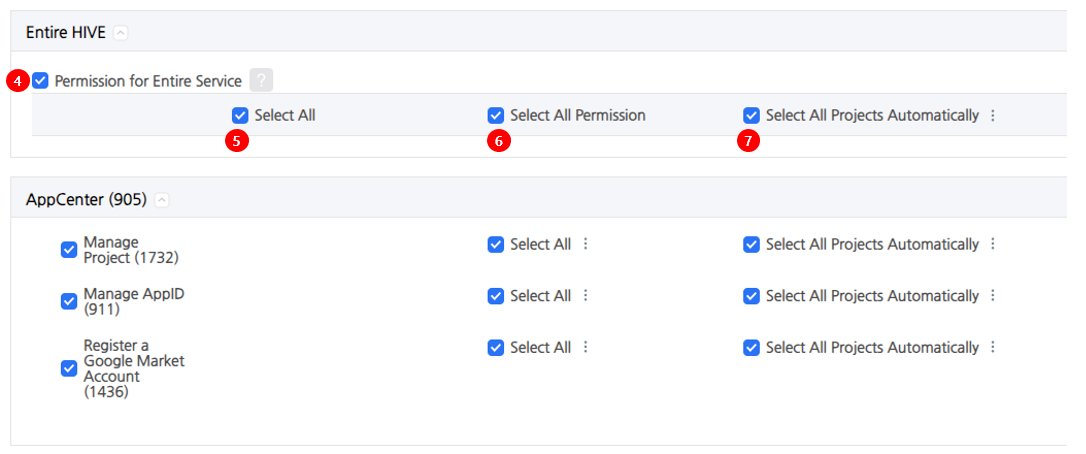
④ When you check all service permissions, all menus, permissions, and project permissions in the console are granted at once.
⑤ When selecting all menus, all menus in the console will be selected.
⑥ When selecting all permissions, all permissions in the console menu will be selected.
⑦ When automatically selecting all projects, permission to view all projects will be selected. To set permissions for a specific project to be common to all menus, select only a specific project from the kebab menu on the right when using “Automatically select all projects” and the permissions to view the selected project will be set to be common to all menus on the console.
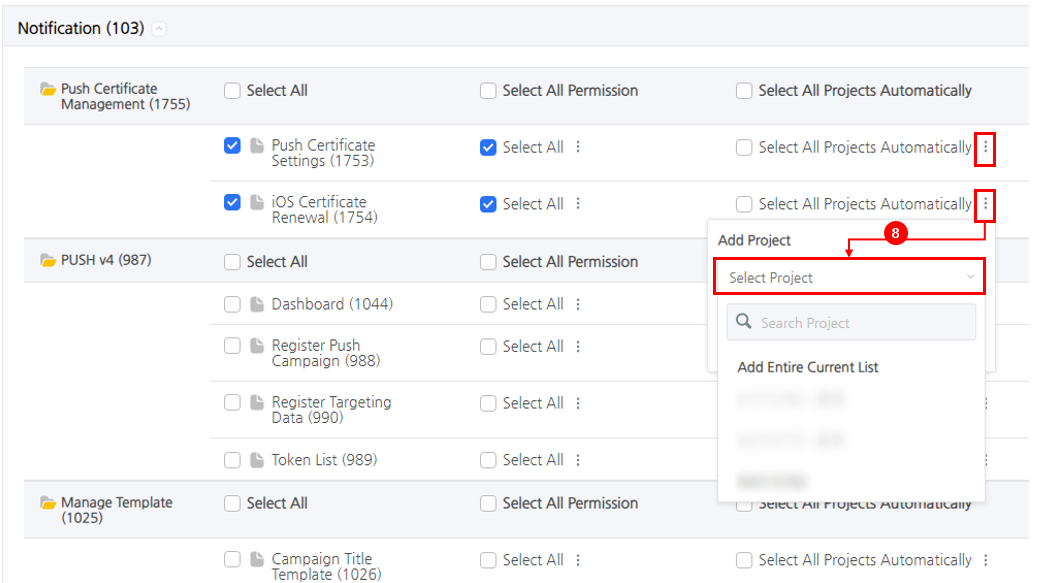
⑧ Project permissions can be granted based on the menu. Select the project you want to grant permission to from the Kebab menu on the right side of the “Automatically select all projects” menu. If you set project permissions in other menus in the same way, you can grant different project permissions based on the menu.
Menus with permissions are displayed as available for activation and deactivated.
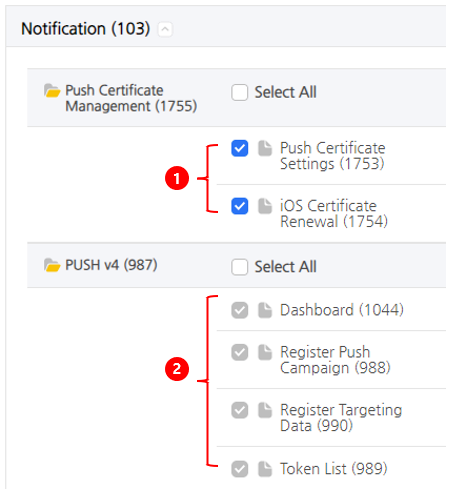
① Activate: You can modify the permissions in the “Grant Individual Permission” menu with the permissions granted through the “Grant Individual Permission” menu.
② Deactivate: You cannot modify the permissions in the “Grant Individual Permission” menu with the permissions granted through the “Grant Individual Permission” menu. You can modify the permission group that’s been granted to the Member in the “Grant Group Permission” menu.
Grant Group Permission
You can manage menu permissions based on permission groups.

① The “Member” permission group is a default permission group and is automatically granted to members who join by receiving an invitation. Menus excluding personal information and sales information are exposed, and project data cannot be viewed. Therefore, in order to use the console smoothly, you must obtain the “Individual” or “Group” permission from the permission manager (Owner, Admin). Because it is a default permission group, deleting the group or modifying permissions is not possible.
② Select a group or category, enter the group name, and click the Add Button to create a new permission group.
③ Set the “Lock/Unlock Group Edit” toggle button to On and edit the group. After editing is complete, set the toggle button to Off to save the changes.
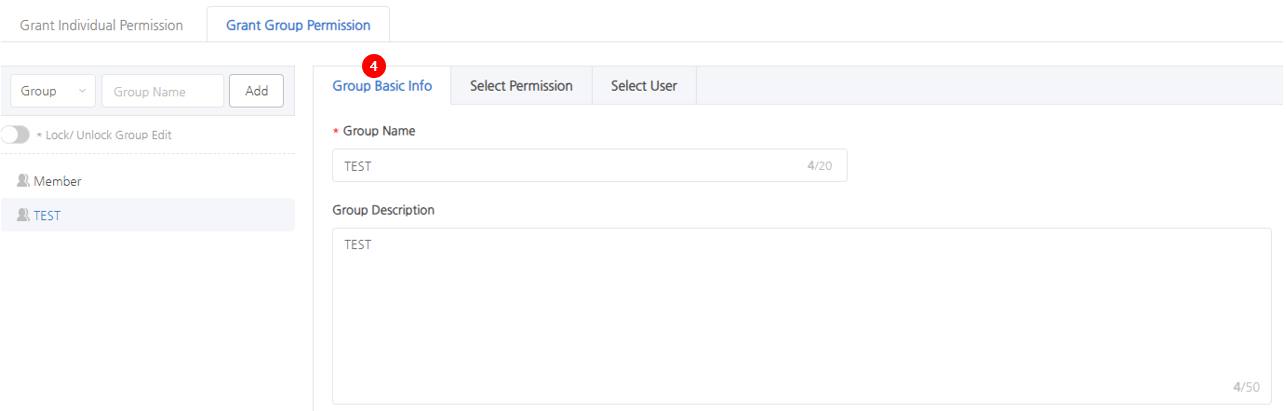
④ Group Basic Information: You can edit the basic information of the selected permission group.
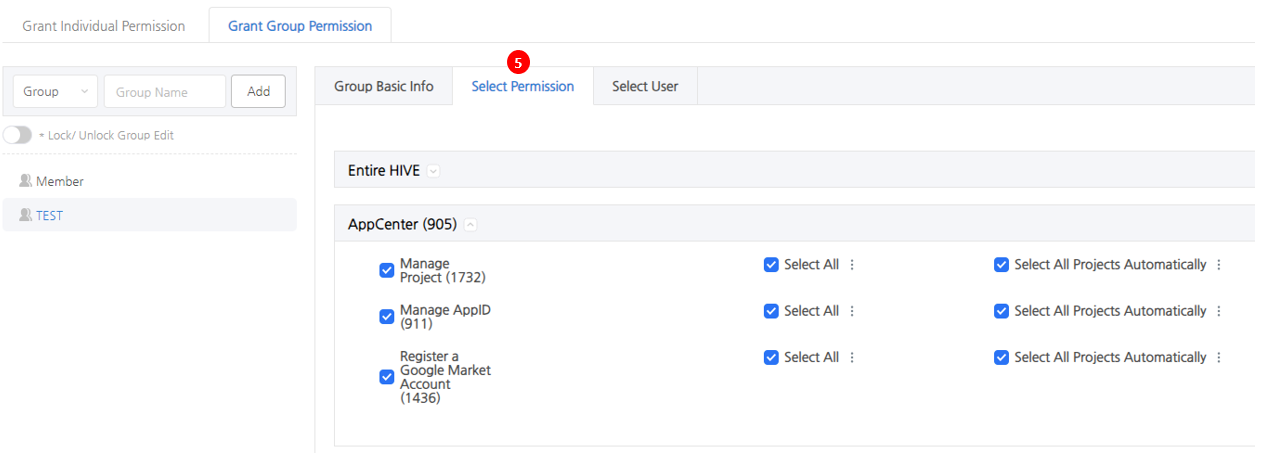
⑤ Select Permissions: Menu permissions can be set for the selected permission group, and permissions are granted to users belonging to the group. The method for setting permissions is the same as “Grant Individual Permission”.
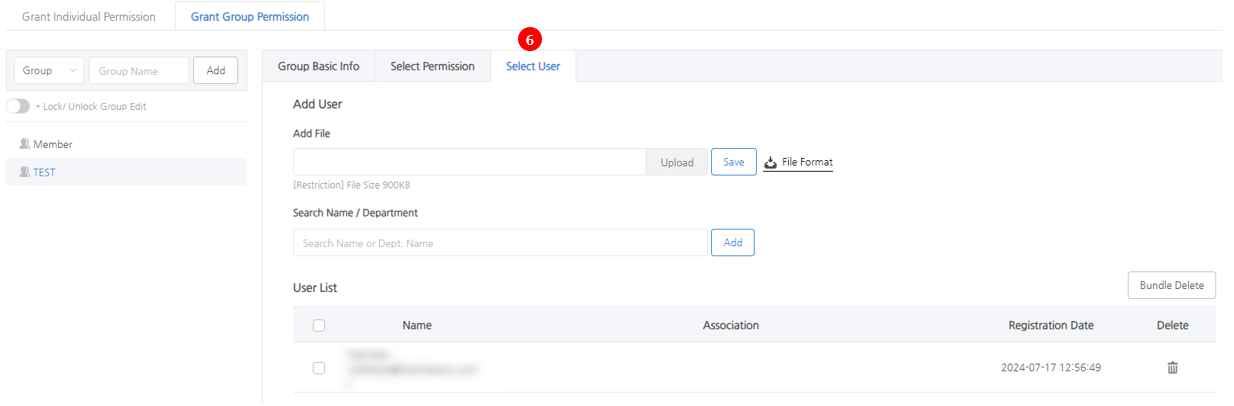
⑥ Select User: Search for the user to whom you want to grant permission within the selected group, add the user, and save to grant permission.